Why do I cook with beer? What is it about this fantastic beverage that drives me to create recipe after recipe with beer as a star ingredients? Flavor. Beautiful and complex flavors that take months, even years to perfect by brewers. Aside from that, beer is a natural meat tenderizer, making it the perfect choice for a brining liquid and explaining that Beer Can Chicken recipe you keep seeing at tailgate parties. Due in no small part to the beer in the brine, it’s flavors and tendering properties, this recipe gives you a juicy bird, crispy skin and the perfect level of beer taste. That’s why I can’t stop cooking with beer, it’s just so perfect.
For this recipe I used Alaskan Brewing Company White Ale due to the flavors of citrus, coriander, and a slight sweetness, this beer is a fantastic choice. Choose a beer with similar flavors and low hops, please no IPA’s.
Beer Brined Roast Chicken
5 lb whole roasting chicken
4 cups water
3, 12 oz Alaskan White (or similar white ale with citrus notes, and low hops)
1 tsp whole cloves
1 tbs whole black peppercorns
1/2 cup kosher or sea salt
1/2 red onion
1 whole lemon
1 tsp black pepper
In a pot over medium heat, combine the water, beer, cloves, peppercorn and salt. Cook until the salt has dissolved, and the liquid starts steaming, about 5 minutes. Remove from heat and allow to cool, adding a raw chicken to hot brine will start to cook it prematurely.
Rinse the raw chicken, removing anything that is in the cavity. Place in a large stock pot, bucket or dutch oven that is just taller than the top of the chicken. Pour the cooled brine over the chicken until submerged. Place in the fridge and allow to soak for 12 hours. If the chicken isn’t fully submerge, turn every 4-6 hours to re-distribute the brine.
After 12 hours, remove from brine and rinse thoroughly, pat dry. Place in a roasting rack in a roasting pan and allow to sit, uncovered in the refrigerator until the skin has dried, about 12 to 24 hours. This final step will allow the skin to become crispy during cooking, while the meat is juicy.
Preheat oven to 450.
Squeeze the juice from the lemon over the chicken, place the spent lemons inside the chicken cavity along with 1/2 an onion. Sprinkle the outside of the chicken with pepper.
Roast for 1 to 1 1/2 hours or until a thermometer inserted into the thickest part of the thigh reads 160 degrees, or the breast meat is at 180 degrees. If the chicken starts to brown too quickly, tent with aluminum foil.
When you get pregnant, people love to warn you about what will be missing from your new life once the baby comes. "You’ll never sleep again!!" They laugh upon hearing the great news. "Have sex now while you can!" His friends will tell him. "You are going to be so broke, those little suckers are expensive!" as if you just bought a tanking stock against their best financial advice.
What they don’t tell you is that you will worry constantly. About everything. An irrational, gut wrenching fear that is so far beyond the non-mom worries you once had, any other type of fear just seems absurd. Even rational, legitimate non-mom fears seem silly in the face of your completely irrational New Mom fears. Forget that old fear of getting mugged late at night in a parking garage that has always given you the creeps, what about a Zombie attack?! What would I do with the baby if there are Zombies? She’s like a tiny appetizer! Fear of getting cancer? Forget it, what if a Mountain Lion wanders into the house and wants to eat the baby! Again, she’s like a tasty little morsel! What would I do?! I need a plan!
You know how insane you’re being. You know it’s crazy. But you can’t help it. Forget sleep and sex and money, the hardest part of being a new mom is the crazy worry that wraps itself around you like a Boa Constrictor and squeezes the air right out of your lungs (Oh No! Boa constrictors?! What would I do if I’m at the park and one of those things got a hold of the baby?! Do they have those in California? Must. Google. It.)
So, for the sake of my own sanity, and I have to admit that I’m sure I’m WAY crazier than most of you, I’ve devised a few rules to help me cope:
1. Don’t watch the news. Especially local news. No good can come of bored reporters looking to sensationalize a story. Just watch reruns of Friends instead. This also applies to clinking on that story of a dead/missing/maimed toddler on the front page of Yahoo news. Just don’t do it.
2. Use the phrase, "Does it end well?" when those friends and family members, who LOVE to relay to you the most tragic news, start to tell you about a story that they just heard. And if they even hesitate for a moment, yell in their face, "WHY ARE YOU TELLING A NEW MOM A STORY ABOUT A DEAD BABY??" It’s therapeutic, I promise.
3. Sometimes you have to make a plan. Even though it’s insane and you know that you will never be adrift at sea after your plane crashes in the atlantic with a toddler and a group of hungry cannibals, sometimes it makes you feel better to just make a plan so that your mind can rest.
4. Dumber People than you have raised kids. Sounds harsh, right? It makes me feel better. When I hear stories about crack addicted mothers living on the streets, turning tricks in dirty hotel rooms while the 6 year old and a newborn baby are locked in the closet, most people think, "That’s awful! Those poor kids!" Not me, I think, "Well if she didn’t manage to get her kids killed or eaten by the ravenous undead, I think I have a pretty good shot!" When I feel like I barely have a 50/50 shot of getting my kid out of childhood alive and intact, it makes me feel better to think, "Dumber people than me have done it."
And when all else fails, bake. But watch those Hansel & Gretel nightmares, those will keep you up at night.
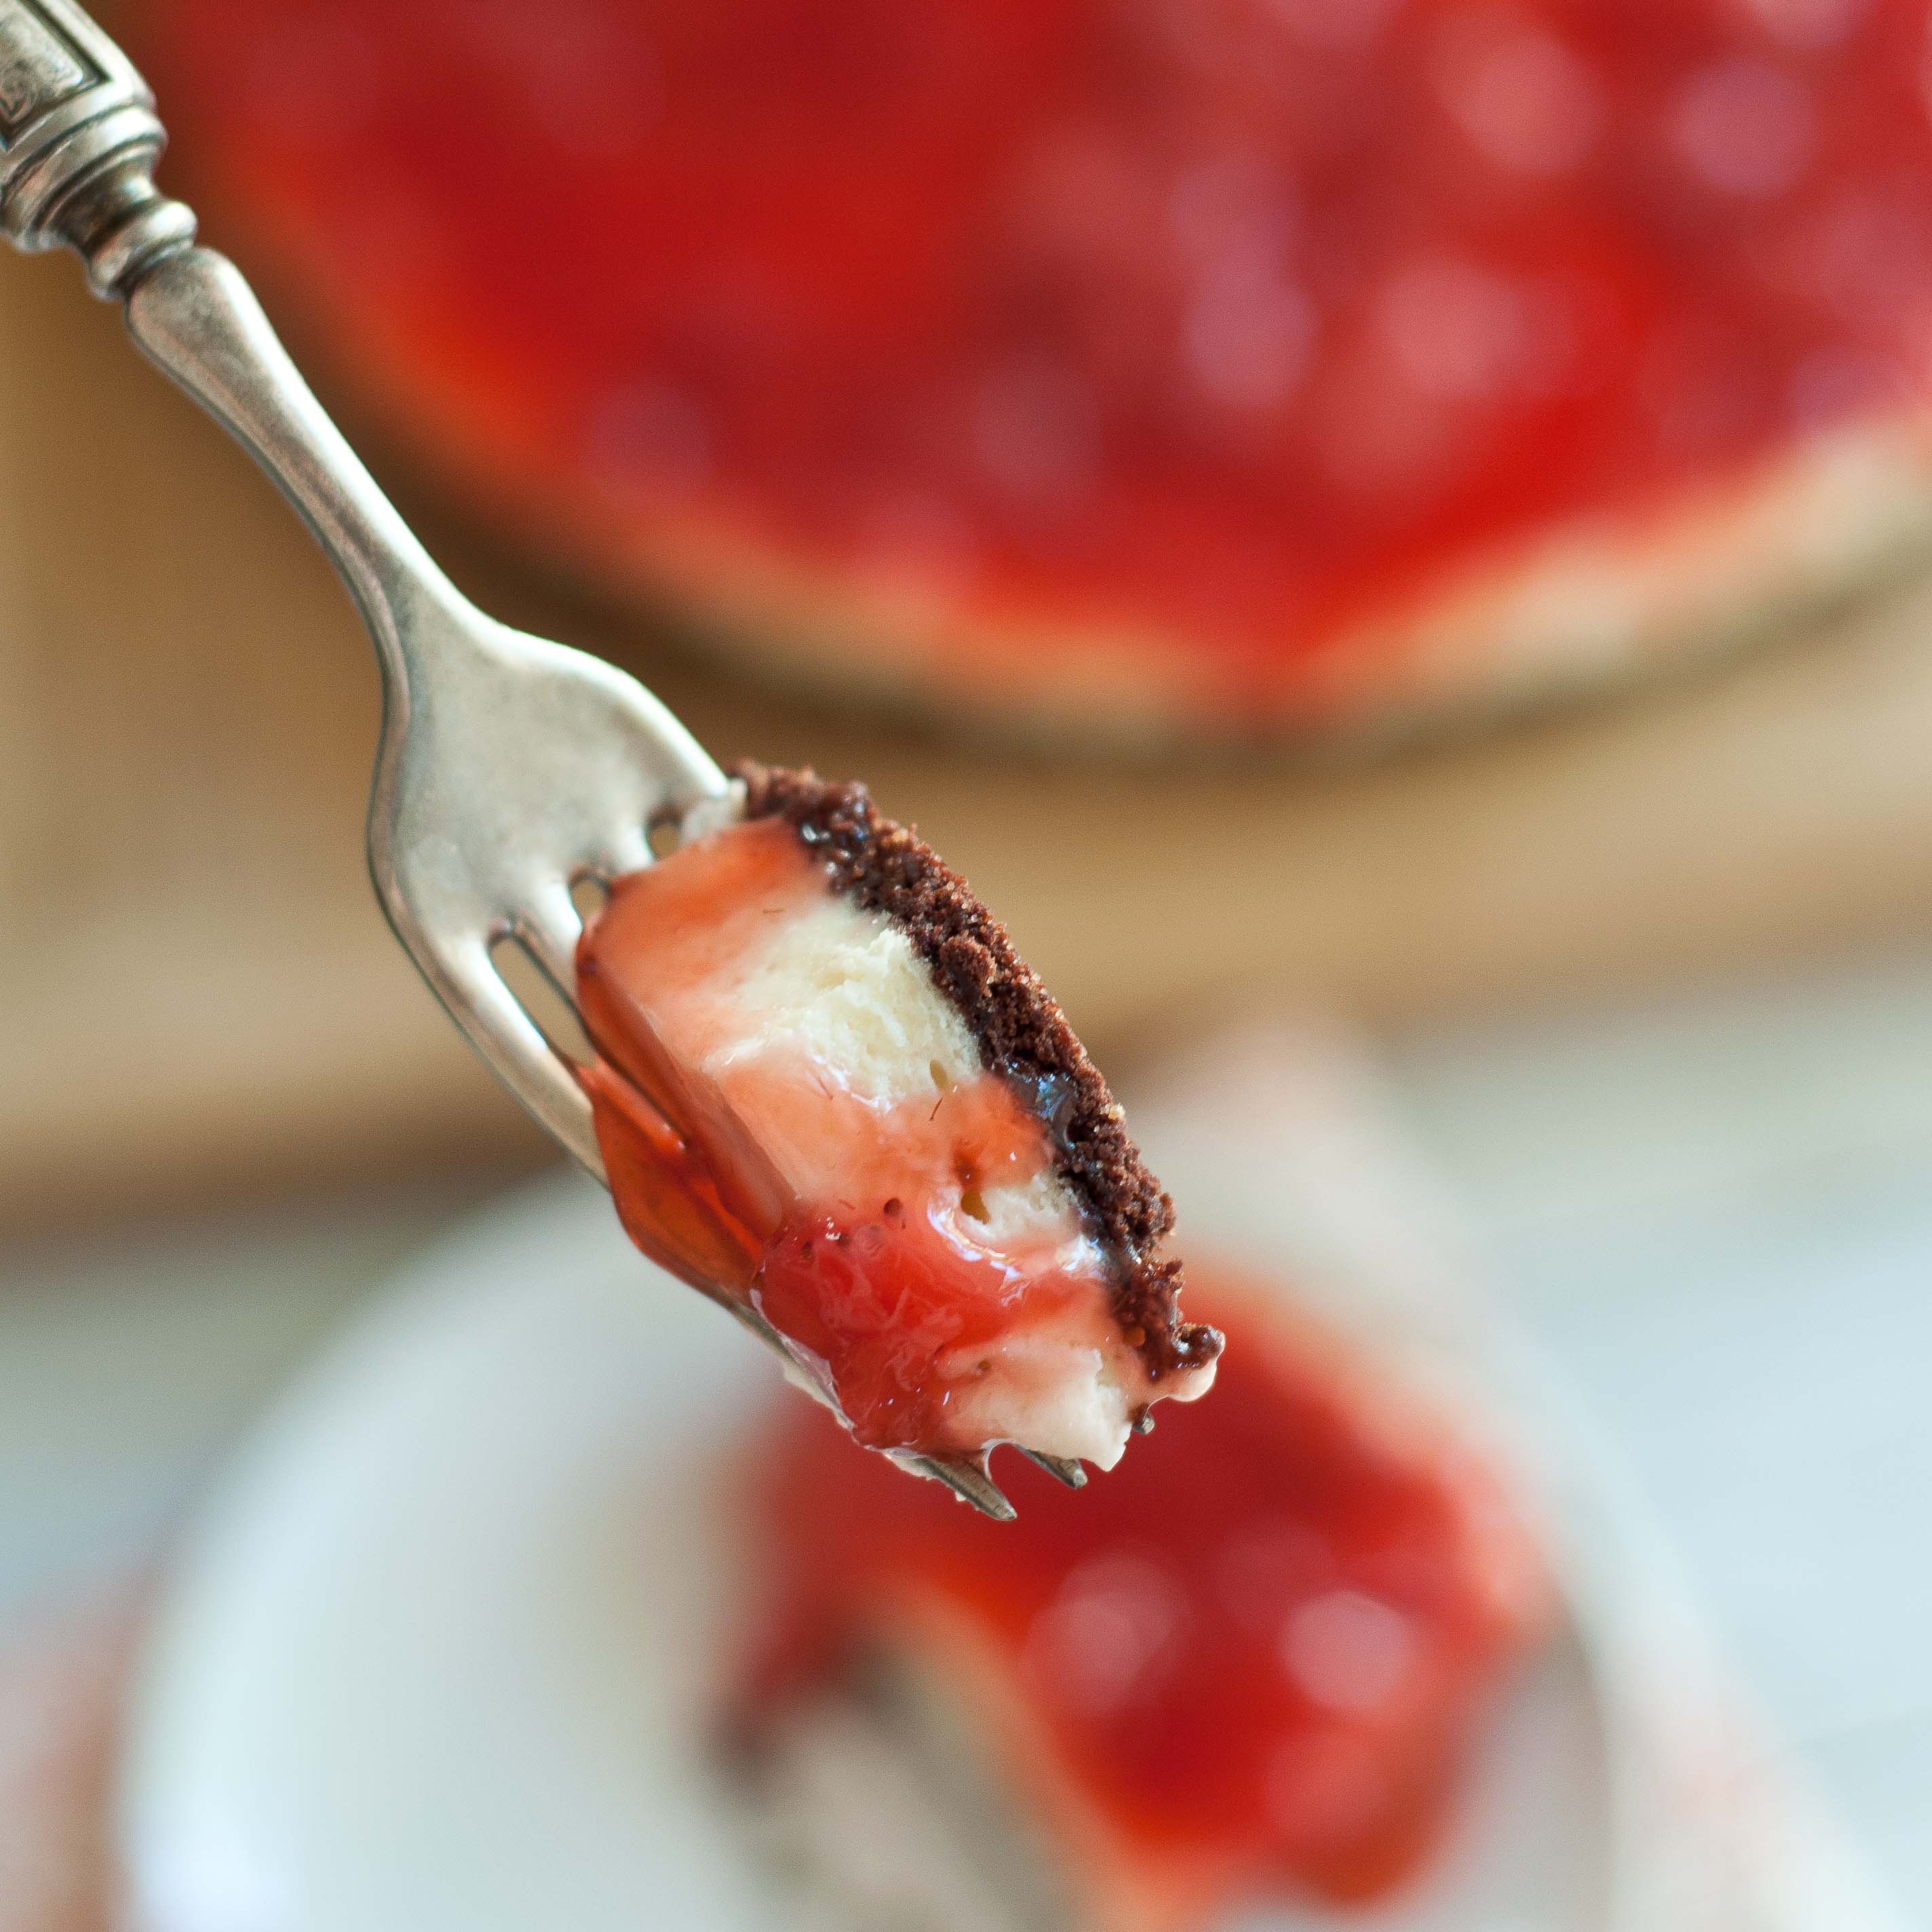
Chocolate Strawberry Cream Cheese Tart
Ingredients
Crust:
2 cups of chocolate graham cracker cookies (like Trader Joes Cat Cookies, or Teddy Grahams)
2 tbs brown sugar
3 tbs melted butter
Filling:
16oz cream cheese
2/3 cup sugar
1 egg
1 tsp vanilla extract
Topping:
2/3 cup water
1 tbs corn starch
3 cups fresh strawberries, sliced
1/2 cup sugar
Instructions
Preheat oven to 350.
In a food processor, add the chocolate graham crackers and brown sugar. Process until only crumbs remain. Add the melted butter and pulse until combined and it resembles wet sand. Dump into the bottom of a 9 inch tart pan with a removable bottom (that has been sprayed with cooking spray). Press very well into the bottom of the pan using the flat bottom of a heavy glass, measuring cup or mug.
In the bowl of a stand mixer, beat the cream cheese and the sugar until well combined and creamy, about 3 minutes. scrape the bottom and add the egg, beating until well combined. Scrape the bottom of the bowl and then add the vanilla and beat on high for about 2 minutes. Pour over the crust and smooth out with a spatula.
Bake at 350 for 20 minutes or until the center of the cream cheese doesn’t jiggle when the oven rack is shaken. This is not a "toothpick inserted in the center should come out clean" situation. Remove from oven.
While the tart is cooking, add the remaining ingredients to a pot over medium high heat. Allow to boil until thick and very bubbly for about 10 minutes, stirring frequently. Remove from heat and allow to cool.
Top the tart with the strawberries and chill until set, about 4 hours, before removing from the tart pan.
In the food world you hear terms thrown around so casually. Words like confit, reduction, braise, semifreddo. I even see those words being used wrong so often, their meanings seem to change as more and more people republish inaccurate content. Braise is one of those terms.
Maybe it’s ignorance, maybe it’s an attempt to fancy-up boiled chicken to make it sound more impressive or maybe it’s just the result of blindly believing everything that’s posted online. As I post the definition of braise, I hope an inherent skepticism creeps into you, it should. Anyone can post anything online and hit "Publish". I have no editor, or fact checker, I don’t even have any consequences if I publish inaccurate content. Just the reputation as a reliable, solid source of information that is important to me, an integrity in writing that I hope to keep in tact. And for that, I’ll give you three sources, that you are free to check at your leisure.
Braise:
A cooking method by which food (usually meat or vegetables)
is first browned in fat, then cooked, tightly covered,
in a small amount of liquid at low heat for a lengthy period of time.
For this recipe I chose Allagash Black, one of my favorite beers of all time. It’s a stout that has notes of caramel, chocolate, coffee and roasted malt and such well-balanced flavors it not only incredibly perfect for mole, it’s a beer I will always list in among my Top 5 of All Time. It’s a beer that I urge you to seek out, whether you decided to make this recipe or not.
If you can’t find Allagash Black, look for a Stout with coffee and chocolate notes. This is a recipe that is on the difficult side and the flavors are in a delicate balance. Choosing the right beer will make all the difference.
Beer Braised Enchiladas with Beer Mole
6 boneless chicken thigh fillets
1 tsp kosher or sea salt
2 tbs olive oil
1/2 to 2/3 cup Stout Beer such as Allagash Black
12 tortillas
2/3 cup mozzarella cheese
For the Mole:
2 dried ancho chilies, stem and seeds removed
2 dried anaheim chilies, stem and seeds removed
2 dried guajillo chilies, stem and seeds removed
4 prunes
1 stick mexican cinnamon
1 cup Stout Beer such as Allagash Black
1/2 cup of water
1/4 cup dry roasted almonds
2 tbs olive oil
1/2 cup onions, chopped
3 cloves of garlic, chopped
1/4 cup bittersweet chocolate
3/4 cup Stout Beer such as Allagash Black
3/4 cup chicken broth
1 tsp sesame oil
1/4 cup tomato puree
1 tsp smoked paprika
1 tbs sugar
1 tbs creamy peanut butter
Toppings (if desired):
1/2 cup mexican crema
2 tbs chopped green onions
In a pot over medium heat, at the 3 types of dried chilies, the prunes, cinnamon stick, 1 cup beer and enough water to submerge the chilies. Bring to a boil, cover and remove from heat. Allow to soak, covered for 20 minutes.
In a skillet, add the almonds and toast over high heat, tossing frequently until toasted, about 5 minutes, remove from skillet and add to a food processor. In the same skillet, add the olive oil and allow to get hot but not smoking. Add the onions and sauté until translucent, add the garlic and cook for about 30 seconds. Add to the food processor.
In a pot over medium high heat, add the 3/4 cup beer, 3/4 cup chicken broth and chocolate. Cook until the chocolate has melted, stirring frequently. Once the chocolate has melted, add the contents of the pot to the food processor along with the sesame oil, tomato puree, smoked paprika, sugar and peanut butter. Removed the chilies and the prunes that have been soaking from the pot and add to the food processor, discard the cinnamon stick. Turn the food processor on and puree until smooth, about five minutes. Add a bit of the soaking liquid from the chilies pot to achieve the right consistency. Return the mole to a pot on the stove to keep warm, adding more soaking liquid or hot water to thin if mole starts to thicken.
To make the chicken:
Sprinkle each side of the chicken thigh fillets with salt. Heat the olive oil in a pot over medium high heat. Add the chicken thighs and cook on each side until slightly browned. Add enough beer to barely cover the chicken, cover and reduce heat to maintain a low simmer. Allow to simmer until cooked through, about 20 minutes. Remove chicken from pan and shred with two forks.
Fill warm tortillas with shredded chicken, and cheese, roll and place 3 or four on each plate. Top with mole sauce, mexican crema and green onions.
Fish Where There Are Fish: The State of Food Writing
Amanda Hesser wrote an article last week for FOOD52 that, in summation, stated that food writing is dead. This drew critiques, criticism, praise, and response articles all over the web. When posted by a mutual friend on Facebook, Babette Pepaj (of TechMUNCH and Bakespace) disagreed, "Fish where there are fish," she stated.
This isn’t the first time I’ve been on the fringes of an idustry in the midst of a tornado like change, all the "Old Schoolers" looking down with dismay as the ripples seems to be coming from a throng of new and unexperienced talent waiting to take a stab in a new and digital format.
When I moved to Los Angeles in the late 90’s as a teenager, my husband, then boyfriend, joined a year later with a band that had just signed a major record deal. He worked his way around the scene, taking jobs at major recording studios, tour managing bands, production, A&R scouting, drum coaching, all while the music industry was still the giant beast of the 1980’s, the A&R guys holding the keys to the kingdom with that illusive Record Contract dangling from their fingers. It wasn’t long before the beast started to crumble and the curtain was pulled from the Great And Mighty Oz.
It all seemed to start with Napster. A brilliant idea, even if illegal and poorly thought out, that brought the Music Industry Beast to its knees. First, largely ignored. Then a few lawsuits, then a few more, then Metallica chimed in. No one, save for a few smart people over at Apple, stopped to hear the cry from the public of, "This Is What We Want." I asked my husbands boss (he was working for a Recording Company headed by a well known music producer) why they didn’t pick up where Napster left off, "Why don’t you sell the songs on your own website? let people download them?" The response was lots of legal jargon, with a dash of, "artist want to sell records, not singles." iTunes disagreed and well know how that went.
Years later, sitting in a bar called The Short Stop, chatting with a small-band-trying-to-make-good in Silverlake, California I asked about that illusive record deal. "We don’t need one, " said the guitar player, "I can get my songs onto iTunes, I can book my own shows. I don’t need to give anyone 90% of my money." He was right. They went on to be the biggest band ever to come out of Silverlake, although I now only see them on Guitar Hero or the Grammys, they will always be the guys (and girl) I used to buy beers for and chat about literature & music with.
Fish where there are fish. Although the sad reality is that the music industry is a ghost town to us now, the mighty and wealthy clamoring to get jobs, moving out of town to find work or wallowing on unemployment, we have a few friends who are making money. For the most part, those are people who started businesses to help artist help themselves. À la carte services that help the musicians maintian control, while assisting them in doing things they don’t know how to do for themselves. PR people, managers, booking, pressing of collectable vinyl, merch, all overseen by the artist. Of course the days of multi-million dollar musicians are largely behind us, more people are making a decent, but modest living, fishing where there is fish.
How does this translate to food writing? We’ll see. Will the only people that make money those who assist blogger with tech help, running ads, photography tutorials and book deals? Amanda Hesser may be right about HER food writing world being dead, and those mighty giants have started to crumble, but what will rise up in its place? What will the dawning of the new food world look like? The truth is, people will always write about food. How and where the money will be made is a different issue.
I’m not going to pretend to link this to cookies, so here they are:
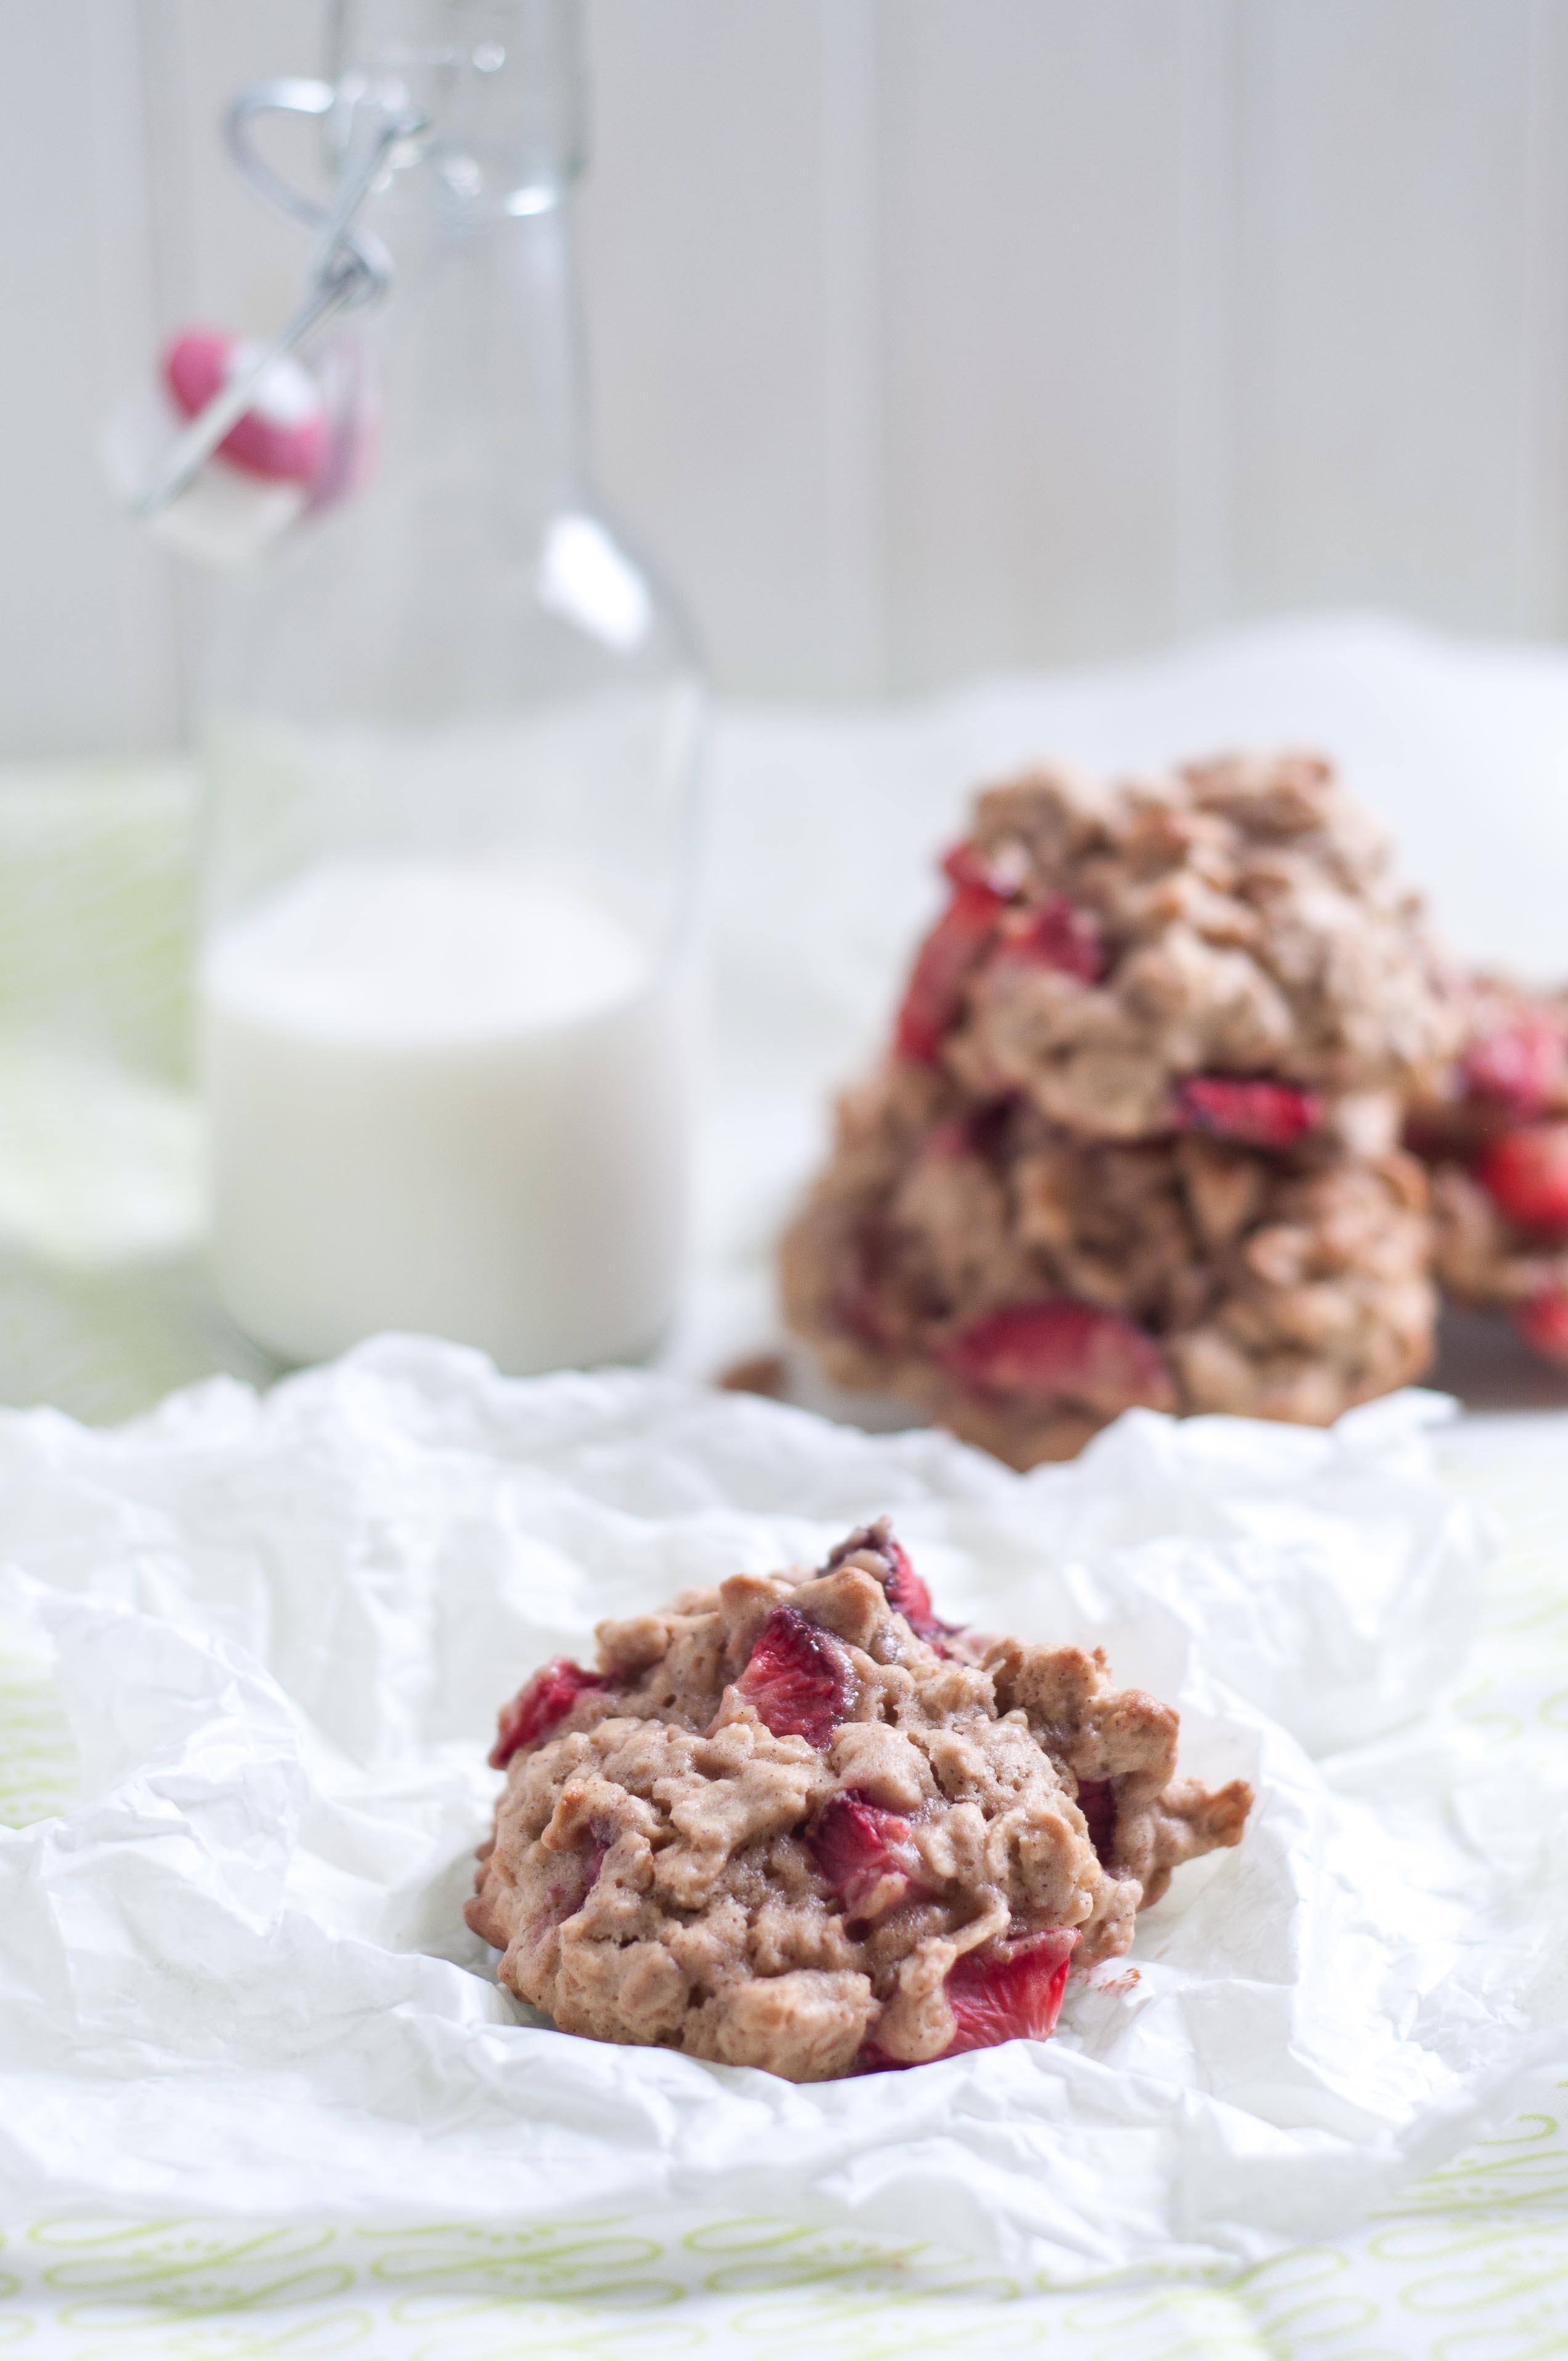
Strawberry Oatmeal Cookies For Two
(makes only 6, because the last thing I need is 48 cookies just sitting around my house)
1/4 cup butter
1/2 cup brown sugar
1 egg
1/2 tsp vanilla
3/4 cup oats
2/3 cup flour
1/2 tsp baking powder
1/4 tsp cinnamon
3/4 cup chopped strawberries (feel free to use those un-pretty ones on their last legs)
In the bowl of a stand mixer, cream the butter and the sugar. Add the egg, and beat on high. Scrape the bottom of the bowl and add the vanilla and beat again. Add the oats, flour, baking powder, cinnamon and beat until combined. Stir in the strawberries.
Cover a baking sheet with parchment paper (or spray with cooking spray) and drop large spoonfuls of dough on to the sheet, leaving space between each cookie.
Preheat the oven to 350.
Place the baking sheet in the refrigerator to chill for 20 minutes.
Bake at 350 for 12-15 minutes or until the cookies turn a light golden brown and are cooked through. Slide the parchment paper off the baking sheet onto the counter and allow the cookies to cool.
I’m in the process of developing a beer scale for the recipes I write. A scale that lets you know how much beer flavor comes through upon the final result. From the low end being, "Mild Hints of Beer Flavors" to the high end of "Strong Bold Forward Beer Taste."
Some people want to be smacked in the mouth with the flavor of beer, while others want the flavors to fly under the radar, yielding a treat they serve to unwitting non-beer lovers. This pancake recipe falls right in the middle. Beer that is tastable, but mild.
The difficulty with a scale such as this is that the type of beer you use has a direct result on the "beery-ness" of your final product. While the most important aspect of choosing a beer for your recipes is matching flavor profiles between your beer and the recipe, the second aspect is finding the right level to suit your desired level of beer taste.
There are a few tricks you can use to adjust the levels of beer taste to suit your needs. If you want to increase the amount of beer you taste, simply adding more beer may not work due to the fact that you will be increasing the amount of liquid in the recipe by doing so. If the recipe calls for "1 cup of beer" then try putting two cups of beer in a pot on the stove and cooking until it has reduced to 1 cup. This will remove water from the beer and intensify the beer flavors. One thing to keep in mind is that beer is often used as a leavening agent and cooking your beer prior to adding it to a recipe can remove those effects.
If you want to decrease the beer taste, substitute some of the beer for a non-beer liquid such as broth, water or juice, depending on the recipe. Or, if the beer is being used as a leavening agent (as in this pancake recipe) try to substitute with carbonated soda water.
If you want to increase the flavor of beer, look for beers that have a strong "malt forward" or "hop forward" taste notes, but beware of too hoppy beers (Such as IPA’s) because when reduced, they are very bitter.
Cooking and baking with craft beer is a journey, there will be a certain level of experimentation, success and failures that you should expect when trying forage ahead in a field that is growing with huge popularity, but with very few who have gone before us. In a lot of ways, this is uncharted water. We should learn from every batch, making note of what works and what doesn’t. Thanks for joining along the road.
For this recipe, I choose Mission Amber Ale because it has notes of caramel and malt, but with a balanced hop flavor. If you want to make this recipe and can’t find Mission Amber Ale, look for an amber with notes of caramel, maple, brown sugar, cloves, or cinnamon with low or balance hop notes.
Beer and Brown Sugar Pancakes
1 cup all purpose flour
1/3 cup brown sugar
1 tsp cinnamon
1 tsp baking powder
1 egg plus 1 additional yolk
2 tbs canola oil
1/2 tsp vanilla
1 cup Amber Ale Beer
(makes 10-12)
In a bowl add the flour, brown sugar, cinnamon, and baking powder, whisk to combine.
In a small bowl, add the egg, the additional yolk, vanilla and the oil whisk until well combined.
Make a well in the dry ingredients, add the egg mixture and beer to the center and whisk to combine.
Heat a skillet or griddle until hot. Spray with butter flavored cooking spray or brush with melted butter. Pour about 1/4 cup of the batter onto the hot griddle. Once bubbles appear in the middle of the pancakes and the edges start to look dry, flip the pancakes and cook on the other side until cooked through, about 5 minutes total (2.5 minutes per side).
*For this recipe, plain Grade A Syrup just didn’t seem to be enough for me. I put 3/4 cup of syrup and 1/2 cup of the Amber Ale in a pot on the stove over high heat for about 10 minutes and it thickened and reduced to a caramely syrup that was perfect.
Creme Brulee and Bread pudding are two things that never occurred to me growing up. Creme Brulee was much to bourgeois for a kid who raised pigs in her back yard and bread pudding sounded like something you ate over Bingo hoping the Polident didn’t give out. As real life grown up, I realized that these are both really simple desserts that have a versatility and beautiful creaminess that have earned themselves a place in my kitchen. Bread pudding has been my way to use up the last bit of homemade pastries, cinnamon rolls and raisin bread that I hate to throw out but go stale so quickly. And Creme Brulee is so easy and lovely, lending itself very well to a multitude of flavors, it tends to be a Go-To for me when I’m a loss for what to serve.
Mixed together, it’s fairly addictive, easy to make and has a homestyle fanciness that’s perfect for so many get togethers.
Creme Brulee Bread Pudding
3 egg yolks
1/2 cup of sugar
1 1/4 cup of heavy cream
1 tsp vanilla
1/2 tsp slt
1/4 cup granulated sugar for brulee crust topping
3 cups bread, crust removed, cut into 1 inch cubes
Preheat oven to 300.
In a bowl, combine the yolks and 1/2 cup of sugar and whisk until light and frothy. In a pot, combine the cream, salt and vanilla and heat until steamy but not boiling. Remove from heat and allow to cool for about 10 minutes. While you whisk the eggs, slowly, slowly add the cream, whisking until combined. If there are any lumps or “eggy bits” in your cream mixture (possibly because you didn’t let your cream cool down) strain the custard through a mesh strainer.
Assemble 6 ceramic ramekins, or individual oven safe serving bowls in a baking dish. Add the bread cubes to each dish, pressing down a little bit to compact.
Pour into the custard over the bread until covered.
Add hot water to the baking dish until about half filled, the water rising to about half way up the sides of the ramekins.
Bake at 300 until the custard no longer wobbles when the rack is shaken, about 20-25 minutes (this is not a "tooth pick inserted in the middle should come out clean" situation).
Refridgerate until set, at least 2 hours. Just before serving, top the creme brulee with an even layer of granulated sugar. Pass the flame of a kitchen torch slowly and evenly over the sugar until it’s liquified and a light amber colored. Serve immediately. The sugar crust will start to break down after about an hour.
I try to eat a healthy balanced diet. Most days, my daily meal planner looks like this:
Breakfast: 2 slices of high fiber wheat toast with 1 tbs of peanut butter each and coffee. Lots of coffee.
Lunch: Quinoa salad or leftover dinner from the night before.
Dinner: Some arrangement of lean protien (mostly chicken or fish), vegetables, and either rice or quinoa
But sometimes I just want to use the gorgeous avocados that were delivered to my door from a local produce delivery service. I want to mix it up with crab and sour cream and eat it over the sink while Tater plays in the back yard. So that’s what I did.
I added fresh jalapenos, and removing the seeds removes most of the heat so you get the flavor, a little crunch and just a bit of heat.
Crab Guacamole
3 large ripe avocados
1 tbs chopped shallots
2 tbs chopped fresh jalapeno, stem and seeds removed
1/2 cup full fat sour cream
3 ounces crab meat
2 tbs lemon juice
2 tbs chopped cilantro
1/2 tsp sea salt
1/4 tsp black pepper
1/2 tsp chili powder
cut the avocados in half, remove the pit and scoop the flesh into a large bowl. Add the remaining ingredients and smash it all together until well combined, but some chunks of avocado still remain.
When you have a blog, and you post instructions about how to make or cook something that you have dreamed up, you want all of the mistakes to happen to you. You want to be the one to discover the holes in the theories, the lapses in the instructions or the possible interpretations that will end up in failure.
Lucky for me, and for any who attempt to make these, those failures bestowed themselves upon me during this craft project.
These yarns balls have been popping up in craft books since the 70’s but made a resurgence a few years ago when Martha Stewart posted a rough DIY on how to make these as christmas ornaments.
Reading the comments on the post it seem as if half the people who attempted this had glowing success and the other half had epic failures. I fell into the latter half. Which ended up being a good thing because I was forced to seek out the answers to the most common failure:
WHY didn’t the yarn harden??
Most of the bloggers who did respond didn’t seem to know the answer: Too much glue? Wrong type of glue? Too humid in your part of the Country?
None of those answers really seemed to fit the issues I was having, but I could tell by the next morning with string that was soft and not stiff, that I had to fix the problem or there would be no party favors for Taters "Lets Have A Ball" Party.
I consulted my sister, from whom I stole the idea to put toys inside these decorative balls in the first place. She’s completely brilliant and epically creative Polaroid photographer.
Her advice: "More glue, it won’t have a choice but to harden."
True. I traced the lines of the yarn with my Elmer’s glue bottle, blotted it in with a sponge brush and in three hours, I had Yarn Ball Party Favors ready to go.
Another common factor that I saw in success was glitter. It seems to act as a binder of sorts. Add it to the glue and it helps to hold shape.
Other than the threat of failure looming over my head, I loved the way these turned out.
Materials:
8 ballons, about 6 inch round
Toys, I used squishy balls, temporary tattoos and Lady Bug Bubbles (Small enough to smash into a balloon and large enough not to fall through the yarn holes)
2 bottle of Elmer’s glue
1/4 cup warm water
2 tbs glitter
Step one:
Squish the toys into the balloons. You might want to have extra incase you break some trying to get the toys in. Also, it helps to have an extra set of hands to help. I used my husbands:
Step Two:
Blow up the balloons and securely tie the end.
Step Three:
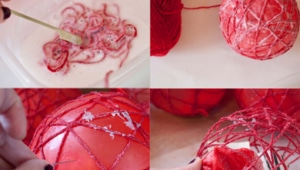
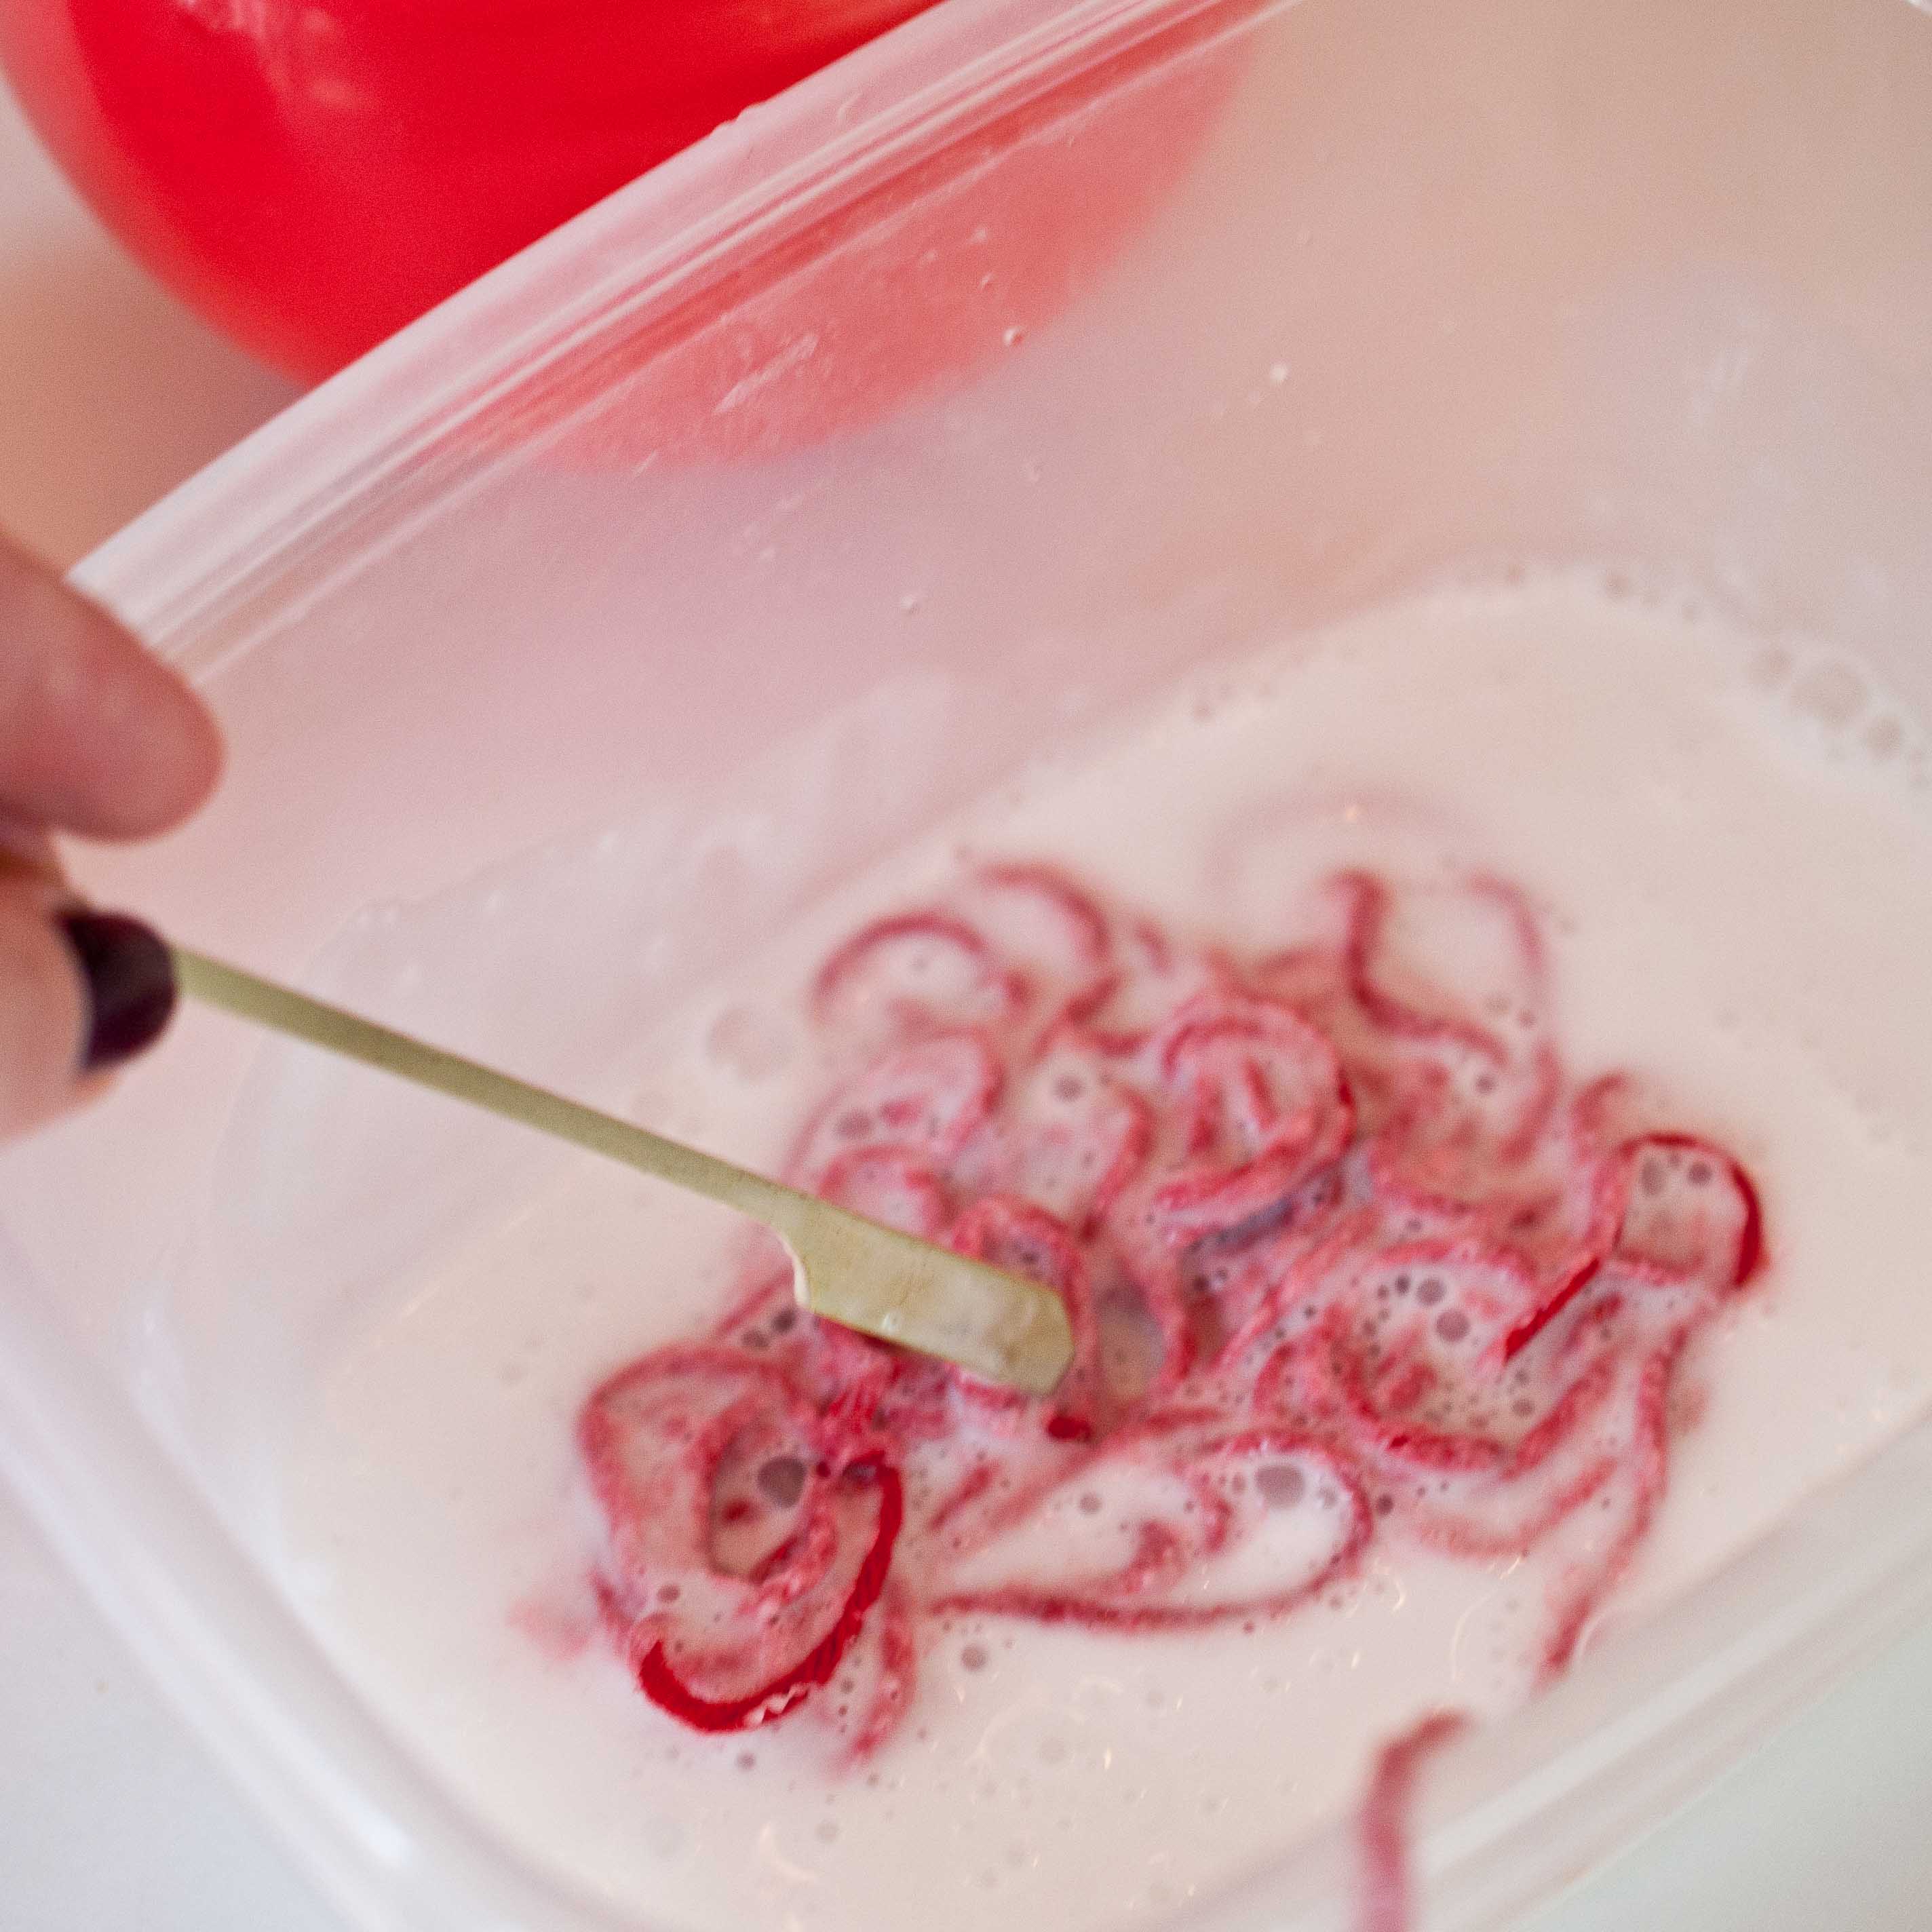
Mix the glue, water and glitter in a large bowl.
Step Four:
Place a few feet of yarn into the glue and press down, try not to stir or you’ll end up with a tangled yarn mess.
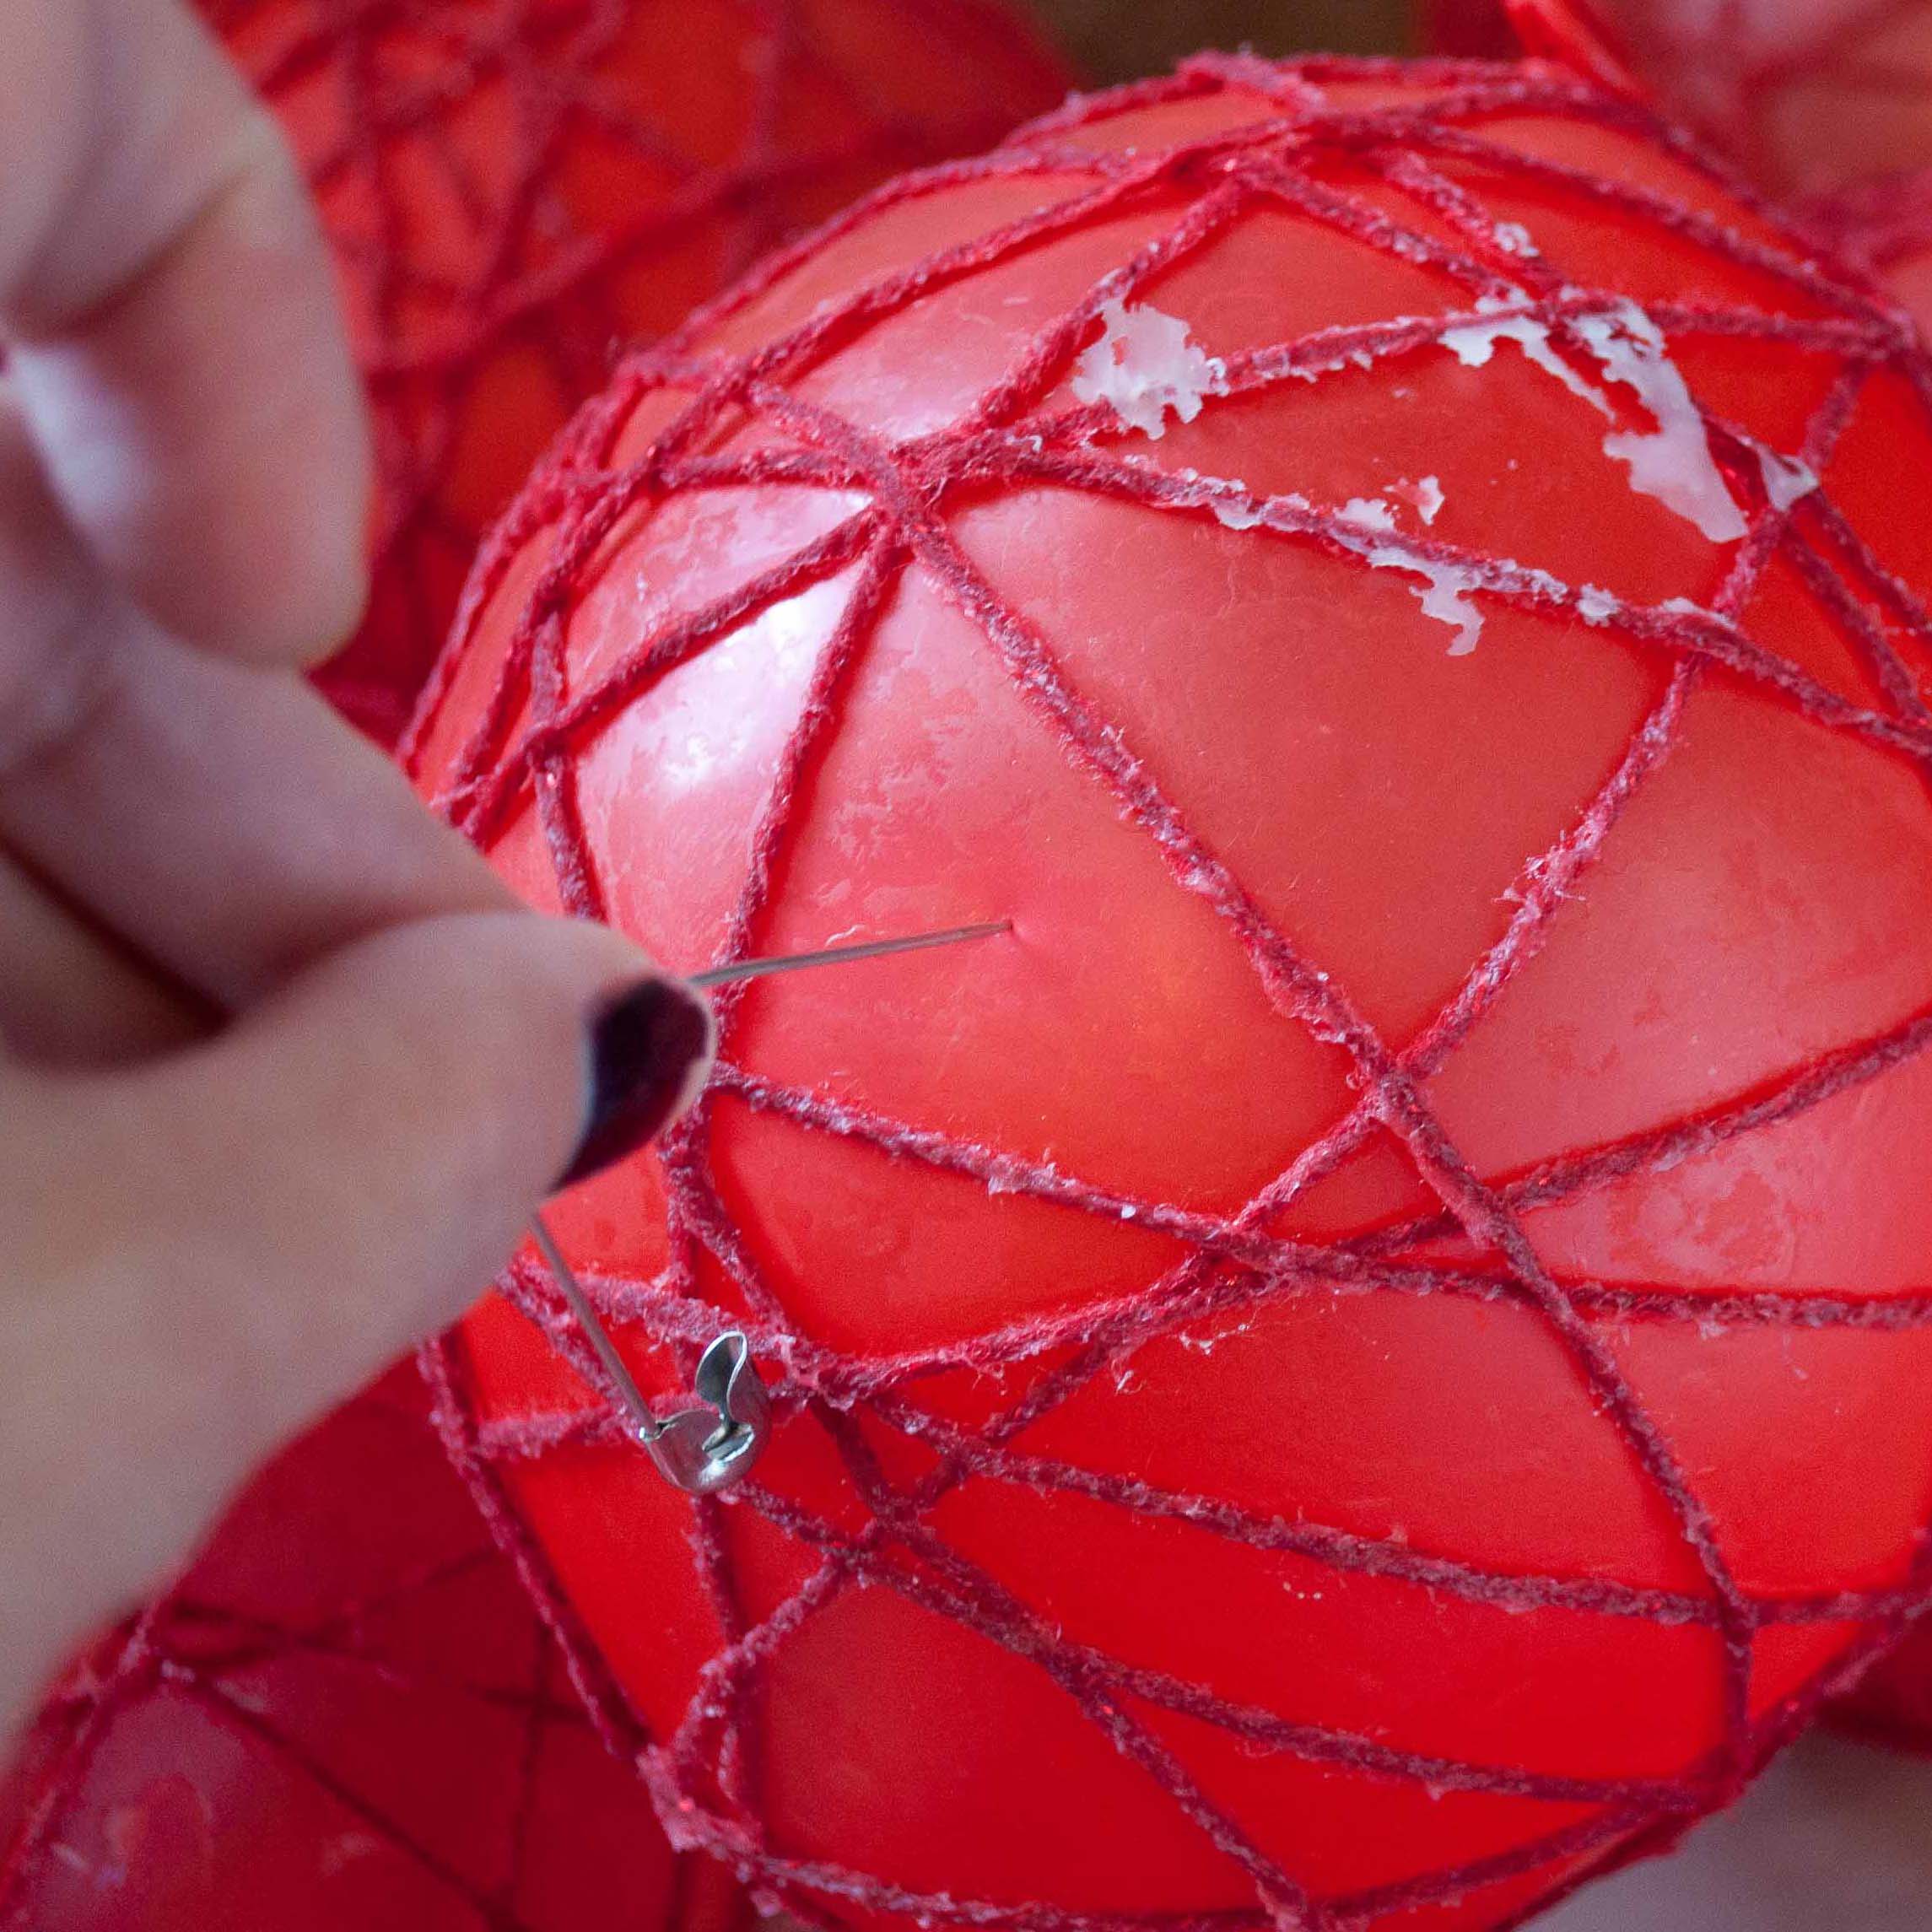
Step five:
Wind the yarn around the balloons, cutting of the end and tucking it into an inconspicuous spot and then place on sheets of wax paper to dry.
Step Six:
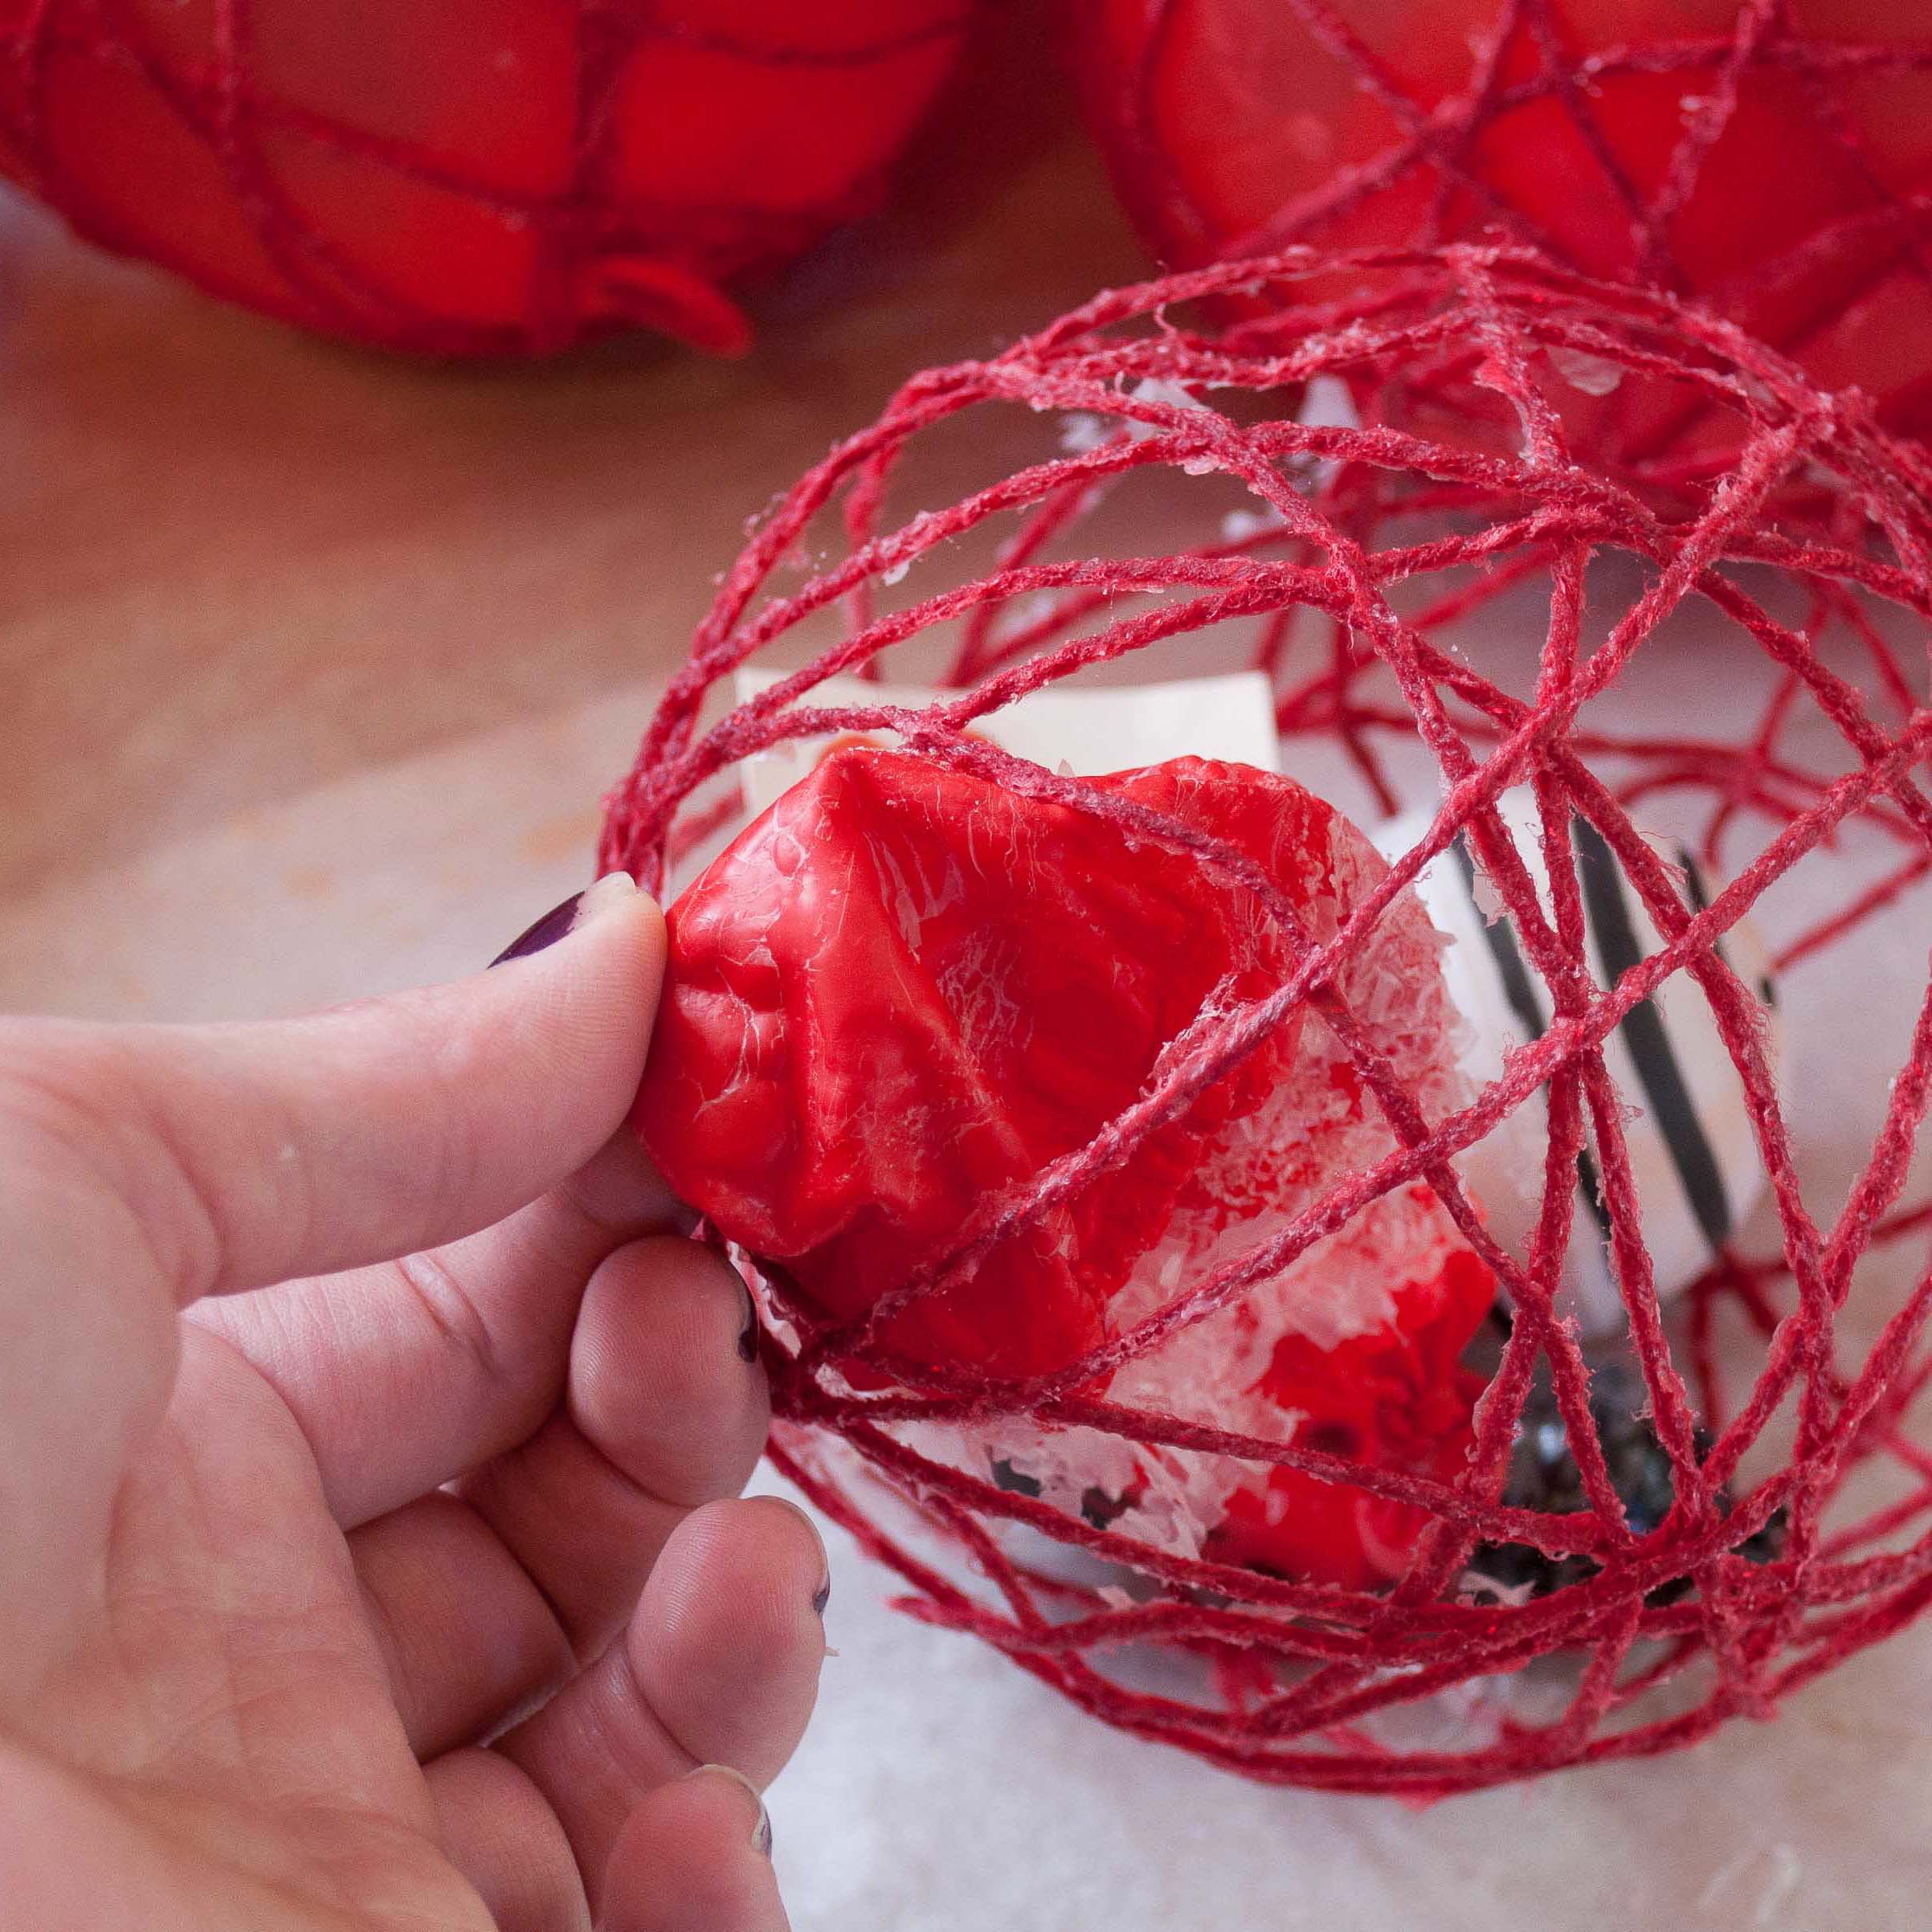
Allow to dry completely until the yarn has become very stiff and there is no give to it. Then pop the balloon in the middle.
Step Seven:
Wrestle the toys out of the popped ballon and remove the deflated balloon from the ball.
Tips:
If your yarn never hardens, don’t remove the balloon. Trace the yarn with the glue bottle tip and then pat the glue into the yarn with a sponge brush.
Yarn must be hard and stiff for this craft to work.
Choosing a beer for a recipe isn’t as arbitrary as it may appear. It also isn’t difficult, but it does require thought and planning. Substituting your favorite beer in a recipe isn’t always a good idea, and may result in an end product that is nowhere near the intentions of the recipes author.
Where do you start? The recipe or the beer?
A fair question, and it’s a toss up. Which ever way you begin, the recipe or the beer, make sure to be mindful of the flavors. Dark beers go well with "dark" recipes. If that beer you want to cook with is a stout, look for a recipe that calls for "dark" ingredients: chocolate, beef, bacon, etc. If the beer you love is a Pilsner, look for a recipe with "light" ingredients, lemon, chicken, fish, etc. There is some room to move around with this rule, but finding complimentary flavors is the key to success when cooking with beer.
Be careful with IPA’s. It’s incredibly difficult to cook with high hop beers due to the fact that the hops reduce to a very bitter product. If you are in love with an IPA, or another high hop beer, strong starches and sugar mellow hops a bit. Try a pumpkin muffin, or a sweet potato pie. Or look for recipes where the beer won’t be reduced, like marinades, beermixology cocktails, or dips.
If the recipe is where you want to start, make note of the flavors and try to find a beer that mimics those. If you want to bake a chocolate dessert, for example, look for a beer with chocolate notes, or coffee, or malt. Look at the list of flavor notes that the beer has and try to imagine those in your dish. Most large chain retailers of craft beer (like BevMo or Total Wine) have cards near the beers that explain the flavors in that beer and give you a fairly accurate flavor profile. If you are making a chicken soup, for instance, you might look for a beer with lemon or basil notes, not a beer with coffee and caramel notes.
Now that you have had your crash course in beer recipe development, please, go cook your beer loving hearts out. And don’t forget to share.
For this recipe, I choose Lagunitas Wilco Tango Foxtrot. I had four craft beers, mostly stouts, that were in the running for this recipe, and all would have made great choices. In the end, it came down to a gut feeling. Lagunitas WTF won out, although loosly categories as a "brown? ale" and more hops that I would generally recommend for this recipe, the flavors of chocolate and malt were an incredible fit for this recipe. This is a beer to keep an eye out for, it’s smooth and bold and fantastic. A fabulous drinking and cooking beer.
A chocolate stout makes an excellent choice for this recipe as well. I’ve made it with both and although I love the WTF, a chocolate stout seems to give more consistent results as far as a general beer style.
If you can’t get your grubby little hands on some WTF, a stout with notes of chocolate would make a great substitution.
Place one oven rack in the middle position, with one rack below. Preheat oven to 325.
In a food processor add the graham crackers, brown sugar and the pretzels and process until it's the consistency of crumbs. Turn the food processor on, remove the stopper from the lid and slowly add the butter and process until it resembles wet sand.
Coat the inside of a 9 inch spring form pan with butter. Pour the crust into the spring form pan. Using the bottom of a heavy, flat bottom glass, press the crust very well into the bottom of the pan until well compacted.
In a pot over medium high heat, add the beer and the chocolate, stir until melted and remove from heat. Allow to cool.
In the bowl of a stand mixer add the cream cheese and the sugar and mix until smooth. One at a time, add the eggs, scraping the bottom of the bowl between additions. Pour the cooled chocolate into the mixer and beat until well combined. Lift the head of the mixer and sprinkle the flour, cocoa powder, espresso powder and salt over the batter, stir on low speed until just combined.
Pour the batter into the pan over the crust.
Place the pan in the oven in the middle position. Place a baking dish on the rack below the cheesecake, fill with water.
If you have experience with a water bath, feel free to use that technique instead of the water pan below the cheesecake.
Bake the cheesecake until the center just slightly jiggles, but doesn't slosh, when you shake the rack, about 60-75 minutes. This isn't a situation where a tooth pick inserted in the middle should come out clean, you just need the center to set and it will continue to set as it cools. Remove from oven.
For the sour cream topping: add the ingredients to a bowl and whisk until well combined. Top the cheesecake with the sour cream topping and return to the oven for 8 minutes. Remove cheesecake and chill in the pan until ready to serve, at least 3 hours.
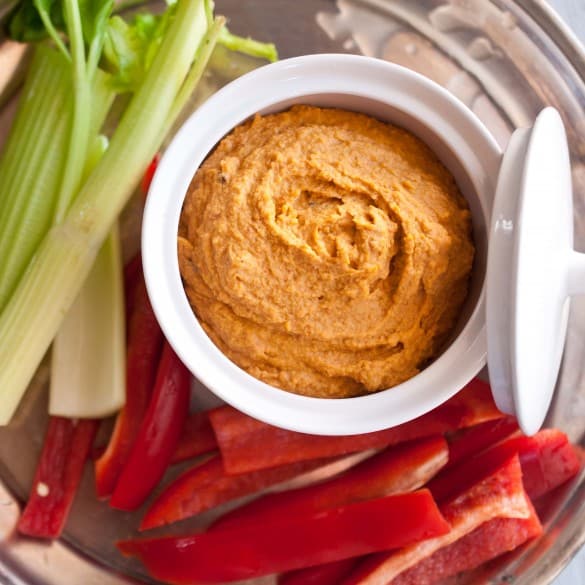
I don’t buy many things in cans. I DO buy Chipotle peppers, and those come in cans. I’ve had to become inventive with them, as I try to use the food in my fridge rather than let it go to waste. And although the can these gorgeous smoked Jalapenos come in is rather small, a little goes a long way and I end up with a lot left over.
Seeing as how I am asking you to open a can to make this here sandwich, I also wanted to leave you with a few other things you can do with the rest of that can, once you devour that spicy, smokey grilled cheese.
I rarely do "Internet Round-Ups," But Chipotle peppers and my desire to use the whole can has left me no choice, but has give me quite a few recipes that I can’t wait to try. Check them out:
Now you are fully equipped to use an entire can of Chipotle In Adobo.
Shiitake Mushroom & Chipotle Grilled Cheese
1 tbs olive oil
6-8 large shiitake mushrooms, sliced
2 chipotle peppers in adobo sauce, chopped (use gloves)
2 tbs cream cheese, softened
1 cup shredded cheddar cheese
2 tbs chopped cilantro
4 slices of bread
2 tbs butter, softened
In a pan over medium high heat, add the oil and allow to get hot but not smoking. Add the sliced mushrooms and sautee until dark and cooked through, remove from heat.
In a bowl, add the softened cream cheese and the chipotle peppers, stir until well combined. Add the cheddar cheese, mushrooms and cilantro and stir until combined.
Butter one side of each slice of bread. Return the pan used to cook the mushrooms to medium high heat, add one slice of bread, butter side down to the pan. Carefully slather half of the chiptole cheese mixture onto the bread and top with another slice, butter side up. Repeat for the additional slices of bread. Cook on each side until browned, about 4 minutes per side.
Remove from pan, slice and serve with a cold beer.
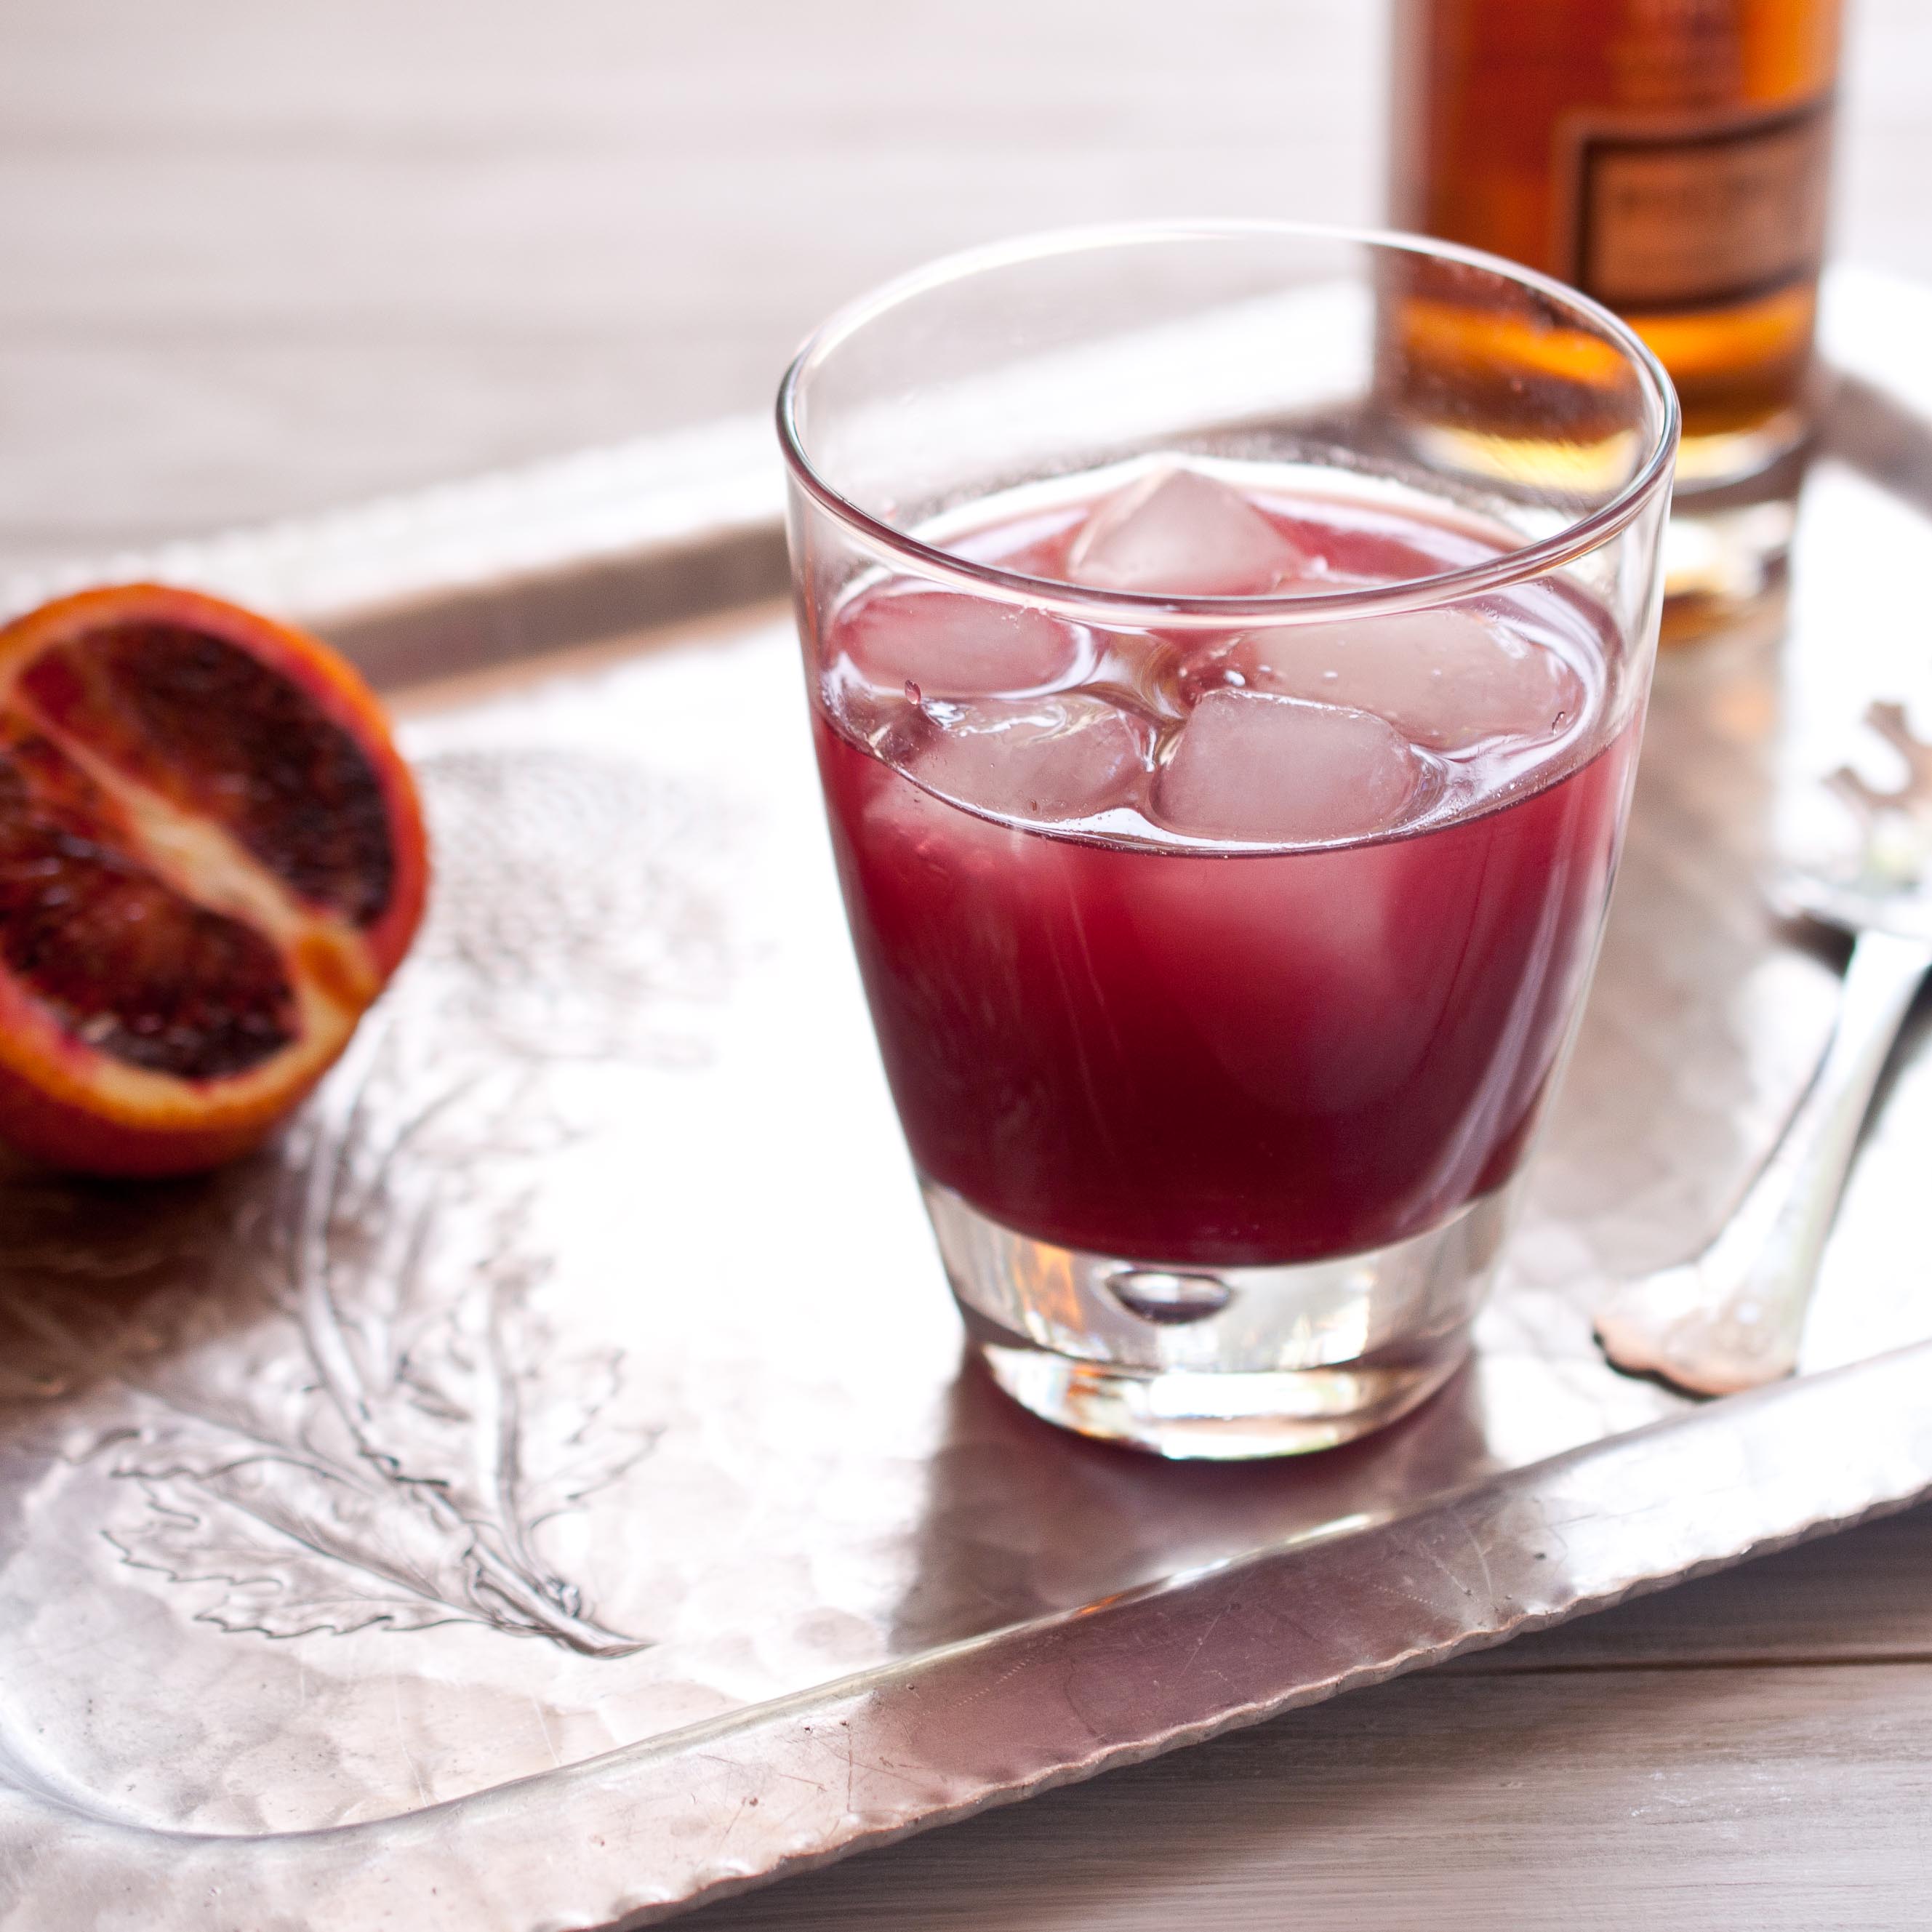
I don’t have a name for this drink. I like names. I love this cocktail. So you can see what type of conundrum this has created in my life. I’ve even gone against suit and made this three times since it’s invention two weeks ago.
If you have a creative, fun name for this cocktail, let me have it. I’ll give you full credit and I will finally be able to refer to this properly when I make it for guest.
Update: This drink now has a name: Hot Blooded
I’ve also learned a few things about drink making with peppers, something I am completely and whole heartedly in love with. Spicy drinks have even lured me away from my one try love of the drink world: Craft Beer. While beer will still hold the number one rank in my drinking life, spicy cocktails have snuck into a close second spot. But there are rules when concocting libations from such unpredictable ingredients. Here are some rules to keep in mind:
1. Most of the heat from pepper are in the seeds. The more seeds you leave in, the hotter it will become. Exponentially.
2. When peppers sit in alcohol it only takes seconds for the heat level to go from hot to way too hot. It happens faster than you would expect.
3. No two peppers are the same and there is no way to predict how hot the ones you have chosen will be.
4. Alcohol intensifies heat. I learned this when writing an article about How To Pair Food & Wine, high alcohol beverages increase the heat level in food. The same rule applies to making cocktails with peppers.
5. Sugar mellows heat. Adding more sugar can lower the heat level a bit.
6. Use gloves. For the LOVE. You only have to forget once, and then try to take your contacts out a few hours later to NEVER do that again. If you do forget, the best way to remove the peppers evilness from your fingers is to rub copious amounts of olive oil into your hands for about 5 minutes, and then wash the olive oil off with very warm water and dish soap.
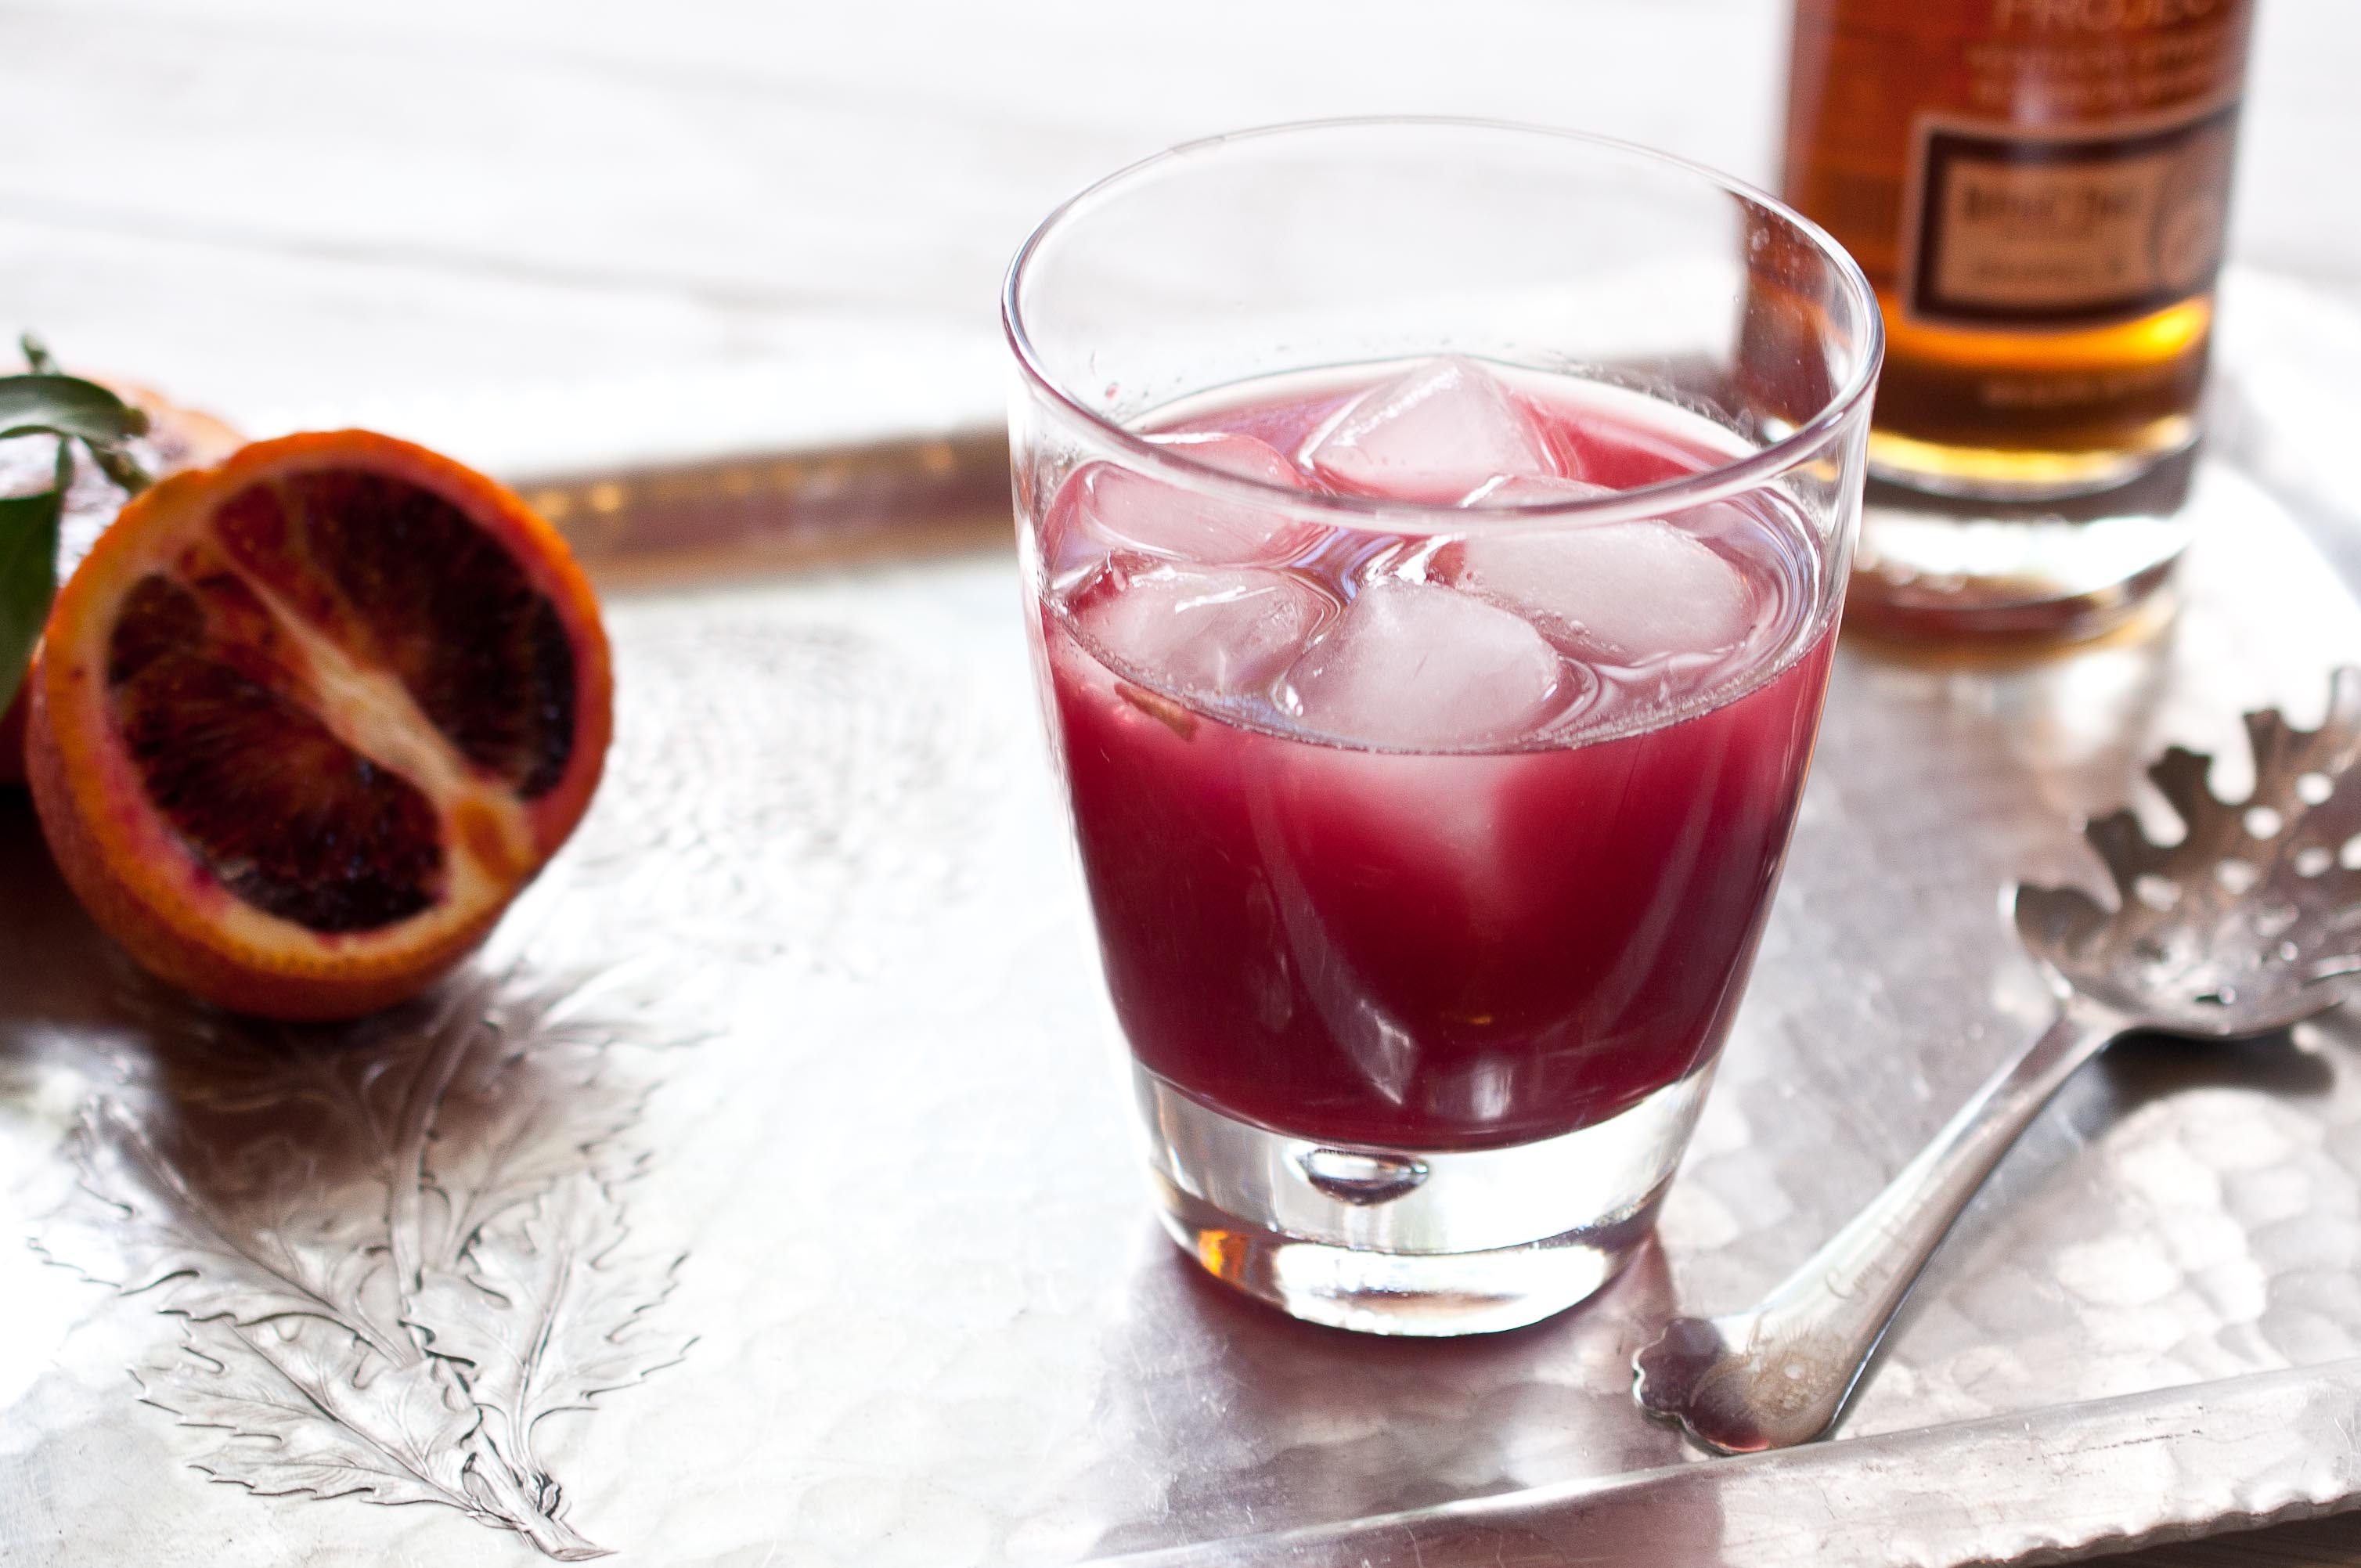
Hot Blooded:
Jalapeno, Blood Orange & Whiskey
(Named by Seth)
1 cup fresh squeezed blood orange juice
2 tbs Agave
1/2 cup whiskey
1 medium sized jalapeno, chopped, stem removed (about 2 tbs)
In a cocktail shaker, add the blood orange juice, agave and whiskey, stir until combined. Add the jalapenos, replace the shaker cap and shake three times, immediately pour through a strainer into highball glasses filled with ice, straining out the jalapenos. Discard the jalapenos.
*I made this cocktail three times. The first time I made it with hand squeezed blood oranges, by far the best choice. Knowing that blood orange season is on it’s last legs, I wanted an alternative. I made it with regular orange juice and it just wasn’t as good. I also made it with Tropicana Trop50 Red Orange, while not as good as hand squeezed blood oranges,it was much better than regular orange juice, a fine substitute. And you can buy it in most grocery stores.
Update: I think we have a name. I had so much suggestions sent to me via email, Facebook, twitter and comments, but the one I can’t get out of my head is: Hot Blooded. Thanks in no small part to Foreigner. I also LOVED the idea of a TrueBlood name, since I am shamelessly addicted to that show, Bon Temp Sunrise?? Maybe not. Thank you to Seth for the new name! I can now get some rest.
I have an analog soul, still shooting with a film camera.
I like to read real life paper books.
I write letters with pen and paper.
I like to listen to the scratchy sound of Robert Plants voice spun out of a vinyl record.
I guess I was born too late to enjoy all the good stuff. And little by little my antiquated habits are being digitized. I own a DSLR, an iPod, an iPhone and of course, a MacBook. But I will always shoot with my medium format Yashica, and I will hold out strong with my paper words inside real life pages, and I will always say Thank You with ink and a stamp.
It’s probably my primitive spirit that draws me to beers that have been around a while, staying true to what they have always been. Full Sail Amber Ale has been a pioneer in the Craft Beer world since the 1980’s, earning the distinction of the first craft beer bottled in Oregon. And just as you should all have a fierce respect for film cameras, vinyl records and paper books, you should also put Craft Beer Pioneers among those ranks.
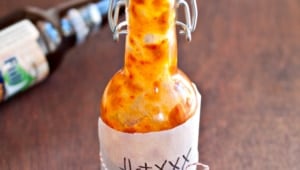
In a sauce pan, heat the olive oil over medium-high heat until hot but not smoking. Add the jalapenos and Serrano, cook until soften, stirring frequently, about 5 minutes. Add the garlic and cook for about 30 seconds, add the beer and then the remaining ingredients. Allow to simmer for about 8 minutes, stirring occasionally. Remove from heat and allow to cool. Add the blender or food processor and puree until smooth. Store in an air tight container in the fridge.
Of course I’ve been warned about the Terrible Two’s and the nightmare that I am now a party to.
And no offense to those who have gone before me, but I rather enjoy this age. Every age, every situation and every person is not without drawbacks. There is no such thing as a perfect situation. Quality of life is built on figuring out what is great about the situation that you are in and enjoying the crap out of it.
So, what is great about 2 year old?
You get to have all the answers. You are able to solve all of their problems. These tiny little humans see you, their moms, as the Fair Princess Goddess of The Universe. You have control over everywhere they go and who they play with. And all of that will end way too soon. As much as I long to have more freedom and independence, sleep past 6:30am, set my schedule on a whim, travel to exotic places and be able to pee in private again, I know without a single tiny doubt that I will miss the hell out of my 2 year old once she is all grown up.
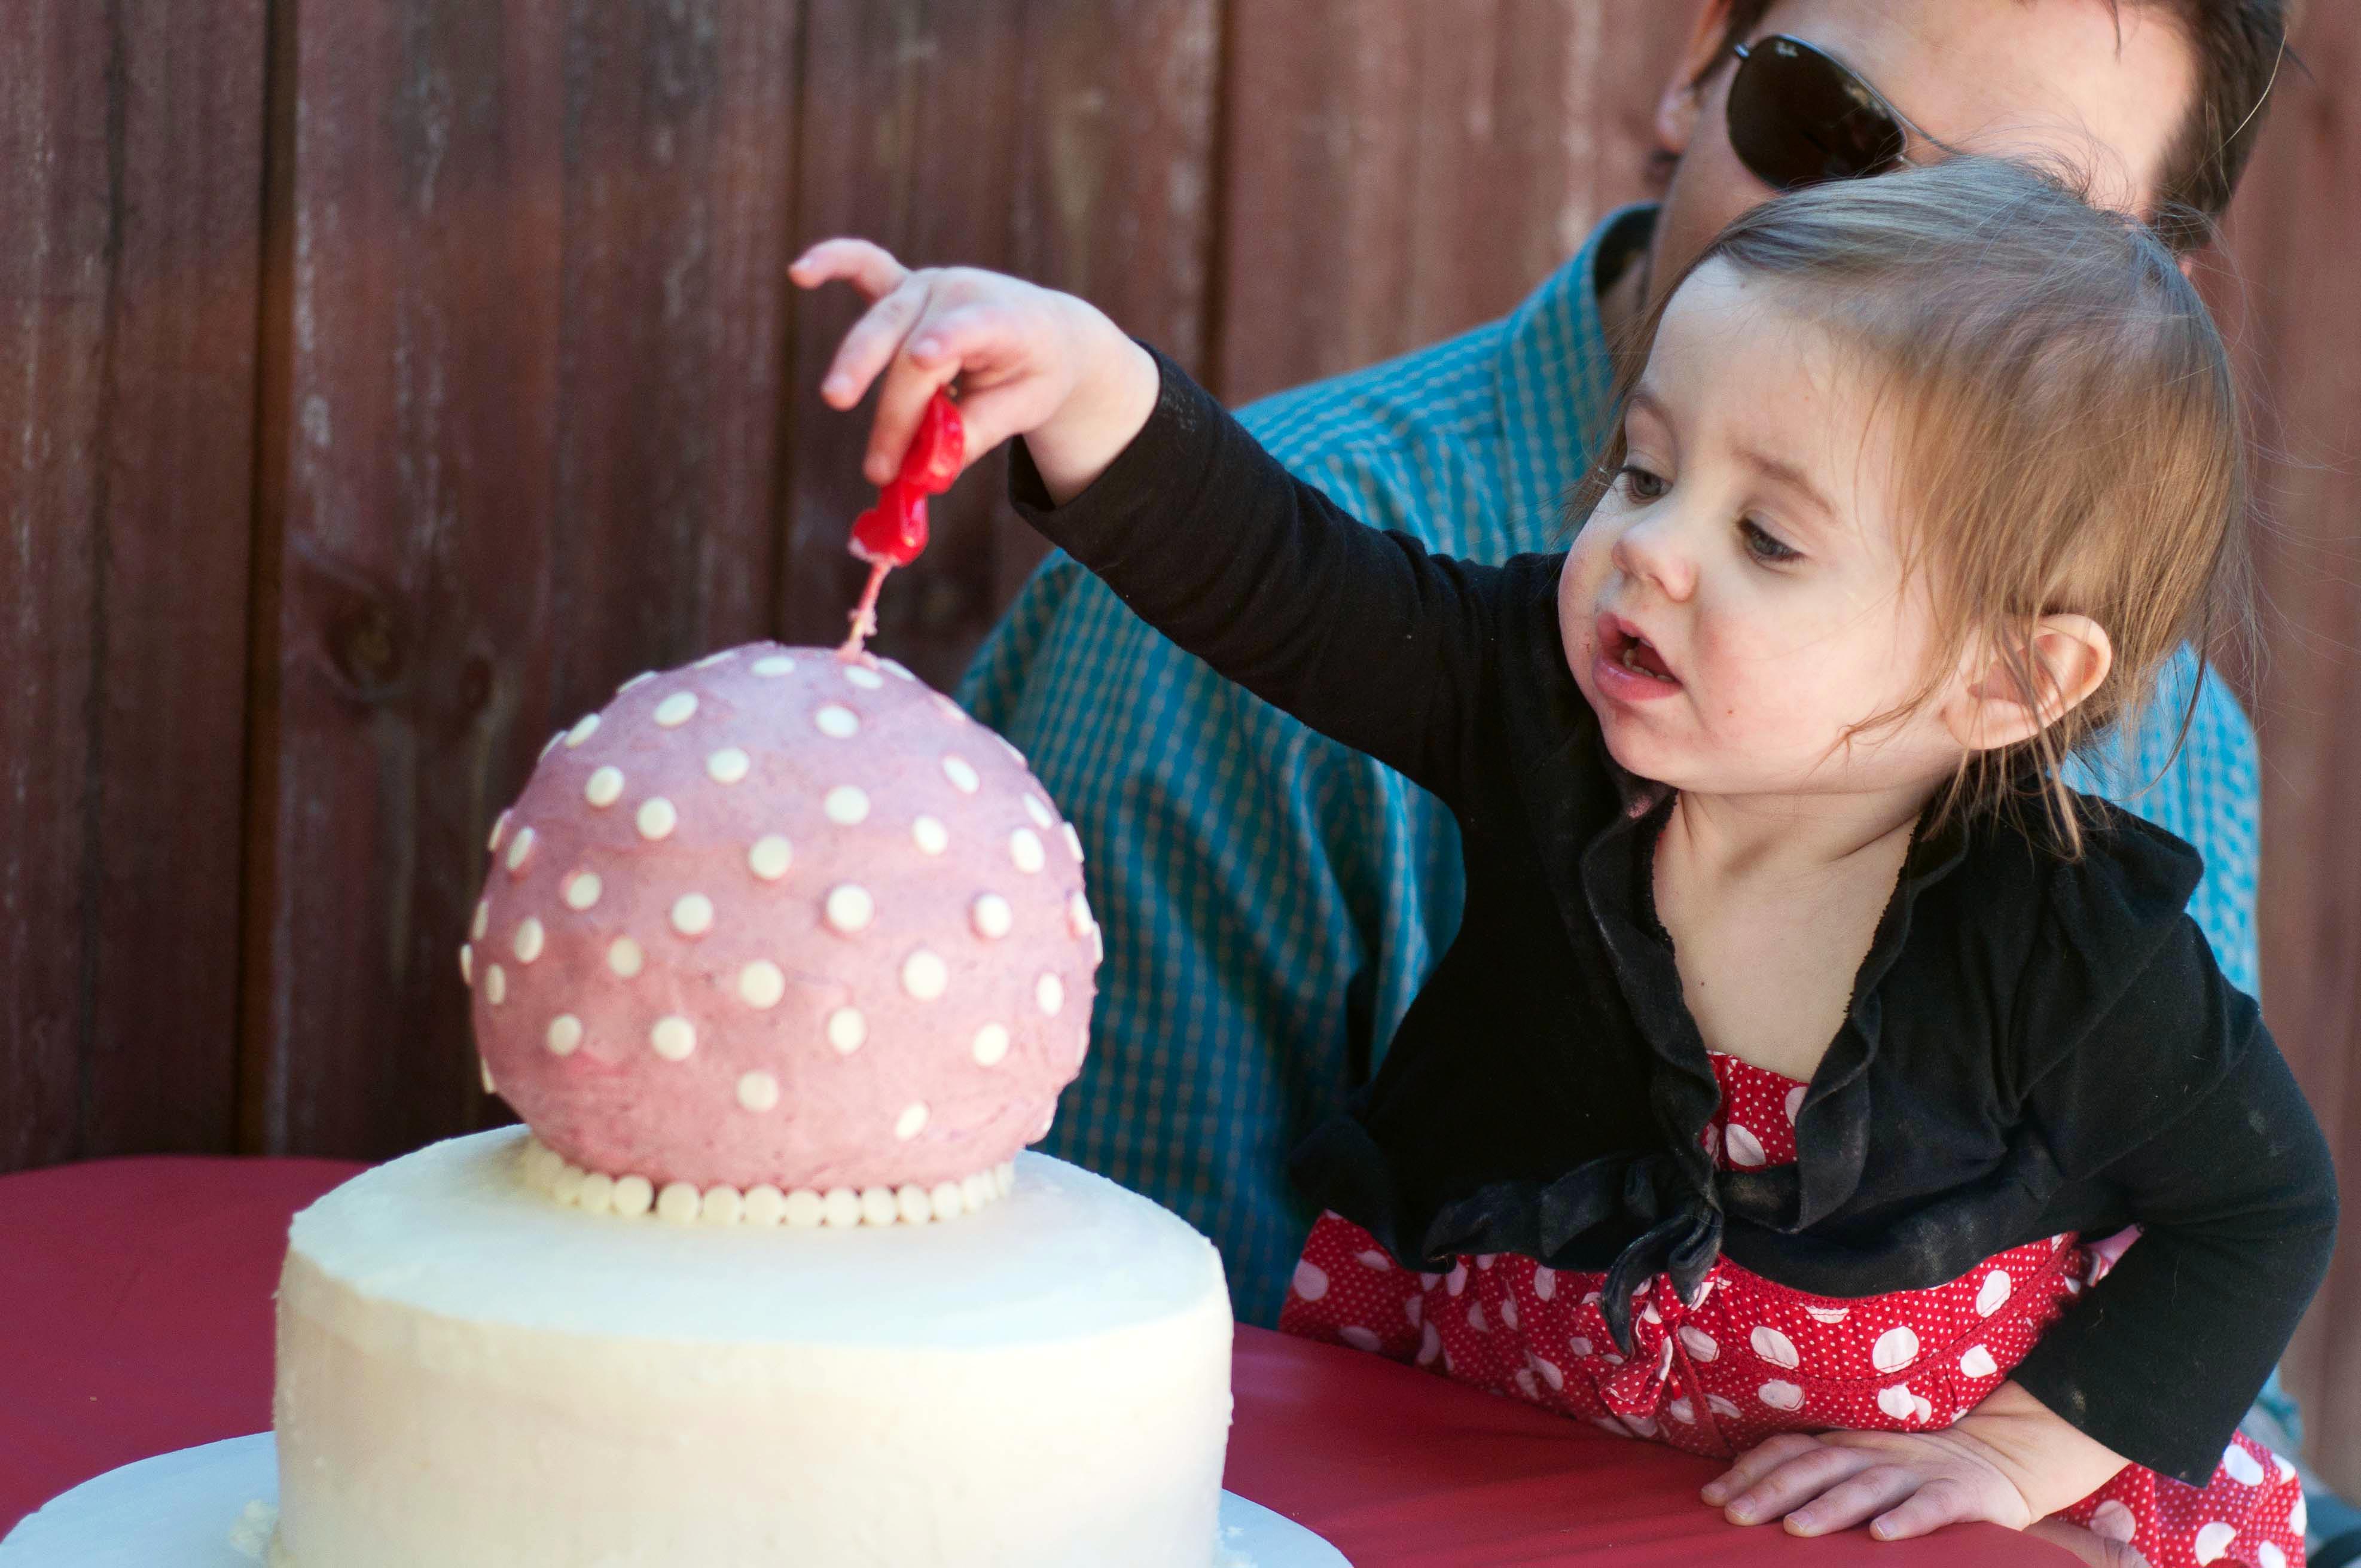
For Tater’s second birthday, my little tomboy wanted to run around the back yard and play with balls, her favorite thing in the entire world. So that’s what we did.
I made Yarn Ball Party Favors, You can see the DIY here:
Dozens of red and white beach balls covering the lawn, that I bought from Oriental Trading
Tater was in love with this.
I filled a red baby pool up with a bag of ball pit balls.
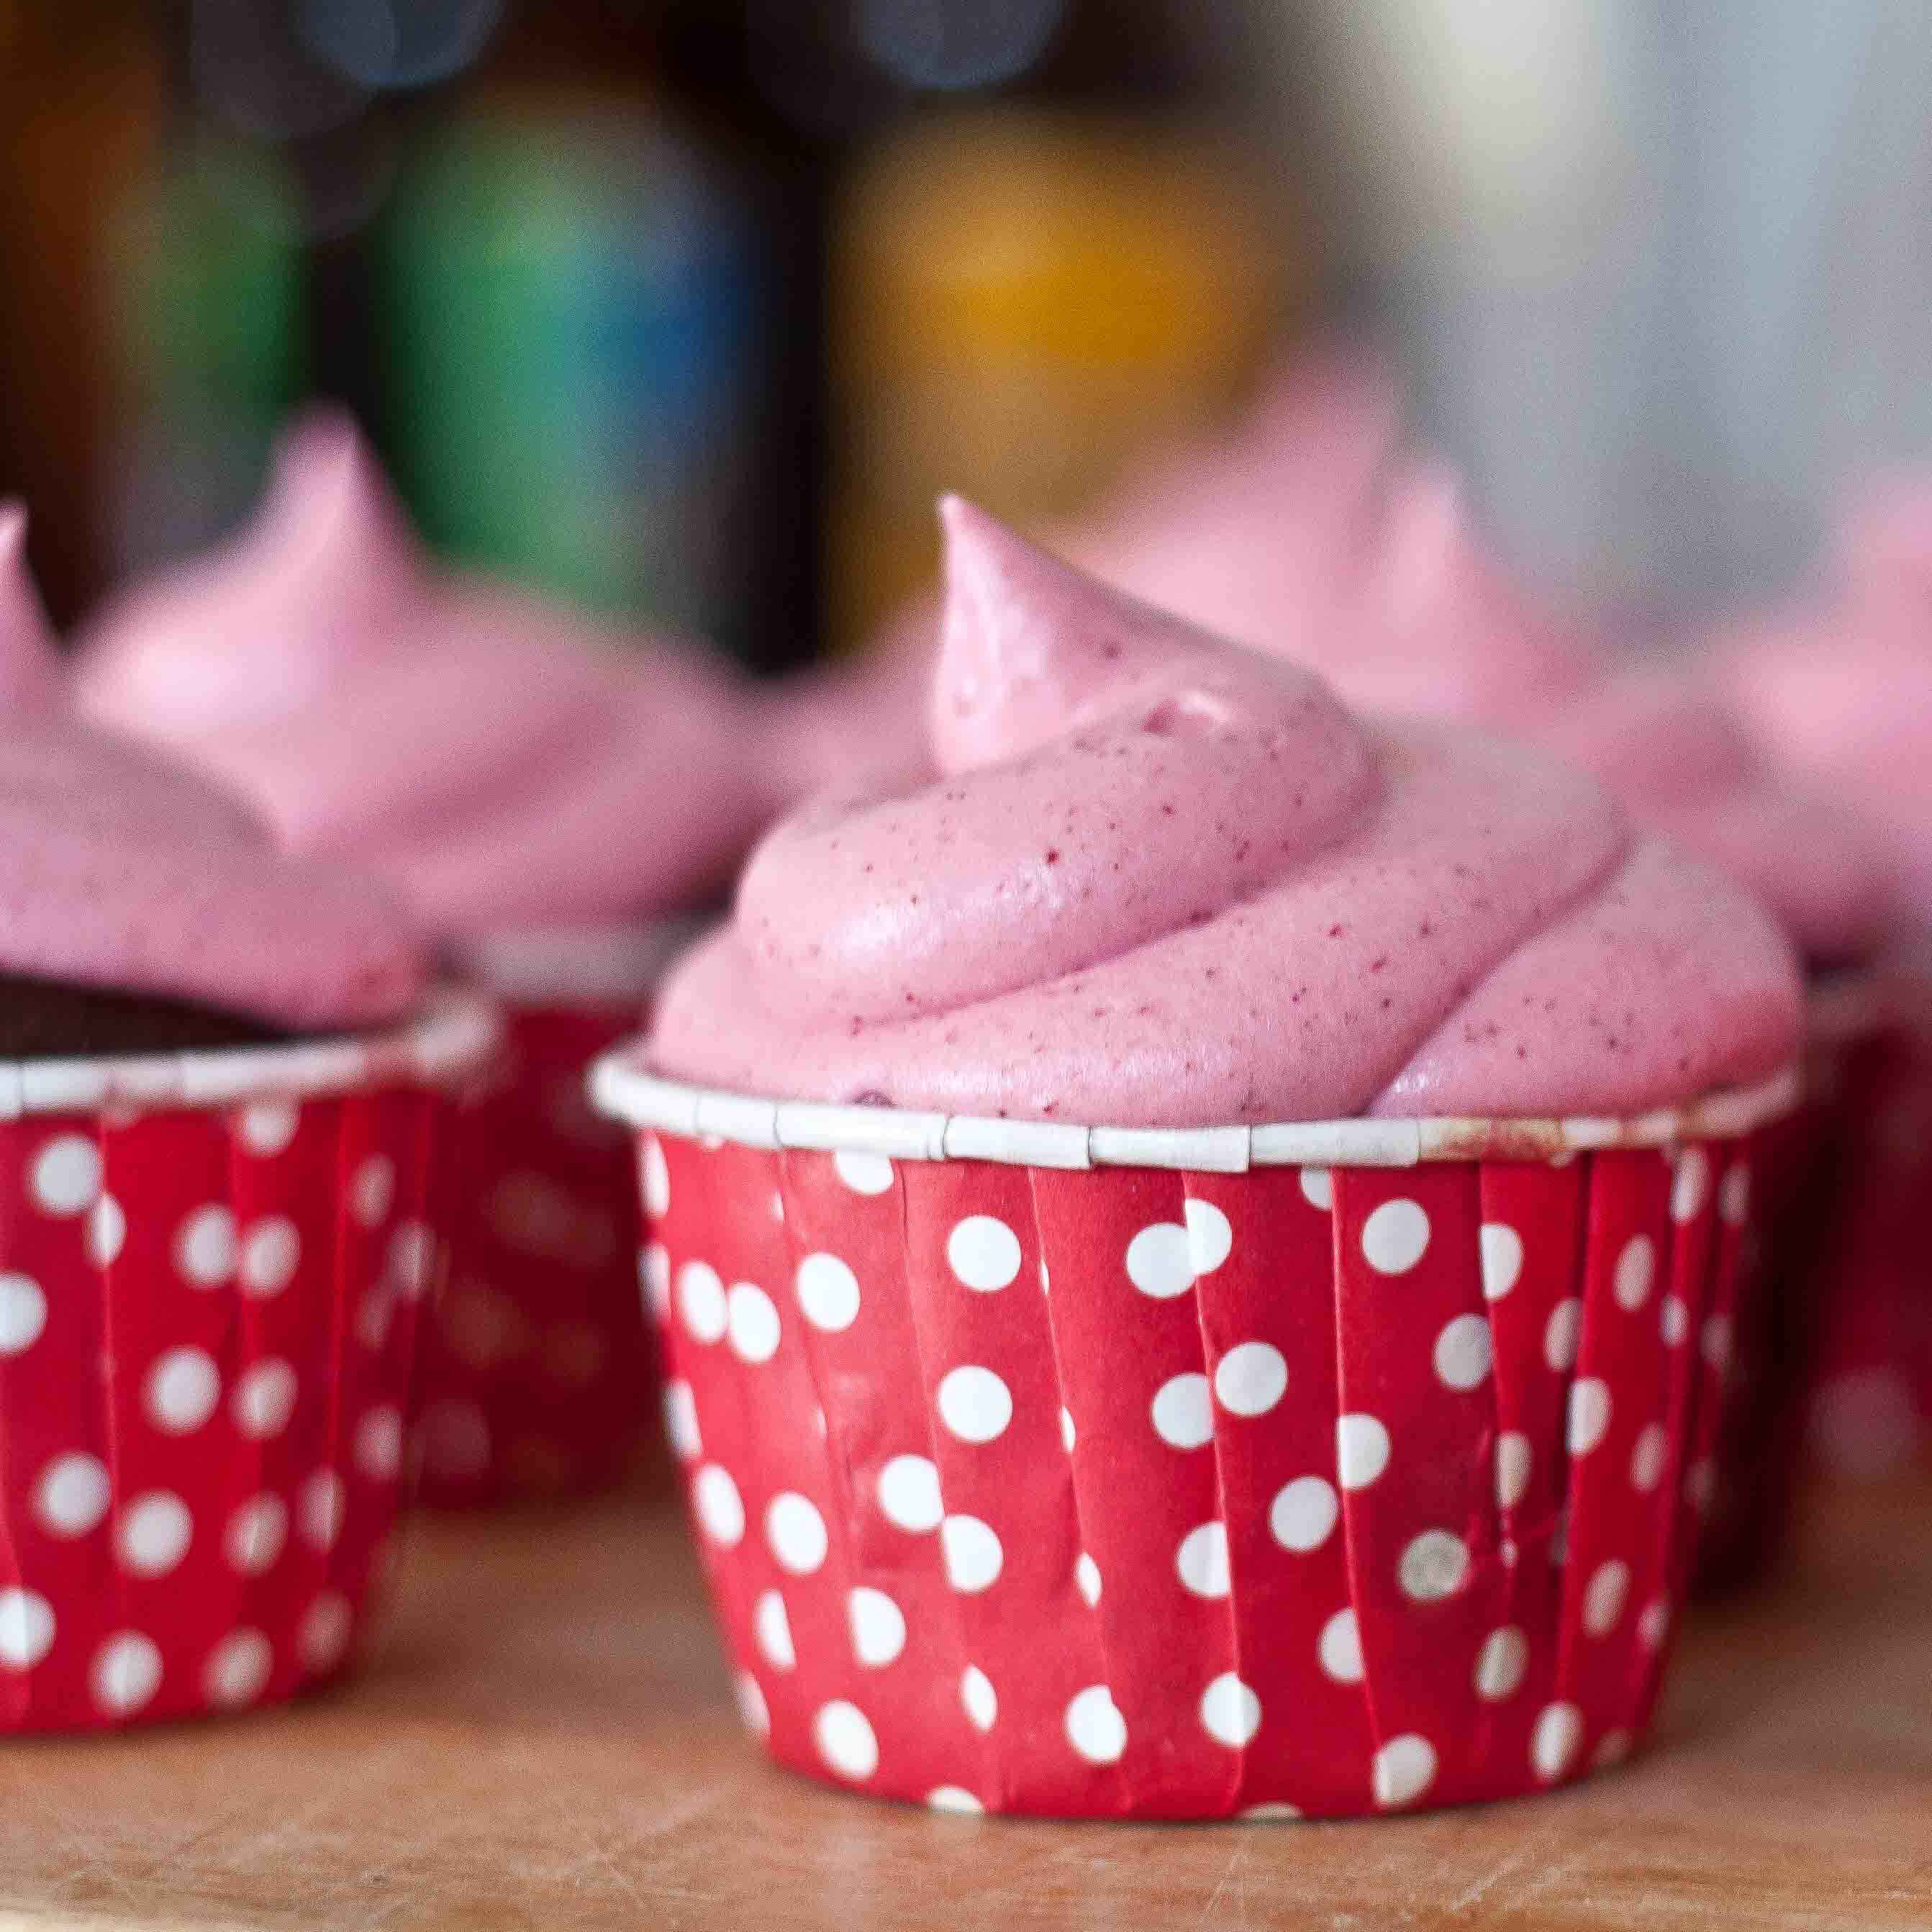
And as I shared with you a few weeks ago, I’m tring to rid my life of food dye. Quite a challenge for someone who is used to spending hours concocting the perfect frosting color for cakes. I let go and accepted the fact that the frosting I made with beet powder was just going to be purple and that was OK. More on that in a later post.
A least I was able to sneak some antioxidants and vegetables into her cupcakes, at fine compromise in my opinion.
And the food went largely unphotographed. A pretty shocking thing in my world, given the frequency with which I snap food pictures.
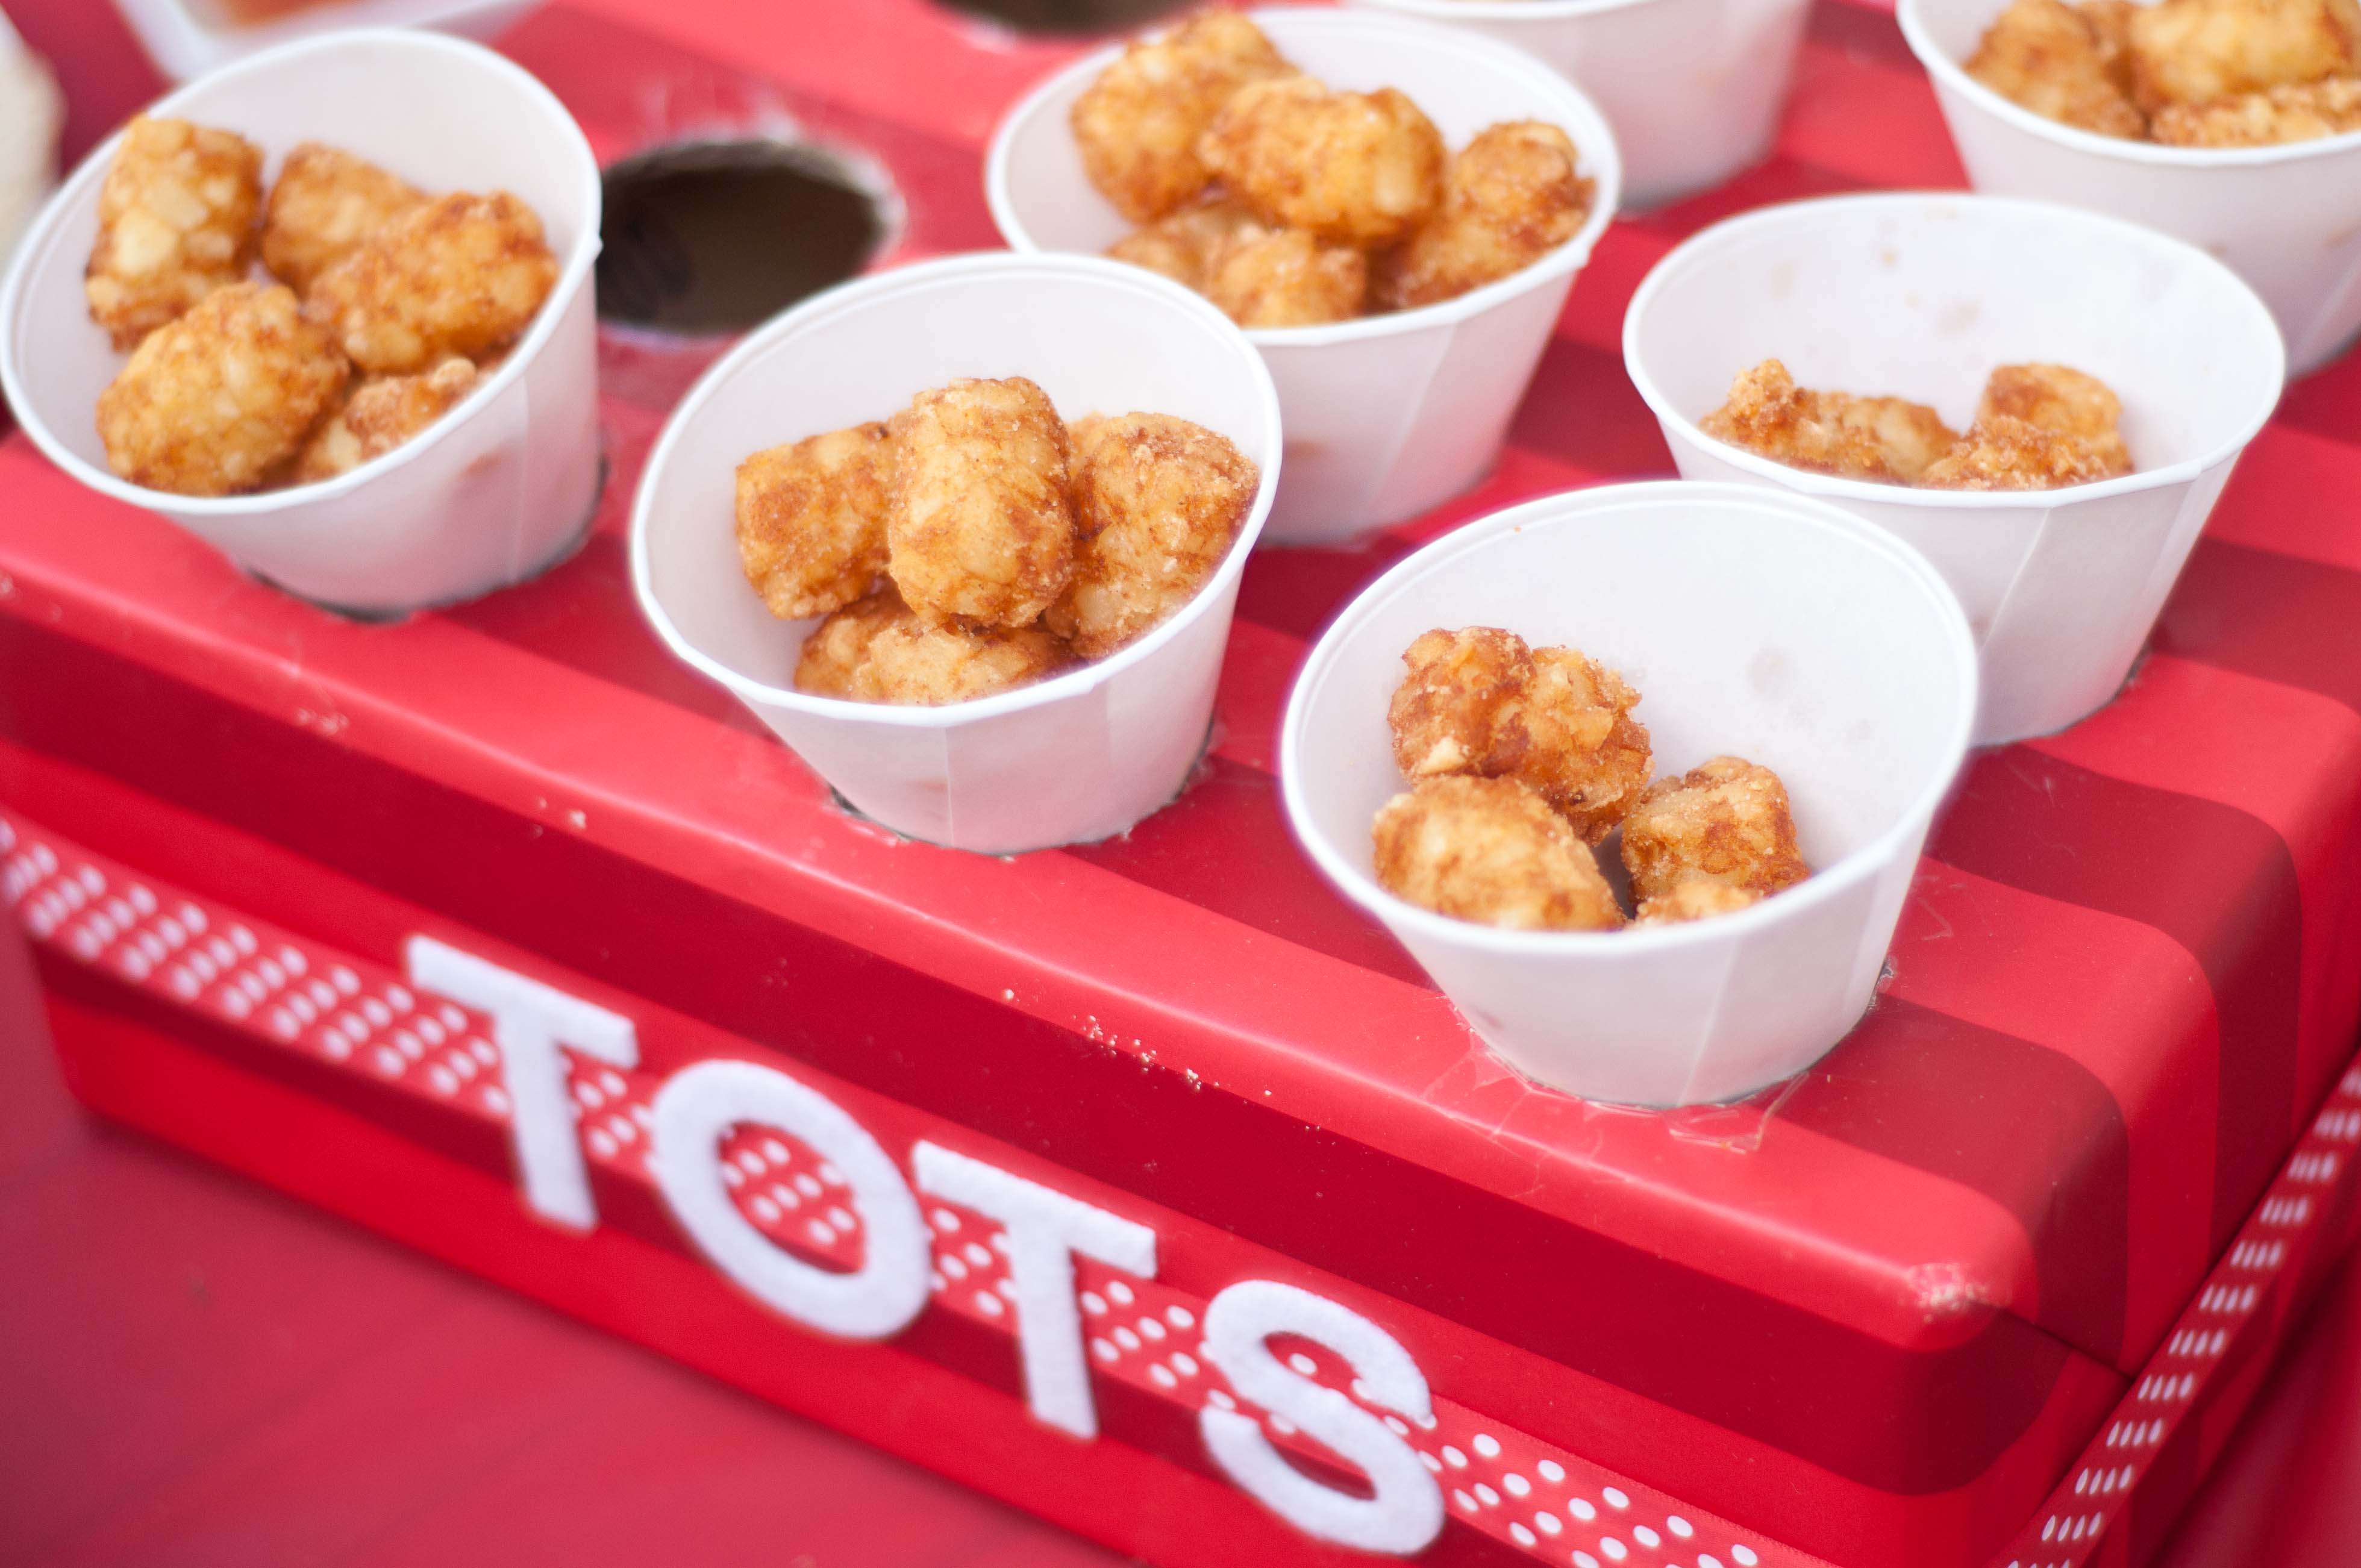
We did, however, reserect the Tater Tot Bar from last year.
I used white cone cups and made the cone holder out of a cardboard box and wrapping paper.
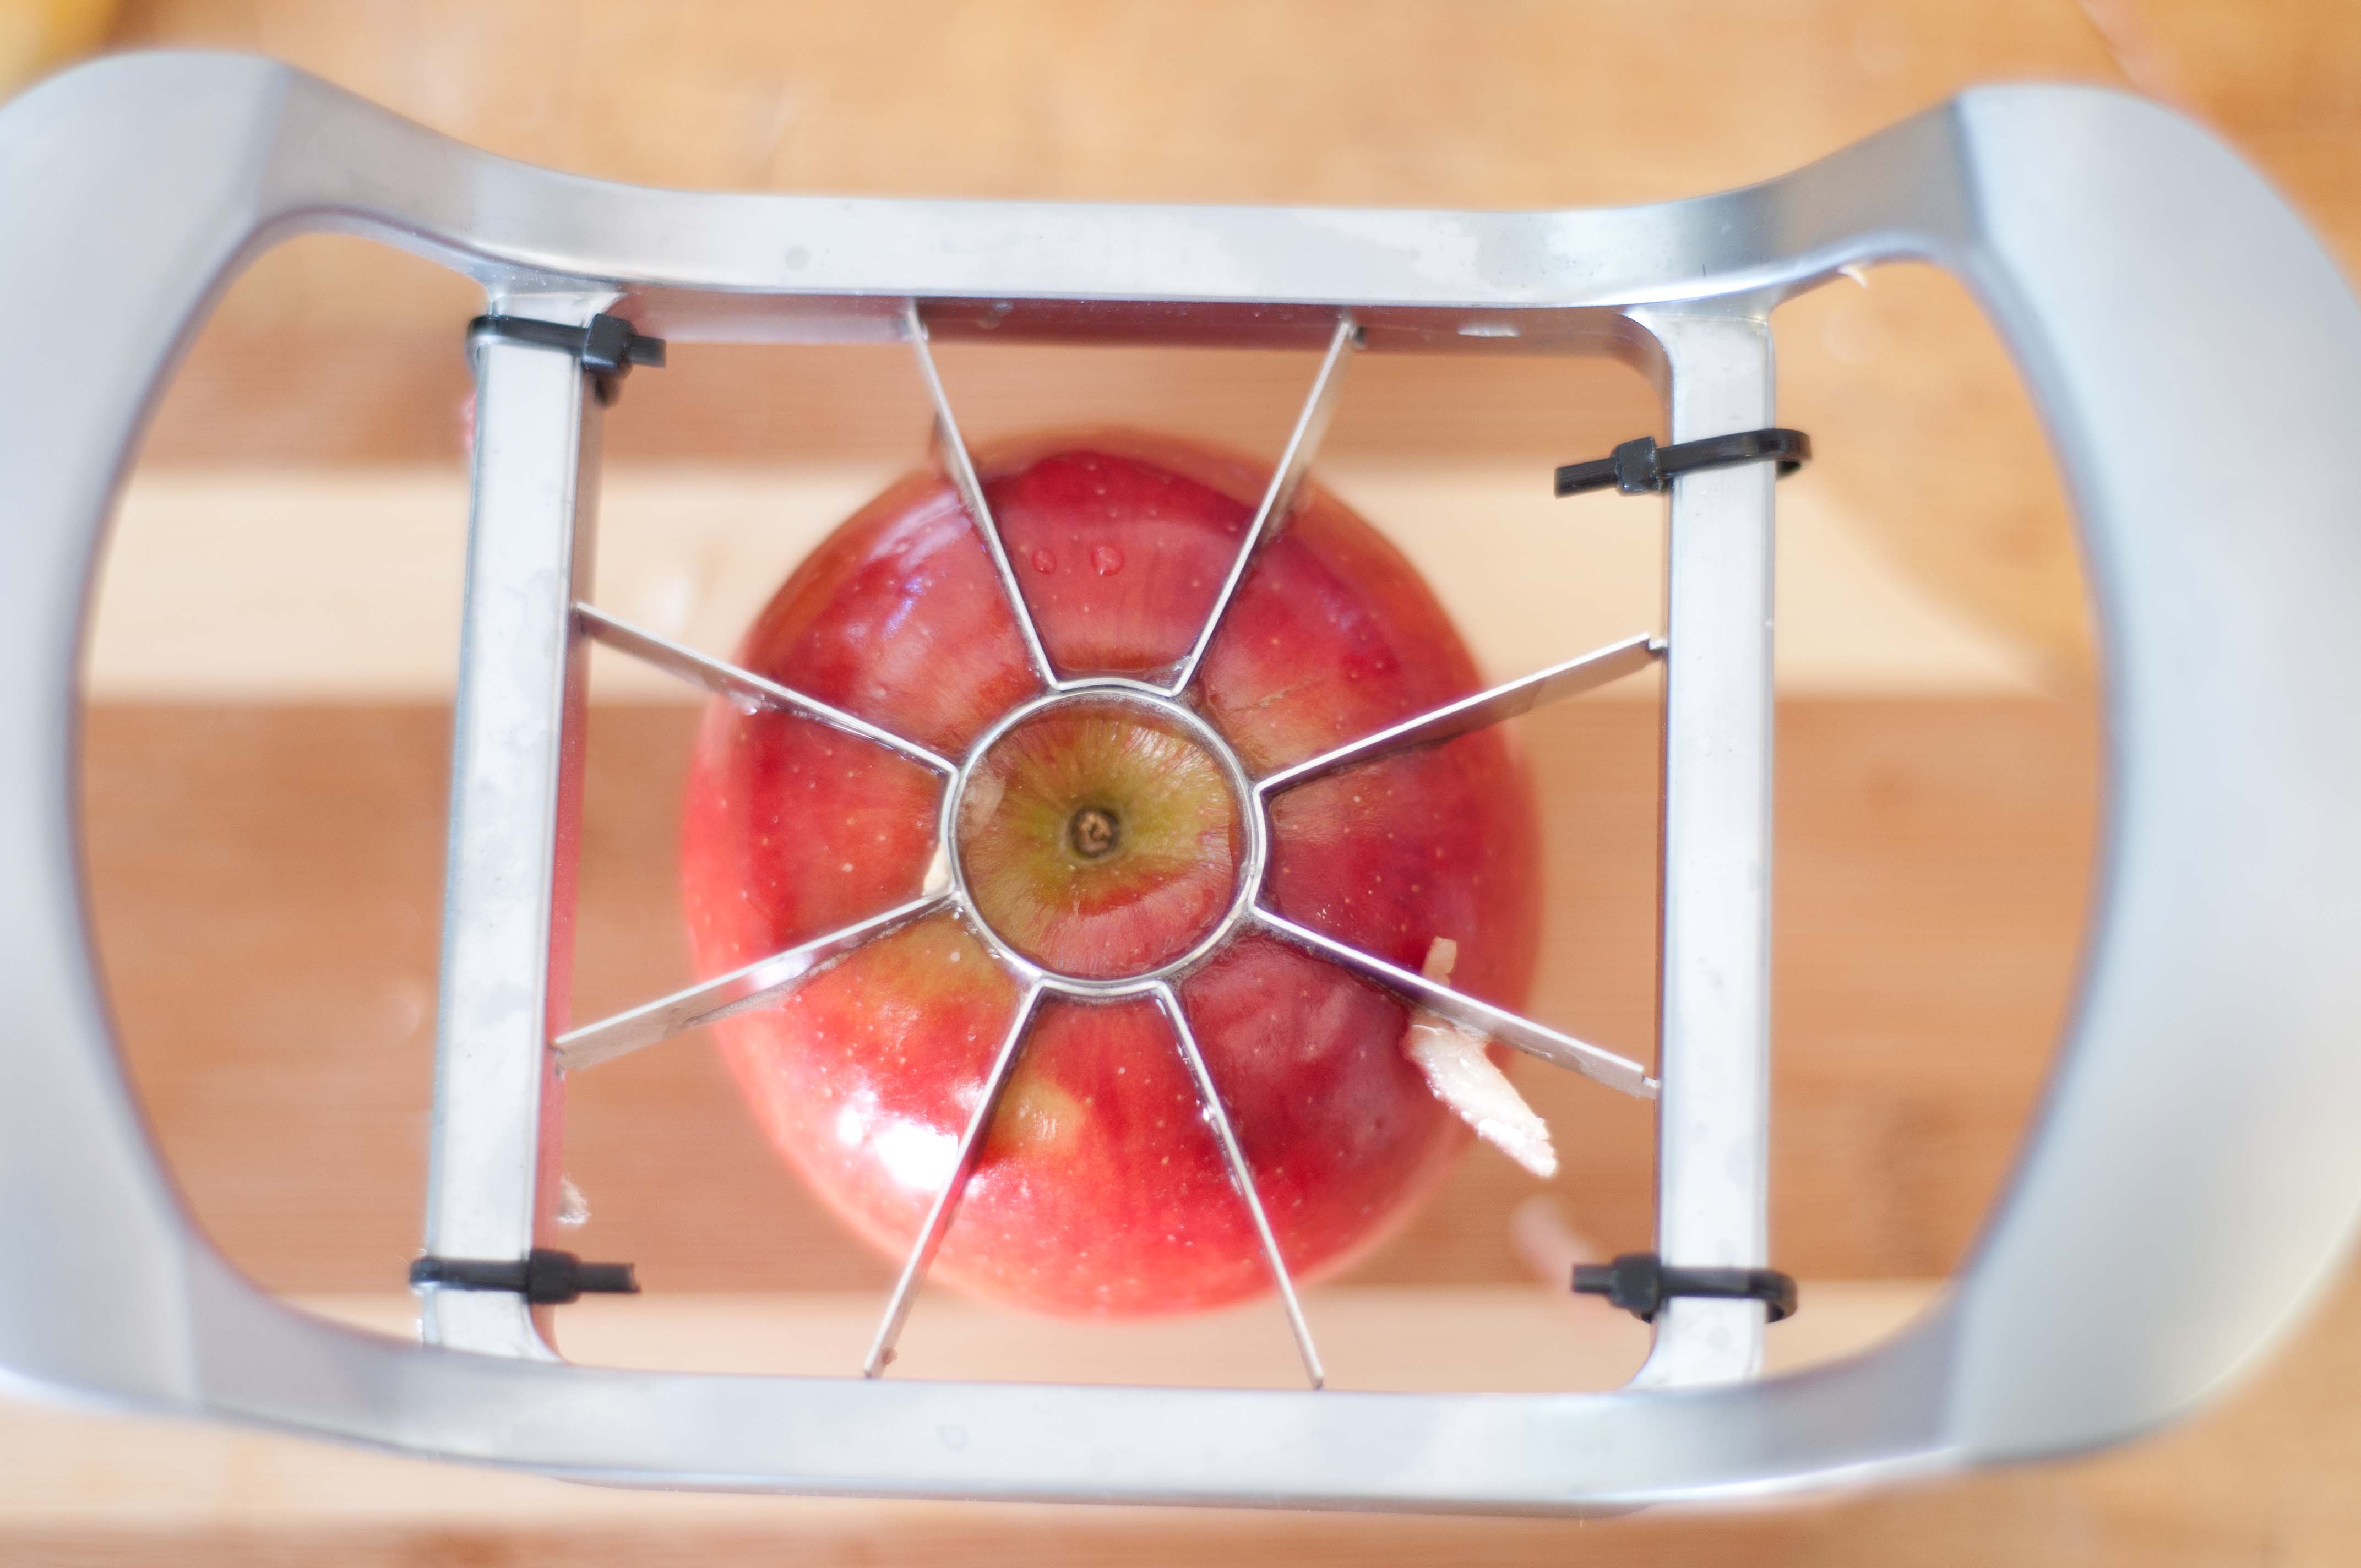
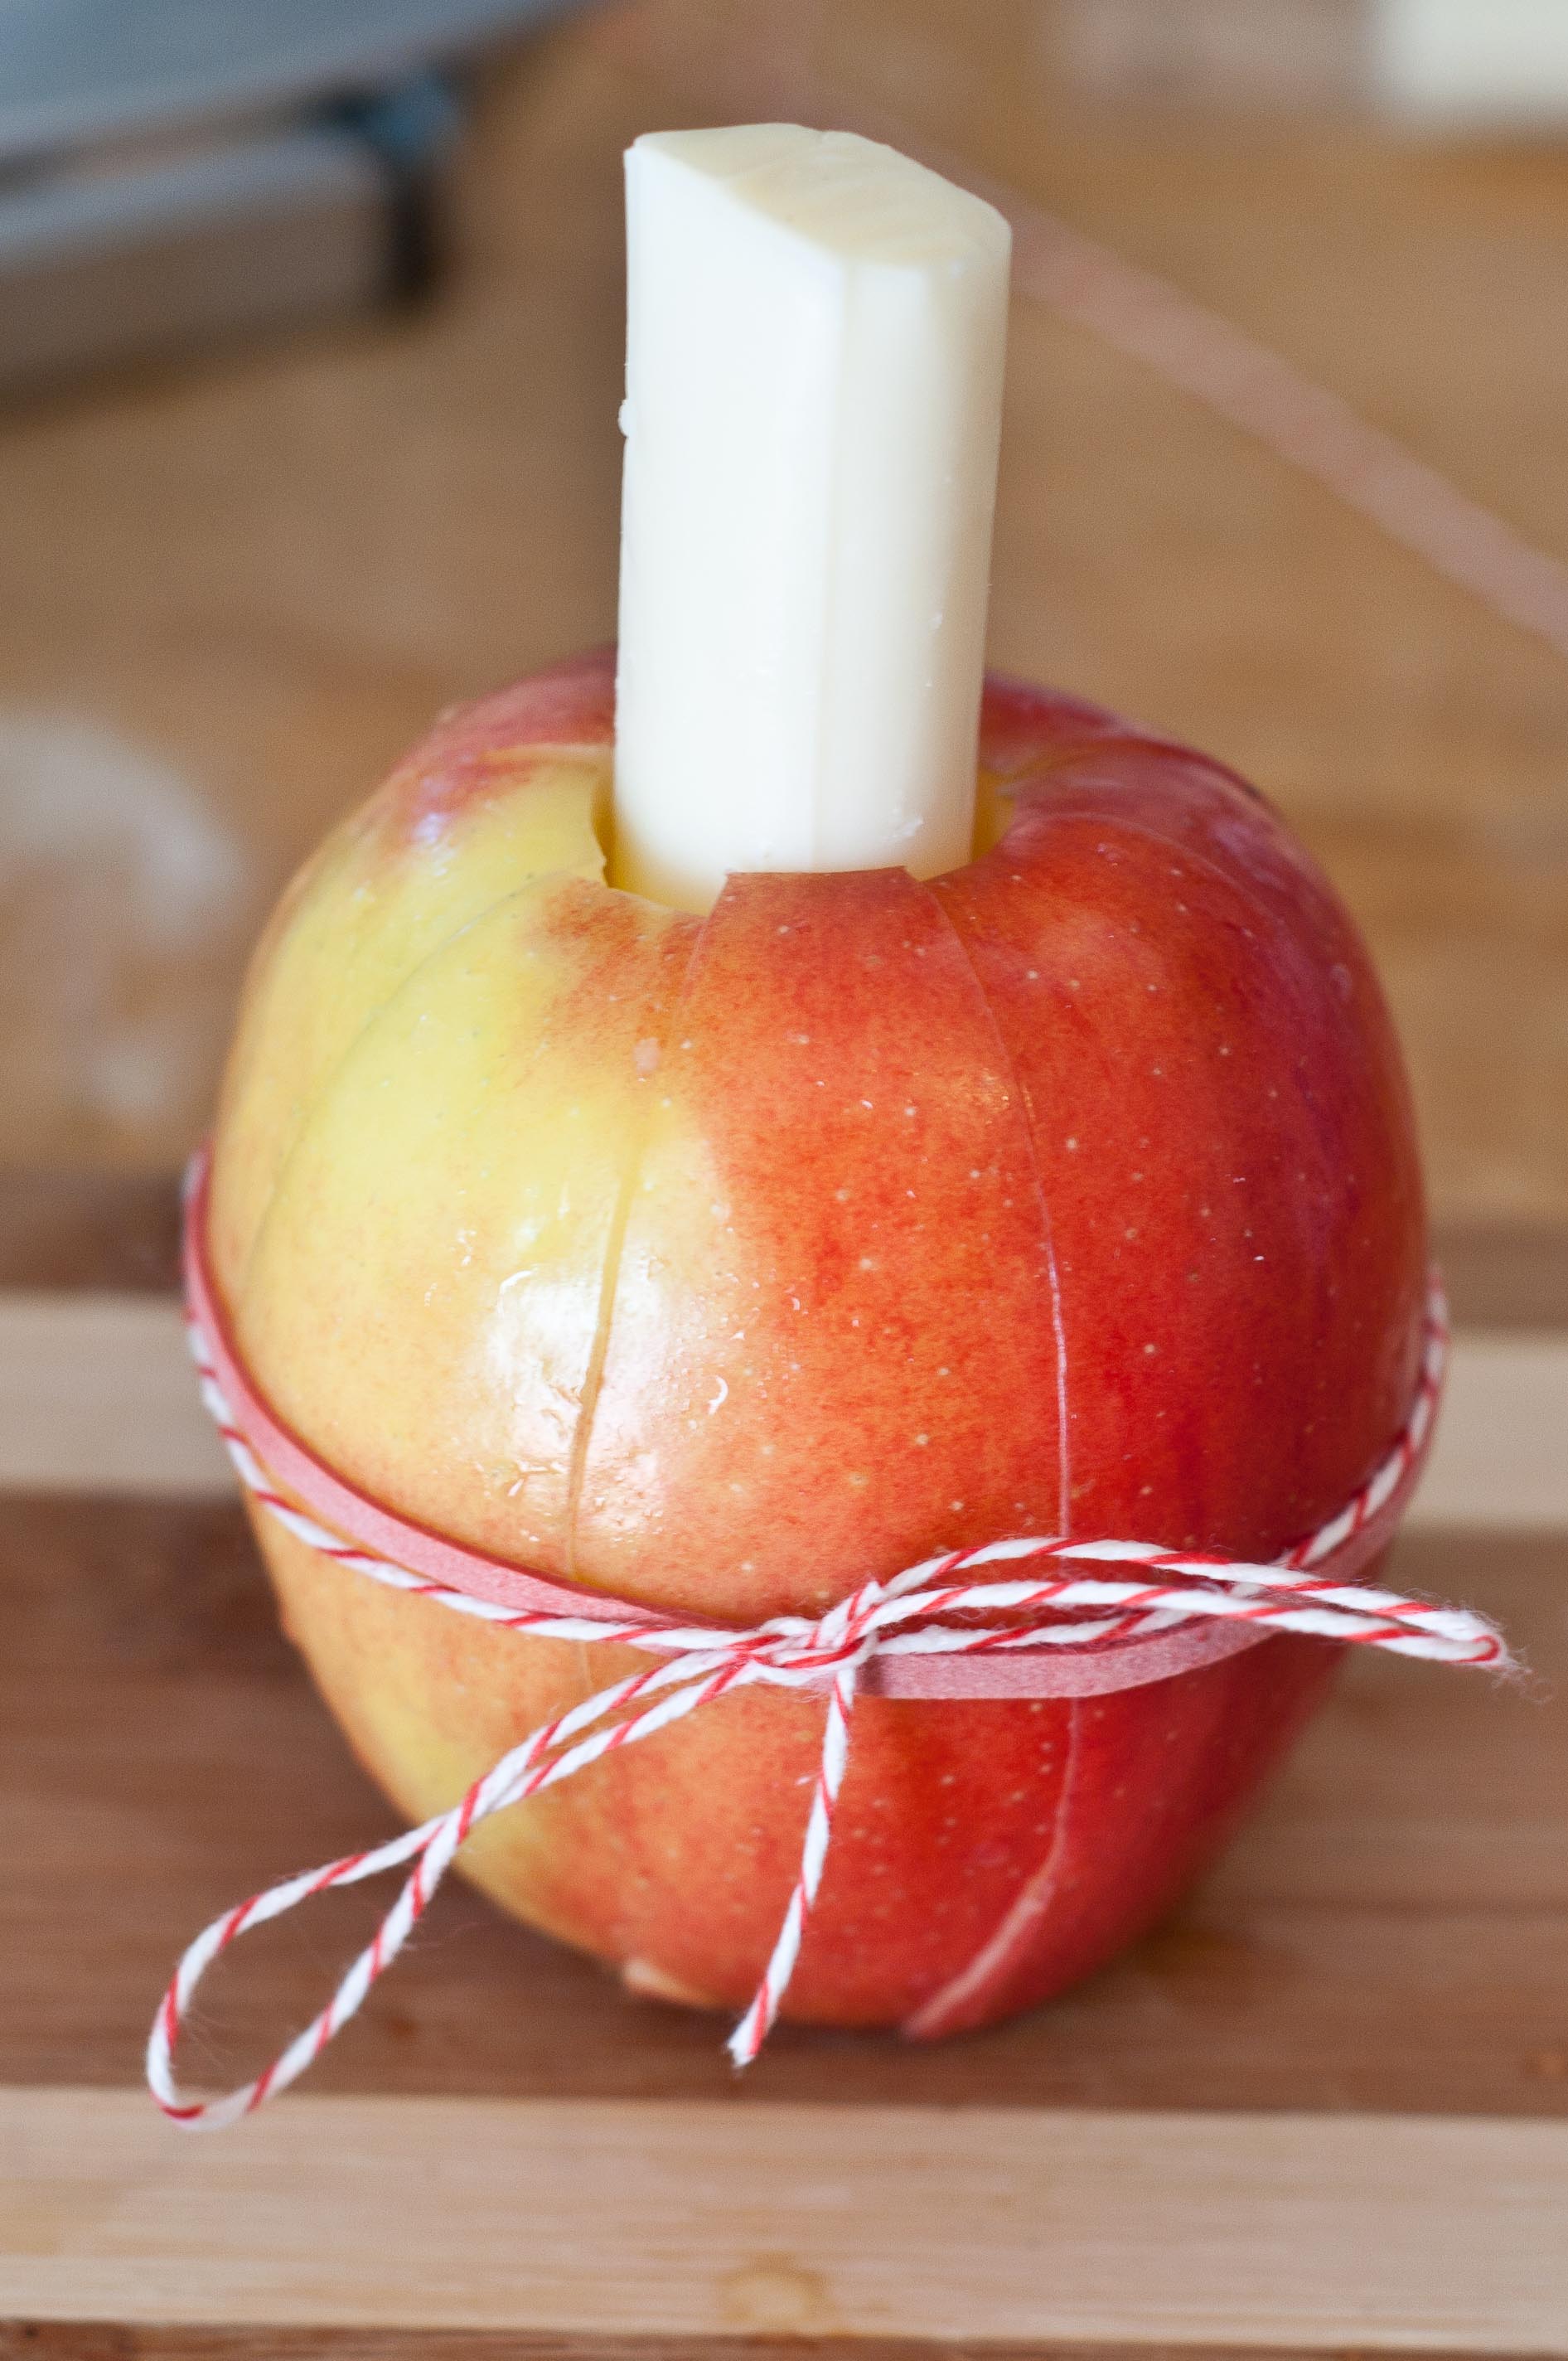
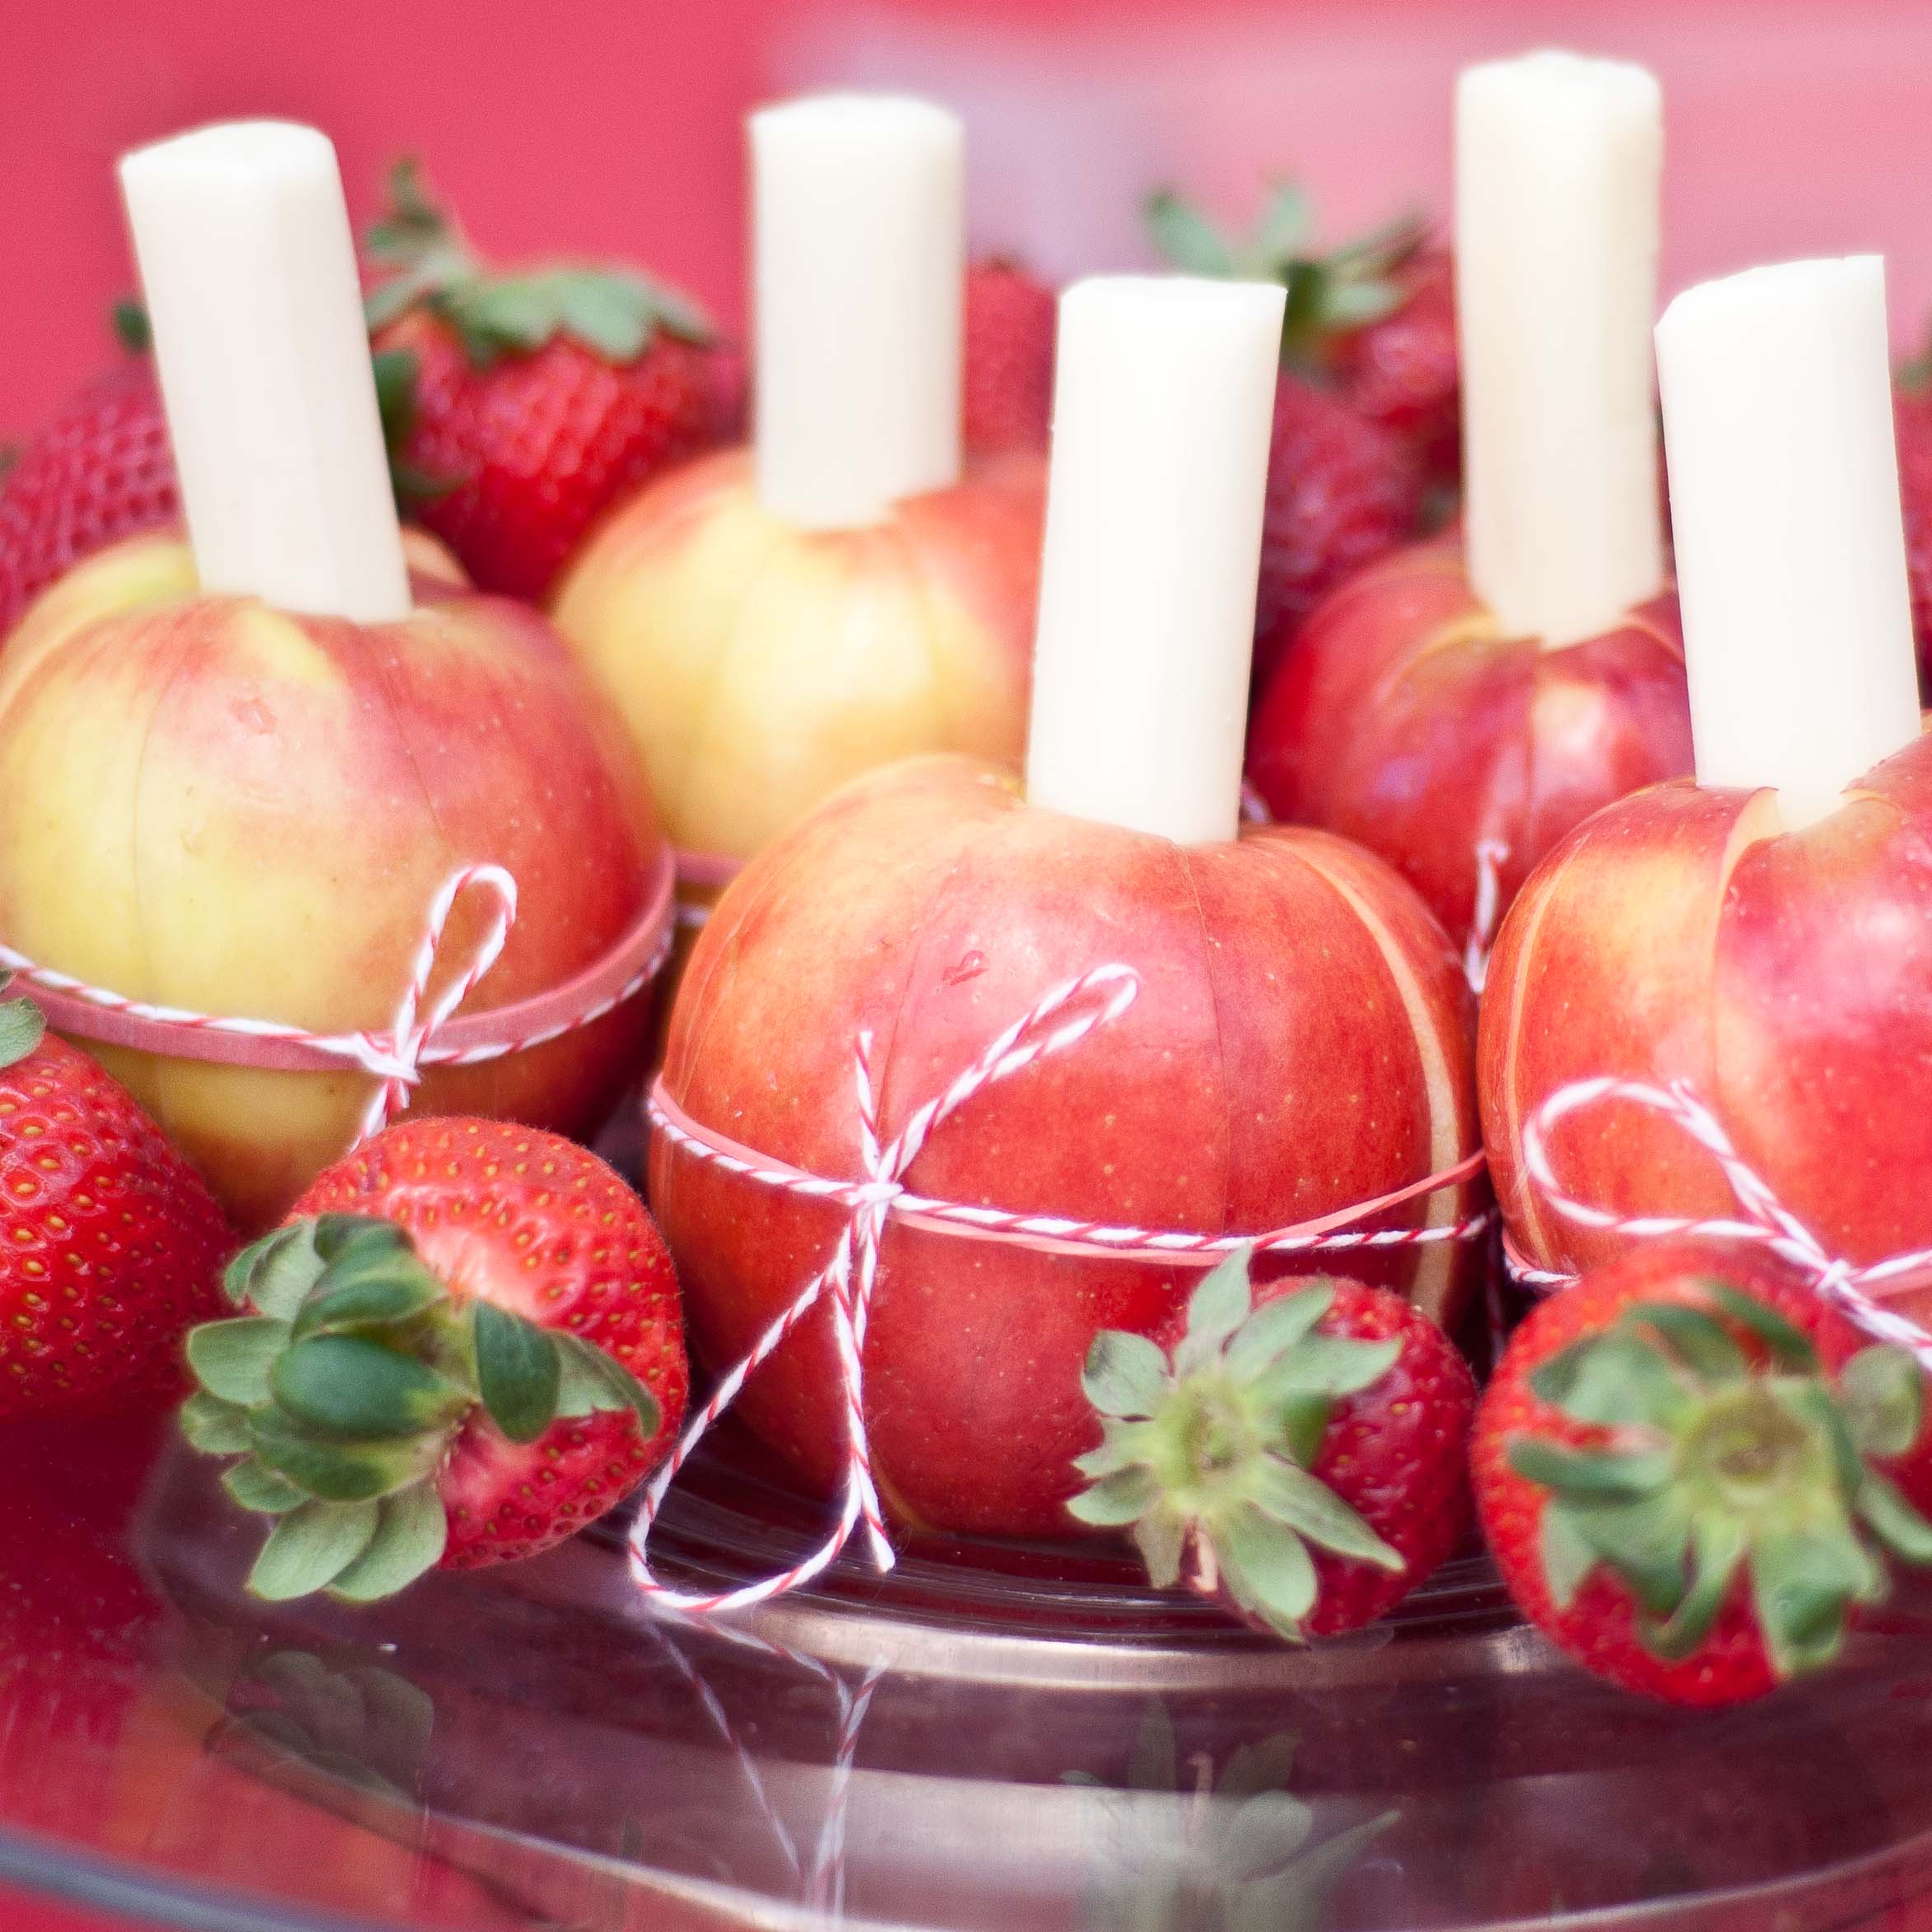
I did get a few shots of my Apple Balls, cored and sliced apples held together with rubber band and bakers twine. I replaced the core with string cheese. This will keep them fresh, un-browned and party ready for hours.
First, core and slice the apples using an apple slicer.
Remove the core and replace it with string cheese. Reassemble the apple and secure with a rubber band, then tie a ribbon or bakers twine around the rubberband. This will help your apple slices to stay fresh longer, without turning brown.
If you can, try to find string cheese that is the same size, or just a bit larger than your apple corer.
It’s hard to be a home cook. Blindly navigating a world that seems to come so effortlessly to others. Comparing our kitchen failures with the extravagant successes we see other producing. Left to wonder why we can’t make a perfect soufflé even when we follow the directions with surgical exactness.
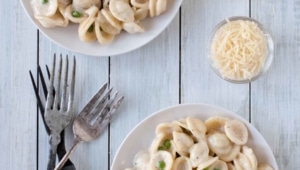
And those of us who reached adulthood with little more skill than it takes to boil water are thrown into the same world with those girls who learned how to make perfect ears of orecchiette pasta by the twirl of their Italian Grandmothers thumbs. Those of us whose childhood culinary training didn’t extend much past reheating and defrosting.
So when you sit there, tears in your eyes as your hard work has turned to a delated over-salted mess, I want you to remember a few things:
1. No one will post their failures on their blogs. Or post pictures of them on their Facebook page. When you compare your failures with everyones success, its not fair to you.
2. Everyone fails. Ask anyone who has ever cooked and they will tell you culinary tails of epic failures. Horrible, inedible food that we will never speak of in the light of day. Sometimes we figure out why we created such a disaster, sometimes it remains a mystery.
3. Great cooks don’t give up. Sure, they fail. A lot. But they don’t give up. Focus more on your success than your failures and just keep going.
4. Make a list of the recipes that you want to tackle. Make it as huge and as grandiose as you want, you have your entire life to master them. No matter how often you make them, and what the end result is, vow to learn something from each batch.
5. Remove emotion. In order to figure out how it is that you have ended up with such a kitchen failure on your hands, you have to be able to look at it objectivly. It is hard not get emotional when you feel like you failed, but that isn’t going to teach you anything. Did you really follow the steps exactly, or are you just saying that to make yourself feel better? Did you use the ingredients that were listed or did you use a substitute thinking it would be ok? If you can use each recipe as a learning tool, it wasn’t a waste. Sometimes it’s the recipes fault, sometimes it’s the ingredients fault, and yes, sometimes it is your fault. But it’s all part of the learning process. We have all tried to change a recipe thinking it would be fine, and sometimes it isn’t. Now you know.
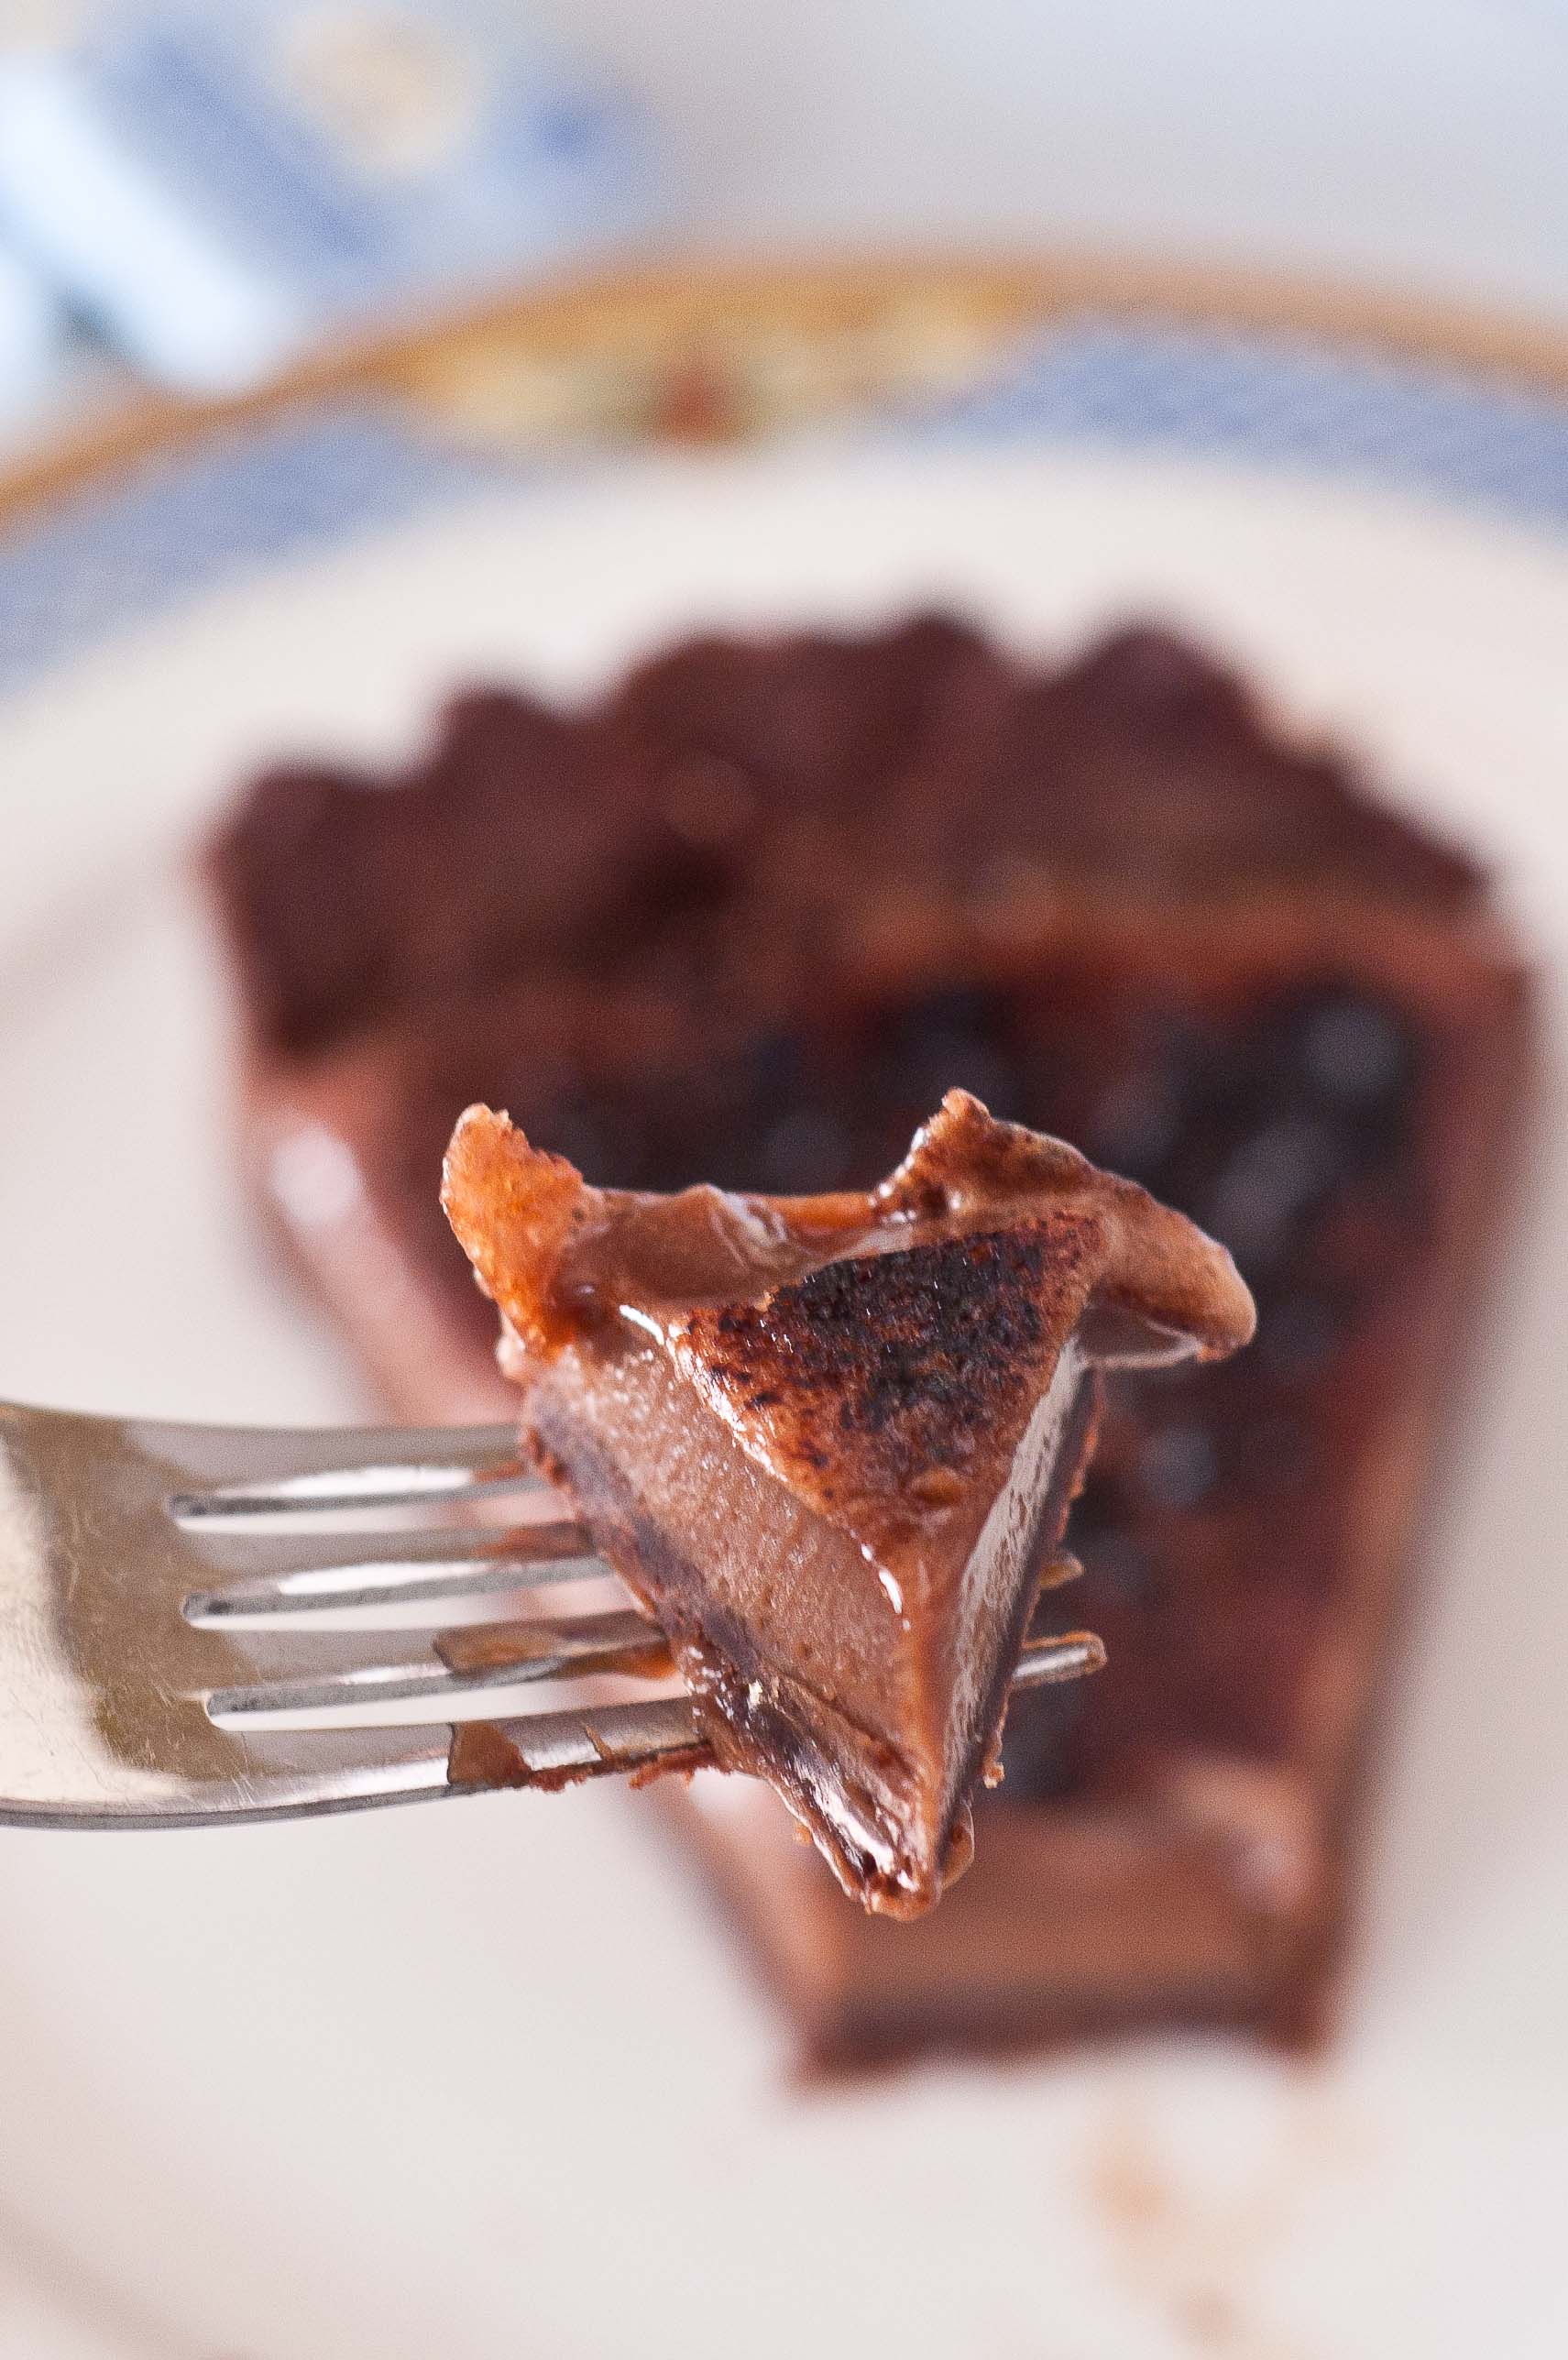
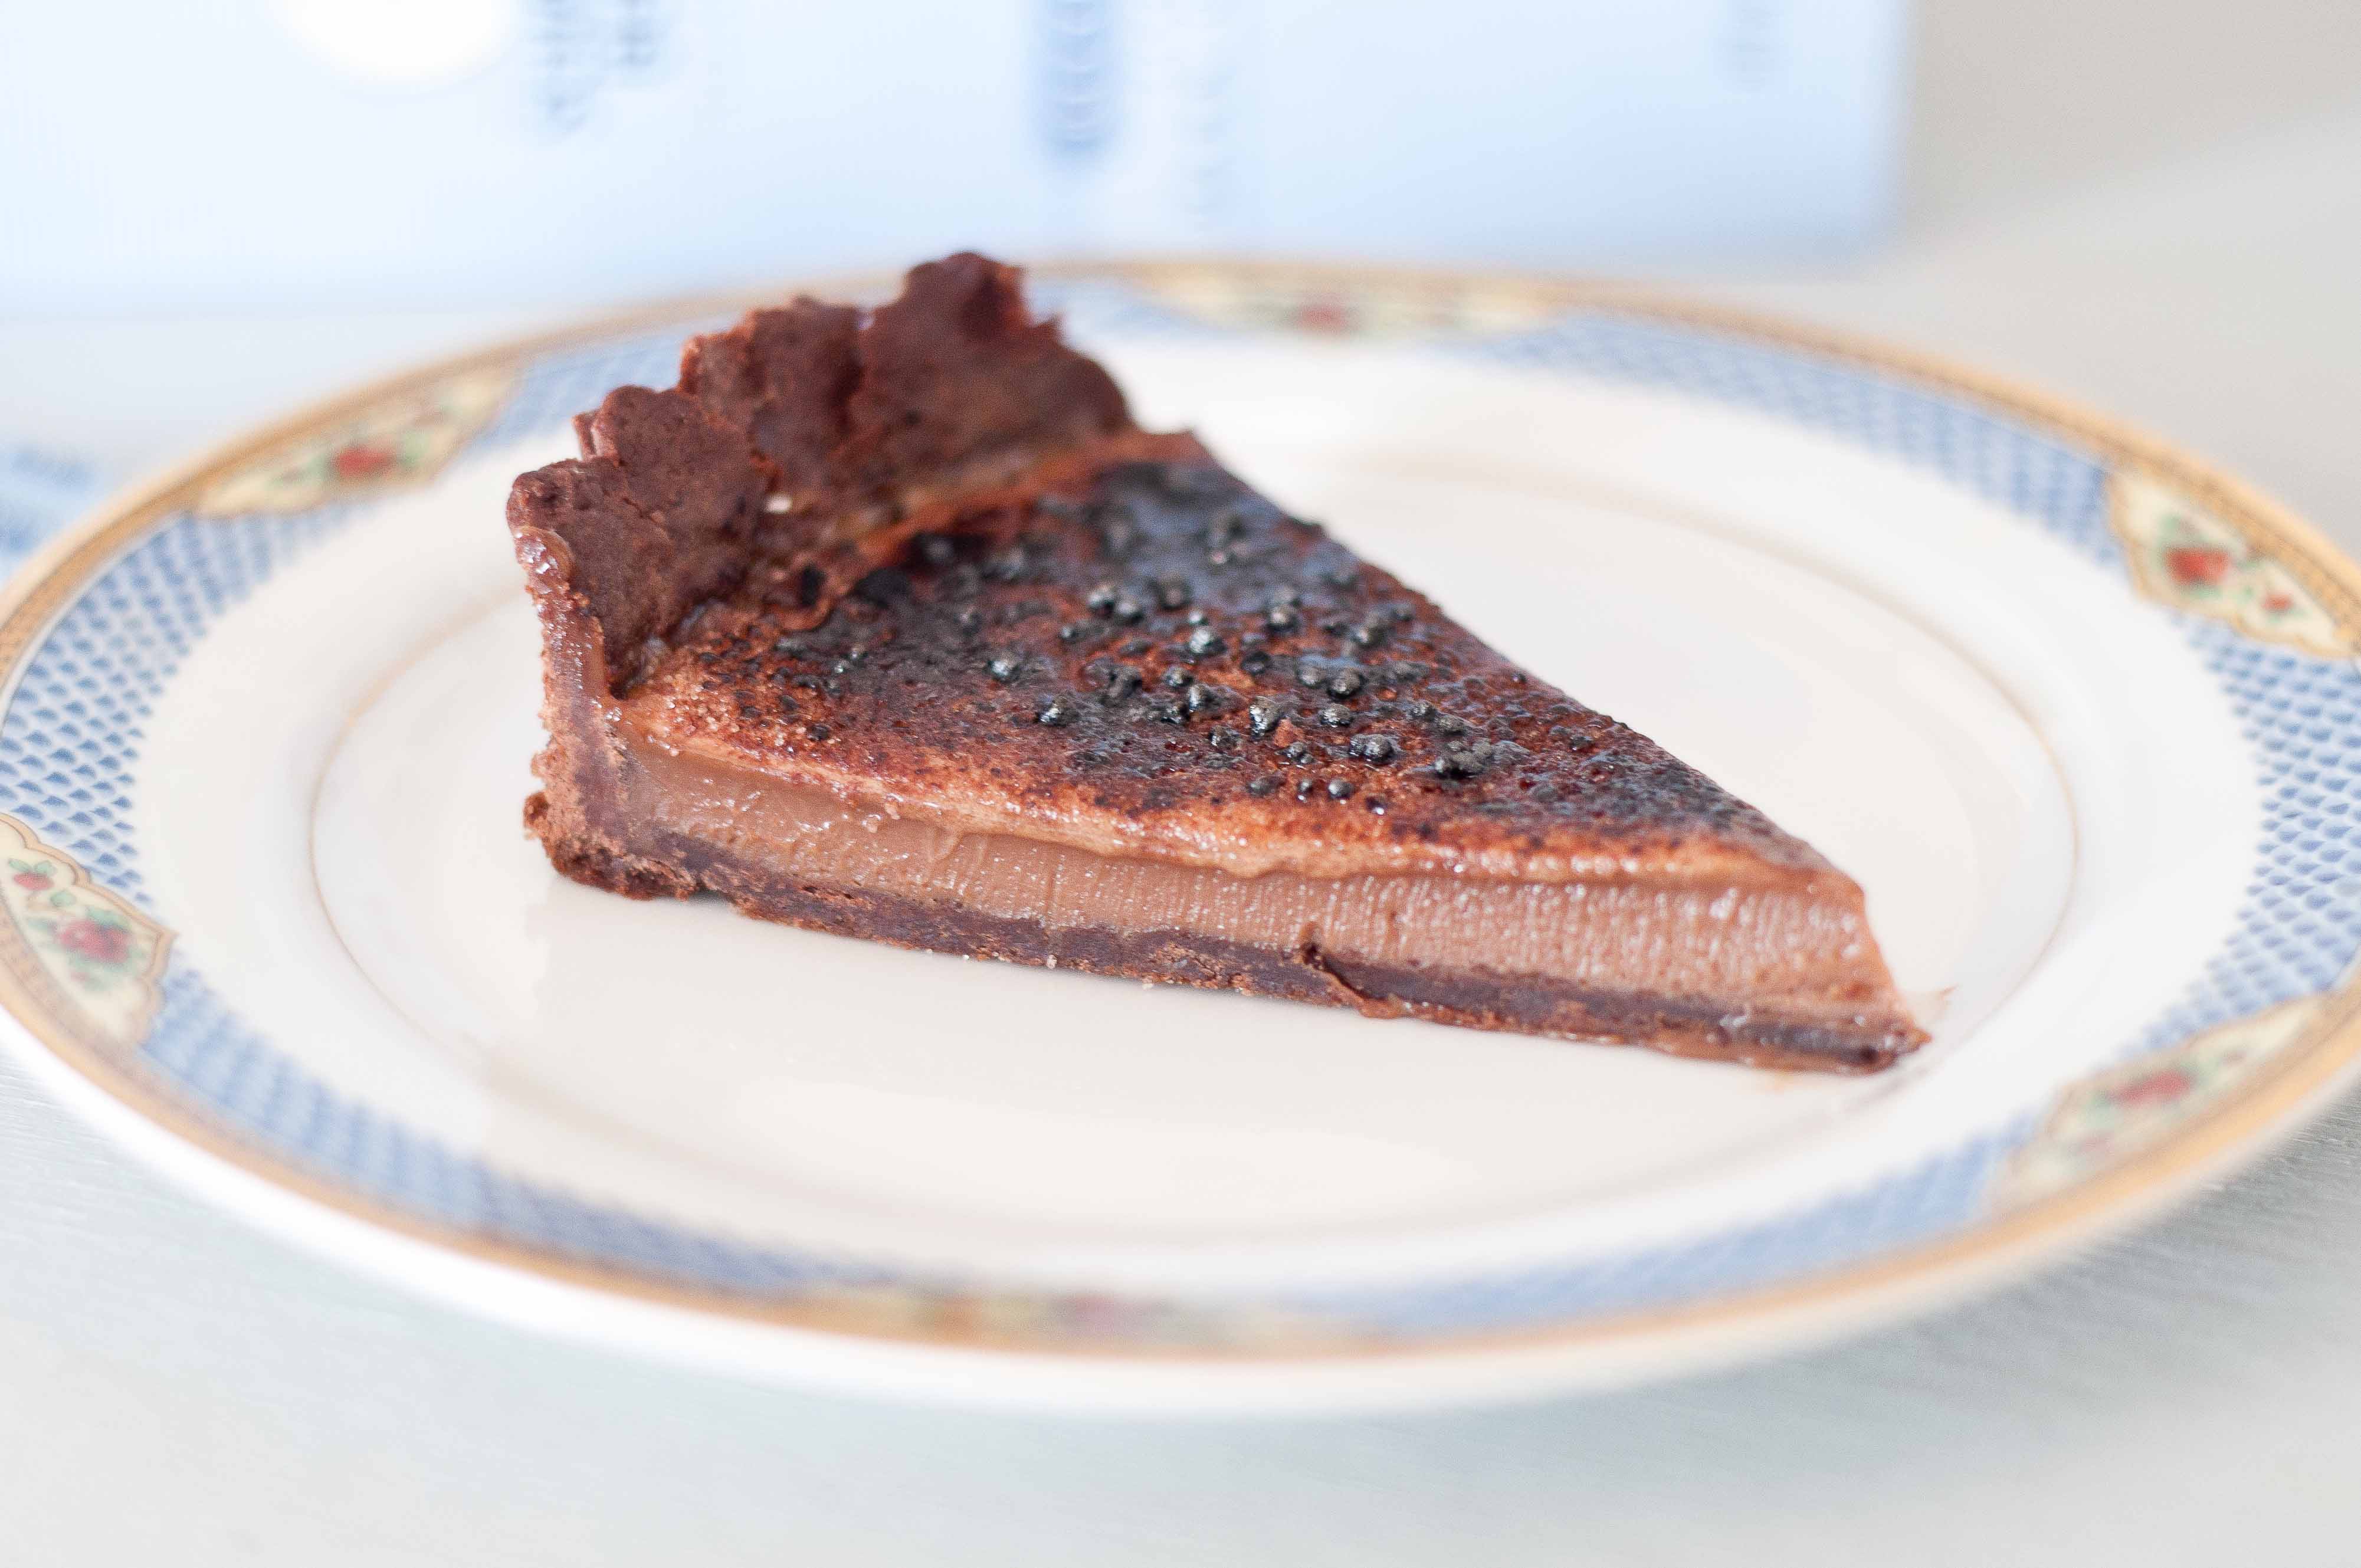
The first recipe on my list of recipes to master was Creme Brulee. It sounded so fancy and grown up, I wanted to learn to make something that was elegant and French and I was shocked at how easy it was. You do need a few kitchen tools, but the recipe and the steps are simple. And the result is incredible. For this recipe, I added a chocolate tart crust and a cocoa powder laced brulee topping.
And a kitchen tip from one of my kitchen failures: Don’t touch the melted sugar before it’s cooled, it will give you the worst mother Eff-ing burn of your life.
Dark Chocolate Crème Brulee Tart
Tart Crust:
1 cup of all-purpose flour
1/4 cup Unsweetened Cocoa Powder
1/4 cup sugar
1/2 tsp salt
10 tbs of unsalted butter, cut into small cubes
3-5 tbs ice cold water
Custard:
4 egg yolks
1/2 cup of sugar
1 3/4 cup of heavy cream
1 3oz bar of 70% Cacao Bittersweet Chocolate, broken into small pieces
1 tsp espresso powder
1/2 tsp salt
Brulee Sugar Topping:
1/4 cup granulated sugar
1 tsp Unsweetened Cocoa Powder
In a food processor, combine the 1/2 cup flour, sugars, cocoa powder and salt. Pulse to combine. Add the cubes of butter and process until combined, about 1-2 minutes. Add the remaining flour and process again. Your dough should resemble course meal. Move to a large bowl and add 3 tbs of the water, knead to combine (if you add the water to the dough with the food processor, your crust will turn into a cracker). Add the additional water if your dough is too dry.
Form into a disk, wrap completely with plastic wrap and chill for at least 1 hour (you can also make the crust a day ahead and allow to chill overnight).
Heat your oven to 375.
Once your tart is all chilled, remove from the fridge and roll out to an even thickness, making sure your dough is just large enough to completely cover the interior surface of the tart pan.
Add to a 9-inch tart pan with a removable bottom (that has been sprayed with butter flavored cooking spray), pressing into shape and removing any excess dough. If the dough is too fragile to transfer in one sheet, it is ok to press it into shape in pieces in the pan. Prick the bottom of the tart with a fork several times.
Place a sheet of parchment paper inside your tart and fill with pie weights. If you don’t have pie weights, you can use dried beans.
Bake for 20 minutes, reduce the oven temp to 300.
In a bowl, combine the yolks and 1/2 cup of sugar and whisk until light and frothy. In a pot over medium heat, combine the cream, salt, espresso powder and chocolate, stir continuously until chocolate has melted, reducing heat to avoid boiling if necessary. Remove from heat and allow to cool to room temperate for about 15 minutes (if you add the cream/chocolate mixture to your egg mixture when it is hot, you will end up with scrambled eggs. Allow to cool to avoid that).
While whisking the egg mixture, slowly add the cream until completely combined. Strain with a fine mesh strainer.
Place tart pan on a baking sheet and set in the oven, then add the custard to tart shell. Bake at 300 degrees until the edges are set and the middle is still wobbly (it will continue to set as it cools) about 35-40 minutes. Refrigerate for at least 2 hours and keep cold until ready to serve.
In a small bowl, add ¼ cup of sugar and 1 tsp cocoa powder, stir to combine. Add to the top of the tart in an even layer. Run a culinary torch over the top of the sugar, slowly and evenly, until it has all melted and is mostly dark. Due to the addition of the cocoa powder, this brulee topping is more likely to catch fire. Make sure to extinguish any fires instantly. You can also brulee with plain granulated sugar, leaving out the cocoa powder, if it makes you nervous! Serve immediately. Once the sugar has been bruleed, it will start to liquify after about an hour.
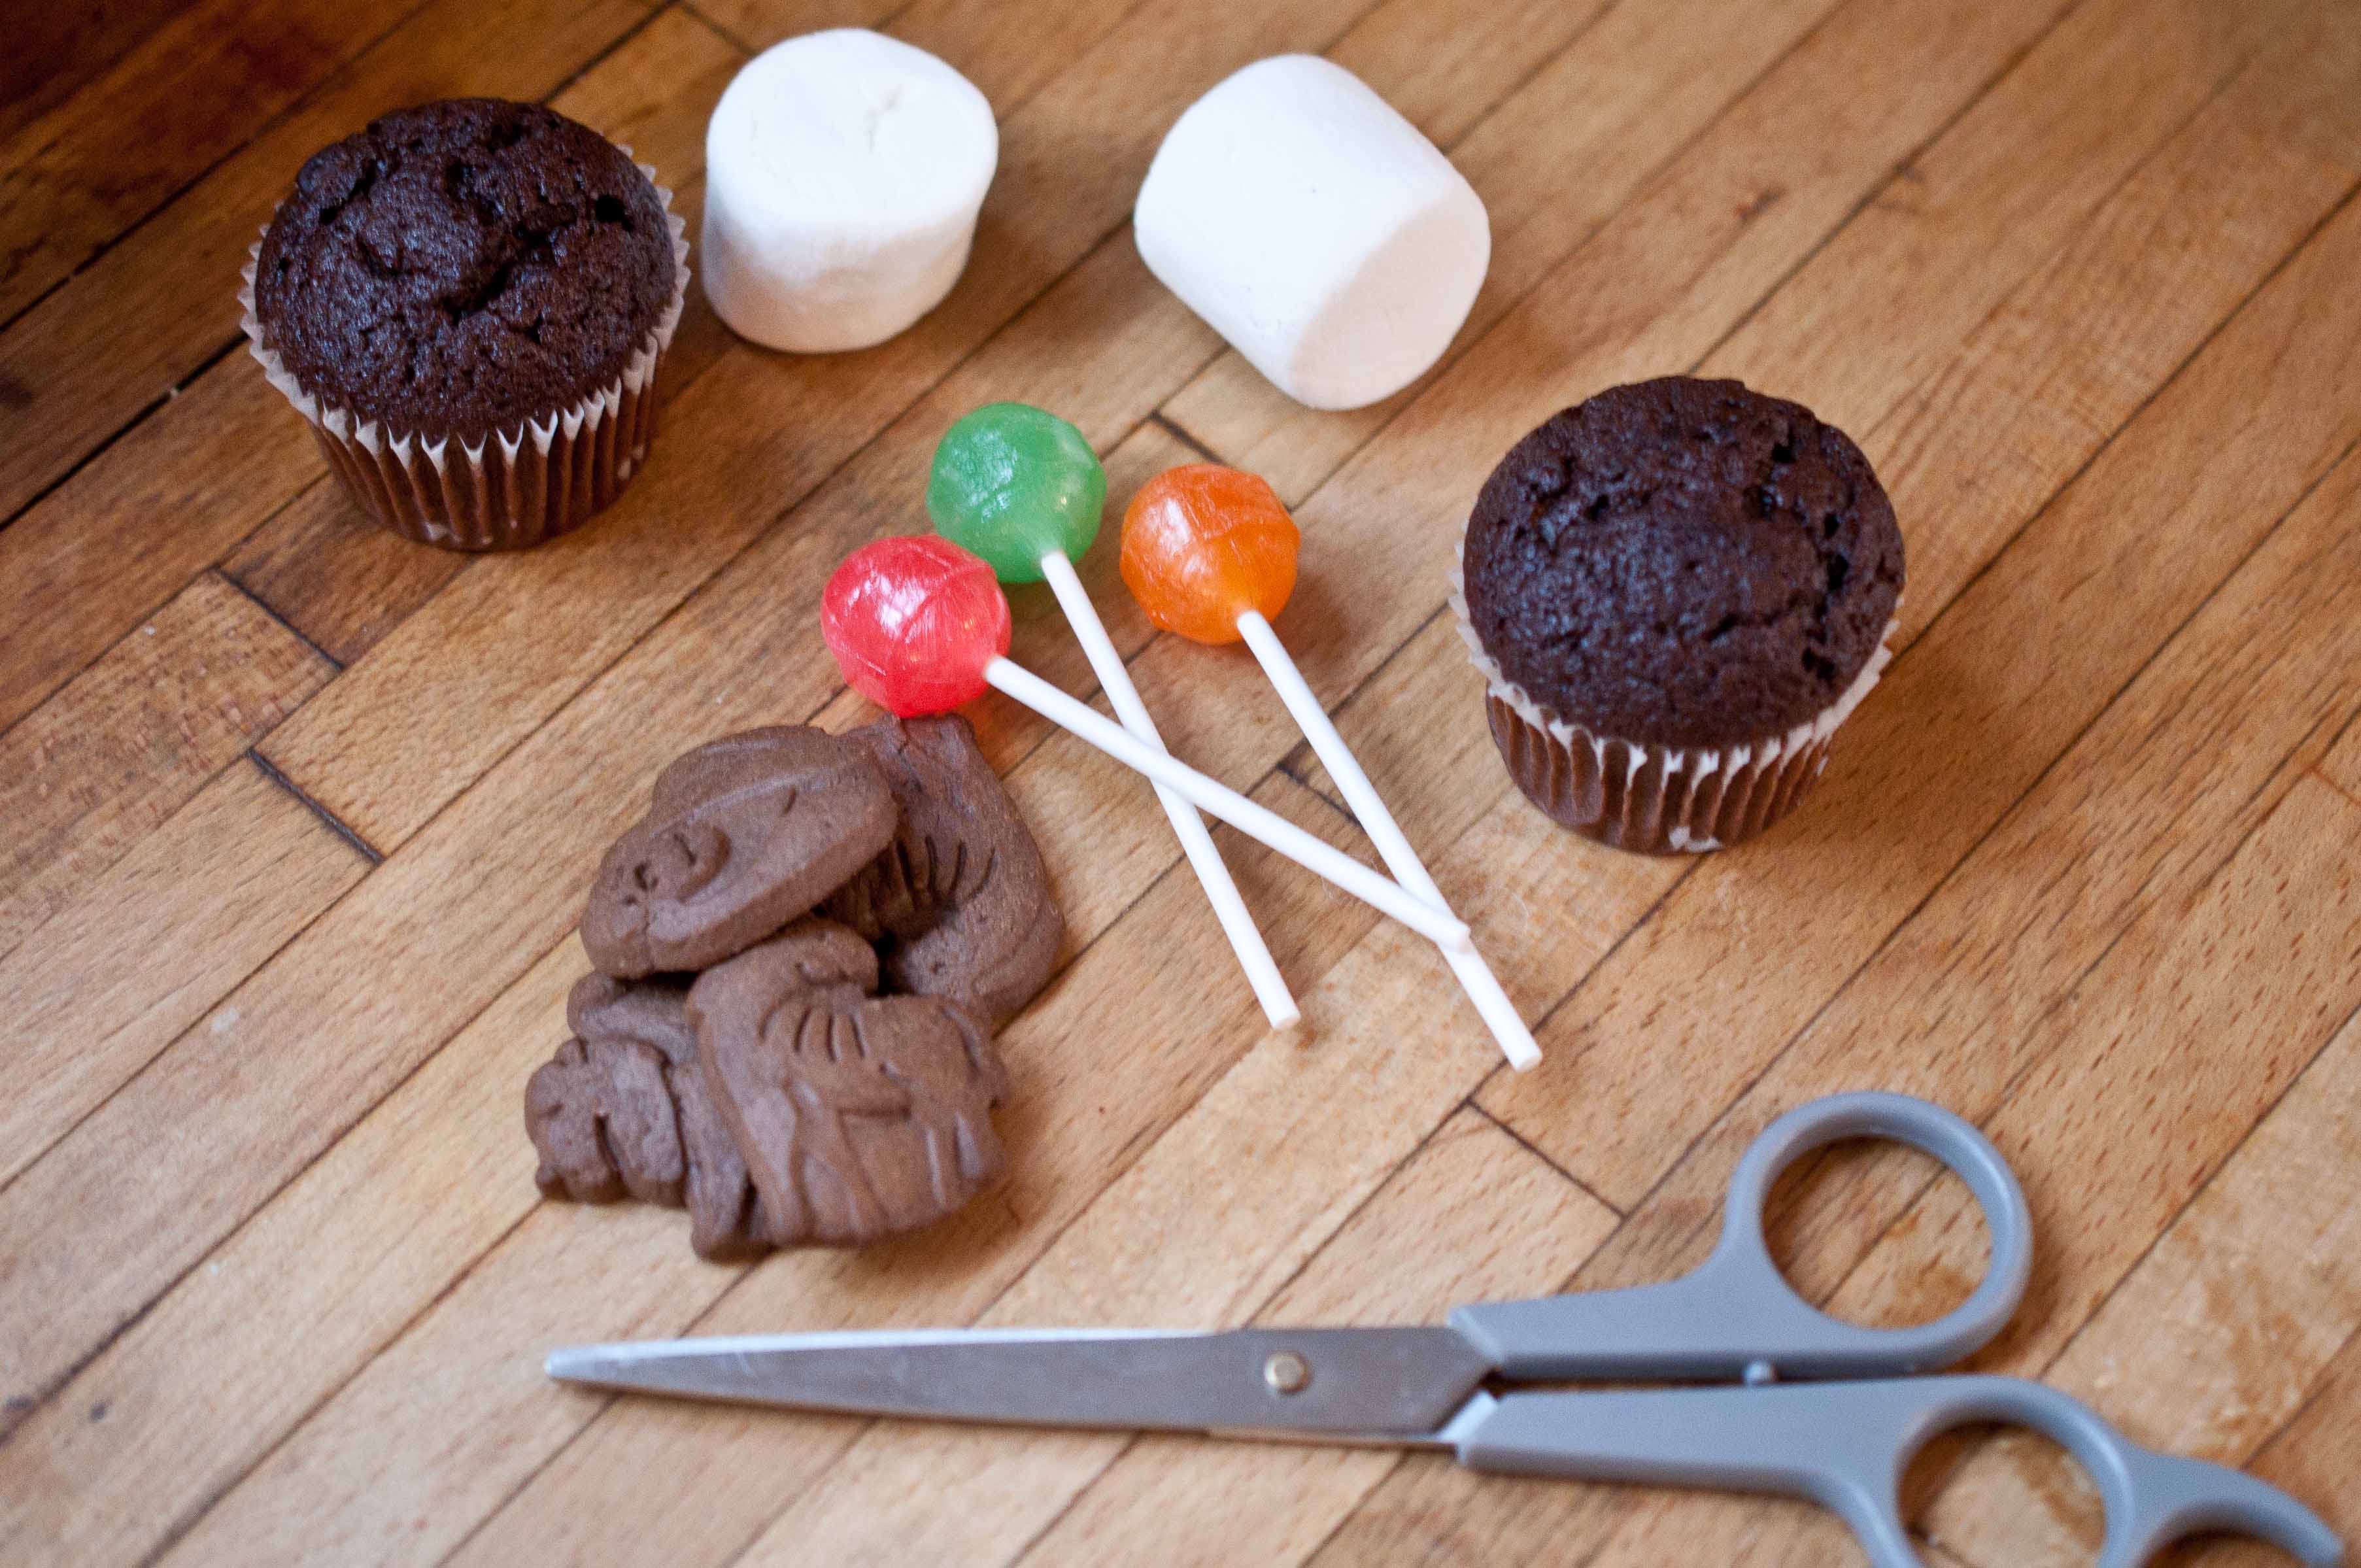
I like to play with my food. For some reason, it makes me less hungry.
When I got these little suckers from a vendor at work, I had no interest in eating them. But I did want to play with them. Maybe it’s a commentary on how much food we waste in America, or maybe it’s just because candy is pretty, Food Crafts are huge source of entertainment in my world. Although there are many cupcake toppers featured on websites across the land, I’m not a fan of inedible garnishes. Even if I don’t plan to eat it, it seems like you just didn’t try hard enough.
Sure you can print out a pretty flower decal from your home computer, or make a rose out of paper, or a fancy embelishment with ribbons and buttons, but if you can’t eat it what the heck is it doing on my plate?
No one glues plastic googly eyes to a pot roast. Or puts a wizzard hat on a chicken sandwich. Why are completely random acts of craftiness allowed on baked goods?
And paper flag banners on a cake? weird. Why not put a pile of mail on there, or decorative globe? What’s next, filling my plate with bedazzled paper mache vegetables?
Here is my entry for completely edible cupcake garnish, other than the stick, of course.
1/2 cup chocolate graham crackers (or chocolate Teddy Grahams)
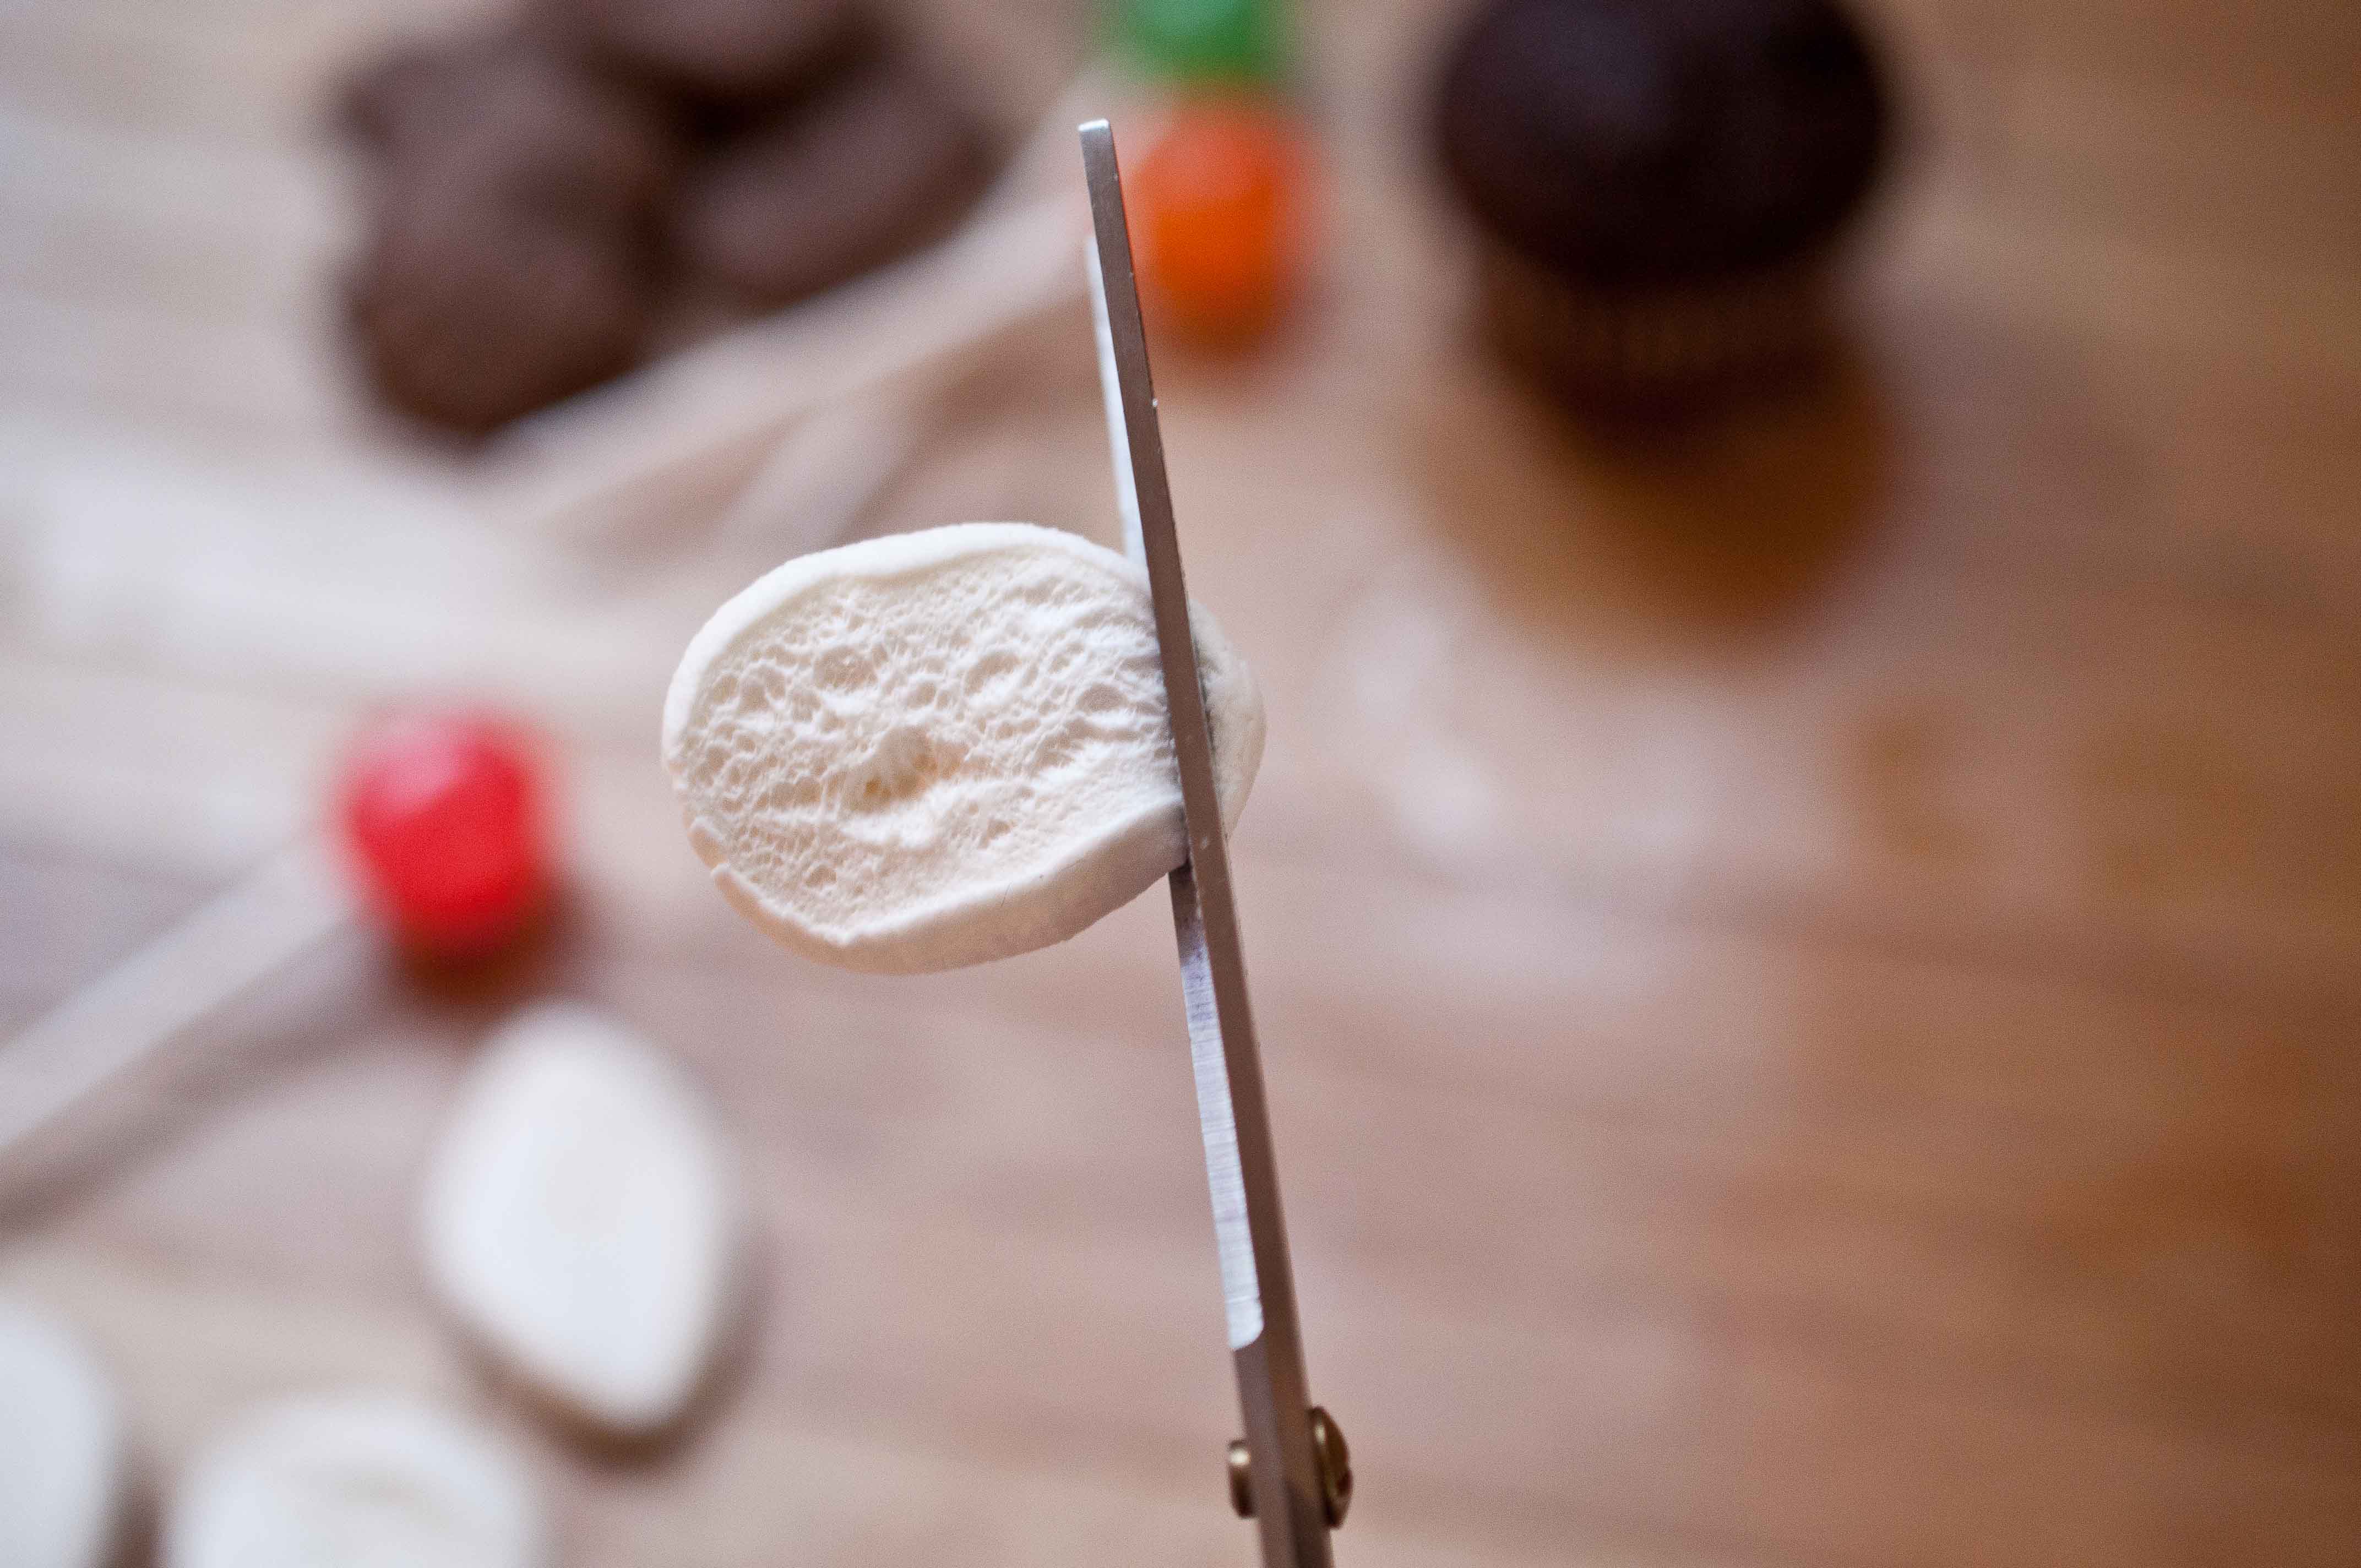
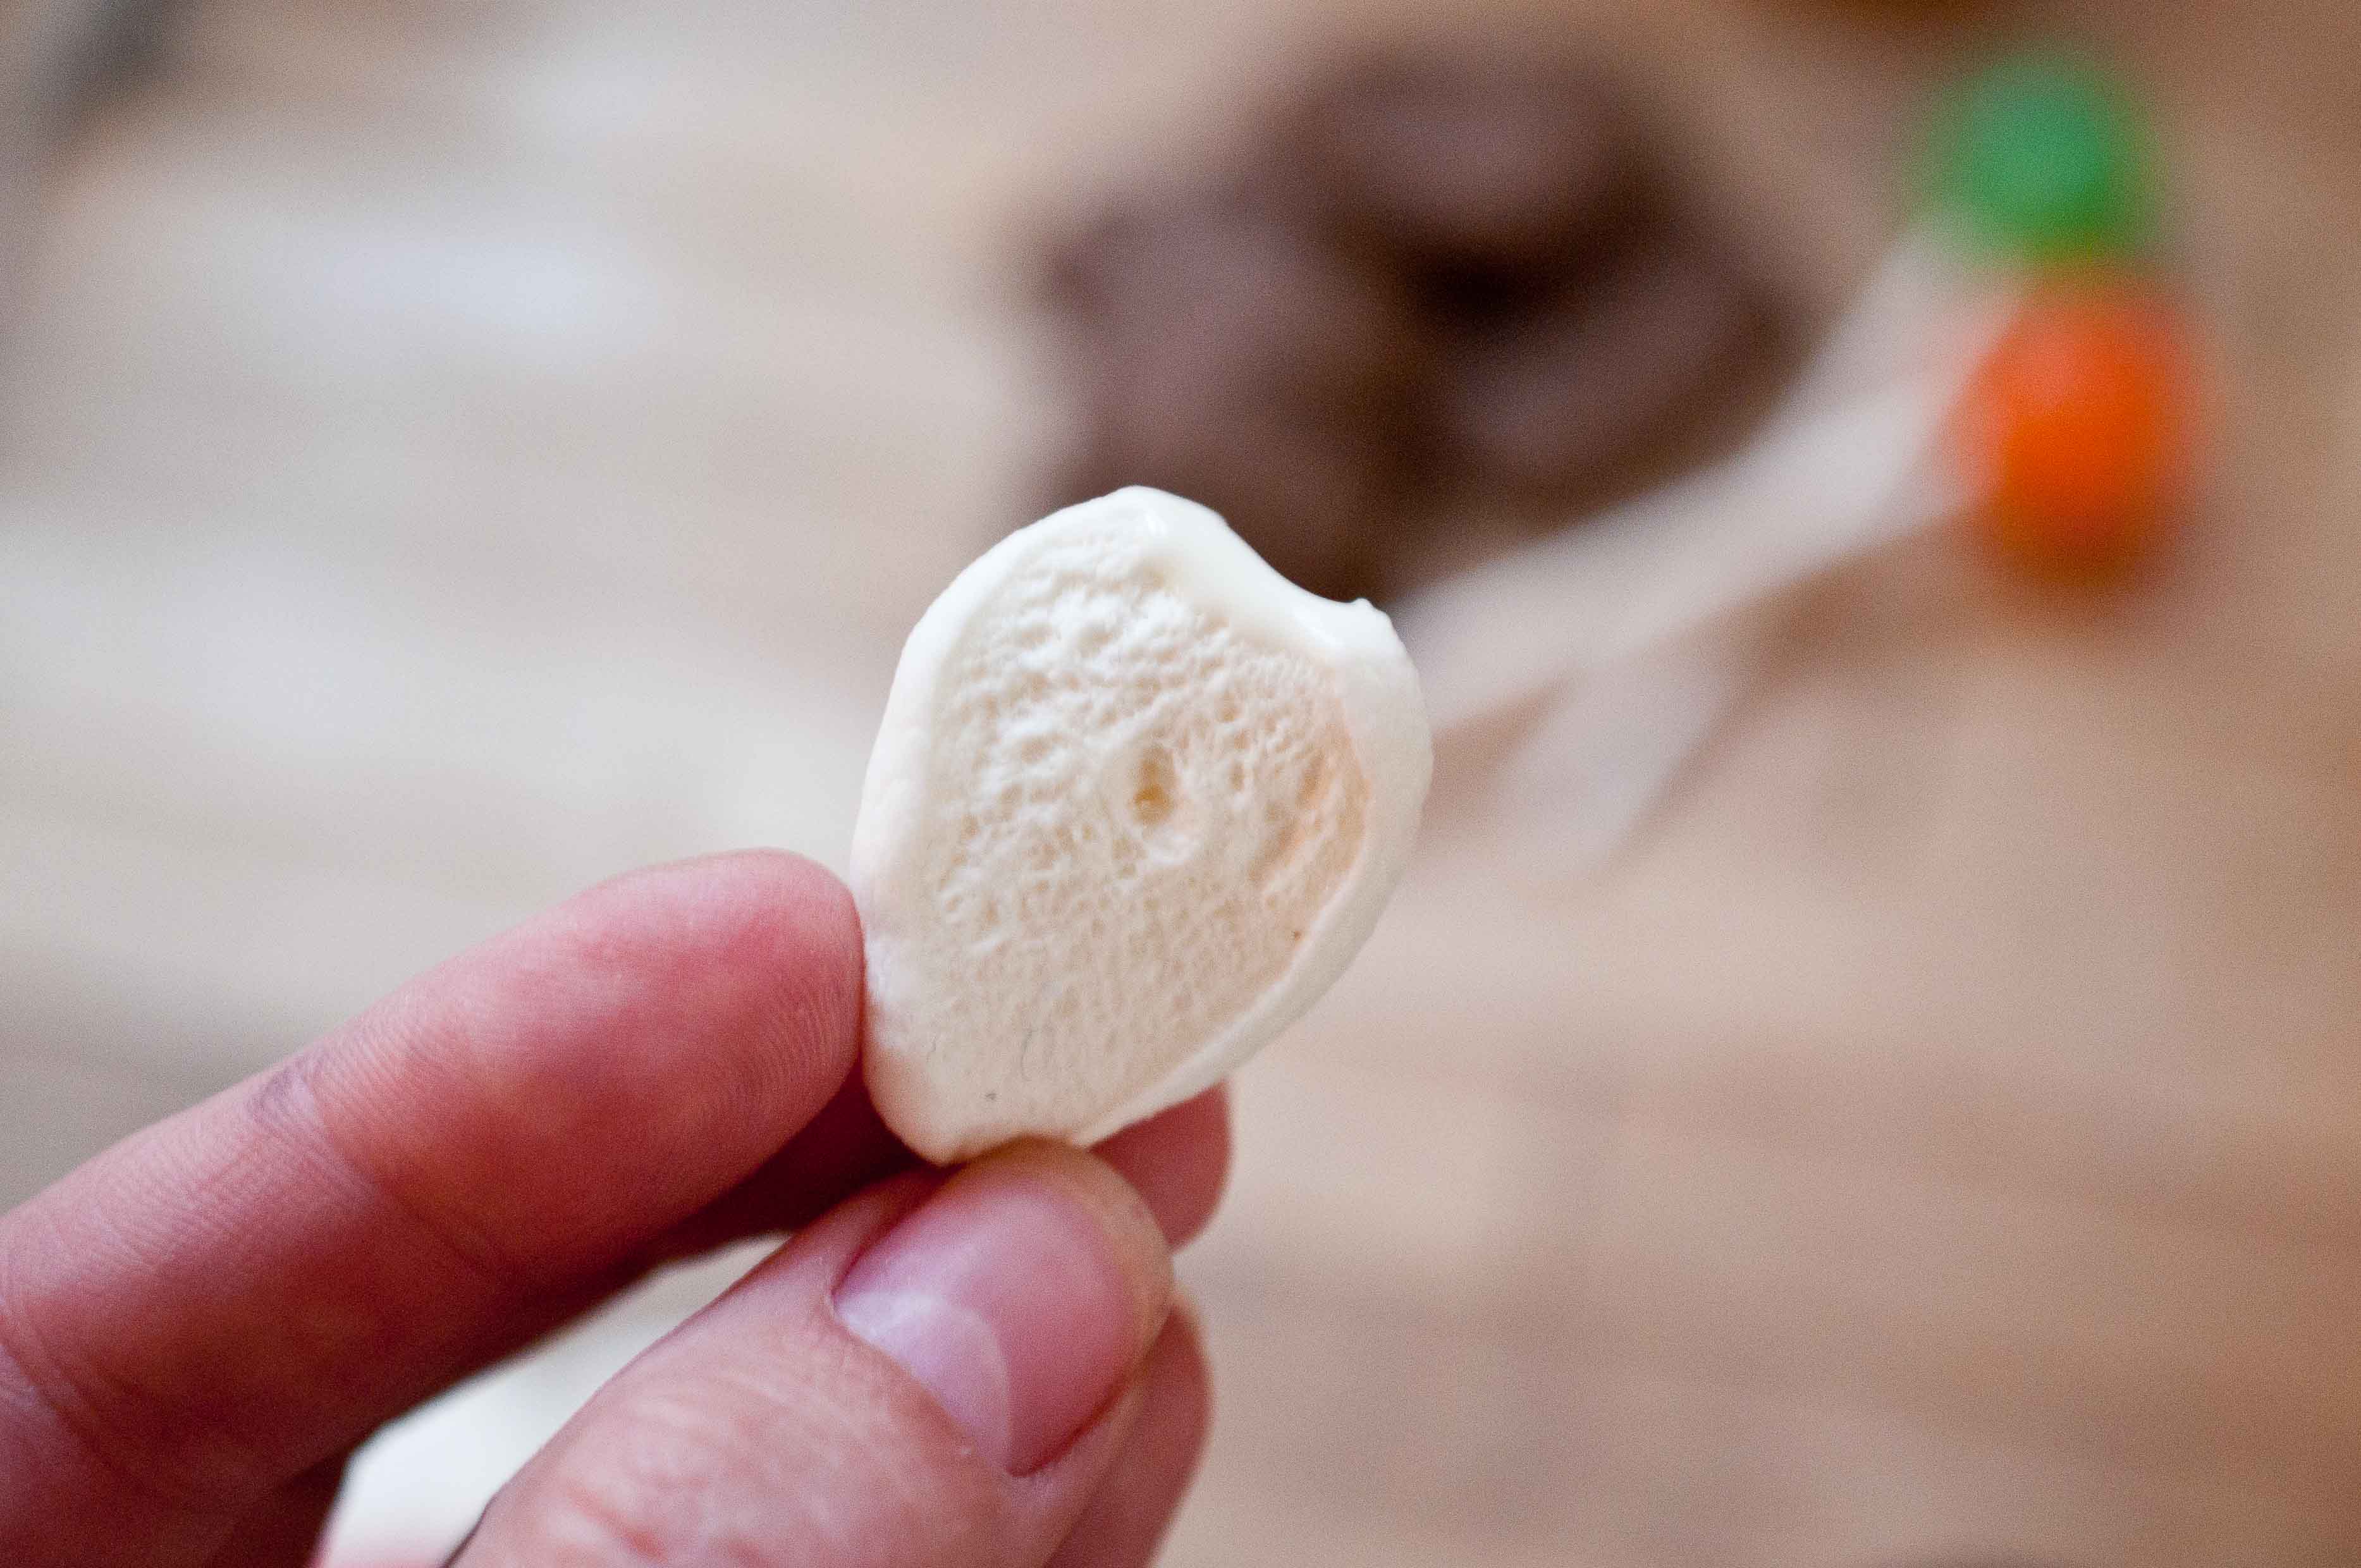
Cut the marshmallows into four to five slices. There are going to be a few that just don’t look right, so cut more than you need. They will curl up a bit, but just push them flat.
There will most likely be one end that is a bit more rounded and one that is a bit pointier.
Cut off a very small amount of the pointed end, about 1/8 of an inch.
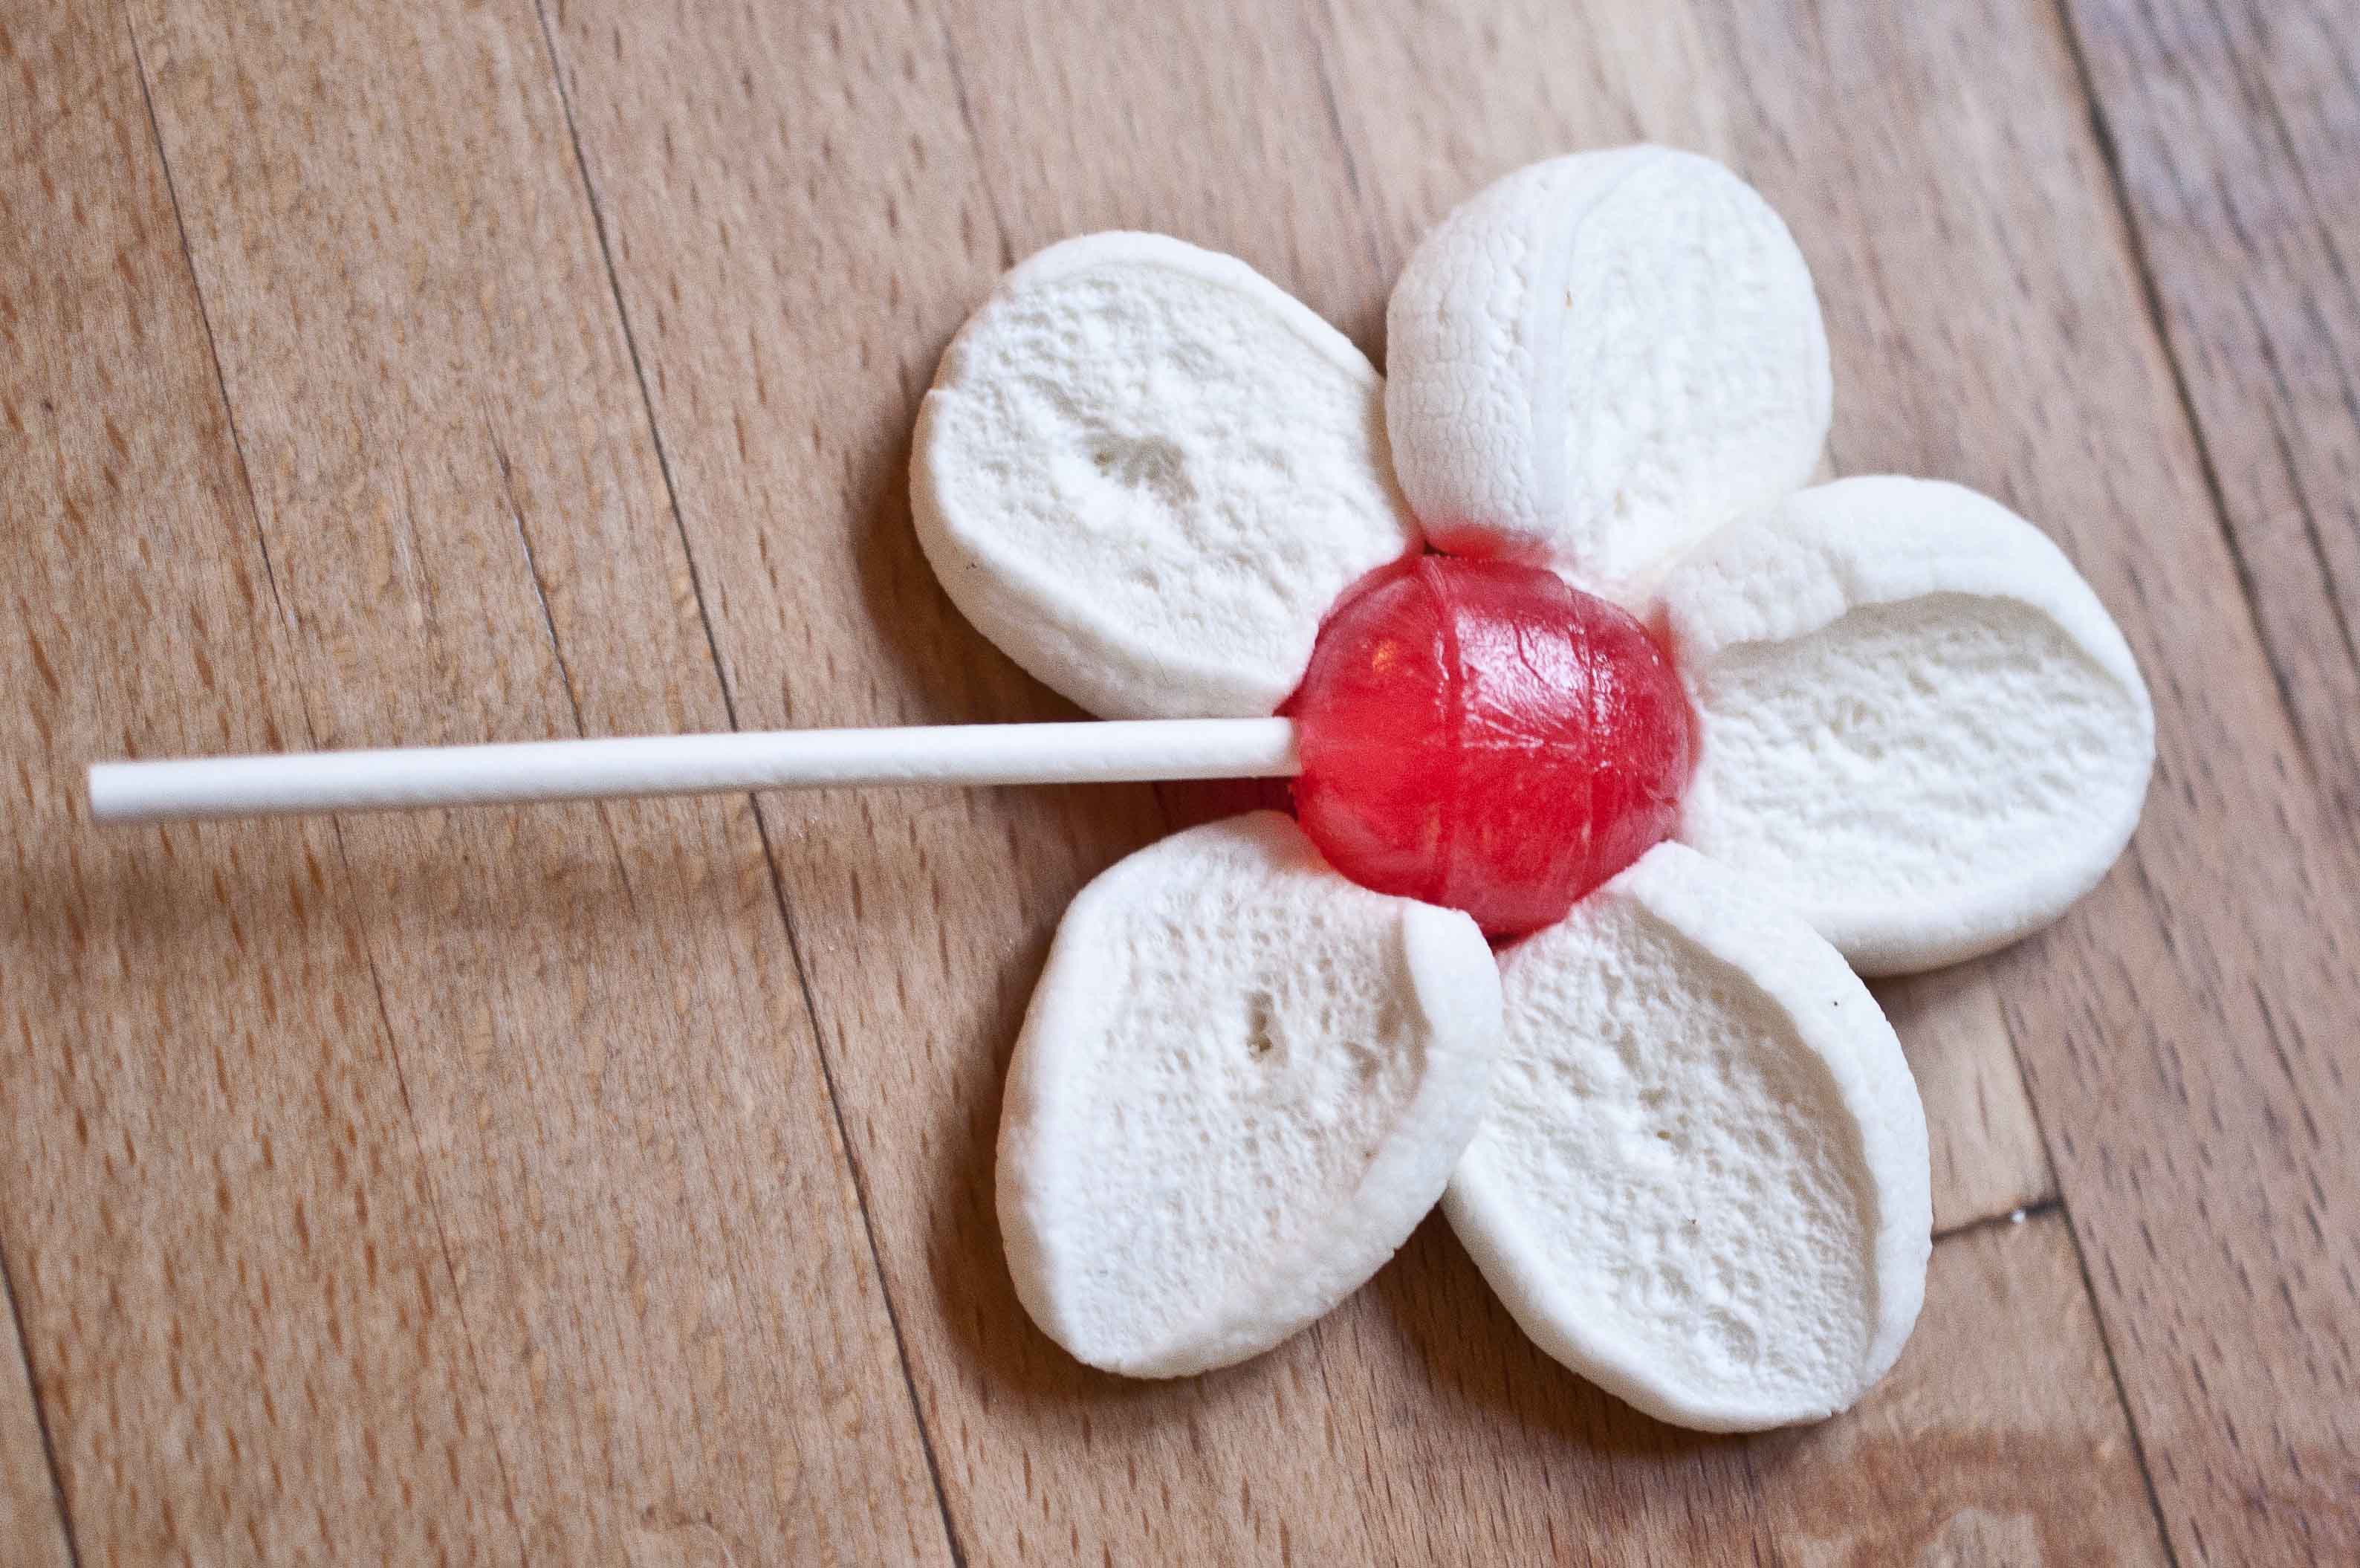
Place the white chocolate in a microwave safe bowl. Heat in the microwave on high for 20 seconds, stir and repeat until melted. Don’t over heat or it will seize. Using a butter knife or a spoon, smear a small on the marshmallow petal where you just made the cut.
Press the chocolate side against the sucker, at the base, nearest the stick.
Repeat for all pedals. You’ll want to put about 5 petals on each flower which will require a bit of overlapping of the pedals.
Lay flat until the chocolate glue dries.
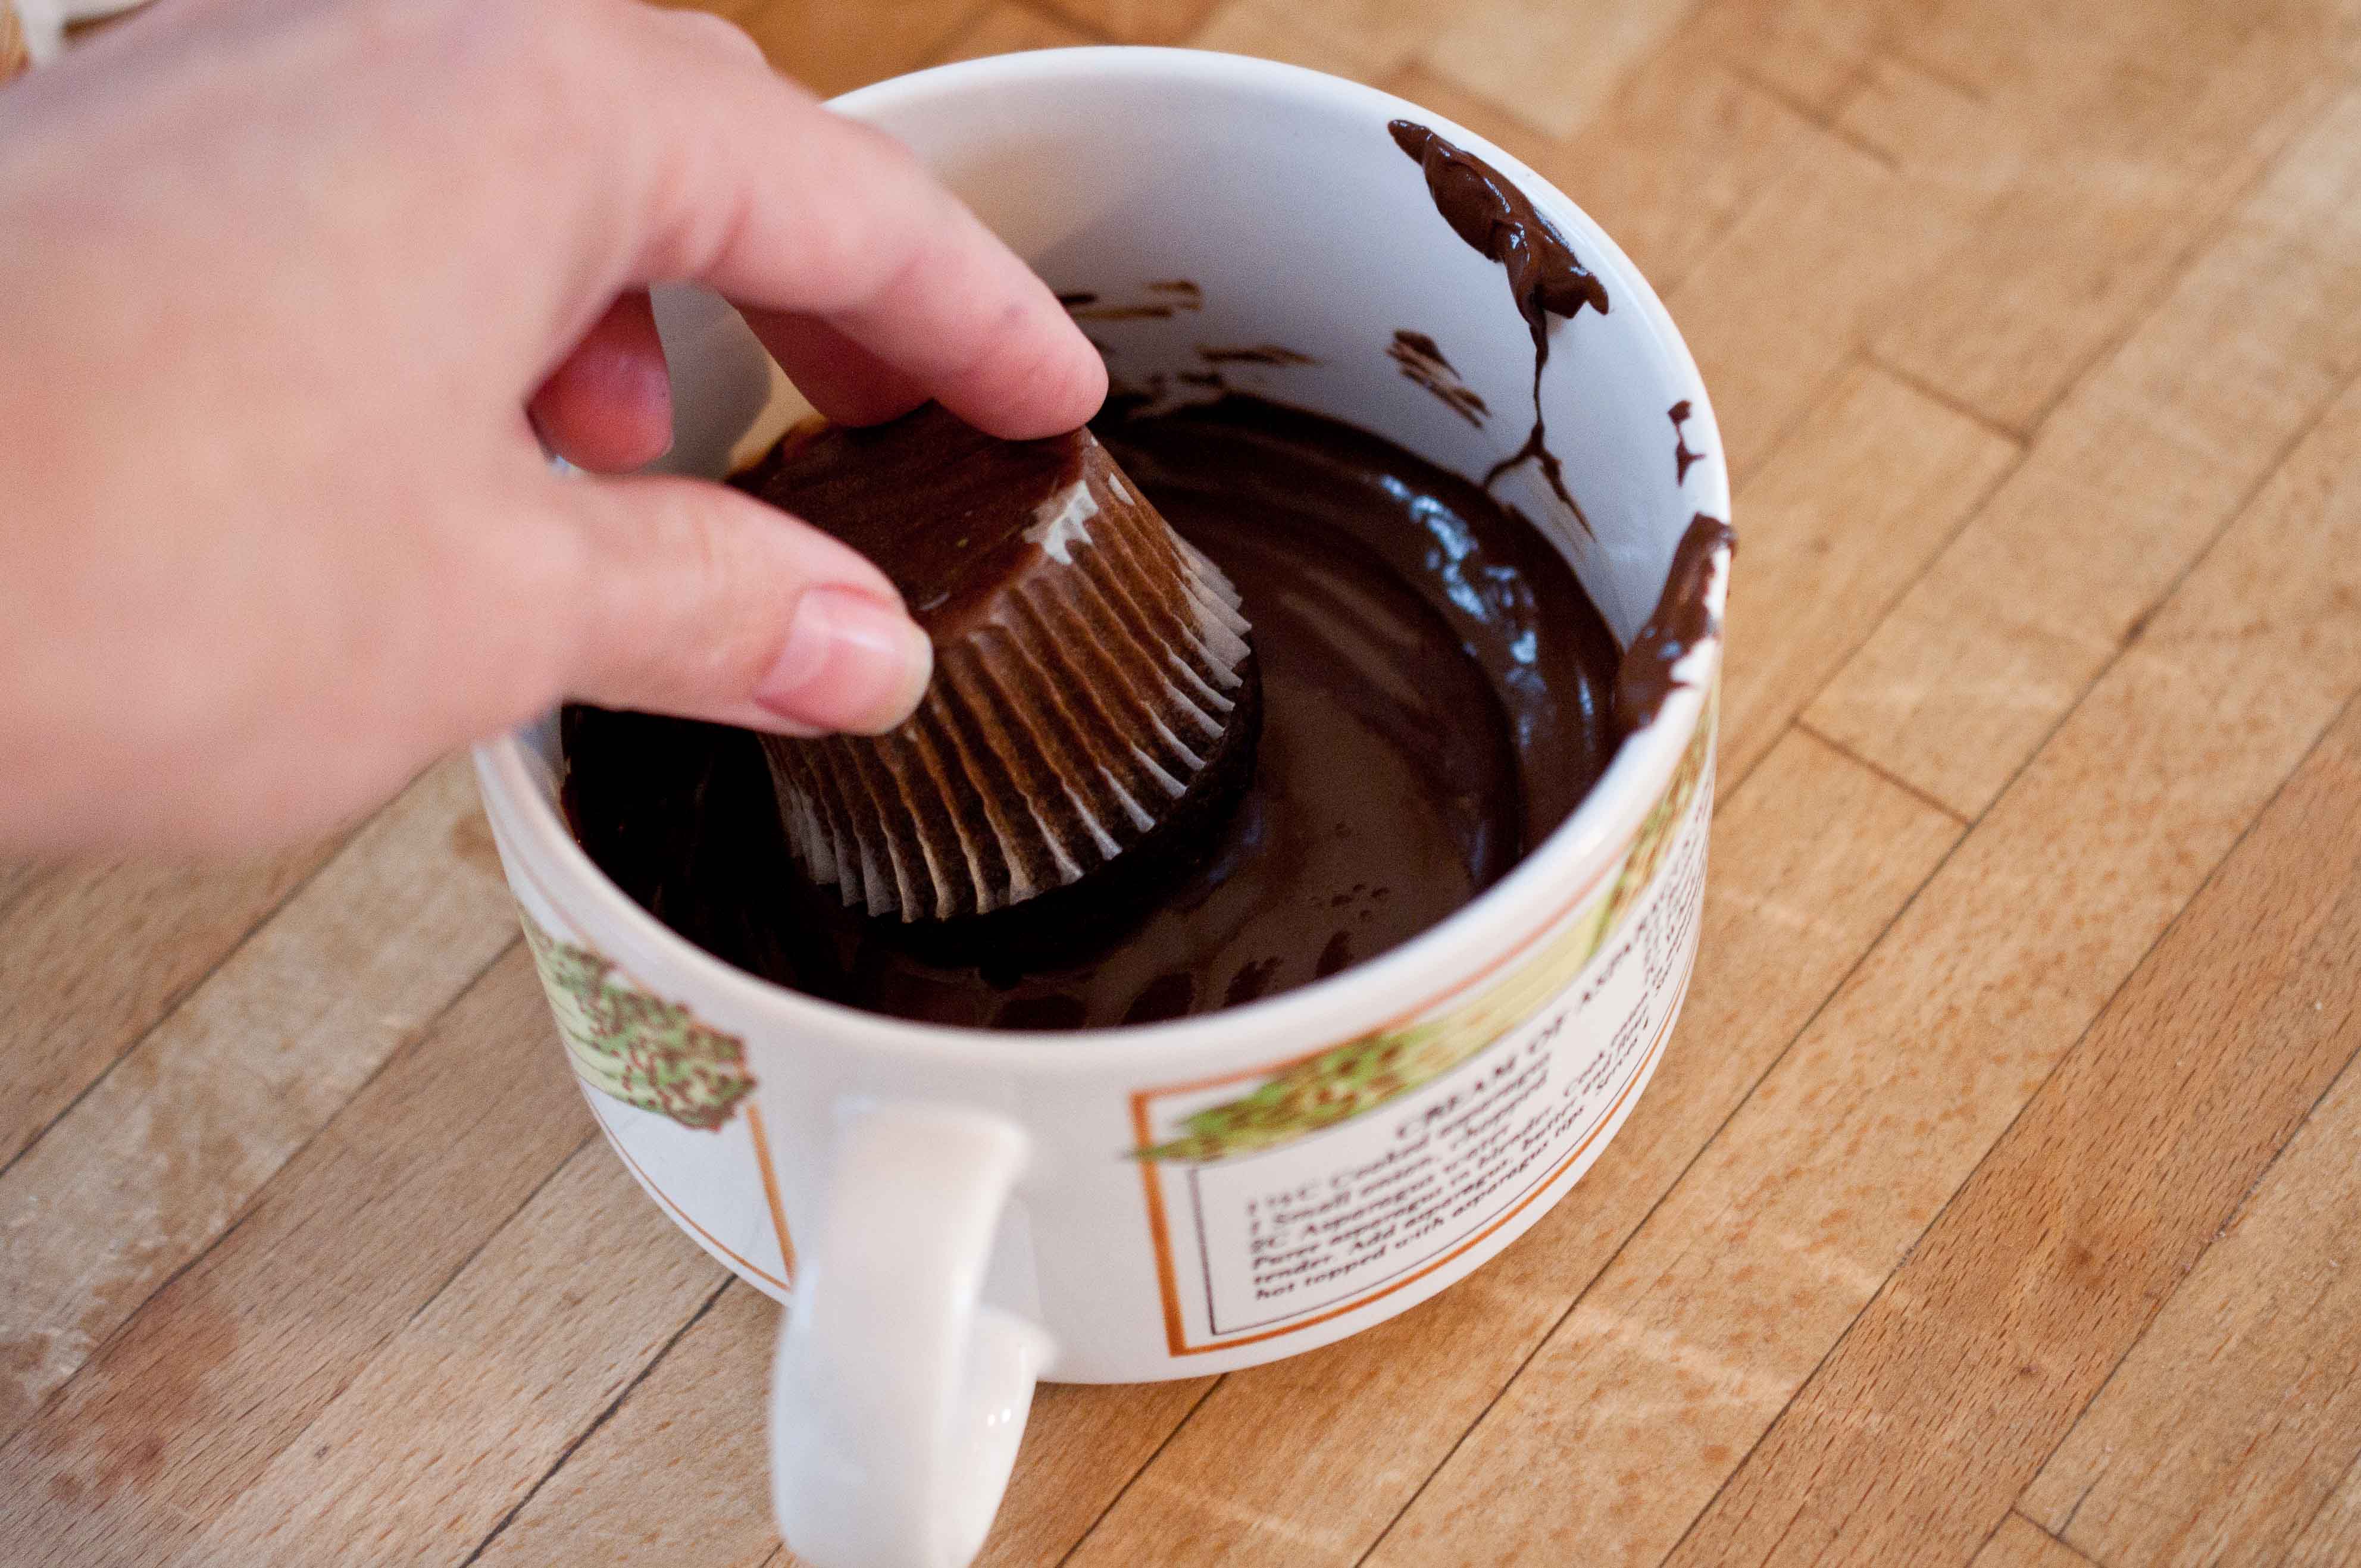
Put the chocolate chips in a microwave safe bowl and heat on high for 30 seconds, stir and repeat until melted.
In a food processor, process the graham crackers until nothing is left but crumbs. Transfer crumbs to a bowl.
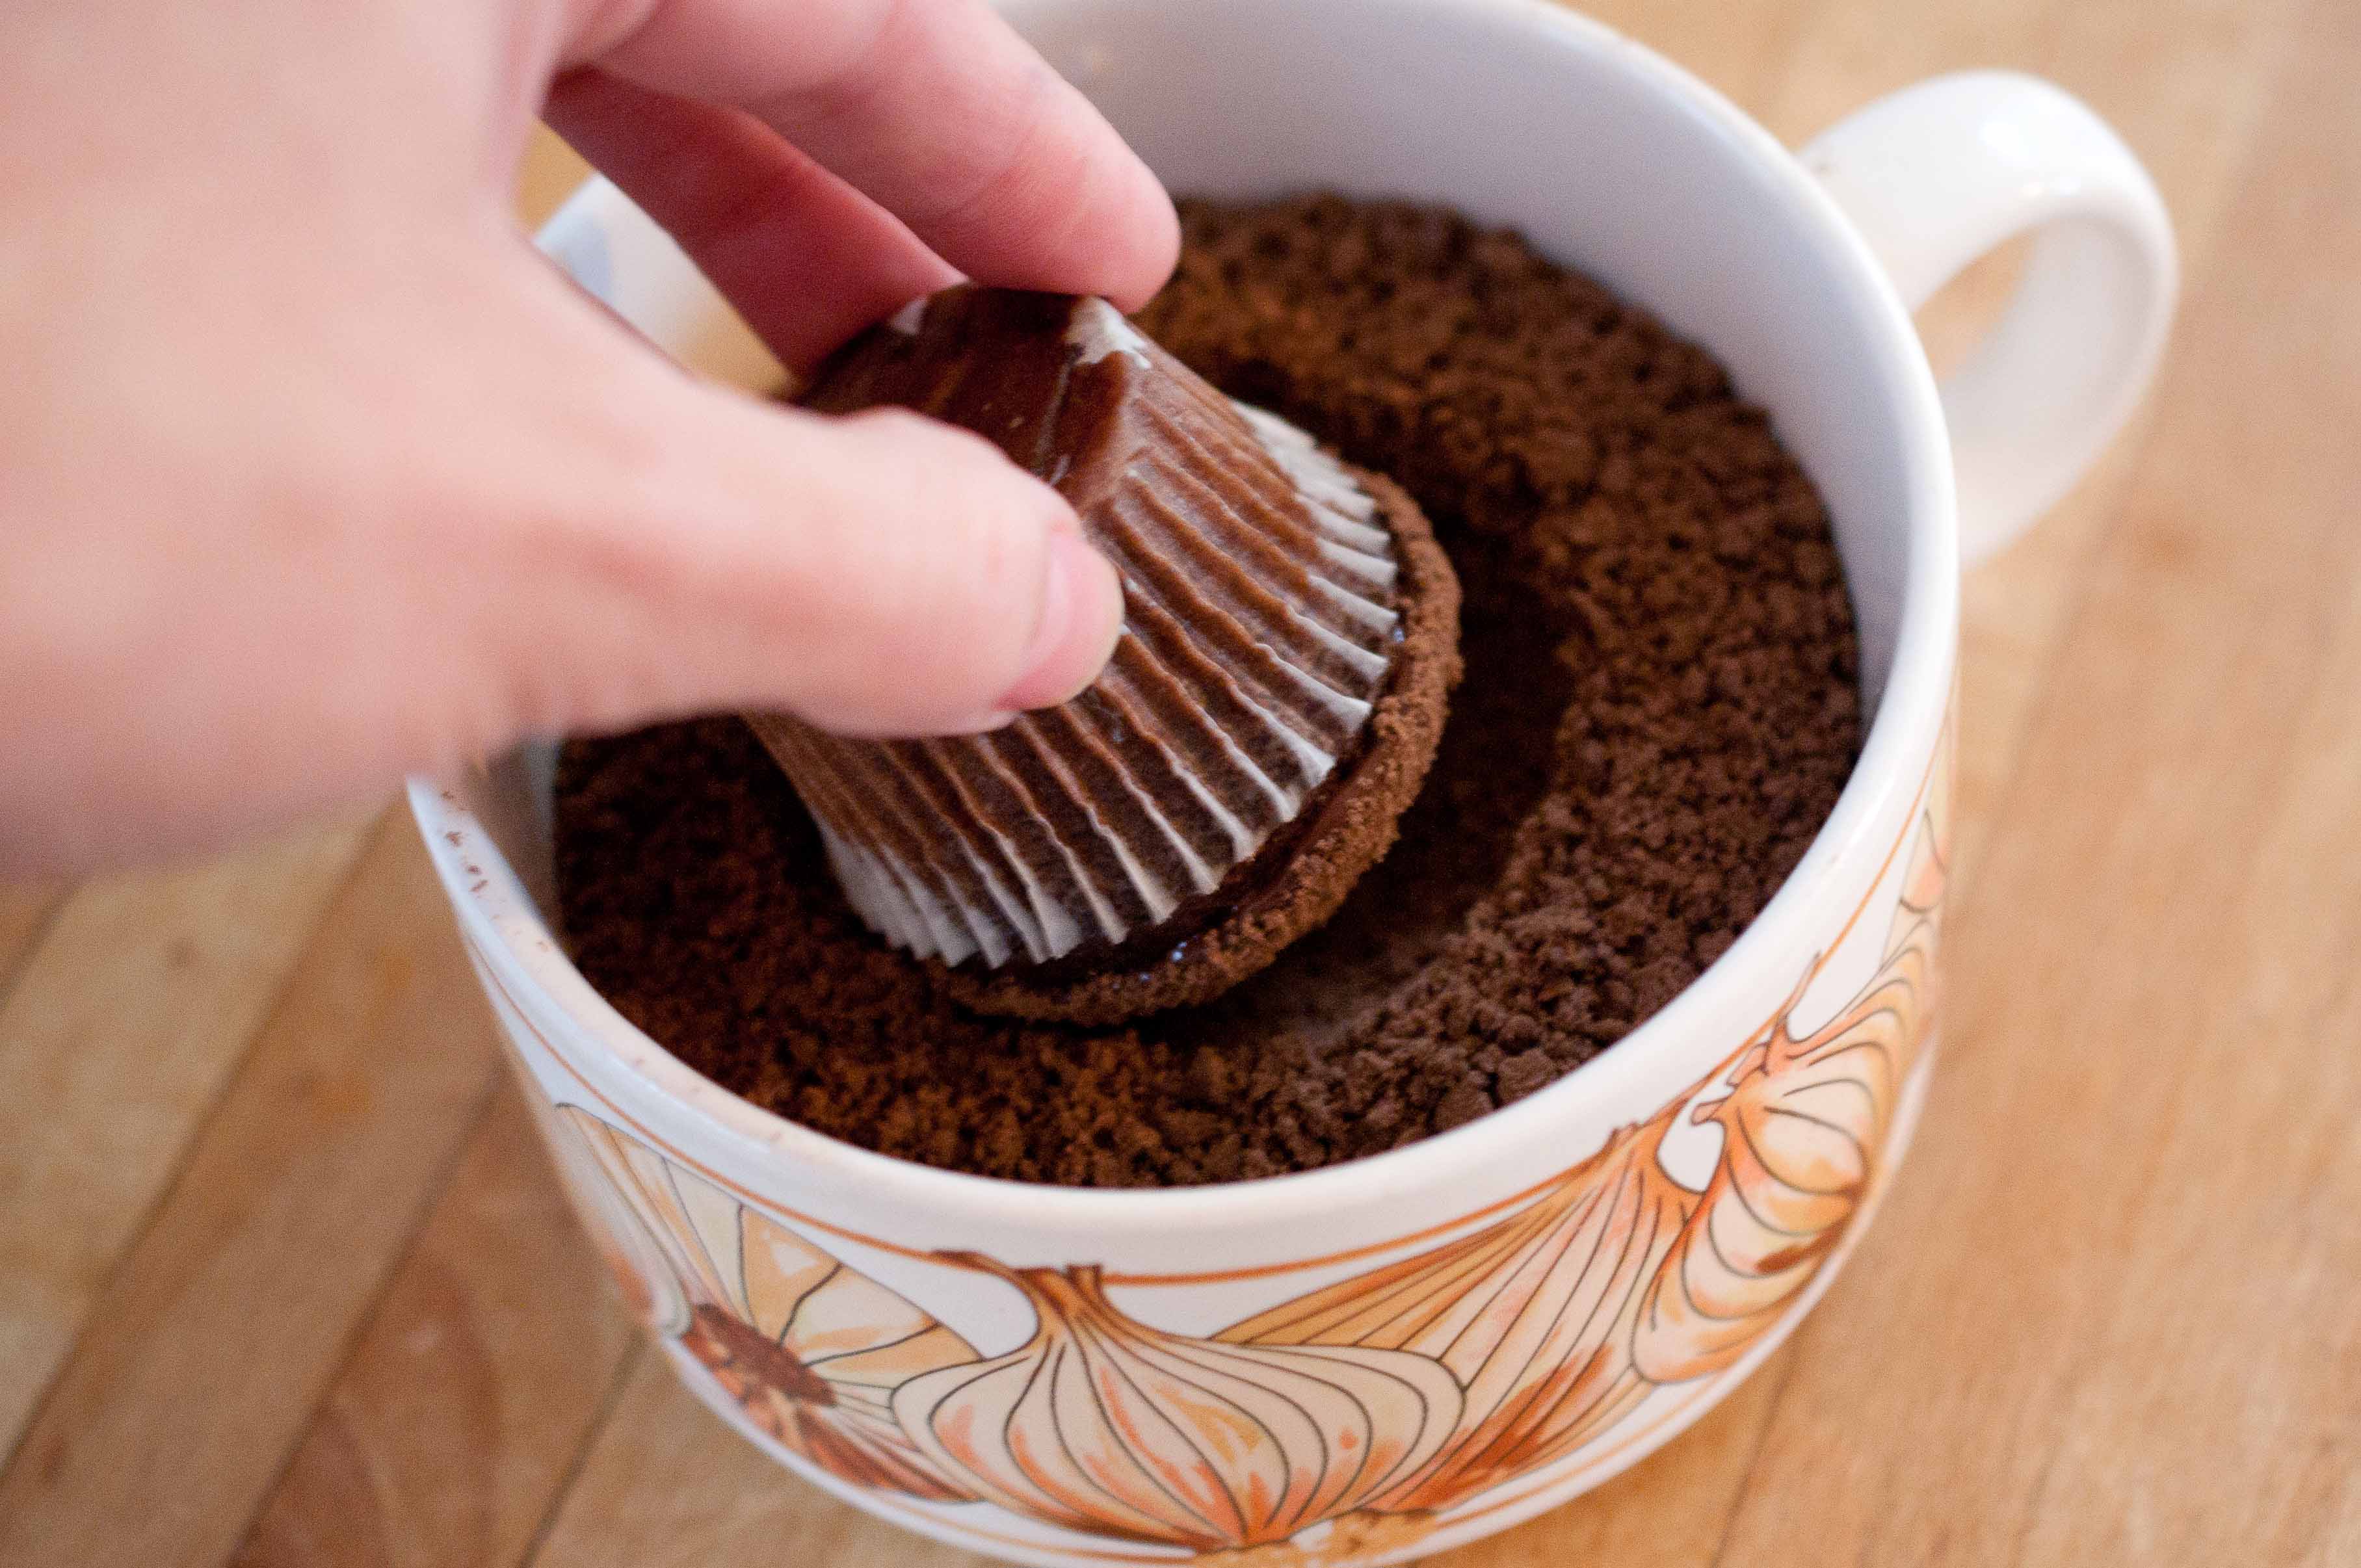
One at a time, take the mini muffin and submerge the top in the melted chocolate until completely coated.
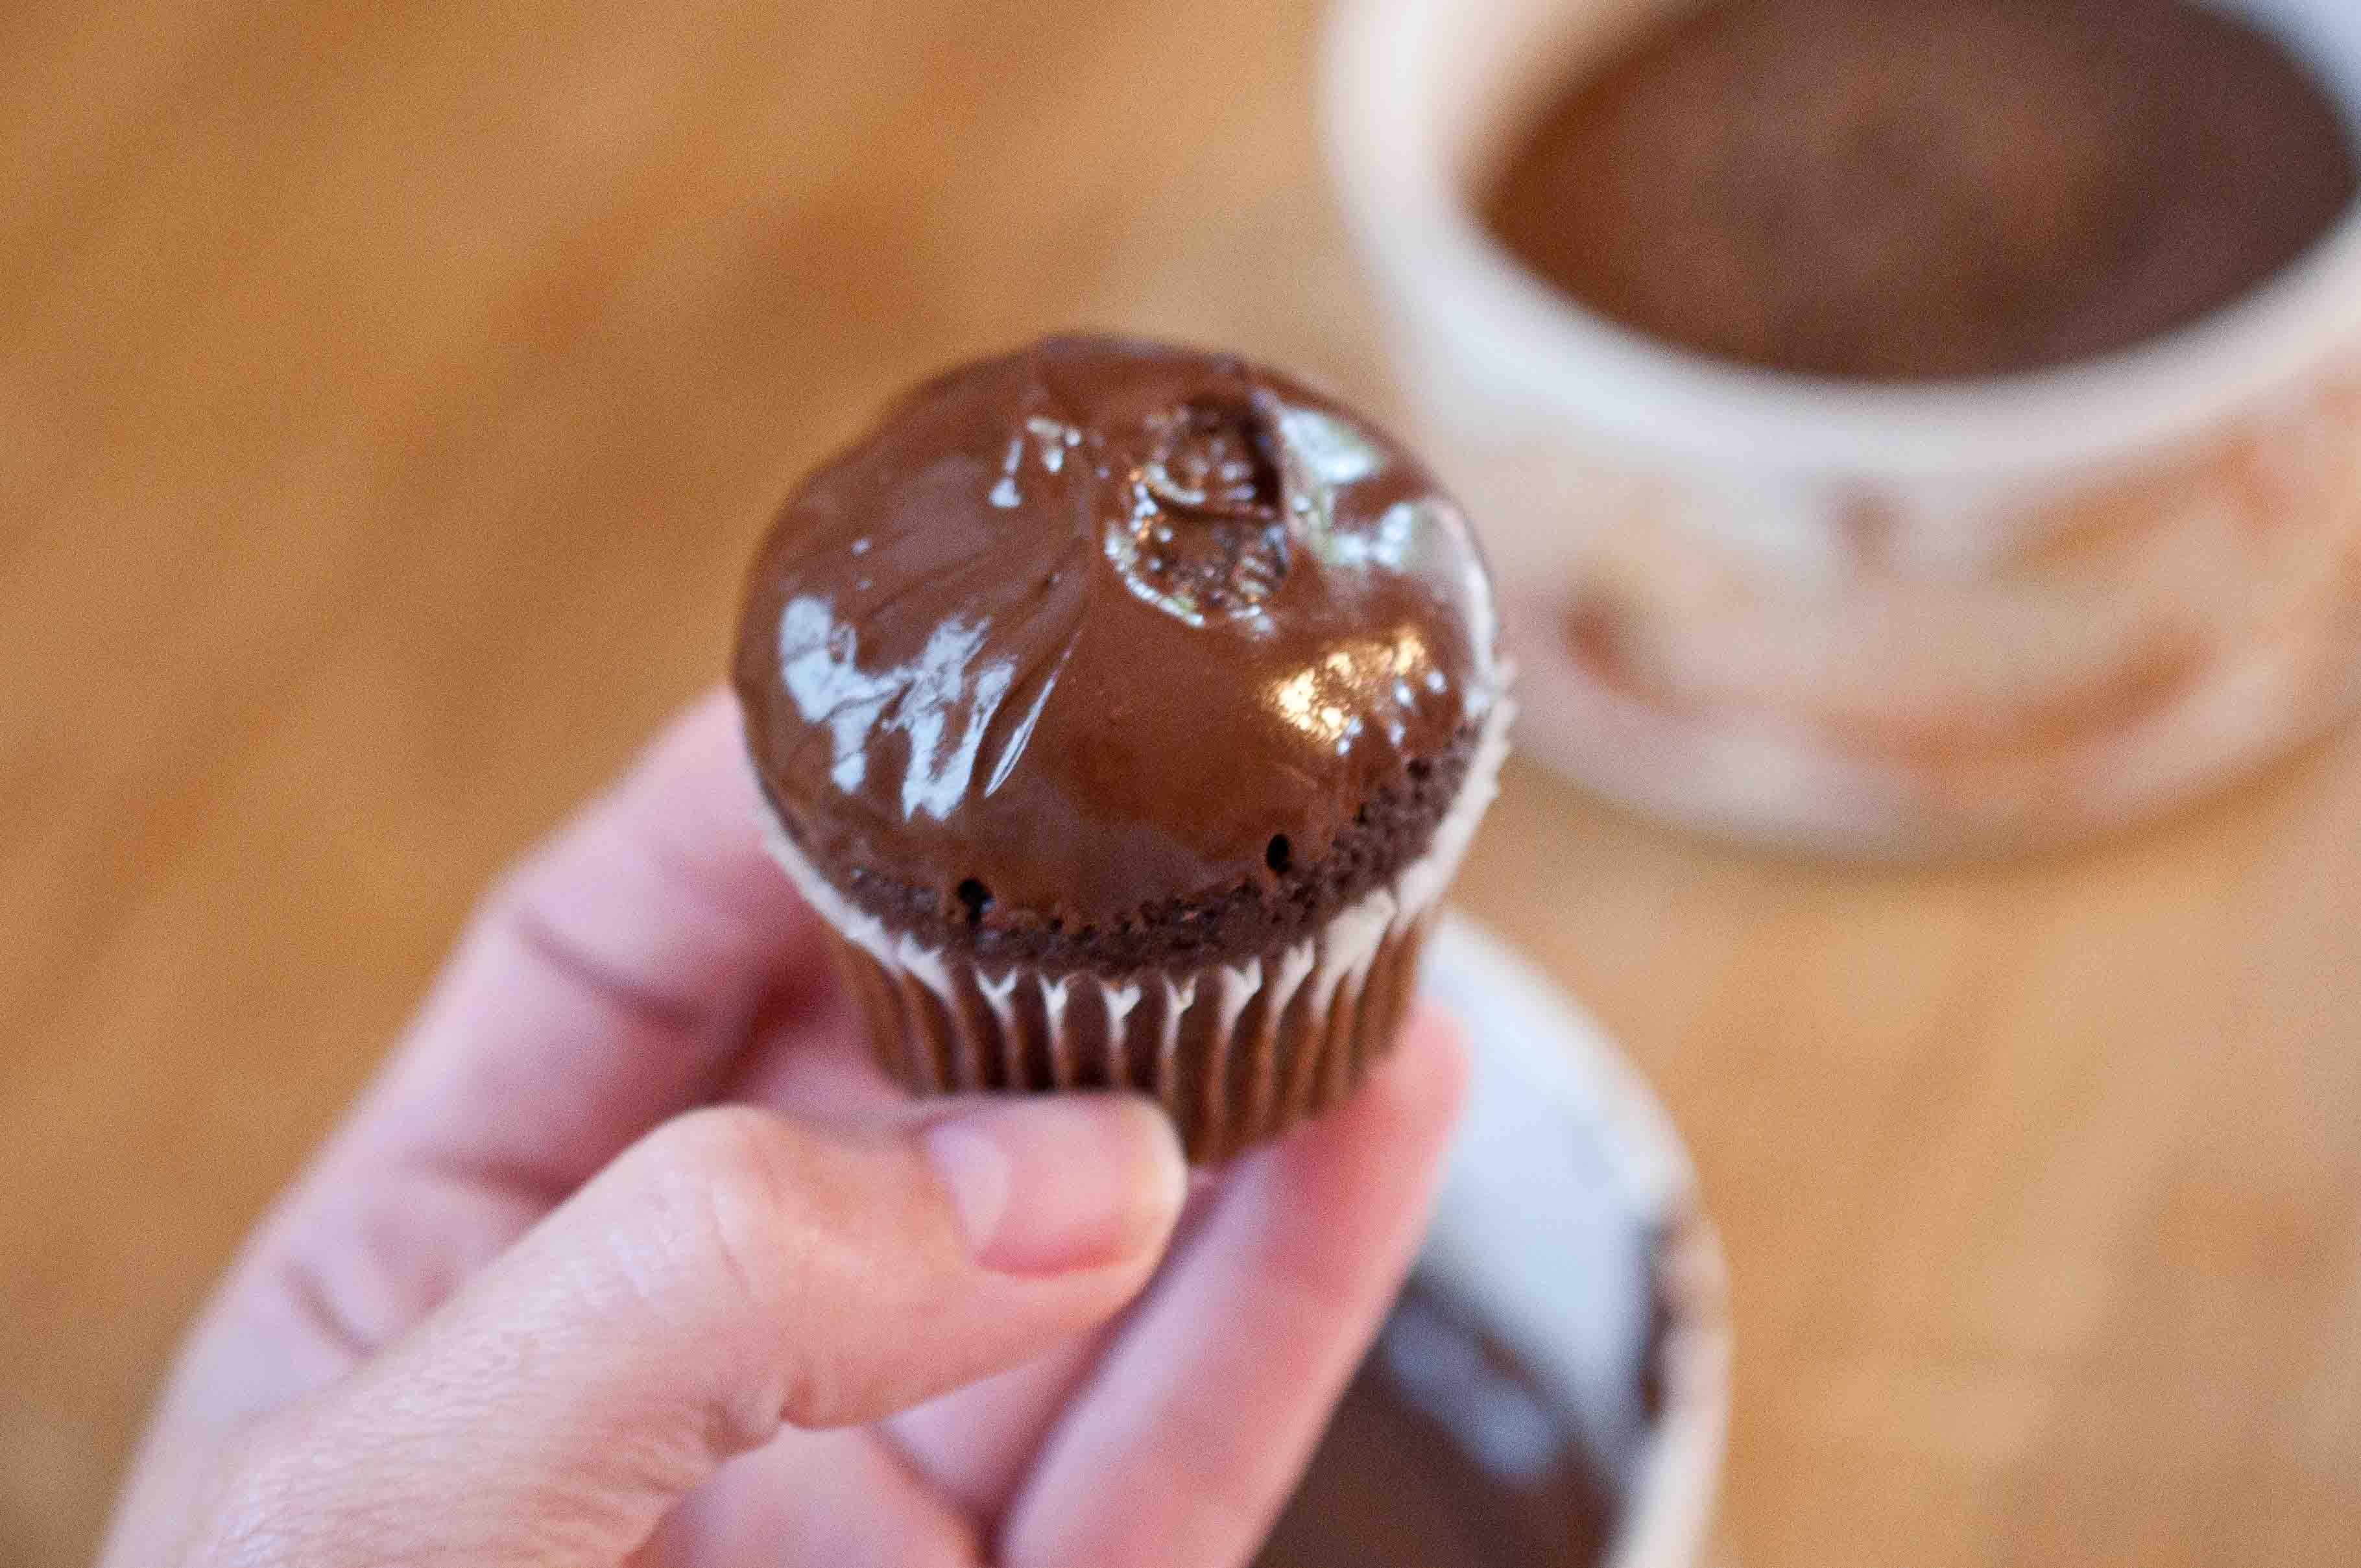
Before the chocolate cools and dries, roll the melted chocolate muffin top around in the graham cracker crumbs.
Once all the chocolate has dried, plant your candy marshmallow flower in your little mini muffin pot.
I’m not going to sit here and pretend that these are as good as the real thing. Those potato skins loaded up with bacon, sour cream and cheese that are somewhere around 62 calories per bite. But these make a great lunch durring my "I am GOING to lose those final 3 pounds" week. And they reheat really well, so you can make a batch on Sunday, and reheat them through out the week for lunch. With a side of this salad.
I’ve run the numbers and have come up with 62 calories each potato half, but that completely depends on the size of your potato and the amount of flesh you scoop out of it.
My Husband added fat free sour cream and shredded cheese. If you add a tbs of fat free sour cream and a tsp of shredded part skim mozzarella cheese, it will about double the calories in the potato. But, if you like it more and that will make you eat less, it may be worth it.
Also, this dish is:
Gluten Free
Vegan
Kosher for Passover
Skinny jeans friendly
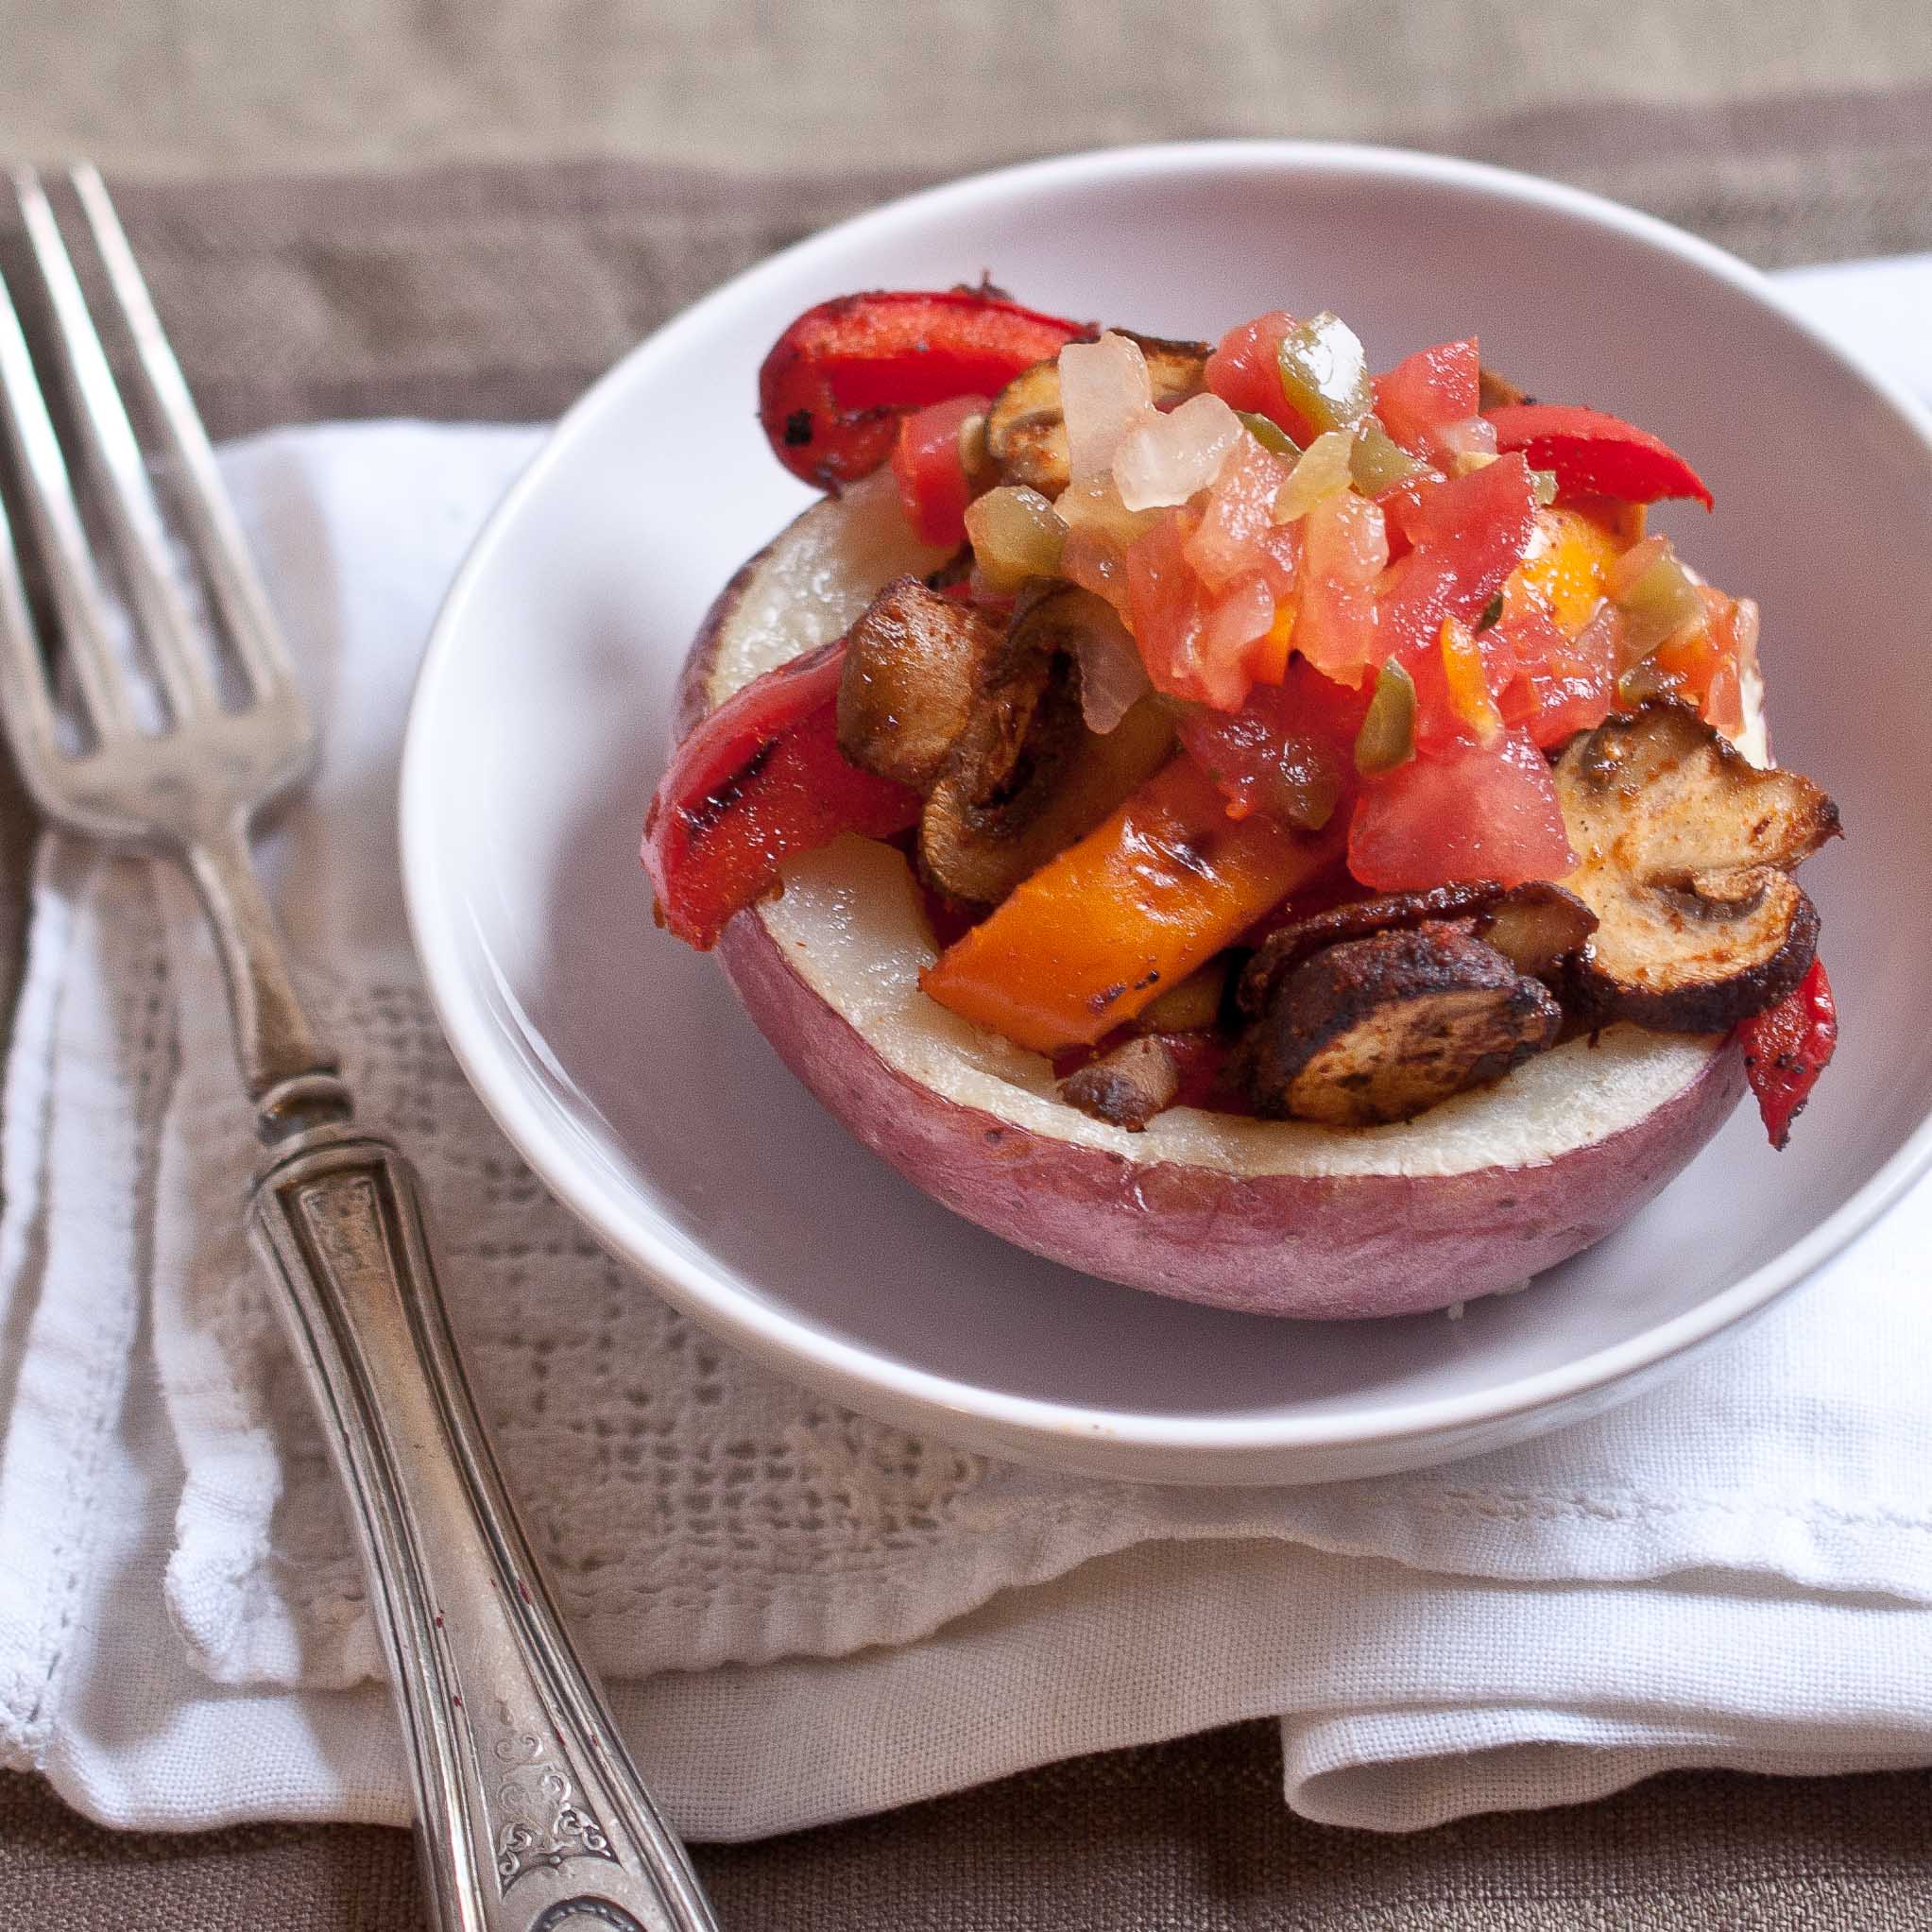
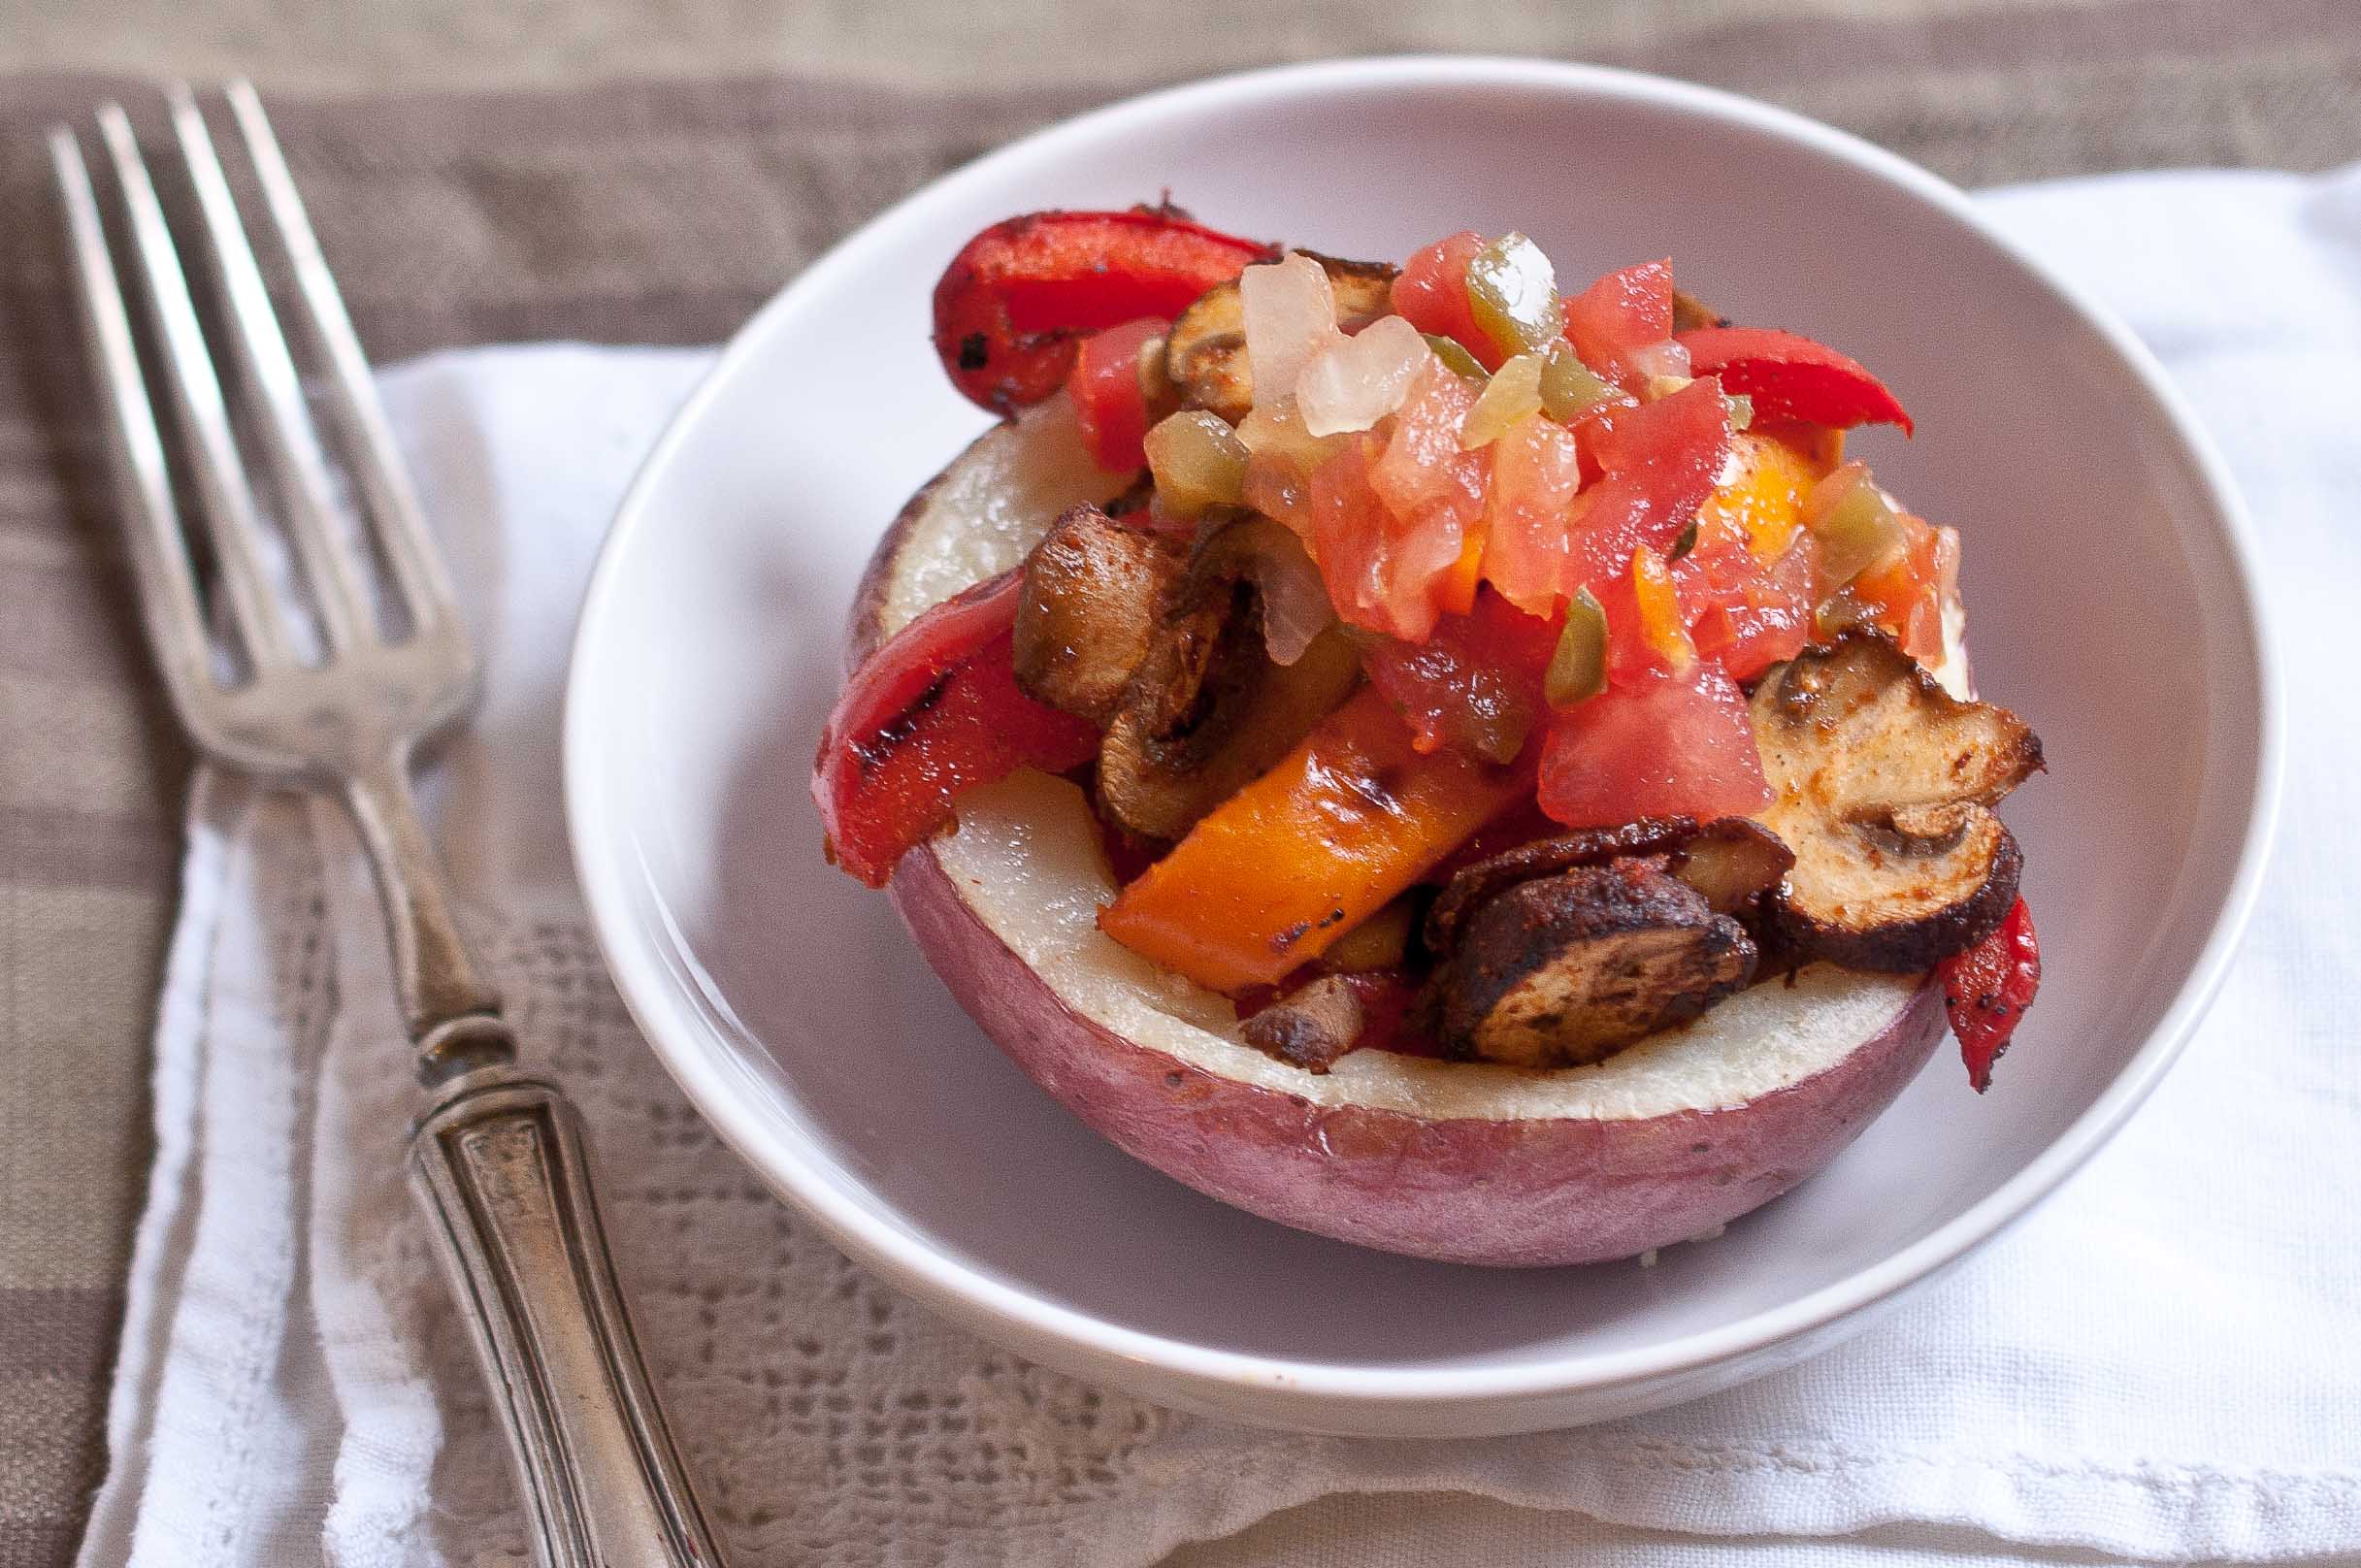
Skinny Potato Skins
4 large red potatoes
1 large red bell pepper, thinly sliced, stem removed
1 large yellow bell pepper, thinly sliced, stem removed
Pierce the potatoes a few times with a fork and microwave on high for 5-7 minutes or until cooked through. Remove and allow to cool until enough to handle. Cut in half and scoop out most of the insides, leaving about 1/4 inch of the walls in tact. You can save the potato middles for mashed potatoes or potato cakes.
Place thinly sliced bell peppers, mushrooms, and garlic on a baking sheet. Spray lightly with olive oil cooking spray and sprinkle with fajita seasoning (or the homemade blend) and toss to coat.
Roast the vegetables in the oven for 15 minutes or until soft and the mushrooms have browned, tossing every 5-8 minutes with a heat safe spatula.
Place the skins on a baking sheet and brush the insides with melted smart balance light, sprinkle with salt. Bake at 400 for 10 minutes, allow to cool slightly.
Fill each potato skin with fajita veggies and top with Pico De Gallo.
Beer people are so often missunderstood and stereotyped.
Don’t mistake our inherent low maintenance for a lack of opinion. Don’t think that our love of indulgence translates to a lack of self-control. Just because we have a adoration for a high calorie beverage, doesn’t mean that we aren’t concerned with healthy living. And our love for a good ole fashion dive bar doesn’t tarnish out Mensa standings.
And as much as we would love for you to understand exactly why we drive 20 minutes out of our way on Friday afternoon to make sure that we have an exciting stash of Craft Beer for the weekend, we also want you to drink what you want. If you love wine, or whiskey, or even a famous Macro brew, that’s ok. More of the good stuff for us.
And if everyone else in the world stopped drinking Lost Abbey Carnevale Ale, or if it became so fervently distributed to every home in America that it was dubbed the new King of Beers and the Beer Snobs decided it was no longer desirable, it wouldn’t matter one bit. I would still drive to Northridge on Fridays to make sure I could find a bottle or two for the weekend, if need be.
I’m pretty sure that it was just a coincidence that the first time I was able to get my hands on this Special Release from Lost Abbey, was also the same day that I saw fresh pineapple at my local market for the first time this year, but it could also be fate. The flavors mixed so beautifully that I’ll have a hard time ever baking with pineapple again and not having the urge to reaching for this beer.
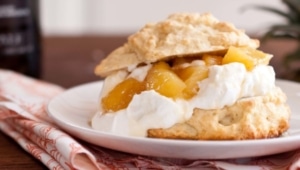
Saison Caramelized Pineapple Beer Shortcakes
For the Beer Shortcakes:
2 cups all purpose flour
2 tsp baking powder
1/4 tsp salt
1/2 cup sugar
1/2 cup butter
1 egg, beaten
1/2 cup Saison Beer(Los Abbey Carnevale recommended)
For the Saison Caramelized Pineapples:
4 cups fresh pineapple, chopped
1/2 cup brown sugar
1/2 cup white sugar
1 stick butter
1 cup Saison beer (Los Abbey Carnevale recommended)
For the Ale Chantilly Cream:
1 1/3 cup heavy cream
2/3 cup powdered sugar
2 tbs Saison Beer (Los Abbey Carnevale recommended)
(6-8 servings)
Preheat oven to 425
In a food processor, add the flour, baking powder, salt and 1/2 cup sugar, pulse to combine. Add the butter and process until it resembles coarse meal. Add the beaten egg and the beer and process until just barely combined, abut 30 seconds. Don’t over process or your shortcakes will be tough.
The shortcakes will be very moist, and have more of a "drop biscuit" style than those that you roll out.
Place a sheet of parchment paper over a baking sheet. Using your hands, or two spoons, place about 1/4 cup of the dough onto the parchment paper and form into a loose ball. Dough should make between 6 and 8 shortcakes, depending on the size you want.
Bake for 12-15 minutes of until the shortcakes have turned a light golden brown and a tooth pick in the center comes out clean. Slide the parchment paper off the baking sheet and onto a flat surface and allow to cool.
Add all of the Caramelized Pineapple ingredients to a pan over high heat. Stir frequently (or continuously) until the liquid has reduced so much that the pan seems to only contain pineapples and frothy bubbles, about 10-12 minutes. Allow to cool to room temperature.
Just prior to serving, make the whiped cream.
Add all of the ingredients to a stand mixer and beat on high until soft peaks form, about 3 minutes.
To assemble, just split the shortcakes in half down the center, add the whipped cream, then the pineapples. Serve with a cold glass of Lost Abbey Carnevale.
I have a confession to make. I haven’t lost my Holiday weight. Granted, my "Holiday Weight" was only 3 pounds, but I still have it. Being a mom, a working mom, a working mom food blogger, I have a hard time finding the time to work out. I used to go to the gym three times a week and run a few miles on my days away from the gym. These days, I have a hard time getting a work out in once a week.
It’s a small price to pay to be the mom to an amazing little human like Tater. But this weekend, as I realized that Bikini season is fearfully close, I’m blogging "Skinny."
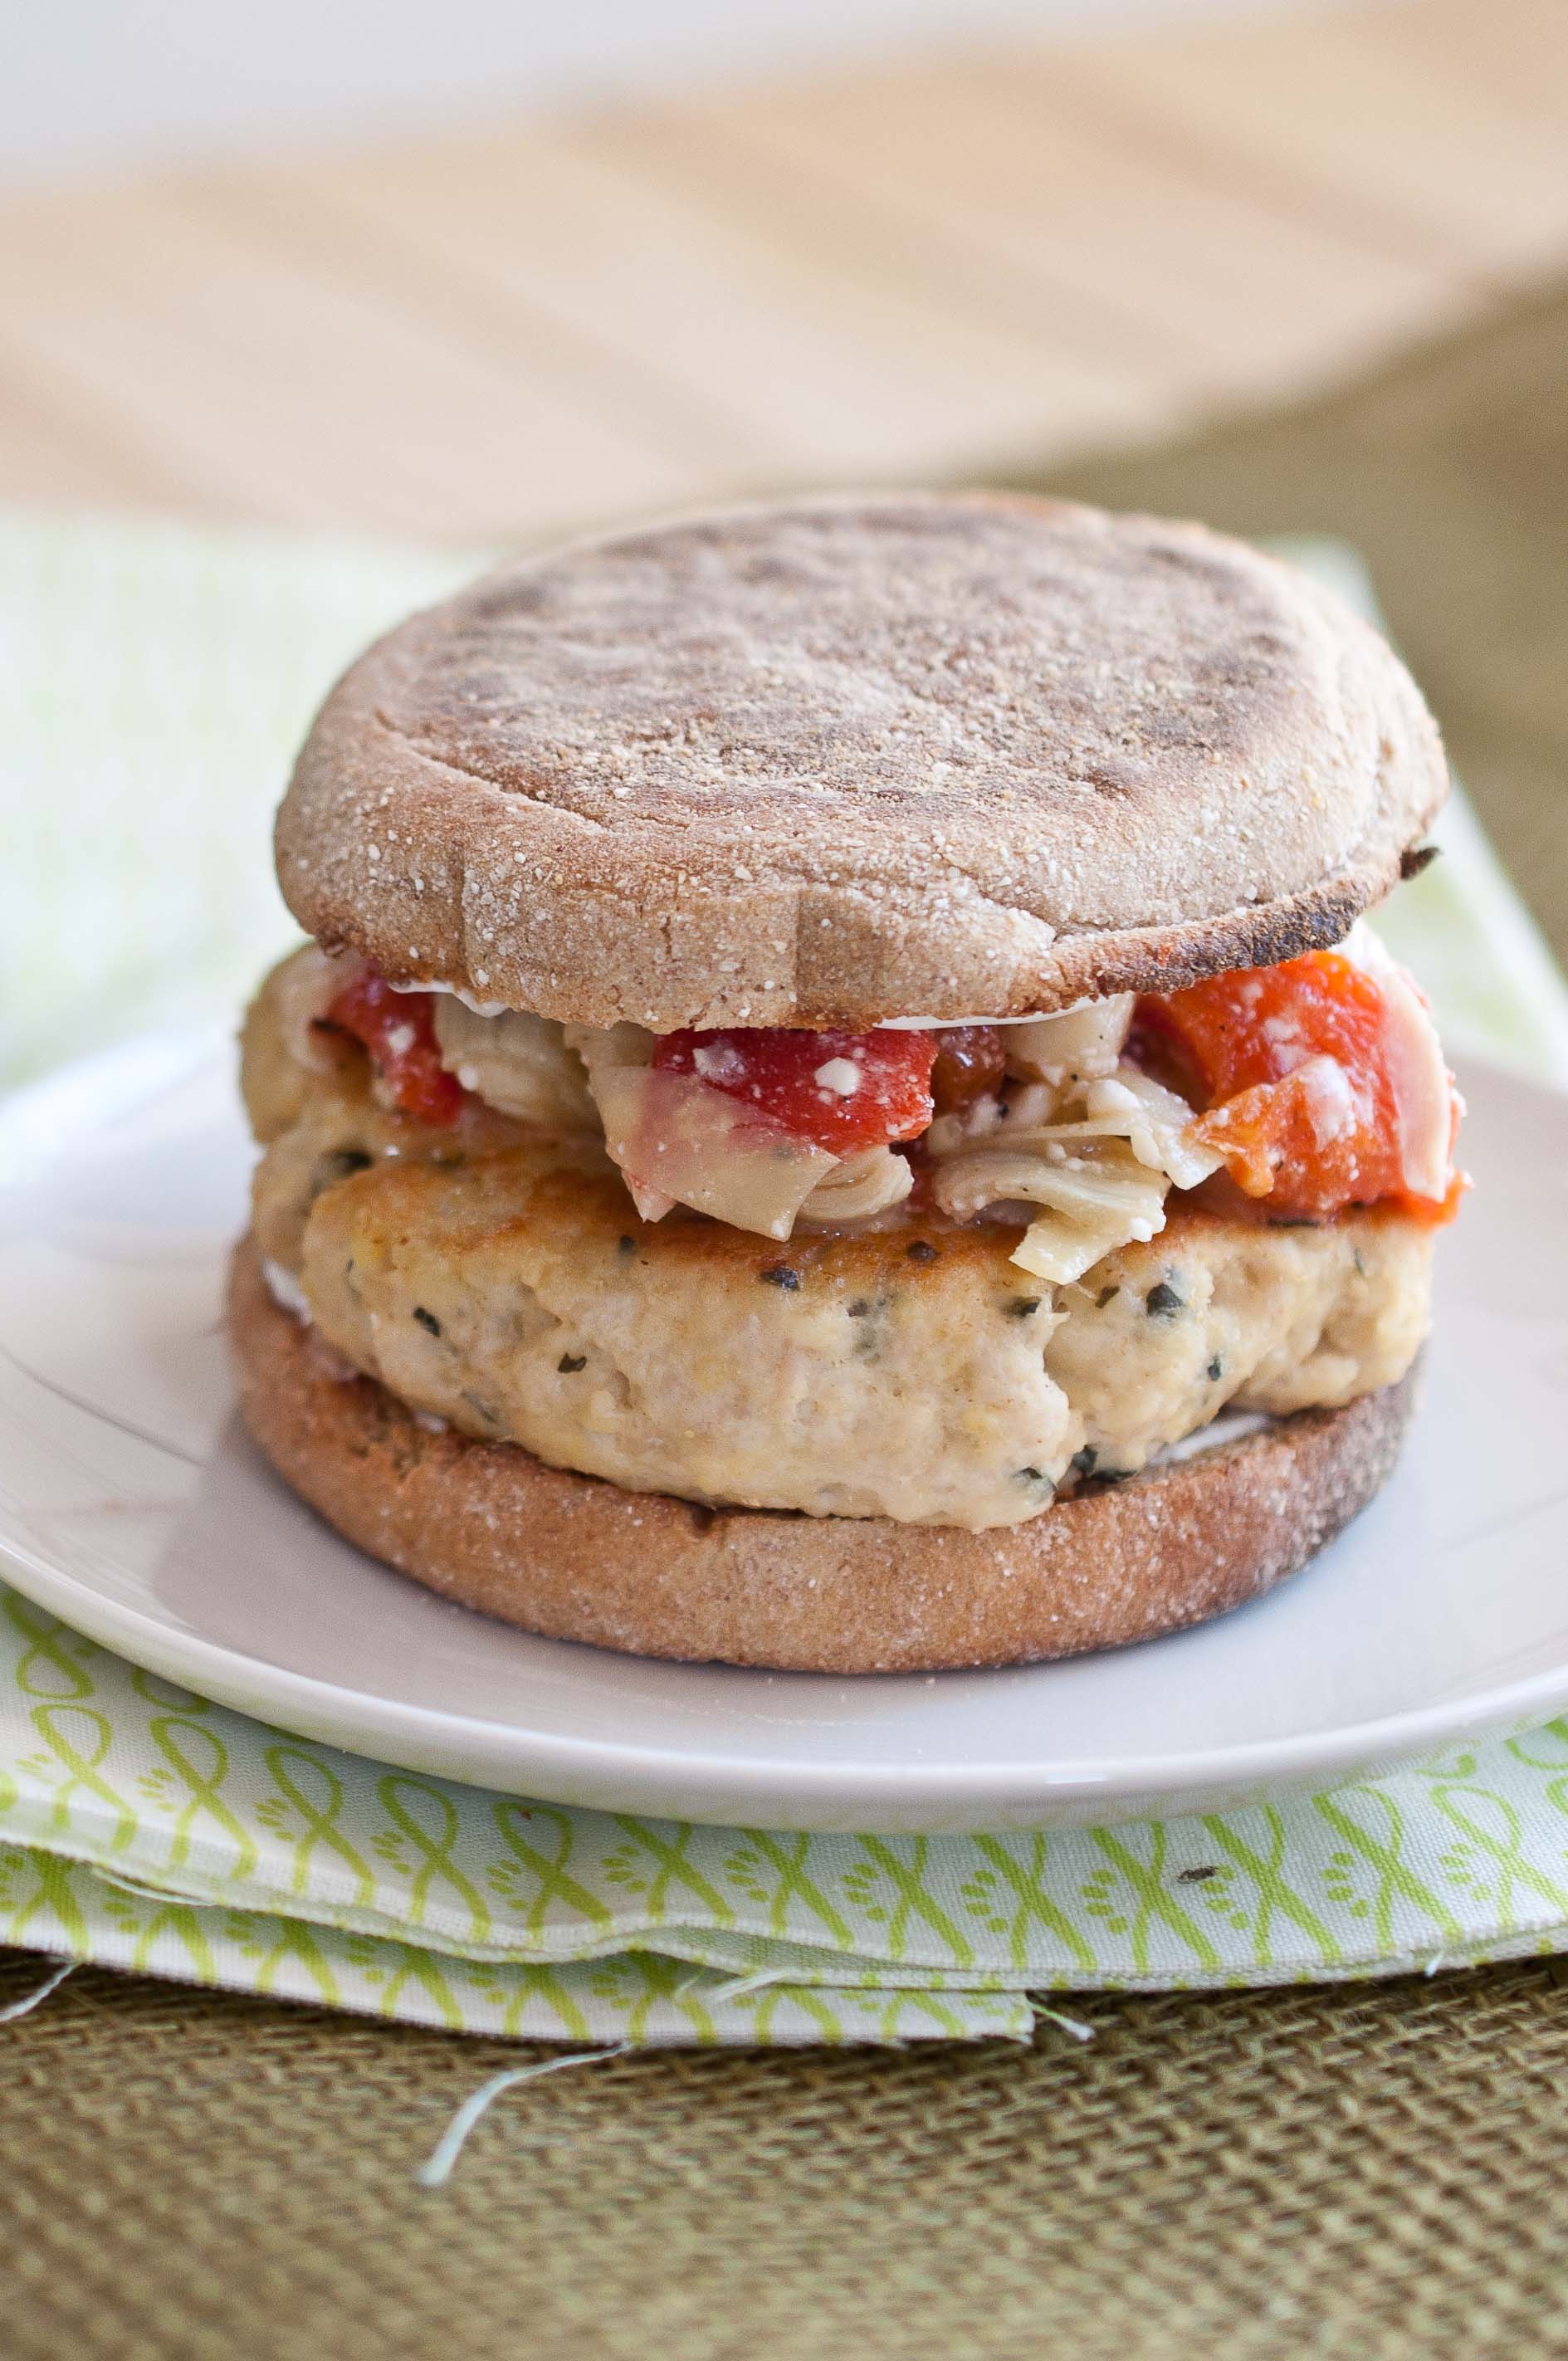
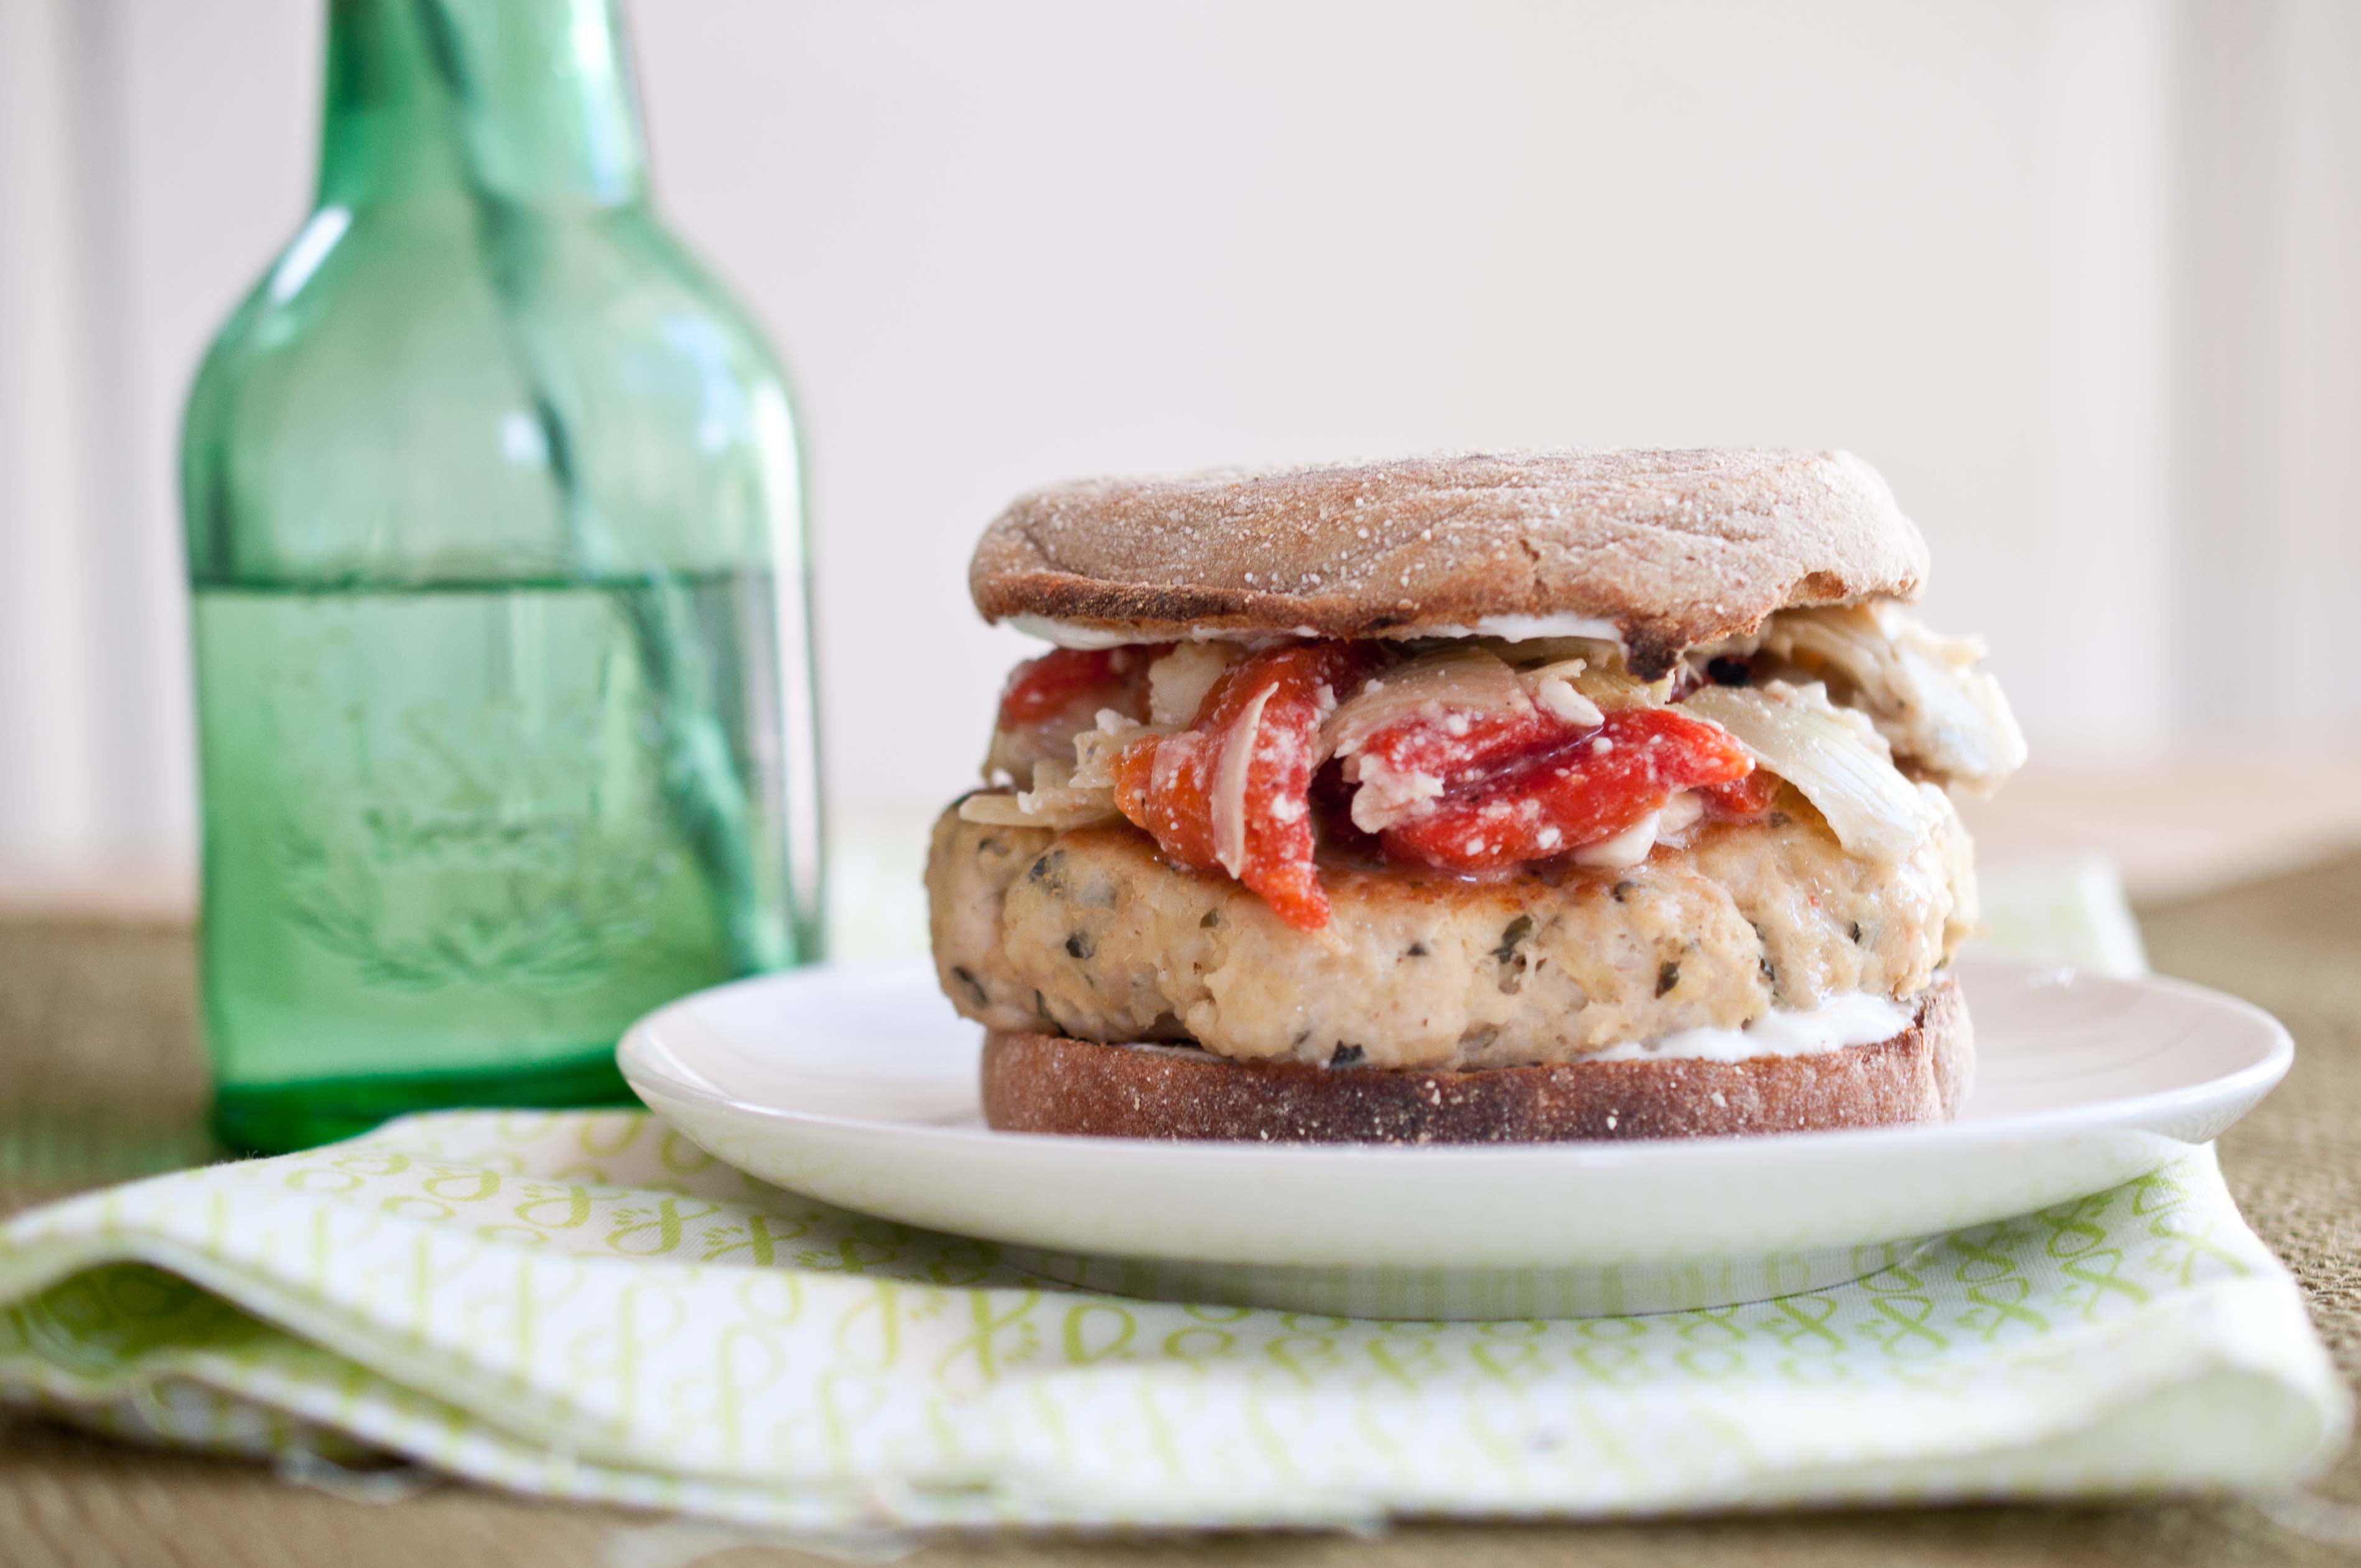
I also have found a way to cook Turkey Burgers so that they’re juicy and not at all dry. And the topping is incredible low calorie. And, English muffins are only about 110 calories. My husband even loved them and to be honest, he isn’t at all afraid of Bikini season.
240 Calories Greek Turkey Burgers
2 cups extra lean turkey (99 Percent Fat Free)
1/2 cup Panko bread crumbs
1 tsp Garlic Powder
1/2 tsp dried oregano
1/2 tsp dried basil
1/2 tsp salt
1 egg
1 cup chicken broth
1/2 cup roasted red peppers, chopped (if you use a jared kind, make sure to get the type that is in water NOT oil)
1/2 cup artichoke hearts, chopped (Again, water, not oil)
In a bowl, add the turkey, Panko, garlic, oregano, basil, 1/2 tsp salt, and egg. Using your hands, mix until combined. Split into four equal portions and form into patties.
You’ll need a skillet that has a lid. Place it over medium high heat and spray with cooking spray. Allow to get hot but not smoking. Cook the patties for about 3 minutes, or until browned. Turn over and cook for another three minutes. Add the chicken broth to the pan, cover and allow to steam for about 10 minutes or until the internal temperature of the patties reaches 165 degreed. Remove from pan and allow to drain on a stack of 3-4 paper towels.
in a bowl, add the artichoke hearts, roasted red peppers, feta, and a pinch of salt and pepper.
Lightly toast the English muffins.
Spread the English Muffins with 1/2 tbs Fat Free Sour Cream on each side.
Place the turkey patties on the English muffins, add the artichoke/red pepper mixture.


