We tend to feminize or masculinize food. Beer is man food, as is bacon, grilled red meat and bourbon. While tea, lavender, scones and blueberries tend to been feminine. Chocolate seems to be neutral go-between, grabbing it’s gender label once the final product is presented. Chocolate Stout Cake with Maple Bacon Frosting: Man Cake. Chocolate Strawberry Mousse: Girly.
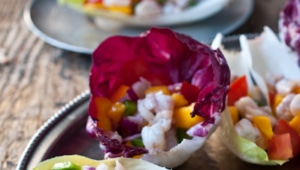
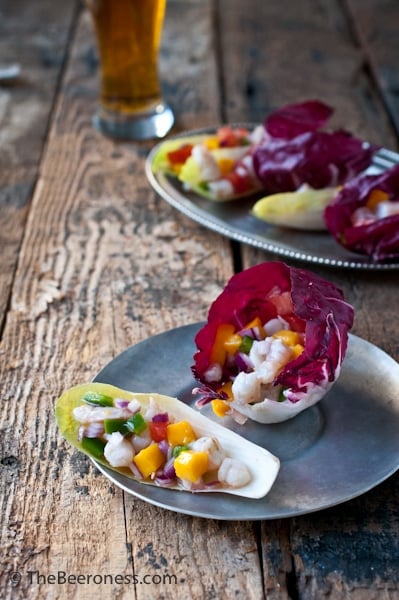
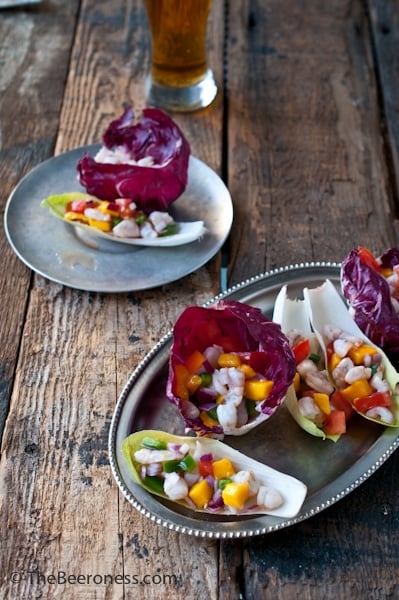
Although I don’t ascribe gender to my food, I can clearly see the lines drawn in the sanding sugar. These daintly looking no-cook treats will fool you like the little vixens they are. One look at these mango and shellfish filled lettuce cups and you firmly place these in the Chick Food category. But with a sharp bite of beer and a punch of spicy heat, they would beg to differ.
Along the lines of my I think now is a really good time to tell everyoneminor motorcycle crash story, It’s past time to tell you that alcohol intensifies heat. While there is no way to tell the precise Scoville Units in any given jalapeno pepper, I can tell you that number will be dramatically increase after those suckers have spent an hour soaking in a high ABV IPA. So if you don’t want to turn on the oven, and don’t mind a little capsasin abuse to the mouth, this is a great meal.
Place the shrimp in a small bowl. Cover with ½ cup lime juice and ½ cup lemon juice. Cover and refrigerate until the shrimp have turned pink, about 2 hours.
In a separate bowl combine the remaining ingredients (except the radicchio and the endive), allow to marinate for at least one hour.
Just prior to serving, drain the shrimp, add to the mango bowl and toss to combine.
Scoop a few tablespoons of the ceviche into the leaves of the endive and the radicchio, serve chilled
Notes
For a lower heat level, reduce Sriracha to 1/4 or 1/2 tsp.
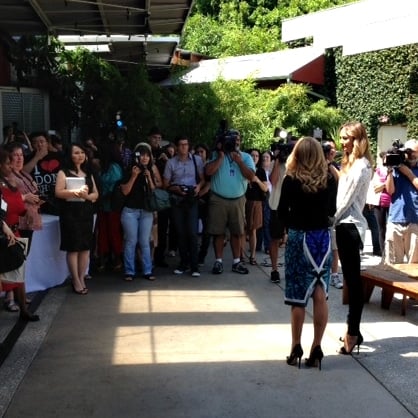
If you follow me on twitter, you may have seen my announcement that I shot a TV show for Lifetime back in January. The premise of the show was to take people with interesting ideas for food products and develop those ideas into product lines that end up on grocery store shelves. There is a hole in the market when it comes to beer infused foods. Clearly this is something that people want that currently isn’t being offered on a large scale. The show airs June 22nd on Lifetime, my episode airs on August 22nd at 10:30pm on Lifetime, you’ll have to watch to see how it all turns out for me. Beyond my story, the show was well cast with incredible people, all with stories to tell and passion for what they make.
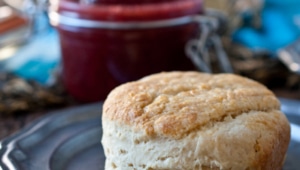
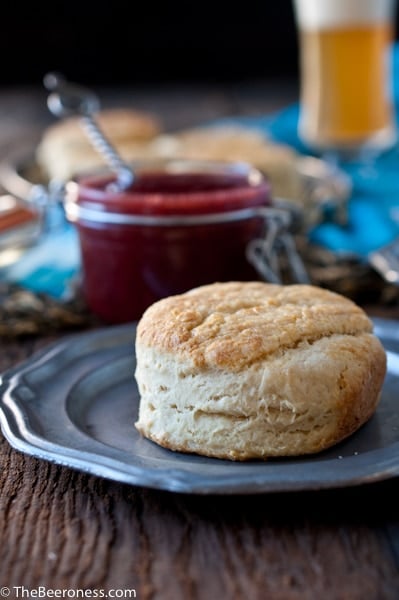
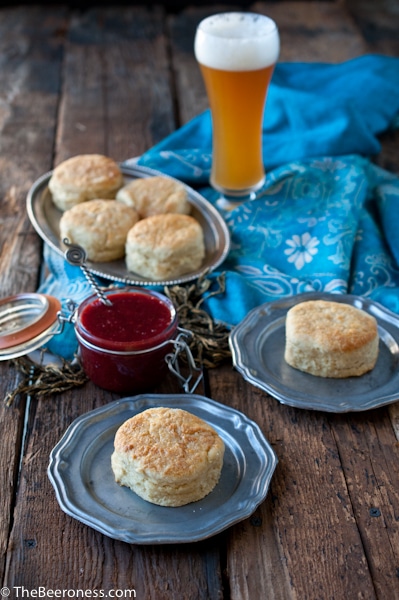
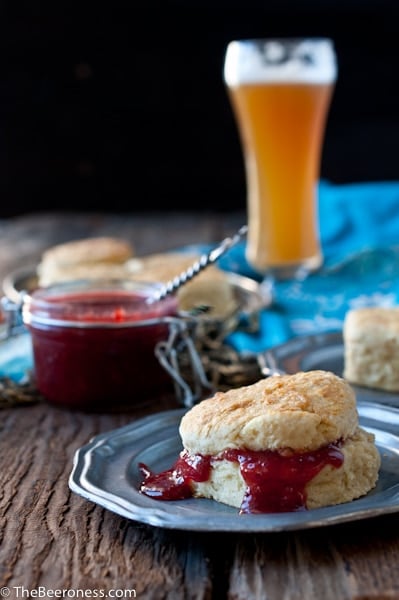
These biscuits, which would be a fantastic addition to a beer infused food line, are the best biscuits I’ve made so far. The technique creates these beautifully flakey layers, the beer lightly leavens the dough, leaving behind soft notes of beer on the finish. For both the sauce and the biscuits I used Mischief from The Bruery.
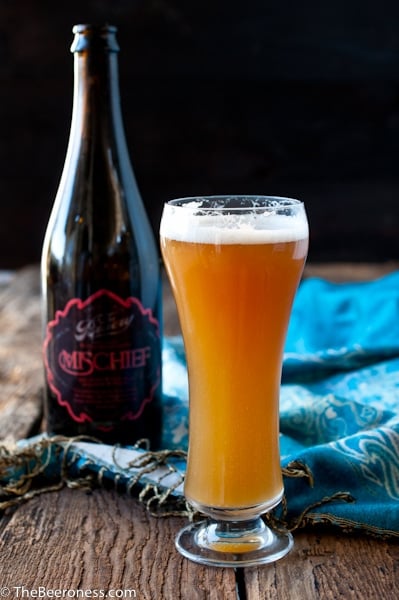
There are two types of breweries that I respect, those that offer accessible beer that’s consistent and well done. Solid beer that can be held up as excellent examples of their represented styles. The Bruery is the other type. They aren’t afraid to break a few rules, they make that clear with the spelling of their name. There is nothing traditional about the beer that comes out of this place, it’s innovative, experimental and exciting. It’s a place that you take a true beer lover, not someones who "like some beer, sometimes." It’s not among the beer I recommend for those who want an easy introduction to craft beer, it’s beer for beer lovers. It’s were you go when you want to see the limits of beer being challenged.
To be honest, I don’t always fall in love with what The Bruery makes, but I’m always intrigued, I always want to try what they’ve come up with because it’s clear how thoughtfully made every batch is. Mischief is one of my favorites. It’s beautifully well rounded with notes of bread, yeast, citrus, grass, with a bit of spice and apricot. It also comes in a bottle that’s a perfect fit for a champagne recorker which comes in handy when you want to open a large 750ML bottle in the morning to make biscuits and want to save the rest for later in the day. It also well distributed, I’ve even heard rumors of it making it past the Booze Guards to the North to earn spots on shelves in Canada.
Another amazing Bruery creation is Black Tuesday, available in October. If you’re near Orange County in late October, it’s worth a drive to the tasting room just for that beer.
If you can’t get your hands on Mischief (although you should try, it’s a great beer) looks for a hoppy Belgian ale or Hefeweizen for this recipe.
Honey Beer Biscuits with Strawberry Belgian Ale Sauce
Add the strawberries, sugar and beer to a saucepan over medium high heat.
Allow to simmer, stirring occasionally, until reduced and thickened, about 20 minutes.
Add to a food processor or blender, blend until smooth.
To Make the Biscuits:
Preheat oven to 425.
In a processor add flour, baking powder, baking soda, and salt.
Pulse to combine. Add the butter and 1 tbs honey, process until well combined. Add to a large bowl.
Add the milk and beer. Mix with a fork until just combined.
Add to a well-floured flat surface, pat into a rectangle. Using a cold rolling pin (preferably marble) gently roll into a large rectangle, about 1 inch in thickness, using as few strokes as possible.
Fold the dough into thirds as you would a letter about to go into an envelope. Roll lightly, once in each direction to about 1 inch thickness, fold in thirds again. Gently roll into about 1 1/2 inch thickness (this will give you the flakey layers).
Using a biscuit cutter cut out 6 to 8 biscuits. Place in a baking pan that has been sprayed with cooking spray.
Add the remaining 2 tbs honey to a microwave safe dish. Microwave for about 15 seconds or until thinned.
Brush biscuits with honey and sprinkle with salt.
Bake at 425 for 10 to 12 minutes or until the tops are golden brown.
Back in January I very vaguely mentioned that I was involved in a Super Secret project that involved being sequestered without phone or internet for almost a week. My intention was not to be ambiguous, but to adhere to the Non Disclosure agreement I signed with Lifetime TV. Yesterday I was finally able to start talking about what I was working on, and if you follow me in Instagram, you already know.
I was on a brand new TV show with the Lifetime Network called Supermarket Superstars. The premise of the show is to take people with great ideas for food related products and turn those ideas into product lines on grocery store shelves. The producers of Shark Tank and Project Runway joined forces for the show.
The producers were amazing, really wanting everyone to root for us all. It was obvious in everything we did, they wanted us to talk about ourselves, our brands, our websites (my book!), and even cast the show with people you want to see succed. It’s not a show that’s full of cliche characters you want to see fail. They cast the show full of really wonderful people, really great ideas and fascinating stories.
Stacy Keibler, Debbi Fields (THE Miss Fields Cookies), Chef Michael Chiarello, and branding expert Chris Cornyn guided us through this process with so much encouragement and faith in what we could be. "We want you all to win!" I just kept hearing, the entire staff cheering us on, giving us amazing feedback, and they couldn’t stop talking about the opportunities this type of exposure could bring us. It was a great show to be a part of.
I spent the time developing a line of beer infused food products, you’ll have to watch the show to see what happens. It airs on July 22 on Lifetime TV at 10pm. My episode airs on August 22nd at 10:30pm, and even features my husband my little Tater! They spent an entire day just following us around, filming me with my family and friends, cooking, photographing, editing, and even (of course) drinking beer at a local brewery.
Once the show airs, I’ll give you an update and some behind the scenes info that I’m not able to share right now. Until then I have a fun little appetizer that I hope you love.
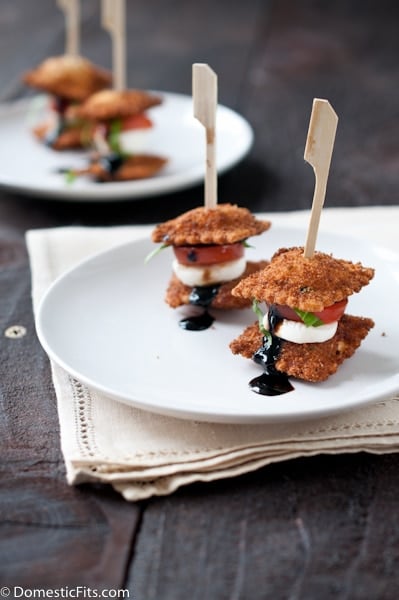
Place about 5 inches of oil in a pot over medium high heat. Attach a deep fry thermometer and adjust heat to maintain between 325F and 350F.
In a small bowl beat together the eggs and milk.
In a separate bowl add the Italian bread crumbs.
Working in batches dip the raviolis in the milk mixture and then dredge in the bread crumbs.
Fry until golden brown on both sides, about 1-2 minutes per side. Use a metal slotted spoon to remove from oil, allow to drain on a stack of paper towels.
Place half of the raviolis on a serving platter. Top with a slice of mozzarella, and then a slice of tomato, some basil and a drizzle of balsamic glaze. Top with remaining raviolis, secure stack with a toothpick.
Notes
It’s best to use small raviolis for this, look for ones (or make some) that are about 1 1/2 inch square.
I have two very distinct sides to my personality, dueling forces that pull me in opposing directions with near cartoon ideation. Although Devil and Angel would be easier to deal with, mine are more Old Lady and Free Spirited Gypsy.
As much as I would like to tell you that Gypsy wins the battles, it’s Old Lady that tends to run the show.
A few years ago Gypsy got ahold of the controls and decided to buy a motorcycle. Paying penance to Old Lady, I signed up for a Motorcycle Riders Training Course. It was a three-day crash course (pun intended) in how to ride a motorcycle without killing yourself.
I also allowed the Old Lady side of me to buy the safest helmet and motorcycle jacket with armor I could find.
The first day of class I was equal parts nervous and intimidated, as I noticed I was the only novice in the group and one of the youngest. Most were crotch rocket guys wanting to "blast the Crest" as soon as possible. The only other girl was a woman who wanted to learn to ride so she could bike cross-country with her partner for their 20 year anniversary.
No one talked to me. Really, no one talked. We were all a bit insular trying to figure out how to learn not to kill ourselves, drowning in the Dead People Smeared On The Road stories told by the ex-bike-cop who taught the class.
On the final day of class we met early in the morning in a parking lot in Long Beach just as it started to rain. A little drizzle that scares the crap out of most of Los Angeles. We were given the opportunity to come back on a non-rainy day but collectively decided, with a series of sideways glances and nods, that we would all stay and ride like Bad Ass SoCal People in the very light drizzle.
The final segment of the day was an obstacle course through the gigantic empty parking lot. Trying to make sure I was at least in the top half of the pack, time-wise, I set out a bit faster than I should have.
As I rounded the first curve, set over a large white arrow painted on the pavement of the parking lot, my bike slipped out from under me and began to skid along the wet ground as I tumbled in the opposite direction.
Ex-bike-cop was visibly relieved to see that I was fine and address the issue with the group by saying, "I think now is a really good time to tell everyone that paint on the pavement gets really slippery when it rains."
To which I responded, "No, ten minutes ago would have been a really good time to say that. At this point, it’s pretty obvious."
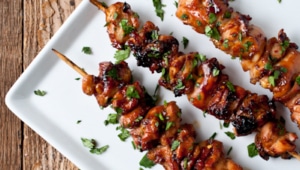
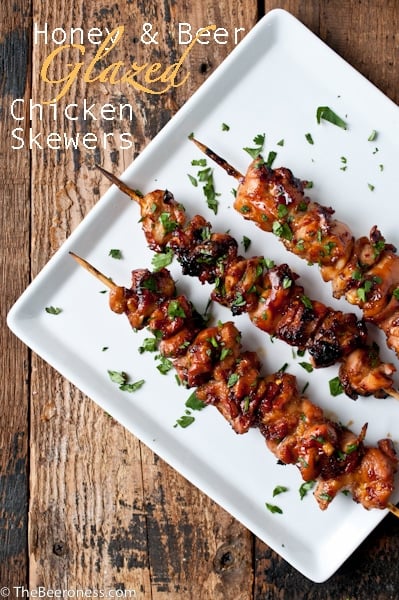
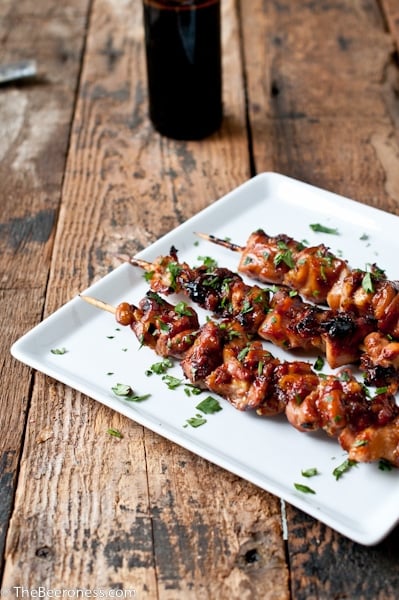
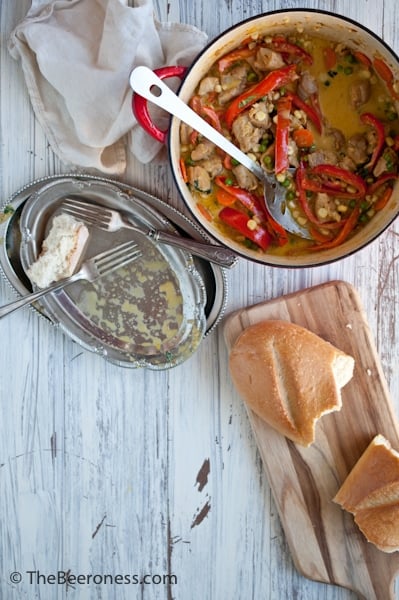
Sometimes, when you are so immeshed in an activity, you don’t think to state what’s really obvious to you, like ex-bike-cop and the paint. For me, it’s this chicken. Maybe you’ve noticed that I tend to lean away from that popular Boneless Skinless Chicken Breast that we all grew up with. Mostly because it’s so often dry and flavorless.
If you favor that cut, try the boneless skinless chicken thigh fillets, so much more flavor and they can take some serious heat before they dry out. Chicken thighs are a bit of secret ingredient when it comes to chicken dishes, making your favorite chicken breast recipe taste at least 30 percent better if you use the thighs instead. They do take a bit longer to cook, but it’s completely worth it.
And that was the only time I ever dumped a bike. At least so far.
6boneless skinless chicken thigh filletscut into cubes
oil for the grill
Chopped cilantro for garnishoptional
Instructions
In a small bowl whisk together the garlic, honey, porter, red pepper flakes, mustard, soy sauce and pepper. Add the chicken cubes, refrigerate for 1 hour and up to overnight.
Remove the chicken from marinade (reserve the marinade) thread the chicken through wooden skewers.
In a pot over medium high heat, add the olive oil and shallots. Sautee until shallots have softened, about 5 minutes. Add marinade and boil, stirring frequently, until reduced and thickened, about 8 minutes.
Grill directions:
Preheat grill to medium high.
Brush the grill lightly with oil.
Brush the chicken with the glaze, place on the grill. Brush with glaze and turn every 2-4 minutes until cooked through, about 10 minutes.
Sprinkle with chopped cilantro prior to serving.
Oven directions:
Preheat the oven to 400. Place chicken on a baking sheet covered with aluminum foil. Brush liberally with glaze. Roast at 400 for 30-40 minutes, brushing with glaze every 8-10 minutes until cooked through.
I’m really hard on myself, I’ve told you that before. I’m a nothing-is-ever-good-enough kind of person. Lately, my photos have been in my line of fire when it comes to Stuff I’m Not Good Enough At. I can’t figure it out, why the light is never that beautiful, why the images aren’t compelling enough, why the heck I can NEVER master the over head shot. By the way, this all drives my husband crazy, because in the Grand Tradition of Amazing Husbands, he thinks I’m the most talented person in the world, let’s not disrupt that delusion, I sort of like it.
So, one of my tangible fixation for resolving at least some of the issues I have with my sub par photos was this slightly deranged idea that I NEEDED a reclaimed wood table. I NEEDED it (#firstworldproblems). I priced this absolutely necessary item, and in the Los Angeles area, this need could be fulfilled for the low, low price of about $2000. My aforementioned Amazing Husband disagreed that this was an actual need after seeing the price tag for such items.
I couldn’t stop thinking about such a need, and scoured Craigslist for the possibility that I might be able to pick one up. But as luck might have it, an old house in my neighborhood started to get torn apart. It was a 1920’s California Bungalow and the sight of it being ripped apart made me a little heartsick.
As I drove home one night, I noticed a stack of gorgeous antique wood, full of age and scars that I couldn’t get out of my mind. After dinner I pulled on a pair of old boots, waited for the workmen to leave for the day, and began to dig the gorgeous planks out of the trash piles.
I had two very specific feelings about this slightly insane venture of trespassing to dig through a trash pile, at dusk, in East Los Angeles. First, I felt like a crazy person (and clearly an amateur who didn’t think to bring gloves to dig through construction waste and old wood) as I tried to ignore the freaked out looks from passers by. Second, that I was heroically saving this amazing wood from the fate of a land fill (also slightly insane that I was heroizing myself for something so selfish).
After I got home with Heroically Aquired Gorgeous Wood, I used actual real life and potentially dangerous power tools to nail it together, saw off the excess and I then had myself a Personally Reclaimed Wood (prop) Table. And posted the picture of my slightly insane venture on Instagram.
Although I’m fairly certain that my newly acquired fake table did not improve my photos, I’m still happy to have him in my house instead of a landfill.
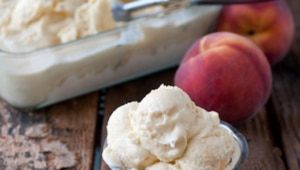
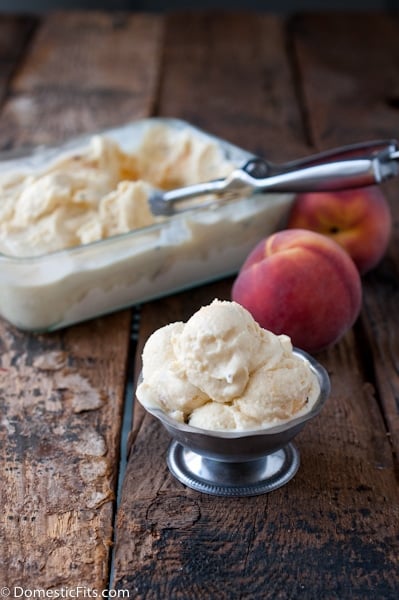
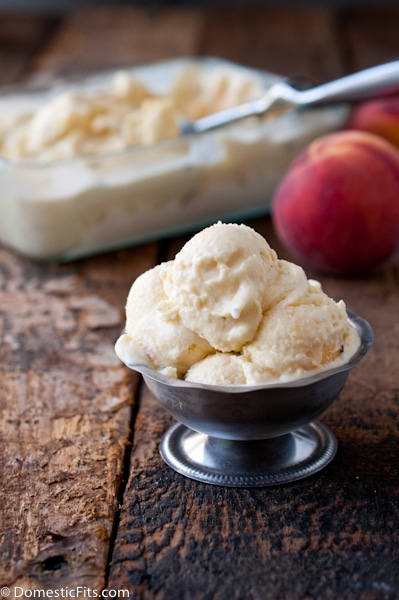
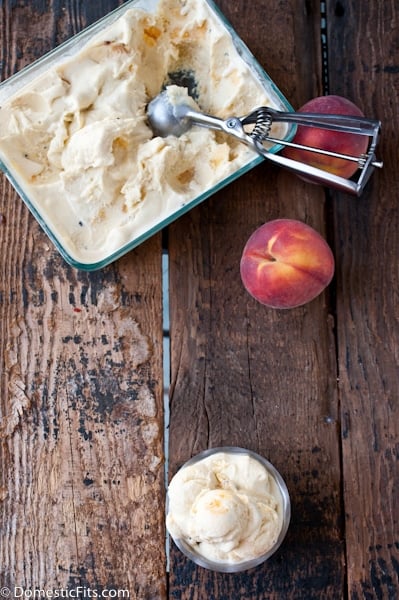
Grilled Peach Ice Cream
Ingredients
1 cup sugar
2 cups cream
1 cup whole milk
1 teaspoon vanilla extract
4 egg yolks
4 yellow peaches cut in half, pit removed
Grape seed or canola oil
Instructions
In a sauce pan off heat whisk together the sugar, cream, milk, vanilla, and egg yolks until very well combined.
Place the saucepan over medium heat, stirring constantly until it thickens enough to coat the back of a spatula.
Transfer to an airtight container (strain through a fine mesh strainer if any lumps were created), refrigerate until chilled, about 4 hours and up to 24.
Preheat the grill to medium high heat (alternately, a cast iron grill pan can be used).
Brush the cut side of the peaches with oil. Place, cut side down, on a hot grill. Close the lid and allow to grill until deep grill marks appear, about 4 minutes.
Remove from grill and gently peel the skin away (should remove easily).
Chop the peaches.
Add the peaches and the ice cream base to your ice cream maker and churn according to the manufacturer’s instructions. Freeze until set, about 2 hours.
Remove from freezer about 5 minutes prior to serving to make scooping easier.
There are a few buzz words that seem to grab peoples attention and promote a recipe to Social Media Sharing Gangbusters status. These words include: Skinny, Quick, Easy, No Bake, Only 3 Ingredients, You’ll Never Guess The Secret Ingredient! None of these phrases are the type to attract my attention on their own.
I like a recipe that takes time, uses fat and sugar, and I’m not scared of a long list of ingredients or complicated directions.
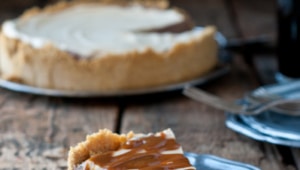
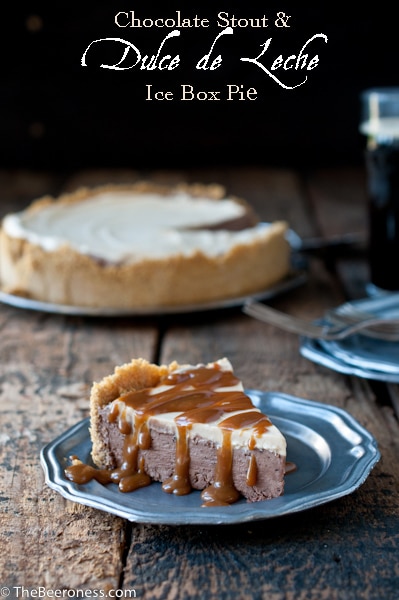
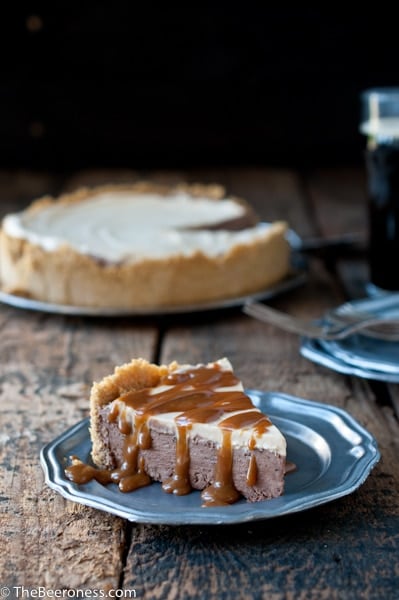
Sometimes, however, I do invent a recipe that inadvertently falls into one of those Gangbusters categories that people seem to like. This, for example, takes 15 minutes and zero baking. It also tastes amazing in a way that seems to contradict the short amount of time it took to make.
You can buy Dulce de Leche, or make it from scratch (here is a really great post on How to Make Dulce de Leche from a blogger I have a girl-crush on). It’s simple to make from scratch, but if that doesn’t fit your time schedule, or intimidates you, it’s fairly easy to find in markets.
I found myself in ownership of a batch of Dulce de Leche after spending a 100 degree day knee deep in Holiday Cheer while making and shooting Christmas Cocktails for the Holiday Issue of a print magazine. Nothing screams July like Brandied Hot Chocolate with Candy Cane Whipped Cream or Dulce de Leche Eggnog. Although I was incredibly grateful for the opportunity, I can’t say that I really wanted to consume hot buttered rum or mulled wine on triple digit summer day.
In a food processor add the graham crackers and brown sugar, process until reduced to fine crumbs.
While the food processor is running, add the melted butter, process until combined.
Add crust to a 9 inch spring form pan. Using a heavy, flat bottom glass, press very well into the sides and bottom of the pan (starting with the sides), make sure to press very well until the crust is very compacted into the sides and bottom of the pan.
Add the chocolate chips to a small bowl. Heat the stout until very hot (about 170 degrees), pour stout over the chocolate chips, stir until well combined and creamy. Allow to cool to room temperature.
In the bowl of a stand mixer, add 1 ½ cups heavy cream and ¼ cup powdered sugar, beat on high until soft peaks form. While the mixer is running, slowly drizzle the cooled chocolate mixture into the mixer. Once it has all been added, turn off the mixer and gently stir until all of the cream and chocolate has been combined an no white streaks or dark chocolate streaks remain. Pour into the crust. Place in the freezer while you work on the Dulce de Leche layer.
In the bowl of a stand mixer, add 1 cup heavy cream and 3 tablespoons powdered sugar. Beat on high until soft peaks form. While the mixer is running, slowly drizzle the Dulce de Leche into the mixer. Once it has all been added, turn off the mixer and gently stir until all of the Dulce de Leche and whipped cream have been combined.
Add the Dulce de Leche cream on top of the chocolate layer, smooth into an even layer.
Freeze until set, about 1 hour. Remove from freezer 10 minute prior to serving and allow to warm slightly before cutting. To remove from pan, run a sharp knife under very hot water, then run the knife between the crust and the side of the spring form pan to release.
Heat remaining Dulce de Leche and drizzle over slices prior to serving.
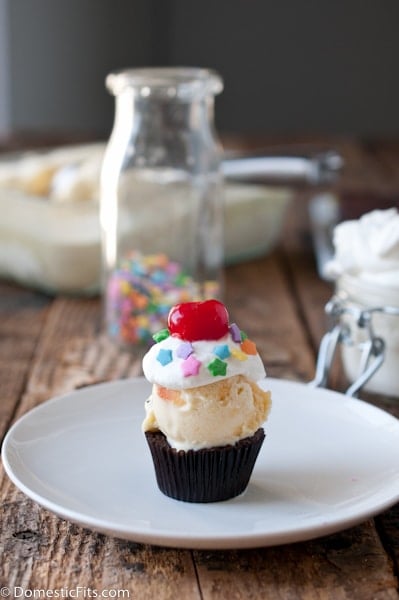
This is another one of my "it’s not a recipe" recipes. Because it’s not, it’s assembly instructions on how to assemble these cute little party desserts.
I made these for the Forth, a huge hit with with the under 5 set, and small enough to be the perfect size for little fingers.
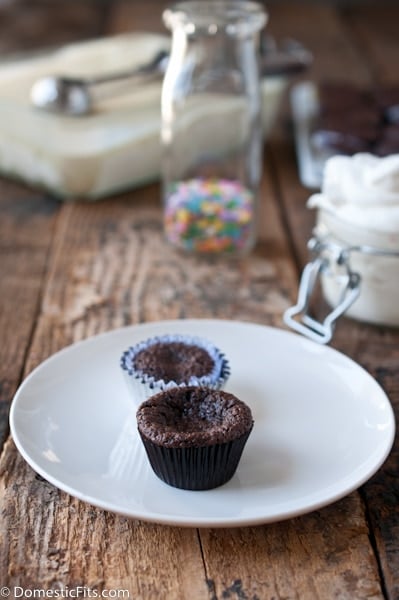
The only thing I would do differently next time is nix the cupcake wrapper. It was too difficult to try and disrobe the mini brownies when they are piled high with ice cream and toppings.
I used my favorite brownie batter, and next time will just liberally spray the mini muffin tins instead of using the cupcake papers. If you want to buy them, most "brownie bites" come sans cupcake wrappers, so you’ll be all set. If you want to make them from scratch, skip the wrappers, use a brownie batter not a cupcake batter (you want to avoid the domed top and hope for a concave one), and let them cool completely before topping with ice cream.
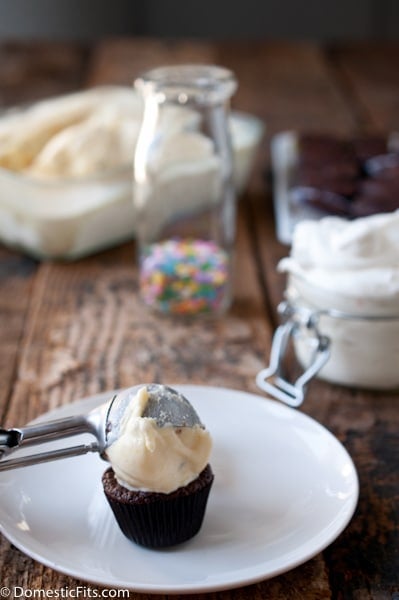
If you have the freezer space, you can make up trays of these in advance and just pull them out when the moment strikes. I used an amazing grilled peach ice cream that I’ll be posting later in the week, but for a classic flavor combo, good ol' vanilla works just fine.
Mini Ice Cream Sundaes
Yield: 24
Ingredients
24 chocolate mini muffins, cupcakes or brownie bites
1 pint ice cream
2 cups whipped cream
sprinkles
24 cherries
Instructions
Place the mini brownies on a serving tray.
Using a cookie scoop, scoop out a ball of ice cream and firmly place it on top of each brownie.
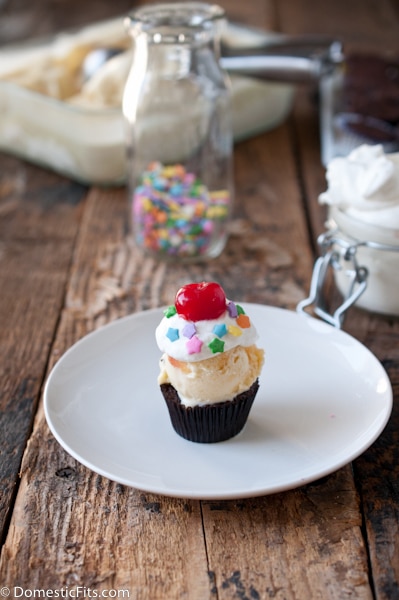
Top with whipped cream, then sprinkles then a cherry.
Serve immediately.
Notes
If making from scratch, use brownie batter rather than cake batter to avoid a domed top. Skip cupcake papers and spray mini muffin tins liberally. Use a cookie scoop for the perfect sized ice cream ball.
None of us really know what we’re getting into when we launch that very first blog post, that Hello World! salute that enters us into the abyss of Blogland. We start these little cubbyholes in the internet Universe out of curiosity, desperation, boredom or just the hope that maybe our lives will take a dramatic tilt. We see the Holy Trinity of blog talent, the online mistress Trifecta we have to master when it comes to blog success: Food, Photos & Writing.
This by itself is a huge undertaking, the hope to be really fantastically,mind-blowingly amazing at three really specific careers, wrapped up in one title, delivered to you at our chosen URL. But that, unfortunately is just the perfectly placed cherry on top of the seasonally appropriate Sundae. Beneath that homemade cardamom whipped cream and strategically placed sprinkles melts an amalgamation of skills that we don’t just need to attempt, we need to master.
Of course we need to be a skillful recipe developer, photographer, food stylist, culinary-guru and engaging author. But that’s not all, your plate isn’t nearly full enough, pull yourself up to the buffet of online careers and load your platter. You will also need to add to the aforementioned list: SEO expert, web designer, social media darling, PR pro, marketing expert, branding aficionado, and business manager. After all, if you hired someone for each of those positions you’d be in the hole for over 200K.
But who else is going to register the LLC, build the website, apply for a trademark, get a PO box, take those gorgeous photos, not to mention edit them, write the posts, send DMCA take down notice, answer the emails, write the recipes, cook the food, do the interviews, fix that broken code, install the right plugin, promote the content, network with the right people and ohmygodican’tdoitall!
We need to give ourselves a break. These are ten really difficult jobs, ten careers for which colleges all over the land offer 4 year degrees. We can’t be good at them all and we can’t really afford to hire them all out.
We need to learn to make peace with it the things that aren’t were we want them to be. It’s a triage in a way, the biggest blood loss goes to the front, the rest can wait. In the midst of these panics, we need to remember the list of thing we are really good at is longer than the list of things we shame ourselves for. Because, odds are, there is someone out there wishing to be as good as you are at something.
Don’t forget that when you start to panic about creating a newsletter or figuring out copyright laws. You are really good at more that you are really bad at, the ship will float, it just takes time.
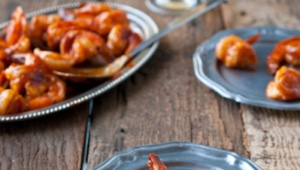
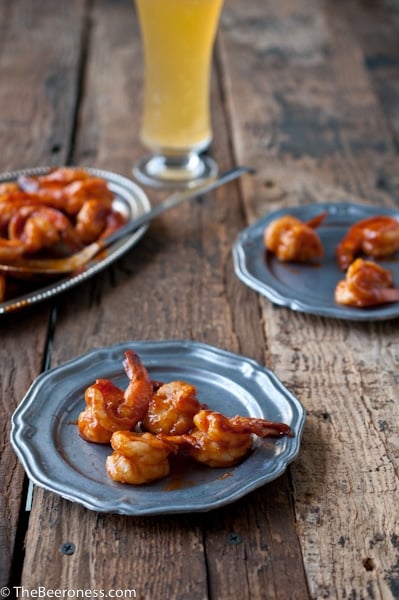
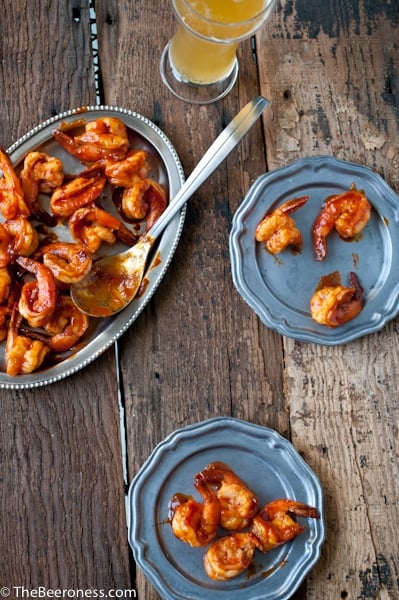
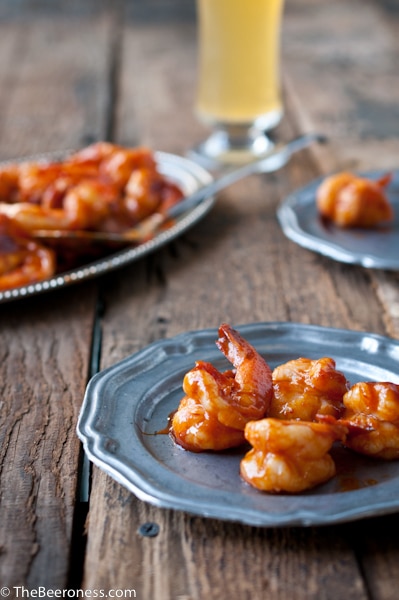
In a saucepan over medium high heat stir together the smoked paprika, garlic, cayenne, chili powder, red chili flake, tomato paste, beer, honey, pepper and salt. Add the butter and bring to a strong simmer, stirring frequently until reduced and thickened, about 5 minutes.
In a separate pan heat the olive oil until hot but not smoking. Add the shrimp and cook until ust starting to turn pink, about 2 minutes. Pour the sauce into the shrimp pan, cook until the sauce thickens and shrimp are cooked through.
Last month California Strawberry Commission generously paid my way to BlogHer Food conference in Austin Texas. As conferences usually go, the memories of the people and food stand the brightest in my mind. The bloggers from all over the globe, the friends I usually only see online, and the food I’ve been reading about for years were right in front of me.
The highlight of the actual conference sessions was a fantastic workshop on food preservation and how to use more food, and waste less. This was not only a reminder to me of how much food I waste, but a call to action on what can be done with those food scraps that usually go in the trash or compost bin.
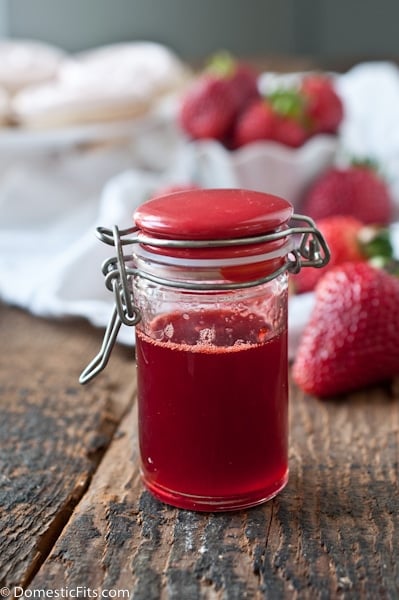
Kate from the Hip Girls Guide to Homemaking is a brilliant source of knowledge on the subject and taught us how to make fruit vinegar (amazing in salad dressing!) like this Strawberry Vinegar on her site. I got me thinking about a strawberry extract, or a strawberry syrup. I love baking with strawberries and I love Italian Sodas, but those syrups always have so many chemicals!
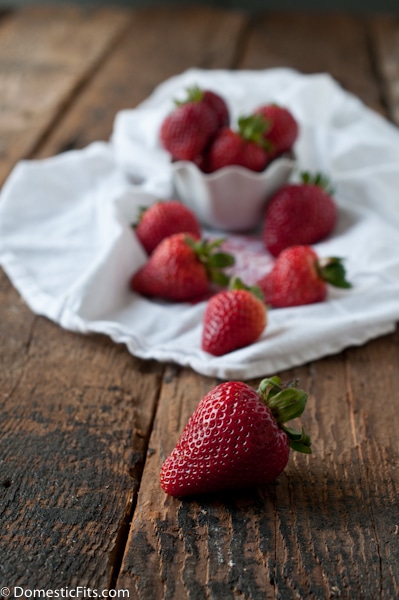
Syrup is also a great use of in-season strawberries. Those giant flats of gorgeous berries are being sold at bargain prices right now, but sadly, the berries don’t stay beautiful as long as we’d like. Once the berries start to lose their luster, you don’t have to toss them! There are a lot of fantastic ways to use those up, like making a beautiful syrup that you can store in the fridge, or even freeze for use in colder months when strawberries are harder to come by.
At the farmers market last week, I came into ownership of about 3 pounds of strawberries, much to the delight of my strawberry obsessed daughter. Once the shine started to fade, I used most of what was left to make this syrup and froze what was left.
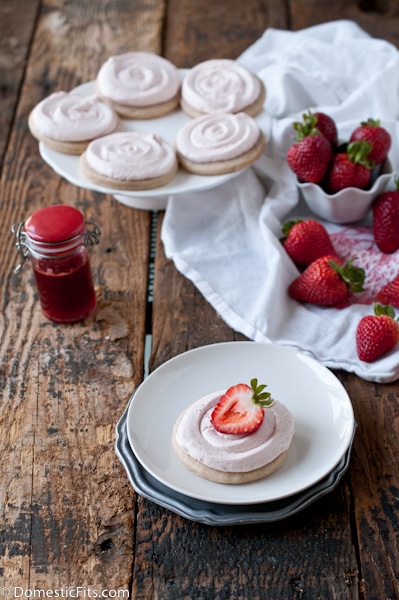
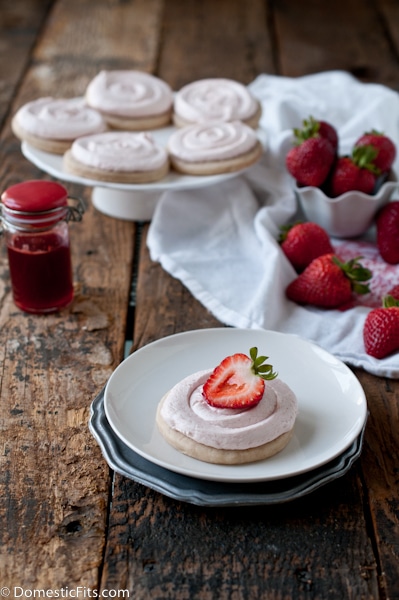
These cookies turned out beautifully, just as soft as I wanted with a hint of fresh strawberry syrup.
Super Soft Strawberry Cookies with Strawberry Mascarpone Frosting
Ingredients
For the Cookies:
1 cup butter
1 cup granulated sugar
2 eggs
3 tbs strawberry syrup
3 ¼ cups flour
1 tsp baking powder
pinch salt
For the Frosting:
1/2 cup butter, room temperature
8 wt ounces mascarpone
4 ounces cream cheese, softened
1 cups powdered sugar
3 tbs strawberry syrup
1/2 cup chopped strawberries for garnish
Instructions
In the bowl of a stand mixer add the butter and sugar. Beat on high until well incorporated. Add the eggs and strawberry syrup, mix on high until light and fluffy.
In a separate bowl add the flour, baking powder and salt, stir to combine. Sprinkle the dry ingredients over the butter and slowly mix until the dough comes together, scraping the bottom to make sure the butter is full incorporated.
Place a sheet of plastic wrap on a flat surface. Dump the dough into the center of the plastic wrap, form into a disk. Wrap with plastic wrap and chill until firm, about 1 hour.
Preheat oven to 325.
Roll the dough out on a lightly floured surface to about ½ to ¾ inch thickness. Cut into shapes.
Line a baking sheet with parchment paper. Place the shapes on the parchment paper and bake until the top no longer looks wet but has not started to brown, about 12-15 minutes. Immediately pull the parchment paper with the cookies onto a flat surface. Allow to cool to room temperature.
To make the frosting add the butter to a stand mixer with a paddle attachment (or a whisk attachment), beat until light and fluffy, about 3 minutes. Add the mascarpone and softened cream cheese, beat on high until full incorporated. Add the powdered sugar and beat until well combined. Add the syrup, mix on high, scraping the bottom to make sure the frosting is fully incorporated, until well combined.
Allow cookies to cool completely before frosting, garnish with sliced berries
Strawberry Syrup
Ingredients
4 cups chopped strawberries
½ cup water
¼ cup granulated sugar
Instructions
In a saucepan over high heat, add the strawberries, water and sugar. Bring to a boil, stirring frequently, for ten minutes.
Place a fine mesh strainer over a large bowl (reserve pan). Pour the strawberry mixture into the strainer and allow to all the liquid to drain into the bowl.
Use a spatula or wooden spoon to press the solids into the strainer to extract as much liquid as possible.
Put the liquid back into the sauce pan and simmer until reduced and thickened, about 5 minutes. Store in an airtight container in the fridge.
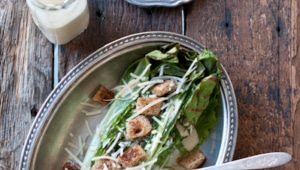
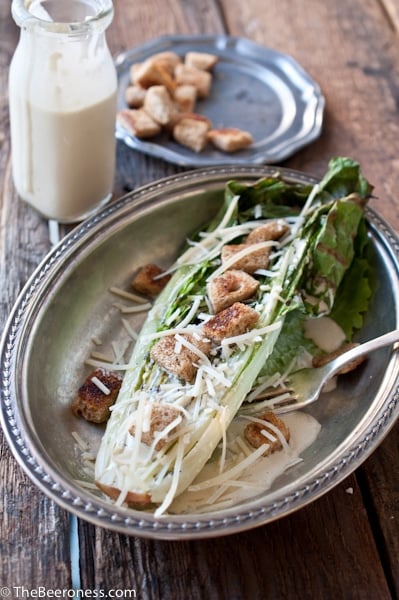
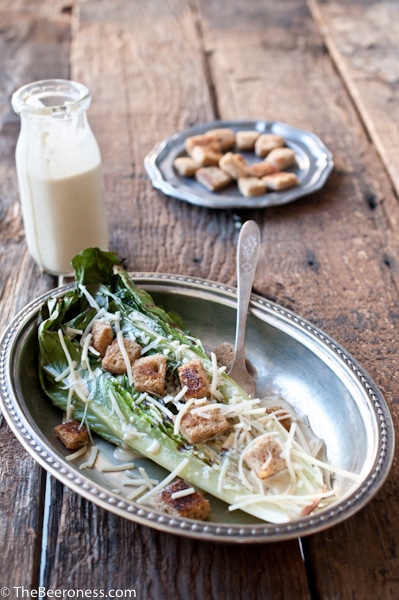
In the world of salad dressing, there isn’t a more fiercely debated member than Caesar. Some swear that the only way to make it is by hand, table side, others claim blasphemy if not strictly adhering to the original recipe, invited in the 1920’s in Tijuana Mexico by Caesar Cardini, while some insist that it’s not Caesar dressing without anchovies. All of these camps, win or lose, are still people who get riled up over a sauce that goes over lettuce, therefore I can’t fully respect any of them. It’s a condiment, lighten up.
My version, by sheer inclusion of the beer, can never really be held up as a true Caesar dressing. And while anchovies aren’t in the original version, the anchovy heavy Worcestershire sauce that was use is no longer available, making them essential to grab that true taste.
The inspiration for this dish came from a guy who used to frequent the restaurant I work at in college. He would order a Caesar salad, no grilled chicken thank-you-very-much, a shot of IPA, and a chocolate milk shake made with equal parts stout and milk. He would then pour about a tablespoon of the IPA on his salad and drink the rest. At the time I thought it was really strange, but he was a good tipper and I was a good smiler (all you need when you’re 19 and bring guys beer and food) so I encouraged his habits. The more I saw him, watched his obvious excitement when his beer flavored meal arrived, the more I understood how all those flavors worked (although I’m not sure I’d pair a milk shake with a Caesar salad).
It stayed with me, this beer-salad-beer-milk-shake diet he seemed to live on, and now I’m on board. He was on to something.
Brush the cut side of the lettuce with olive oil. Place on the grill, cut side down, until grill marks appear, about 3 minutes.
In a blender or food processor add the anchovies, garlic, egg yolks, mustard, and beer. Blend until well combined and light and frothy, about 3 minutes.
Heat the olive oil until hot but not smoking (20 seconds in a microwave is sufficient). While the food processor is running, slowly add the oil, drop by drop, until an emulsion forms. Add the salt, pepper, and Parmesan cheese, pulse to combine.
Place each Romaine half on a plate, drizzle with dressing, top with remaining Parmesan and croutons. Serve with knife and fork.
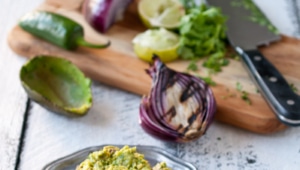
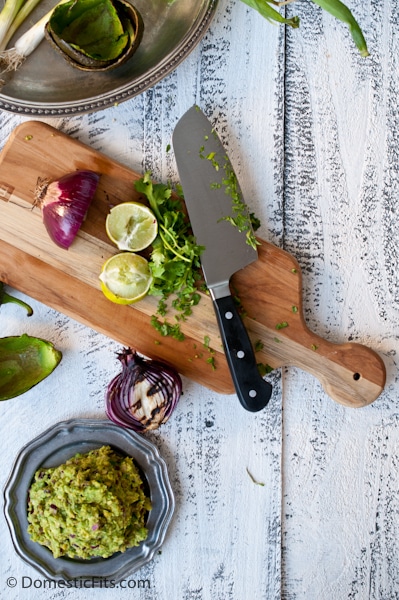
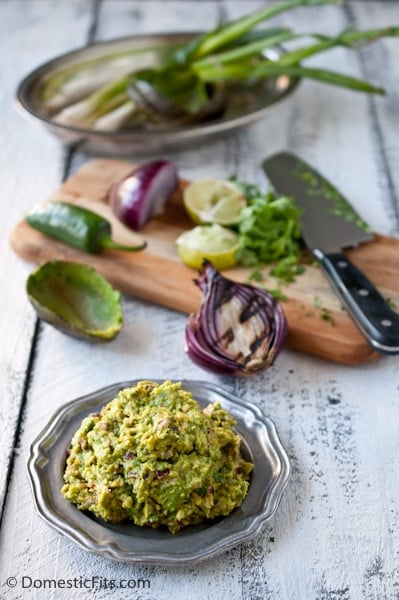
This grilled guacamole isn’t just a product of my grill junky status, grilling avocados is a fantastic idea and the perfect way to get some of that wonderful smoke flavors into your favorite summer dip. After all, the 4th of July is right around the corner, and next to Thanksgiving, it’s America’s favorite reason to take a day off work, eat too much food, and spend the day with people we love.
Of course meat was made for the grill, but vegetables have an ever better transformation when cooked with fire. When comes to grilling, anything goes, don’t forget about how amazing fruit is when it has a bit of char, or even slices of pound cake. Don’t discount pizza, it’s quick and fabulous off the grill.
Try something new next time you break out your grill, who knows, you might just find a new way to impress your guests.
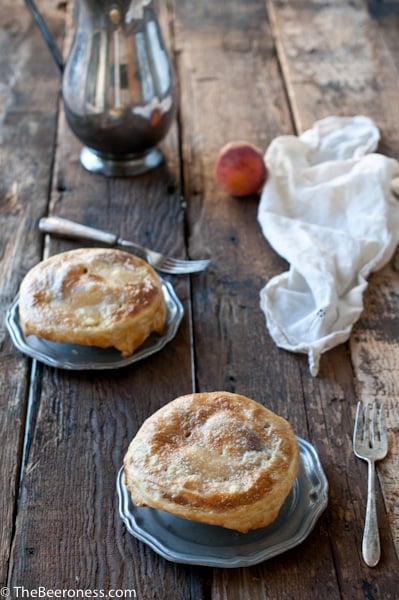
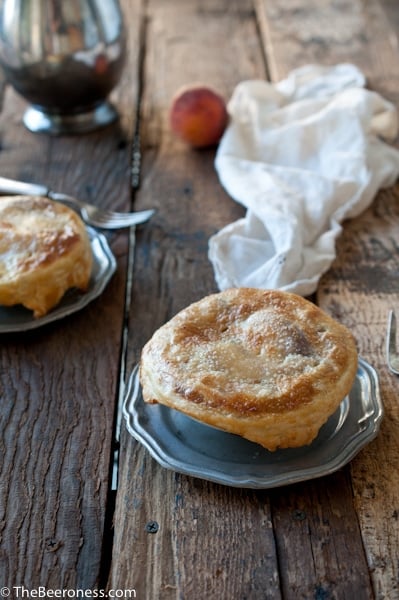
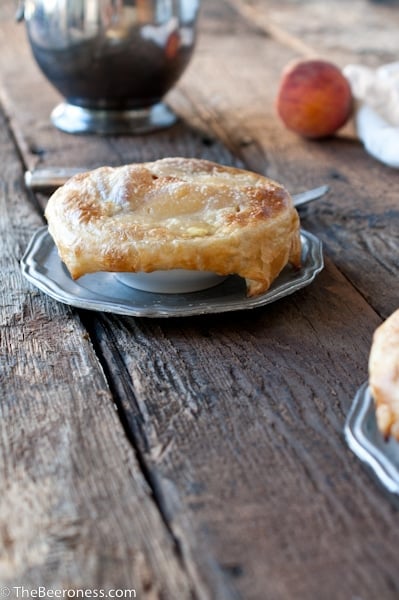
This bowl embodies a bit of culinary contradiction. It’s a bit of soup, and it’s a bit of a dessert, two genres of menu items that don’t seem to be easily meshed. But I have a love for soupy pies, given to me by a young kid I met in the back of a squad car.
I used to work with propation kids, I’ve told you that before, all from different parts of Los Angeles, some with gang ties, some without families, all wanting help in one form or another. Peter (*Name changed) was a walking contradiction to what most people assume was inside this big kid with a criminal record.
He was a sweet, honest, hard working kid that had never so much as been tardy from any class he’d taken. He had, however, stolen some food when his mom was too drunk to buy groceries and his little sister needed to eat, this earned him a all expense paid trip to Juvenile hall and then a spot in a Group Home. His grades were good enough, he always stayed out of trouble, and I was able to find him part time work at a Jewish deli & bakery in the Valley. When his birthday rolled around I asked what he wanted, the company I worked for had a small budget for special occasions that I was able to access for a present for him. "Pie making…stuff." He’d been working in a kitchen for weeks, fell in love with his ability to produce really great food, but outside work he’d never made food that didn’t require a microwave. I bought him a pie pan, a rolling pin, pie weights and pie cookbook. His reaction to the gift was much more shy and reserved that I’d expected. When I asked him why he was quiet, he said, "This is the first birthday present I ever got. Thank you."
I had to immediately whisk him to the kitchen to put said gift to use or I would have cried all over him. Instead we made a pie. The crust was gorgeous, but with limited ingredients in the state funded Group Home, the pie turned out a bit more watery than I had intended. I was deflated. He didn’t notice. He took one bite and a huge smile lit up his big face. It tasted great, and he had no preconceived ideas about what homemade pie looked like because he’d never seen one. Now, soupy pie makes me happy.
I found out a few years ago that Peter is doing really well, he’d put himself through culinary school, works as a chef and teaches classes at the community college.
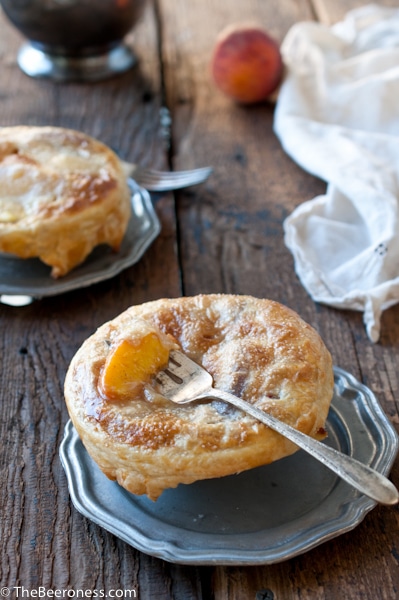
6cups6-8 large peaches yellow peaches, sliced (peeled if desired)
1/2cupbrown sugar
1/3cupwhite sugar
½tspcinnamon
1/4cupflour
3tbscornstarch
pinchsalt
1/3cuphoppy wheat beer
1sheet puff pastrythawed
Egg wash1 egg, 1 table spoon water, beaten
Instructions
Preheat oven to 400.
Add the peaches to a large bowl. Sprinkle with brown sugar, white sugar, cinnamon, flour, cornstarch, and salt. Use your hands to stir the peaches until they are fully coated with the dry ingredients and all of the dry ingredients have been moistened.
Pour the beer over the peaches, gently stir to combine.
Place 4 oven safe bowls (1 cup size) on a baking sheet. Divide the filling evenly among the bowls.
Roll the puff pastry out on a lightly floured surface, cut into 4 squares. Cover each bowl with a square of puff pastry. Brush with egg wash.
Bake at 400 for 18-22 minutes or until golden brown.
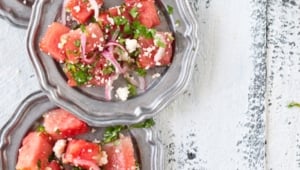
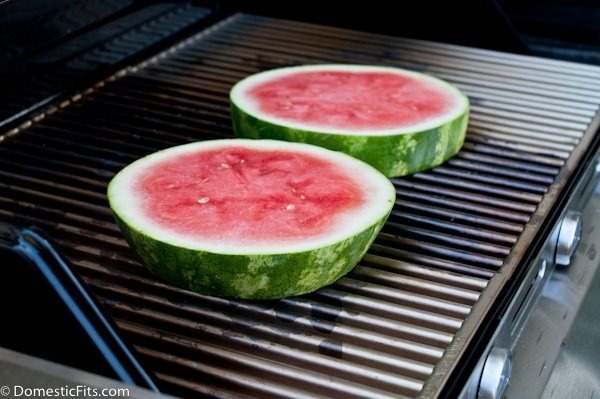
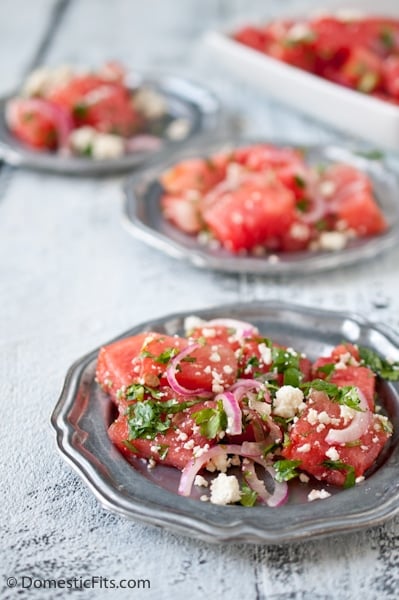
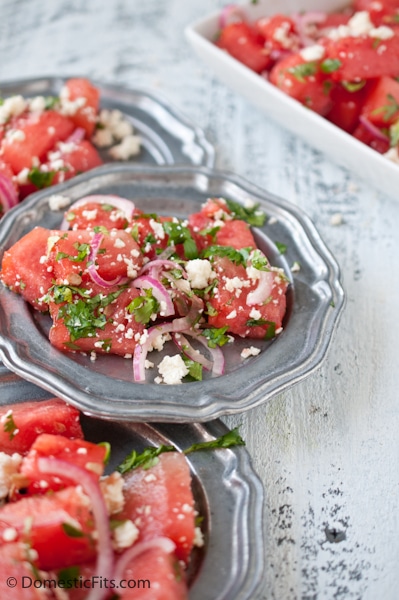
Grilled watermelon salad is the perfect summer side dish. Slice up some watermelon rings, throw them on the grill (literally if you’re brave enough), wait for some gorgeous smokey grill marks to spear and you’re half way there.
If you don’t have a grill, a grill pan will work fine. You can also skip the egregious use of fire all together and just cut the watermelon into bite sized chunks. The saltiness of the Cotija and the briny quick-pickled red onions set of that great sweetness of in-season watermelons.
It’s also a great salad to serve at room temperature, making it the perfect low maintenance side dish to serve on your summer party table. It also has a lovely sweetness that pairs well with a spicy food, I served it with these wings. It does not, however, keep very well. If you plan to make it ahead of time, keep all of the components separate and toss just prior to serving.
If you need a patriotic plan for the rest of the watermelon, check this out.
Grilled Watermelon Salad
Ingredients
¼ cup apple cider vinegar (or rice wine)
1 tbs raw honey
½ red onion, very thinly sliced
2 slices (2 inch thick each) watermelon
½ cup crumbed Cotija cheese (can substitute feta)
¼ cup chopped cilantro
Instructions
In a small bowl whisk together the vinegar and honey. Add the red onions, toss to coat. Cover and refrigerate for 20 minutes.
Place the watermelon slices on a hot grill until grill marks appear, about 3 minutes per side.
Remove the watermelon rind and chop the grilled watermelon into bite sized chunks, place in a large serving bowl.
Pour the red onion and the vinegar over the watermelon. Sprinkle with Cotija cheese and cilantro.
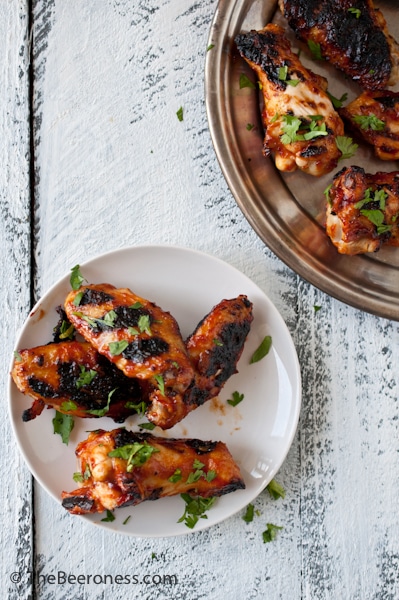
The above picture is pretty strong illustration of what I did nearly the entire weekend. Along with spicing up my beer wings, I also made a Sriracha butter for grilled corn. In other news,I ran out of Sriracha.
Maybe it’s the new grill that found it’s way into my backyard, or maybe it was eyeing this chicken recipe, or this one, but I really wasn’t able to think about anything but beering up some chicken and giving it a good grilled char.
I’m also trying to figure out how to grill a pie, but more on that later.
Grilled Beer and Buttermilk Chicken with Sriracha Glaze
In a large bowl whisk together the buttermilk, 12 ounces beer, salt, smoked paprika, cayenne, cumin, and brown sugar. Add the onions and chicken to the marinade. Cover and place in the refrigerator for at least 6 hours and up to 12.
Just prior to grilling, make the glaze. In a saucepan over medium high heat, whisk together all the glaze ingredients. Bring to a boil, stirring frequently, until thickened, about 8 minutes.
Remove the chicken from the marinade, discard marinade.
Place the chicken on a preheated grill, brush with glaze, cook for about 2 minutes, flip and brush with glaze. Continue to flip and brush with glaze every 2-4 minutes until chicken is cooked through, about 20-25 minutes (depending on the size of your chicken). Transfer chicken to a serving platter and sprinkle with cilantro.
My grill broke last summer. We were in the middle of a move, and I still held onto the hope that we could fix it, so it wasn’t replaced. In Southern California, grillin' isn’t just a summer activity, it’s a year long love affair, making an entire 13 months sans grill a really long time to deprive myself of the chard glory of fire cooked food.
We just replaced it this past weekend and I can’t get enough of it. I had been trying to satisfy my urge to grill via my grill pan. Although it is a pretty fantastic pan, after making this corn on my stove top in a grill pan I couldn’t take it anymore, I had to have the real thing. I think I’ve officially reached Grill Junky status, lets hope I can keep it under control.
Hope you don’t mind too much, but I’ll be posting my grilling adventures over the next few weeks. And probably well into fall.
My favorite pinterest board right now is my Grillin' like a Villain. Feel free to post links to grilled food I should be aware of!
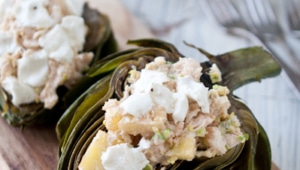
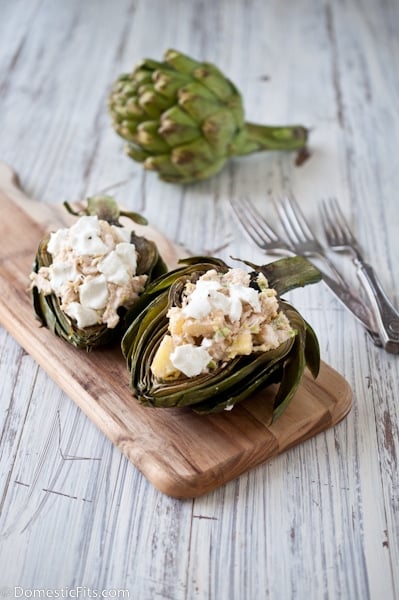
Grilled Artichokes with Crab Filling
Prep Time: 10 minutes
Cook Time: 28 minutes
Yield: 4 servings
Ingredients
For the Artichokes:
2 fresh artichoke
4 tbs melted butter
2 tbs lemon juice
½ tsp salt
½ tsp pepper
Vegetable oil for the grill
For the Filling:
4 rings fresh pineapples (cut off rind and remove core)
12 ounces fresh lump crab meat
½ cup sour cream
½ tsp salt
½ tsp pepper
½ tsp chili powder
½ tsp mustard powder
¼ tsp hot pepper sauce
8 large Brussels sprouts
2 ounce crumbled goat cheese
Instructions
Prepare a pot of lightly salted boiling water. Preheat the grill
Slice the artichokes down the center, lengthwise. Using a melon baller and a paring knife remove the hair from the choke as well as the inner purple leaves, leaving a cavity in the center of the each artichoke half.
Boil in the pot of lightly salted boiling water until the outer leaves tear away easily, about 20 minutes.
Grill the pineapple rings until strong grill marks appear on each side, about 3 minutes per side. Remove from grill, allow to cool slightly, chop.
In a small bowl stir together the crab meat, pineapple, sour cream, hot pepper sauce, ½ tsp each of salt, pepper, chili powder, and mustard powder.
Using a cheese crater, grate the Brussels sprouts, this should equal about 2/3 cup. Stir the grated Brussels sprouts into the crab mixture.
Once the artichokes are done cooking, remove from water and allow to drain.
Mix the melted butter, lemon juice, salt and pepper together in a small bowl. Brush artichokes on all sides with melted butter mixture.
Brush the grill with vegetable oil. Grill artichokes, cut side down, until nice grill marks appear, about 5-8 minutes. Baste artichokes with melted butter while grilling.
Remove from grill, fill the cavity of each artichoke with crab mixture and top with crumbled goat cheese. Return to the grill, crab side up, and cook just until the filling is warm and the cheese has started to melt, about 3 minutes.
Serve immediately.
Notes
Starting at the outside and working inward, use the artichoke leaves to scoop out and eat the filling.
Recently I read a response that a famous food personality had to the aggressive criticism of what is arguable to the worst food show on TV. She said that people who expect American households to cook with real, whole, unprocessed ingredients just don’t understand how real US households function, that it isn’t realistic to expect people to cook food that isn’t mostly can-and-box, defrost-and-feed type food.
I can’t underscore enough how much I not only disagree with this mentality, but how that line of thinking devalues food and the abilities of working America. I grew up in a family of ten, a family that was pay check to pay check on our best months, I’m not naive to what American households face when it comes to limited time and money.
I also have more faith in America, in food, and the resources we all have access to that can empower people to cook for their families in ways that don’t necessitate can openers and microwaves. The mentality that the best we can do is a jazzed up Hungry Man and a can of apple pie filling in the middle of a pre-made cake is demeaning. We can do better, regardless of budget. Corn is inexpensive, it’s easy to grow herbs in even the windowsill of an apartment, and inexpensive meat like chicken thighs have more flavor than their light meat counterparts. We can buy vegetables in season, when they are the least expensive, and freeze batches for months. We have options and abilities that extent far past what may be expected of us. Some of the best food I’ve ever had was handmade food in the poorest parts of the world, made with simple, inexpensive ingredients. America isn’t old enough to have a rich culinary history, but it isn’t too late to start building one that doesn’t begin with yelling a food order out of a car window into a metal speaker.
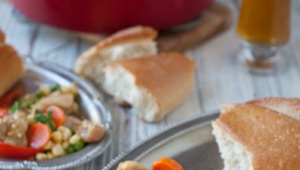
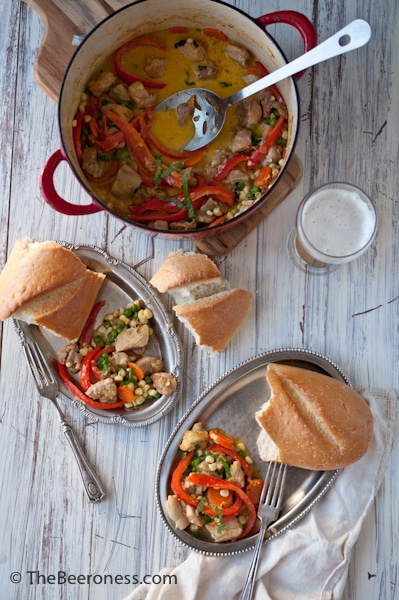
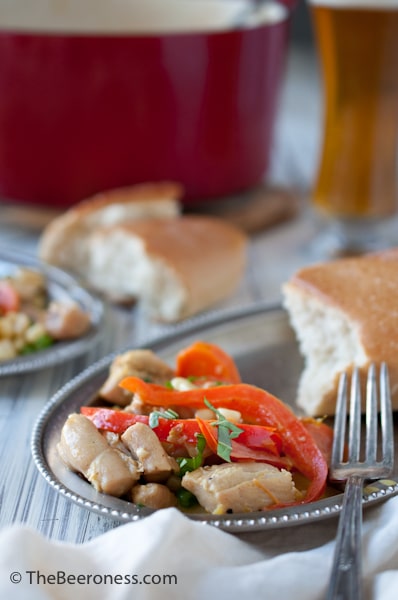
Heat olive oil in an enamel cast iron pot or Dutch oven.
Sprinkle salt and pepper on chicken cubes.
Once the oil is hot but not smoking add the chicken, cook until browned on all sides, about 8 minutes. Using a slotted spoon, remove chicken from pot.
Add red peppers, carrots and shallots (plus additional oil if the pan is dry), cook until vegetables have started to soften, about 8 minutes. Add the garlic and cook for about 30 seconds.
Sprinkle with flour, add the beer, scrapping to deglaze the pot, making sure the flour is well combined without lumps.
Add the chicken back into the pot along with the corn and peas.
Reduce heat to maintain a low simmer, cover with the lid at a vent and allow to simmer for ten minutes.
Stir in the lemon juice, remove from heat.
Stir in the cream, turmeric, salt and pepper. Sprinkle with basil.
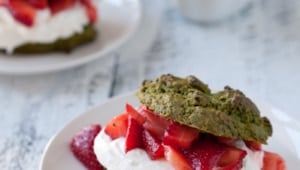
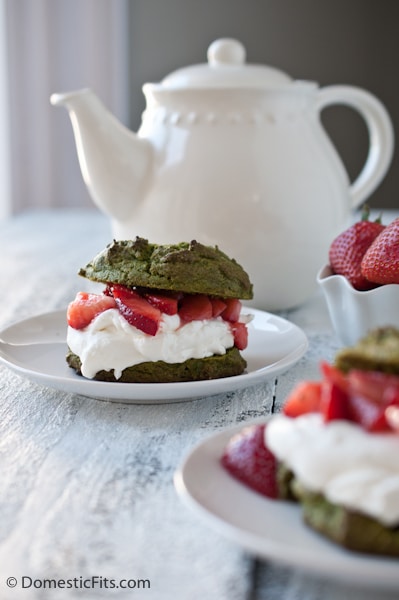
My first official assignment as a Brand Ambassador for California Strawberry Commission was to re-invent the strawberry shortcake. After a brief stop on the idea of another chocolate strawberry shortcake, and possibly a lemon lavender version, I settled on a matcha version, something I hope is new to you all (I like to feel inventive!), and matcha goes so well with strawberries.
I’ve had Matcha powder (Japanese green tea powder) in the back of my mind for a while, on my list of foods to bake with. It gives a great contrast of color and flavor to the gorgeous strawberries, if you’re a matcha lover, I think you’ll agree.
I also have a pin contest to tell you all about. It’s a great excuse to spend a little extra time on pinterest while checking out some fantastic strawberry recipes, getting inspired for those summer cook-outs and trying to win some extra cash!
Matcha Strawberry Shortcakes with Lime Whipped Cream
Prep Time: 10 minutes
Cook Time: 18 minutes
Yield: 6 servings
Ingredients
For the Shortcakes:
1 ½ cups all purpose flour
½ cup granulated sugar
1-2 tbs matcha powder*
1 tsp baking powder
1 tsp baking soda
pinch salt
6 tbs chilled unsalted butter, cut into cubes
½ cup whole milk
For the Strawberries:
4 cups strawberries, cleaned and chopped
¾ cup granulated sugar
2 tsp lime juice
For the Lime Whipped Cream:
1 ½ cups chilled heavy cream (or whipping cream)
1/3 cup powdered sugar
1 tsp lime zest
1 tsp lime juice
Instructions
Preheat oven to 400
Add flour, sugar, matcha, baking powder, baking soda and salt to a food processor, pulse to combine.
Add the butter cubes, process until the butter is incorporated, about 1 minute.
Add the milk, process until just combined.
Line a baking sheet with parchment paper. Drop large spoonful’s (about the size of a lime) onto the baking sheet, evenly spaced.
Bake at 400 for 15-18 minutes or until the tops have just started to brown, remove from oven and allow to cool.
In a large bowl, stir together the strawberries, lime juice and granulated sugar, set aside.
Once the shortcakes have cooled, make the whipped cream. In the bowl of a stand mixer beat the cream, powdered sugar and lime zest until soft peaks form. While the mixer is runner, add the lime juice, beat until incorporated.
Split the shortcakes and fill with strawberries and whipped cream.
Notes
*Note: 2 tablespoons of matcha powder will give you a strong green tea flavor and a deeper green color. If you want a more mild, mellow flavor, add only 1 tablespoon.
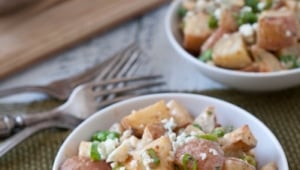
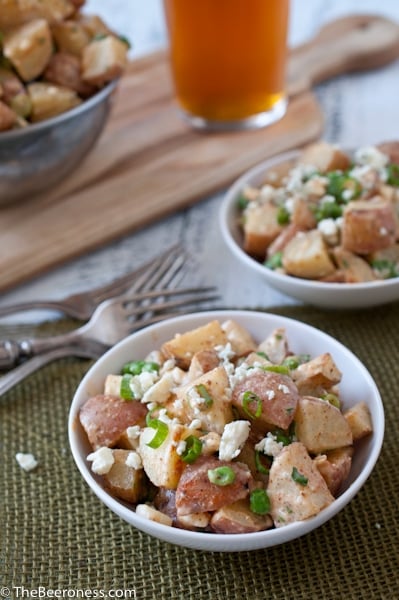
The anemic looking, plastic tub dwelling potato salads of my youth put a pervasive distain in my culinary soul for the union of the words "potato" and "salad." It wasn’t until I found a non-mayo based version that I really started to see potential. While I’ve used sour cream, blue cheese dressing and even bacon garlic aioli, the mustard vinaigrette edition is a fun twist. I also like to roast the potatoes rather than boil them, it prevents the possibility of the over cooked mush and it brings out flavors that might otherwise be washed away in boiling salted water.
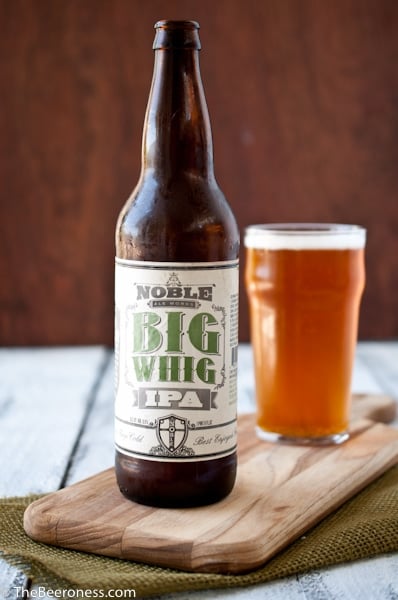
For the vinaigrette I used an IPA from a brewery not to far from me, Noble Ale Works out of San Diego. A newer brewery that, rumor has it, just celebrated their second anniversary. Like most brewers I’ve been lucky enough to come across, this team seems profoundly dedicated to what they do, fiercely loyal to to their community, and in near constant pursuit of the perfect brew.
Big Whig IPA is a fine example of a West Coast IPA, with a bold hoppyness that’s balance with a pale male, citrus notes, a bit of caramel and some pine. The accessibility of this beer makes it perfect to add to your summer beer rotation and the light seasonally appropriate flavors make it perfect for a salad dressing.
2weight ounces crumbled Roquefort cheeseabout 1/3 cup
¼cupflat leaf parsleychopped
½cupshelled peas
Instructions
Preheat oven to 400.
Heat the duck fat (or olive oil for vegetarian) in a large oven safe skillet (cast iron preferred). Add potato cubes and 1 tsp salt, tossing to coat. Cook until potatoes start to brown, about 5 mintues. Transfer skillet to oven and roast for 20 minutes or until fork tender.
In a blender or small food processor, add the shallots, garlic, mustard, honey, IPA, smoked paprika, pepper and ½ tsp salt, process until well combined, about 2 minutes.
In a large bowl add the potatoes, mustard vinaigrette, green onions, blue cheese, parsley and peas, toss to coat. Serve warm.
I use this Duck Fat because it’s well priced and good quality. A little goes a long way so one jar will last a while. (Affiliate Link)