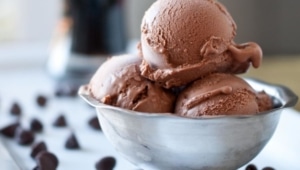
It’s either the summer death rattle manifesting itself in an ice cream during the first week of fall, or it’s the nexus of the best of summer treats and the best of fall beers joining forces at the perfect moment.
For this, I used Bison Chocolate Stout. Rich, dark and beautiful. Although I did try and hold out for the Stone Chocolate Mint Stout that I’ve been teased with for months now, I may have to give this recipe another try when the red tape is lifted and the world is able to indulge in that.
7ouncesof 60% dark chocolate with peppermint oilsuch as Dark Chocolate Mint from Green & Blacks, broken into chunks
4egg yolks
1 1/4cupwhite sugar
Instructions
In a pot over medium high heat, add the cream, milk, mint leaves cream and stout. Bring to a gentle simmer. Remove from heat, remove and discard mint leaves, and stir in the chocolate until melted.
In a separate bowl, add the egg yolks and the sugar, whisk until well combined. Slowly add the chocolate milk, whisking continually, until about 1/2 the mixture has been added to the egg yolks. Add the egg yolk mixture back into pot, whisk until well combined. Return pot to heat and bring to a mild simmer.
Refrigerator until chilled, about 3 hours.
Churn in ice cream maker according to manufactures directions. Chill until firm.
Green & Blacks provided me with a sample of chocolates used in this post. I was not monetarily compensated for this recipe. All thoughts, opinions and ideas are my own.
I can’t decide if I’ve been obsessed with Dessert for Breakfast or if it’s really an obsession with Breakfast for Dessert.
Well, you say, it depends on what time of day said meal is being consumed. Although if this dessert/breakfast hybrid is eating all day long, the lines get a little blurred.
I figured out that although I eat pretty well most of the week, I let myself eat whatever I want at my Saturday morning breakfast, making me want to get the most bang for my bite. Hence, breakfast and dessert crammed into one plate. I hope you don’t mind too much.
And if you want to get craaaazy, go ahead and top this with vanilla ice cream. And sprinkle it with bacon. But make sure and invite me over.
Brownie Waffles
Ingredients
1 cup flour
2 tsp baking powder
1/3 cup cocoa powder
1/2 tsp salt
1/2 cup dark chocolate chips
1 cup milk (divided in half)
1/4 cup vegetable oil
1 tsp vanilla extract
2 eggs, divided
1/4 cup sugar
Instructions
Preheat waffle iron according to manufacturers specifications.
Get out three bowls.
In the largest bowl, add the flour, baking powder,cocoa powder, and salt, stir.
In a microwave safe bowl, add the chocolate chips and 1/2 cup milk. Microwave for 30 seconds, stir and repeat until melted. Add the remaining milk, vegetable oil, vanilla and only the yolks of the two eggs.
Add the whites to the third bowl, along with the sugar. Whip with a hand mixer until soft peaks form, about 5 minutes.
Make a well in the dry ingredients, add the chocolate milk mixture and stir until just combined. Gently fold into the egg whites until just incorporated.
Cook in waffle iron according to manufacturers specifications, using butter flavored cooking spray if indicated.
And I recommend topping with whipped cream, or ice cream, or frosting, or chocolate chips, or all of it.
If you live in the Los Angeles area, I’m going to need you to do me a favor. I’ve somehow been booked on CBS, Los Angeles mid-day news with a cooking segment this Friday, August 31st. They want me to do a quick Cooking With Beer segment on the news at noon. People will be hungry, naturally, it is lunch time, and my hope is that this will persuade them to ignore any brief moments of nervousness that I have.
But If you could tune in, and support me, that would be great. I’m not really nervous, I keep waiting for that to set in, but it hasn’t yet. When it does, I would love to know that people who have been visiting me here on this little blog for the past year are out there cheering me on.
That would be great.
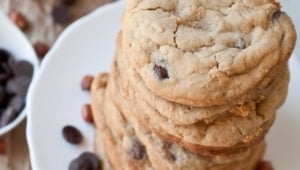
In the meantime we’re going to make some cookies. These call for the classic Beer Nuts, which I found myself in possession of after a particularly round night of cards at my house. Several bags of Beer Nuts left by an anonymous donor. And I can’t just leave them in my pantry, I need to find a use for them.
We are also going to revisit that crazy idea I have of making beer extract. Because vanilla is just too…well, vanilla.
In a pot over medium high heat add the beer. Cook, stirring occasionally, until reduced to about 1 tbs.
In the bowl of a stand mixer, add the butter and both types of sugar, beat until well creamed. Add the egg and beat until well combined. Add the 1 tbs of beer extract and beat until well combined, scraping the bottom to make sure all the ingredients are well combined.
In a sperate bowl, add both types of flour (these two types of flour are very important to the end result of your cookies, regular all purpose flour will not give you the same results), cornstarch, baking powder and salt. Mix well. Add dry ingredients to the stand mixer and mix on medium/low speed until just barely combined, don't over mix. Add the chocolate chips and Beer Nuts, and stir until incorporated.
Resting the dough is an important step in this recipe. Cover a baking sheet with parchment paper, scoop golfball sized scoops of dough, roll them into round balls and place on the baking sheet, cover with plastic wrap and chill for at least 4 hours.
Preheat oven to 350.
Bake for 20-22 minutes or until light golden brown, don't over bake. (If you don't chill the dough, or if you make smaller sized cookies, the cooking time will be much shorter. Start to keep an eye on your cookies after about 14 minutes).
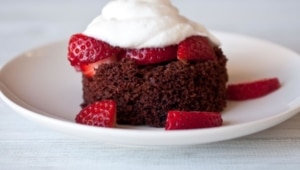
(Chocolate Porter Strawberry Shortcakes With Beer Whipped Cream)
I’m taking a huge risk here.
You may have taken one look at this post and decided that I’ve lost my magic. Chocolate beer cake is as common as Nascar sweatpants in Walmart. But unlike motor sports fashion blunders in public, I loved this dessert.
I’m combining a past evoking childhood treat with my beer loving present tense self, and topping it with beer whipped cream. Strawberry shortcakes were one of my favorite desserts as a kid, but growing up I never had them from scratch. I was raised in a very prepackaged, frozen food section, shelf-stable house, with a mom who was trying to feed all of her 8 daughters (yes, that isn’t a typo, I have 7 sisters) with no time for any culinary adventure beyond reheating and assembling. Completely understandable.
Making my childhood memory of strawberry shortcakes those pre-packaged round sponge cakes, with Cool Whip and chopped strawberries.
So this is the "I cook from scratch and add beer" version of that. Although not a traditional "shortcake," I hope once I top it with drunken whipped cream and fresh berries you’ll forgive the misstep in terminology.
Chocolate Porter Strawberry Shortcakes With Beer Whipped Cream
For the cake:
3 cups cake flour
2 tsp baking soda
1 tsp baking powder
3/4 cup cocoa powder
1 tsp salt
2 sticks butter (softened)
2 cups sugar
5 eggs
1 tbs vegetable oil
12 oz Porter beer
For the strawberries:
4 cups strawberries, hulled and chopped
1/2 cup sugar
For the whipped cream:
2 cups heavy cream
1/2 cup powdered sugar
2 tbs porter beer
(makes 10)
Preheat oven to 350.
In a bowl, combine the flour, baking soda, baking powder, salt and cocoa powder.
In the bowl of the stand mixer cream the butter and sugar. One at a time add the eggs, beating well and scraping the bowl between each addition, then add the oil. Alternating between the beer and the dry ingredients, add both a bit at a time, starting and ending with the dry ingredients, stir until just barely combined.
Grease and flour two 8 inch cake pans.
Pour batter into prepared pans. Bake at 350 for 20-25 minutes or until a toothpick inserted in the center comes out clean. Allow to cool.
Invert the cake pan onto a flat surface. Using a 2 1/2 inch biscuit cutter, cut out 5 circles from each cake round (you can also use a large knife to cut them into squares).
Place chopped strawberries in a bowl with sugar, stir to combine. Allow to sit at room temperature for ten minutes.
In the bowl of a stand mixer, add the cream, powdered sugar and 2 tbs beer. Whip on high until soft peaks form, about 4 minutes.
Place one cake round on a plate, top with strawberries and then with whipped cream.
To see my Coconut Oat French Toast, click on the picture:
Why would a meat eating cheese monger such as myself want to make something vegan? Several reason, not the least of which are my friends and family who can’t or wont eat dairy. As meat eaters, it is even more important for us to experiment with vegan and vegetarian food and not hang on the crutch of animal products with the exclusion of other foods. We need to have all types of recipes in our arsenals, not just to accommodate those who might be guest at our tables, but in order to discover foods that we didn’t know we loved, because we didn’t think food with "vegan" labels applied to us. In exploring vegan cooking I have discovered what an amazing texture vegetable shorting lends to frosting, how rich and beautiful coconut milk tastes, and how fruit purees can be a flavorful stand in for butter.
Dairy free baking is something I want to lean towards more. Only using milk products when other substitutions would compromise the overall product, but in many cases vegan substitutions make the end result just as good or even better. Plant based foods just feel better in my body and if the taste of the food isn’t harmed then why would I make any other choice?
I started exploring dairy free cooking when three friends where coming over for dinner. One was kosher (meat and dairy can not be served together) one was allergic to cow’s milk and the other was breast-feeding a baby who couldn’t have dairy. All three needed a dairy free meal. I realized how much dairy I use. Why? I love plants, produce, vegetables, fruit…why all the milk?
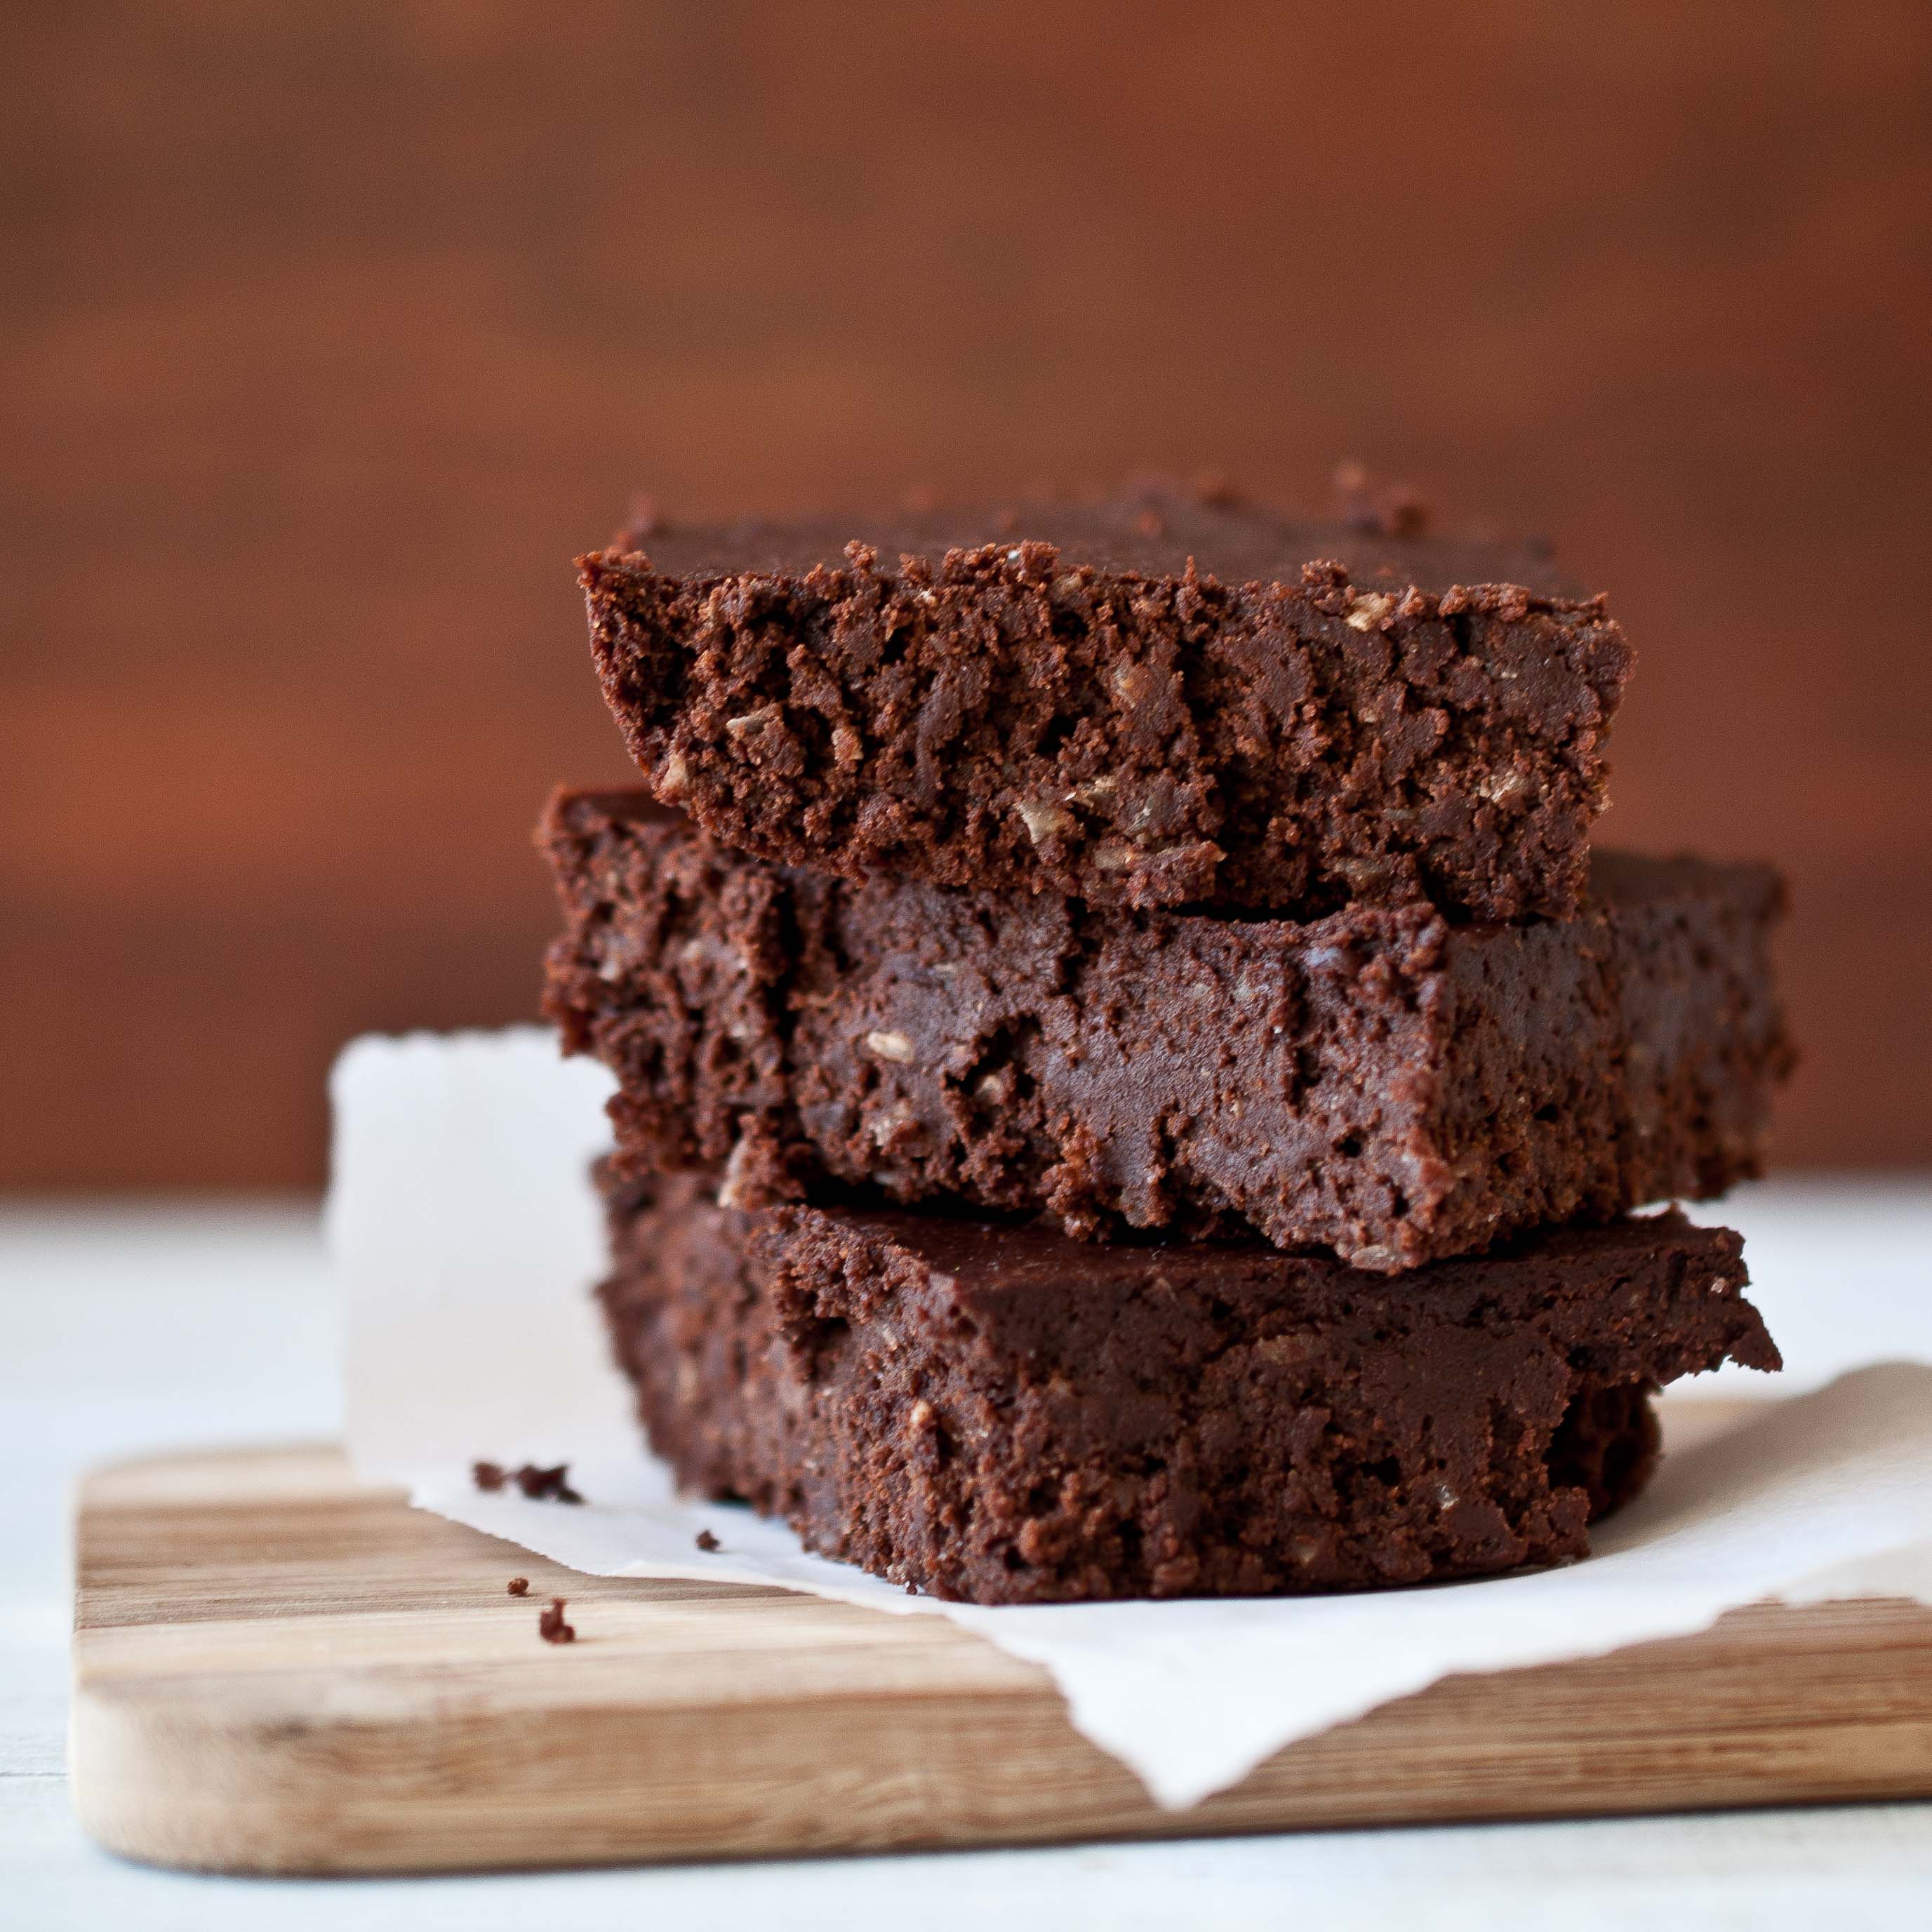
These brownies where really good. Not just "good for vegan" but just really good. So fudgy and intensely chocolatey, even Tater couldn’t keep her little fingers off them.
She took a bite and then carefully put it right back where I had place it. So cute, I love that kid.
Chocolate Coconut Vegan Brownies
1/3 cup coconut oil
1 cup agave nectar
1/2 cup unsweetened soy milk (can sub coconut milk)
1/3 cup strong coffee*
1 cup cocoa powder
3/4 cup whole wheat flour
1/2 cup unsweetened shredded coconut (I used Bob’s Red Mill)
1/2 tsp salt
In a bowl, beat together the coconut oil and the agave nectar until well combined. Add the soy milk and coffee and beat again. in a separate bowl, add the cocoa powder, flour, shredded coconut and salt and stir to combine. Add the dry ingredients to the wet ingredients and stir until just combined, don’t over mix.
Spray a 8×8 inch baking dish with cooking spray (or line with parchment paper) and pour bater into prepared pan.
Bake at 350 for 16-18 minutes. You don’t want to overcook these or they will be too dry. Allow to cool before cutting into.
For an extra treat, serve warm topped with coconut milk ice cream.
*Note: Coffee intensifies the flavor of chocolate, with no trace of a coffee taste. If you don’t like coffee, or don’t have a coffee maker, stop by a Starbucks and order a black coffee, use 1/3 of a cup and freeze the rest in ice cube trays for use in future chocolate baking.
Last week I was able to sit down with a guy, who in just two years went from a home brewer who was opening the doors to his first bar, to owning three bars and the fastest growing craft brewery in California.
If you live in Los Angeles, and you’re a craft beer fan, I’m certain you have heard of Tony Yanow of Golden Road. If you haven’t you are going to want to acquaint yourself with him and what he’s building. Here is my article for your craft beer research indulgence.
He is also the man who helped create one of my favorite IPA’s. Golden Roads, Point The Way IPA.
As I’ve hammered into you several times before, IPA’s make terrible cooking subject, which is why I rarely use them. This is a recipe that doesn’t require cooking, and the tart hoppiness of the IPA is a great compliment to the cherries.
And, as a salute to my fellow beer lovers who happen to be vegan (more vegan beer fans exist than one would expect) this is an easy recipe to veganize.
8 oz Dark Chocolate (60%) (For vegan, use vegan chocolate. Most higher end brands are vegan at 60%, but make sure to check if you want to make sure)
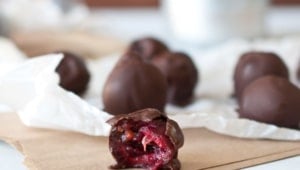
Pit the cherries and add them to a loaf pan in one tight layer. Pour the IPA over the cherries and allow to soak at room temperature for 2 hours and up to 6. Drain and allow to dry for about 20 minutes (they need to be dry before chocolate gets involved).
To temper the chocolate: (*Note. Tempering chocolate makes it shiny and gives it a nice snap. If you don’t care so much about that, you can just add the chocolate to a microwave safe bowl and microwave on high for 30 seconds, stir and repeat until melted)
In a double boiler melt the chocolate over medium heat. If you don’t have a double boiler, add a metal bowl over a pot of water, making sure the bottom of the metal bowl does not come in contact with the water in the pot.
Chop the chocolate into chunks and add about half to the top of the double boiler. Heat the chocolate to 115 degrees (use a clip-on candy thermometer to do this). Add the rest of the chocolate and stir until all of the chocolate has melted and is now down to about 90 degrees.
A few at a time, add the cherries to the chocolate with a fork, roll around until coated, remove with the fork and allow to drain a bit, then place on a piece of parchment paper to harden. Repeat for all cherries. Chill until ready to serve.
For years I’ve been insisting that I hate coconut. Ever since those crappy Almond Joys and Mounds bars started taking up valuable real estate in my orange plastic pumpkin during childhood Halloweens, I convinced myself that coconut was to blame. Assaulting me with it’s odd texture that wasn’t quite crunch and wasn’t quite chewy and it definitely was not caramel.
And with the loathsome of all Trick or Treat offerings, the Neapolitan Sundaes as a side kicks in my Trow Away pile of post Halloween candy sorting, my distain was cemented. I hated coconut.
Even when I discover Malibu Rum in college, and I would only buy coconut scented sunscreen because the smell made me blissfuly happy, I still wouldn’t release my grudge.
And even, after years of growing up with the idea that International Cuisine was Costco Lasagna and Taco Bell, I figured out that I adored Chicken Panang so much I wanted to bathe in it, still my aversion persisted.
And when I waitressed in dozens of mid-level family style restaurants, with shrimp shooters and extreme fajitas avoiding conversation about my Flare, and I was introduced to the white trash joy of Coconut Shrimp, it changed nothing.
I hate it, I’m serious.
It wasn’t until I read a post from my friend Julia that It all clicked. I don’t hate it. I hate crappy candy. Huge difference.
I went directly to my nearest store and bought some Bob’s Red Mill Coconut and set out to bake.
I made these for some friends who came over for a poker night, one of whom said, "No thanks, I don’t like coconut."
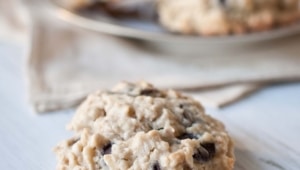
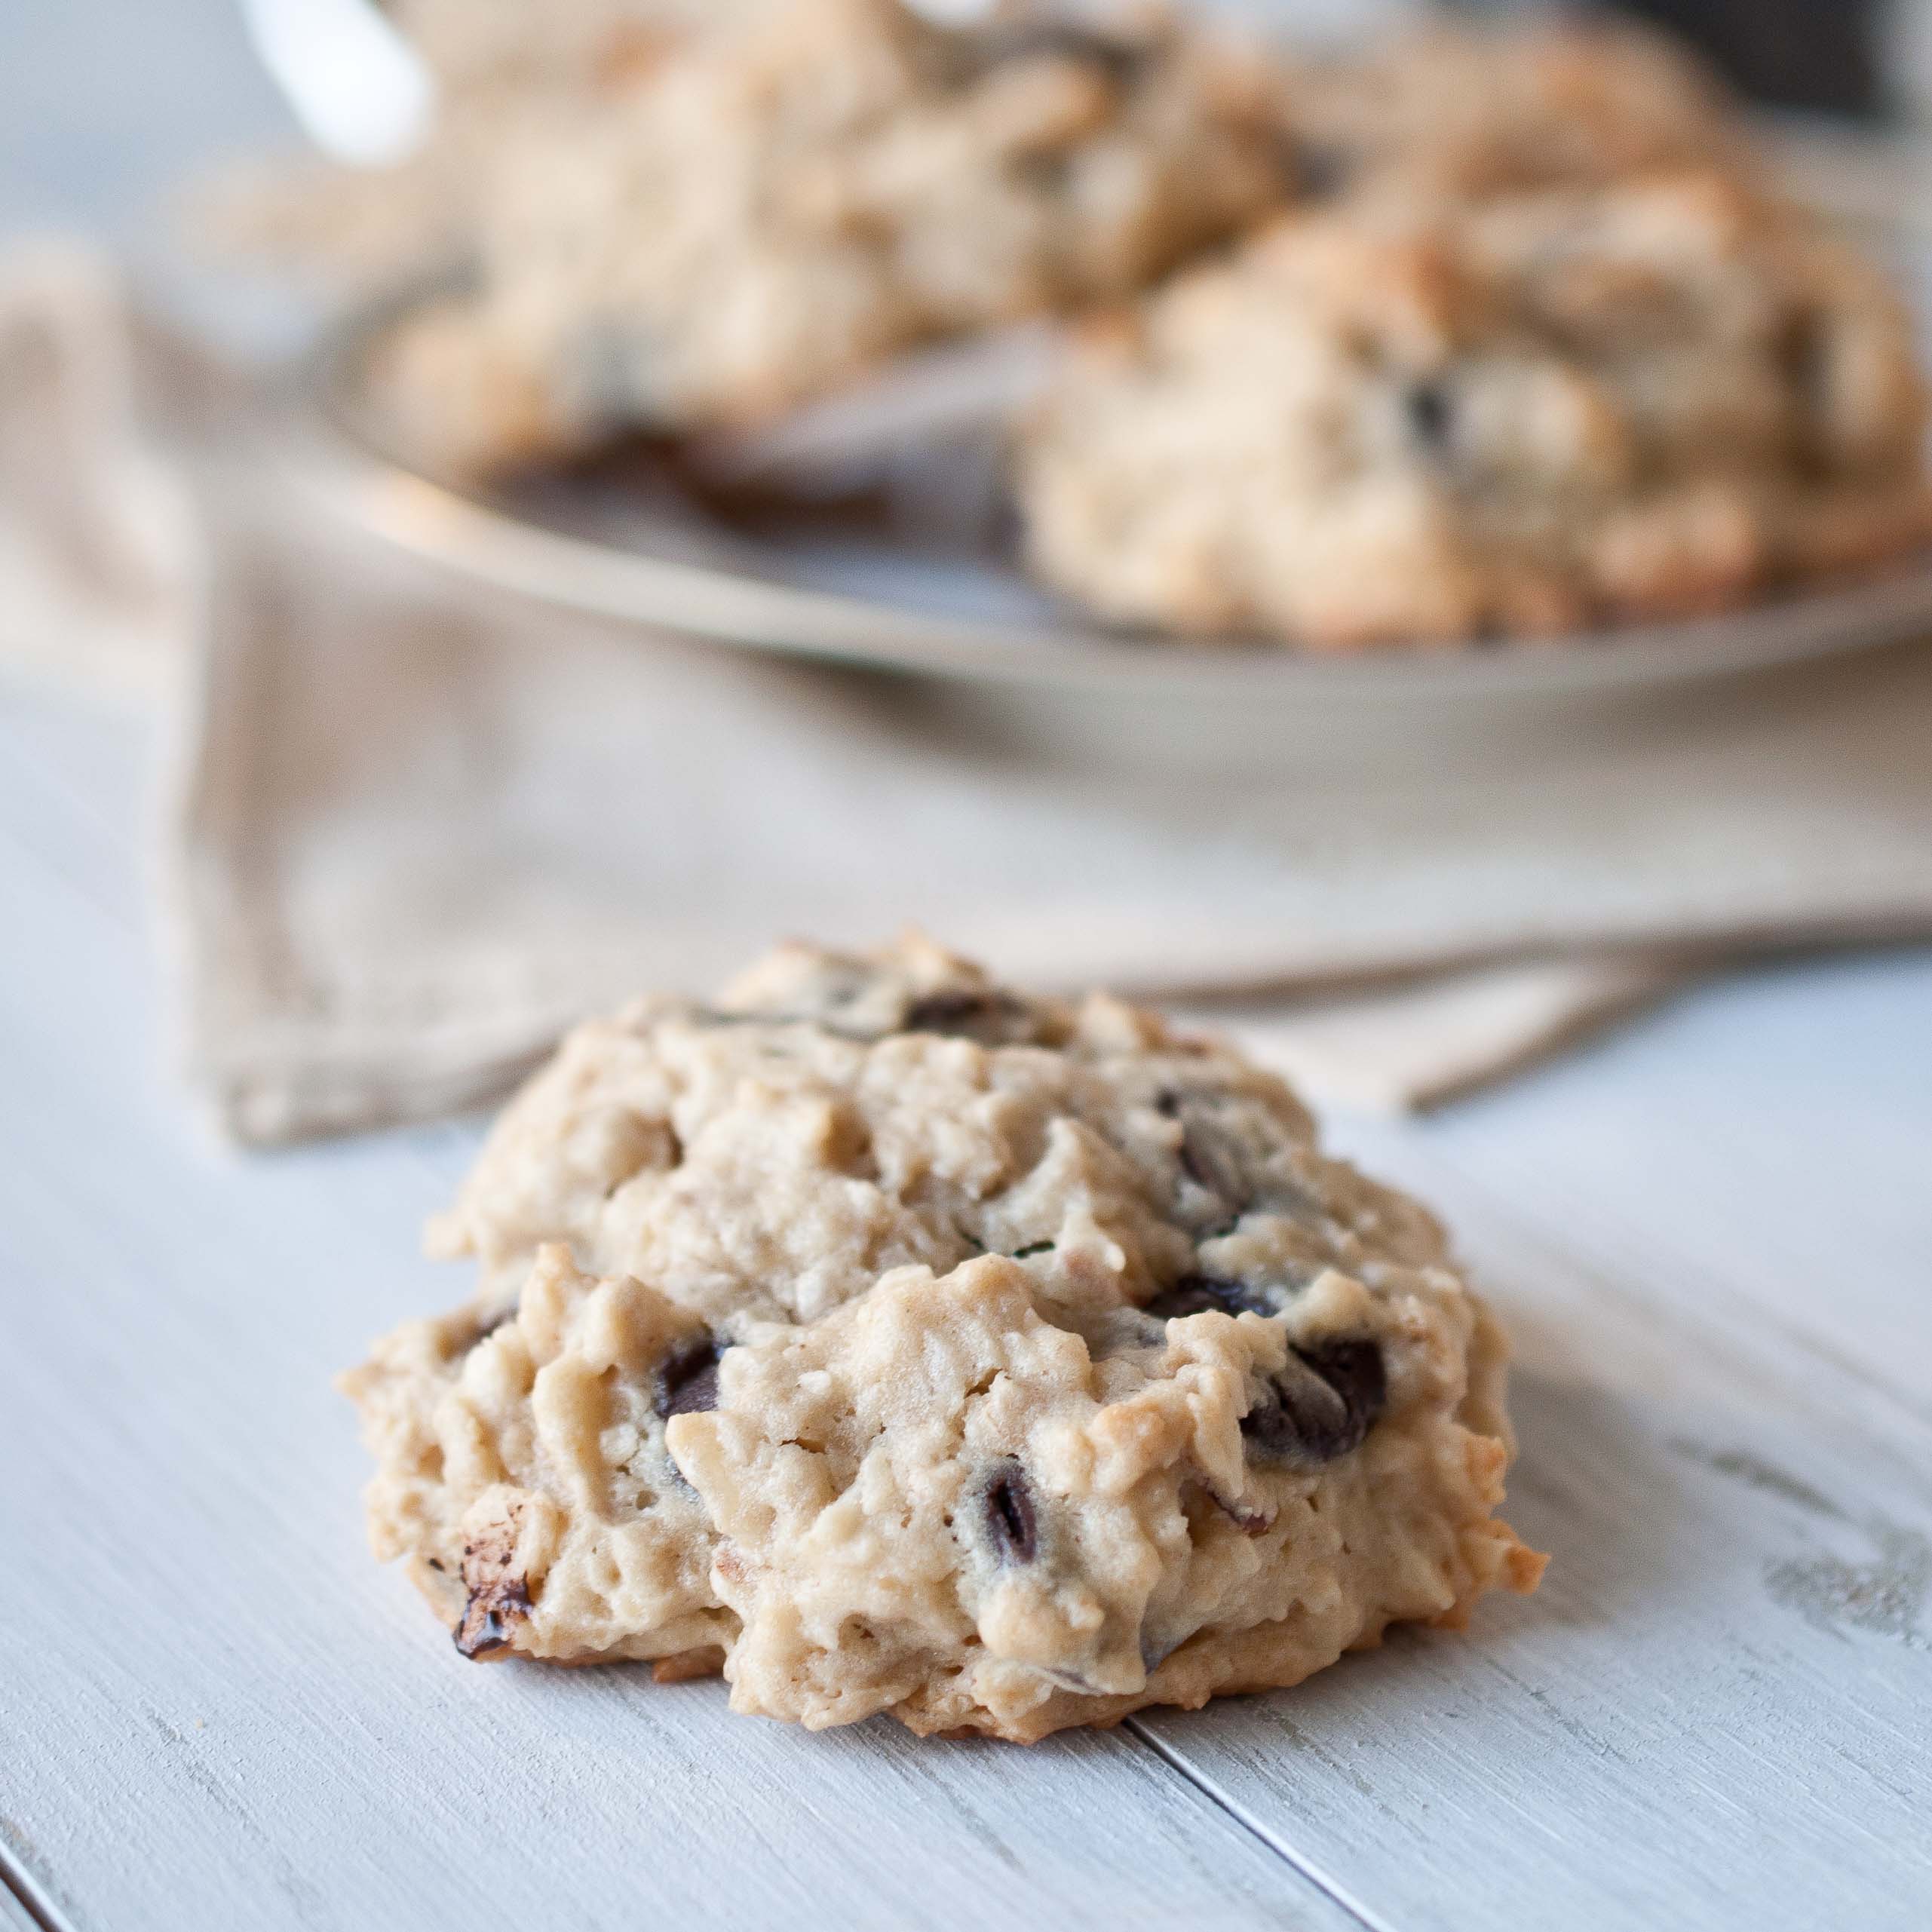
After I begged and pleaded for him to just take one tiny taste, he ate five cookies. Afterwards, he said to me: "I totally thought I hated coconut until I ate these cookies."
I have no idea what you mean.
Other than the fact that these cookies rule. And so does coconut.
My husband and I at Poker Night, not exactly winning,but having a great time.
Coconut Chocolate Chop Oatmeal Cookies
1 stick of butter
3/4 cup brown sugar
1/2 cup white sugar
1 egg
1 tsp vanilla
1/2 cup coconut milk fat (scraped off the top of a full fat can of coconut milk)
In the bowl of a stand mixer, cream the butter and both sugars. Add the egg and vanilla and beat on high until well combined. Add the coconut milk and beat until well combined.
In a separate bowl, add the remaining ingredients (other than the almonds and chocolate chips) and stir until well combined.
Add the dry ingredients into the stand mixer and mix on low until just barely combined. Add the chocolate chips and the almonds and mix again until barely combined.
Cover a baking sheet with parchment paper.
Using a cookie scoop or an ice cream scoop, scoop out balls approximately the six of a golf ball and place evenly on the baking sheet.
Refrigerate for 2 hours, up to 24.
Preheat oven to 350.
Bake for 20-22 minutes or until lightly golden brown. You don’t want to over cook these, so start to check on them at about 12 minutes in case your oven cooks way faster than mine. Especially if you skip the refrigeration step, room temperature cookies will be done a lot sooner. Once you pull them out of the oven, slide the parchment paper onto the counter and allow to cool.
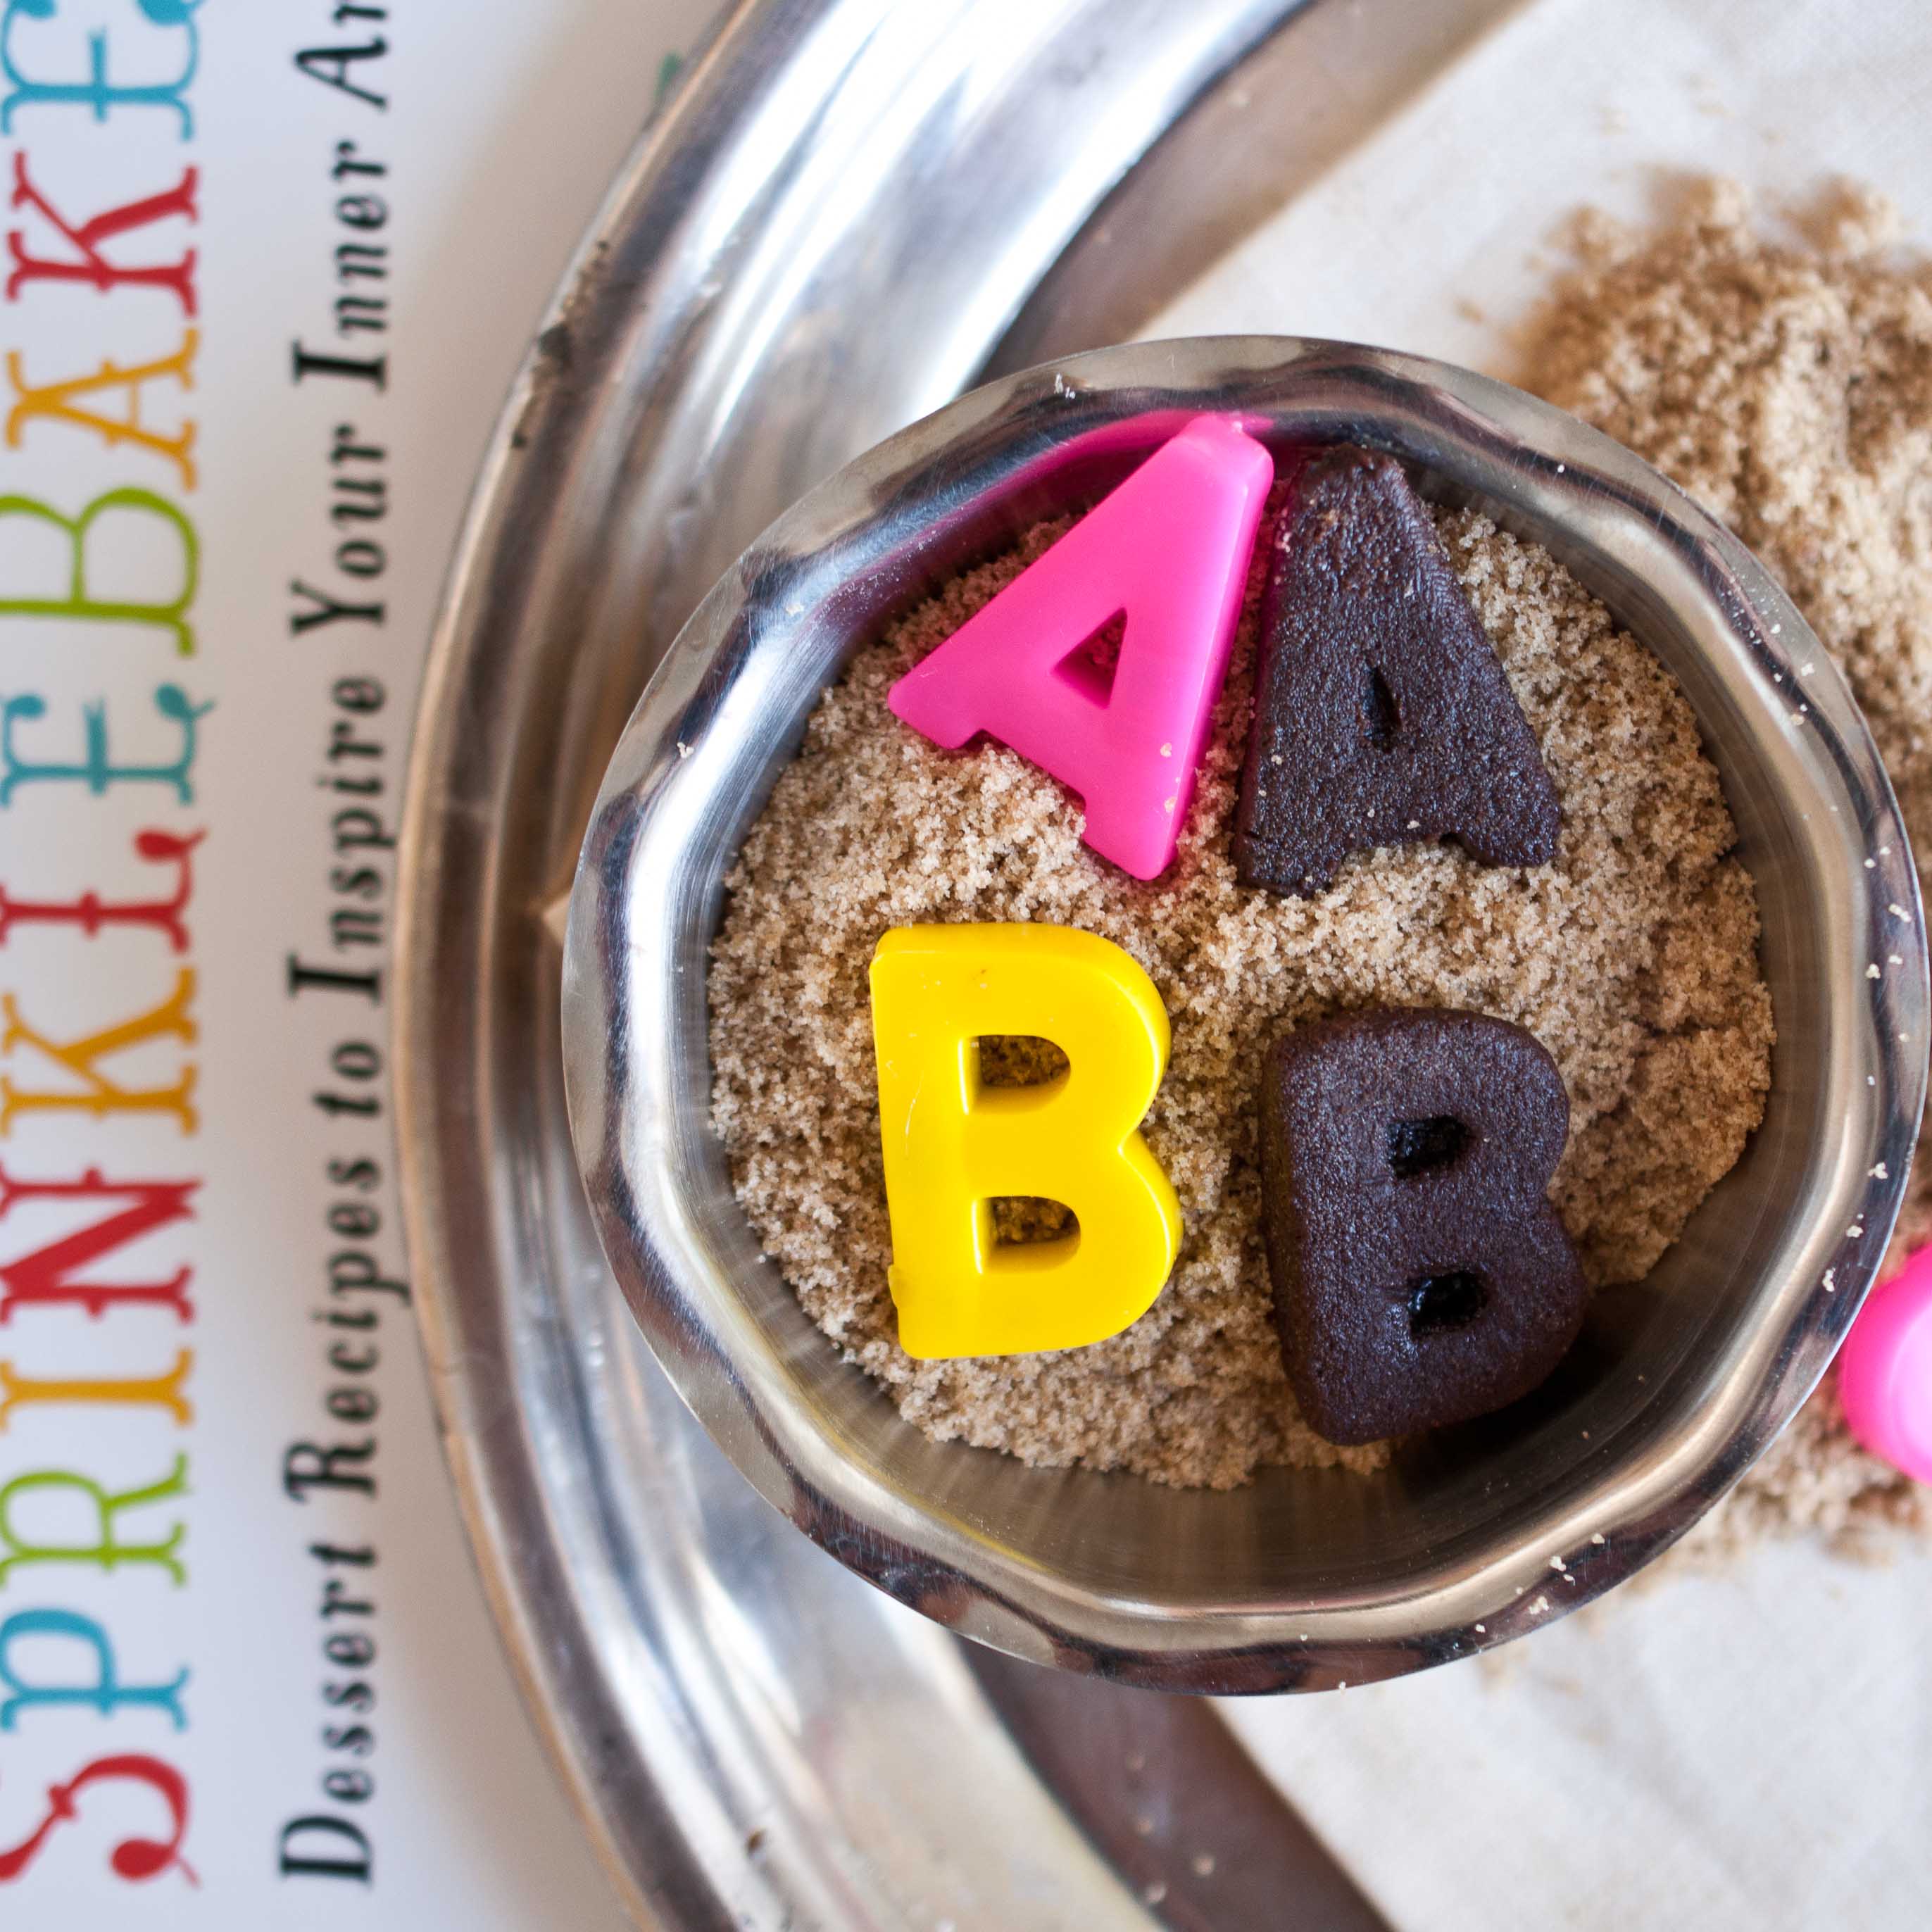
Cookbook is a bit of a misnomer with SprinkleBakes. It’s more like an education. Like your best friend who happens to be an incomprehensibly talented pastry chef standing in your kitchen teaching you everything she knows about baking. Of course there are recipes, they range from redefining the idea of a basic cake to fabulously well crafted mousses, but it’s more than that. As with most cookbooks these days, you get more than just a compilation of recipes, it’s a catalouge of all the tips and tricks you didn’t even know were missing from your repertoire. SprinkleBakes is filled with instruction that not only inspires you to create your own works of art, it gives you the tools you need to do so. From simple to extravagant, everything you learn is accessible, no matter what your skill level.
This is the perfect addition to the kitchen of anyone who wants to learn more about the art of baking, no matter how long or short your’ve been at it.
I was so impressed by the tips and tutorials in this book, they seemed endless, like every time I flip though it I am bound to learn something new. This is a book that I will be referencing for years.
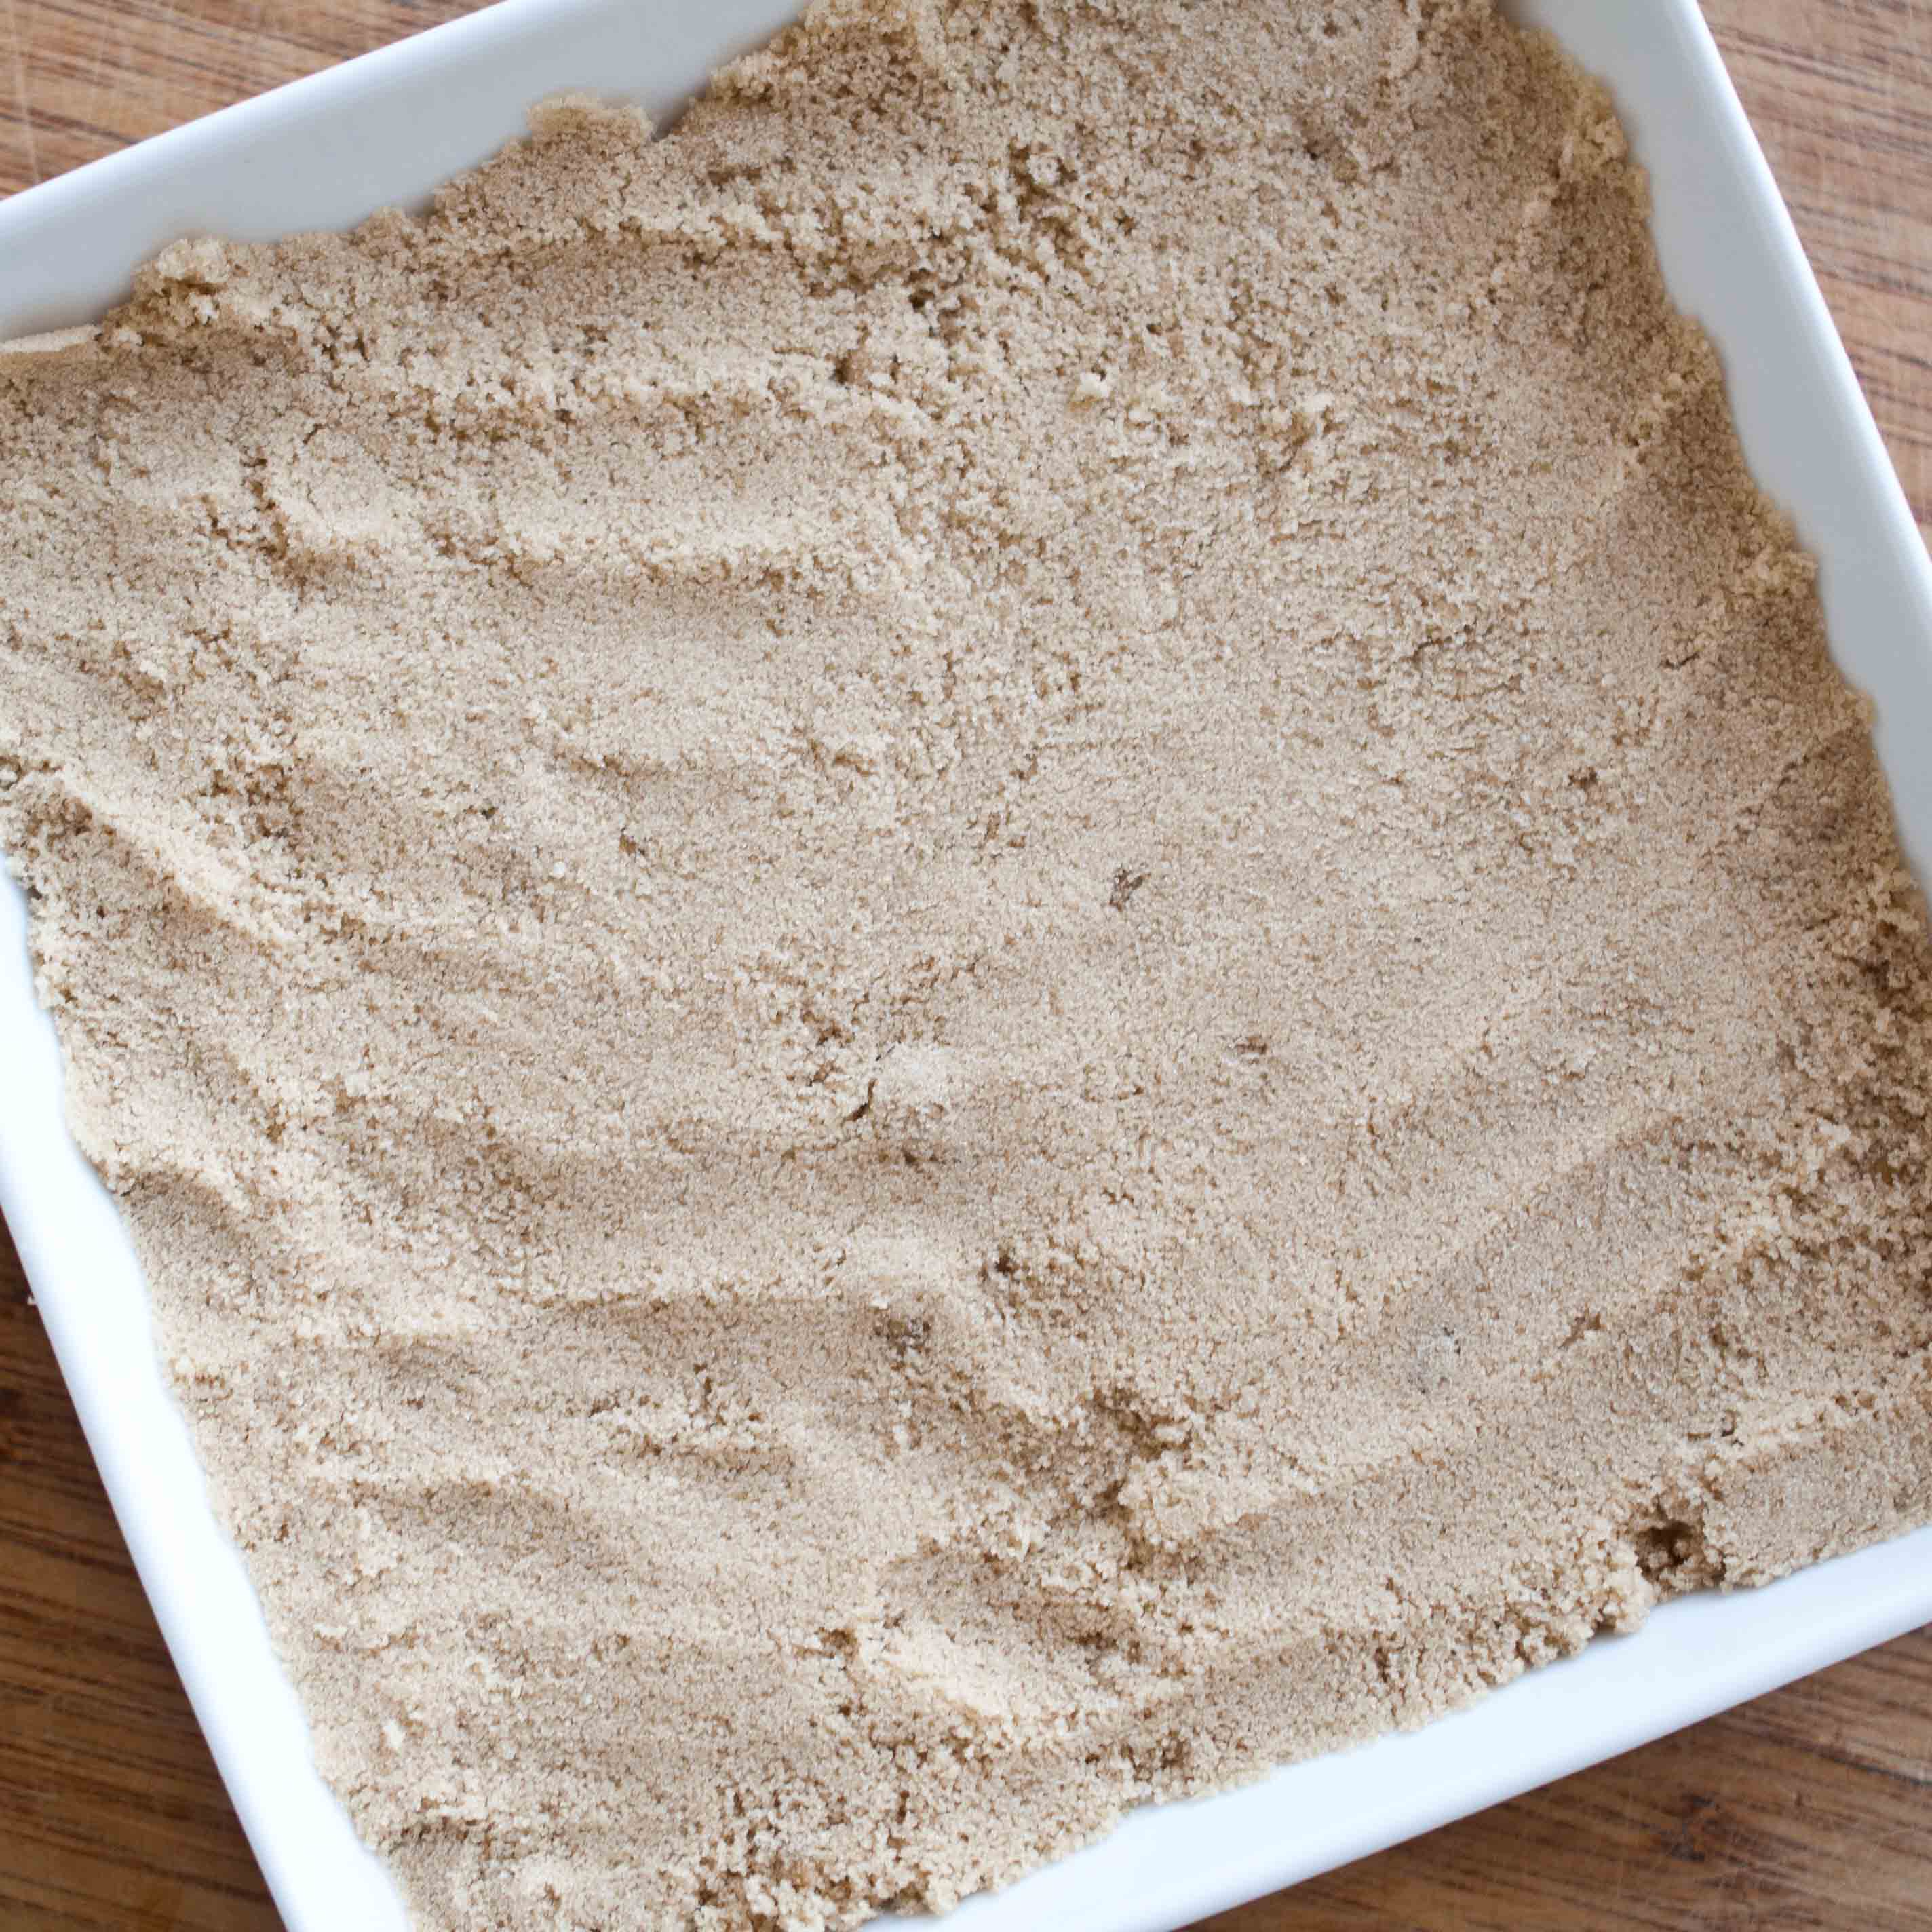
Here is a fun trick that I feel in love with right away. She teaches you how to turn just about anything in your house into a chocolate mold using just brown sugar. This is a great tip for anyone who throws kids parties and doesn’t want to invest in a chocolate mold that you’ll use once.
Brown Sugar Chocolate Mold
Step One:
Fill a small bowl with soft brown sugar and pack lightly.
Step Two:
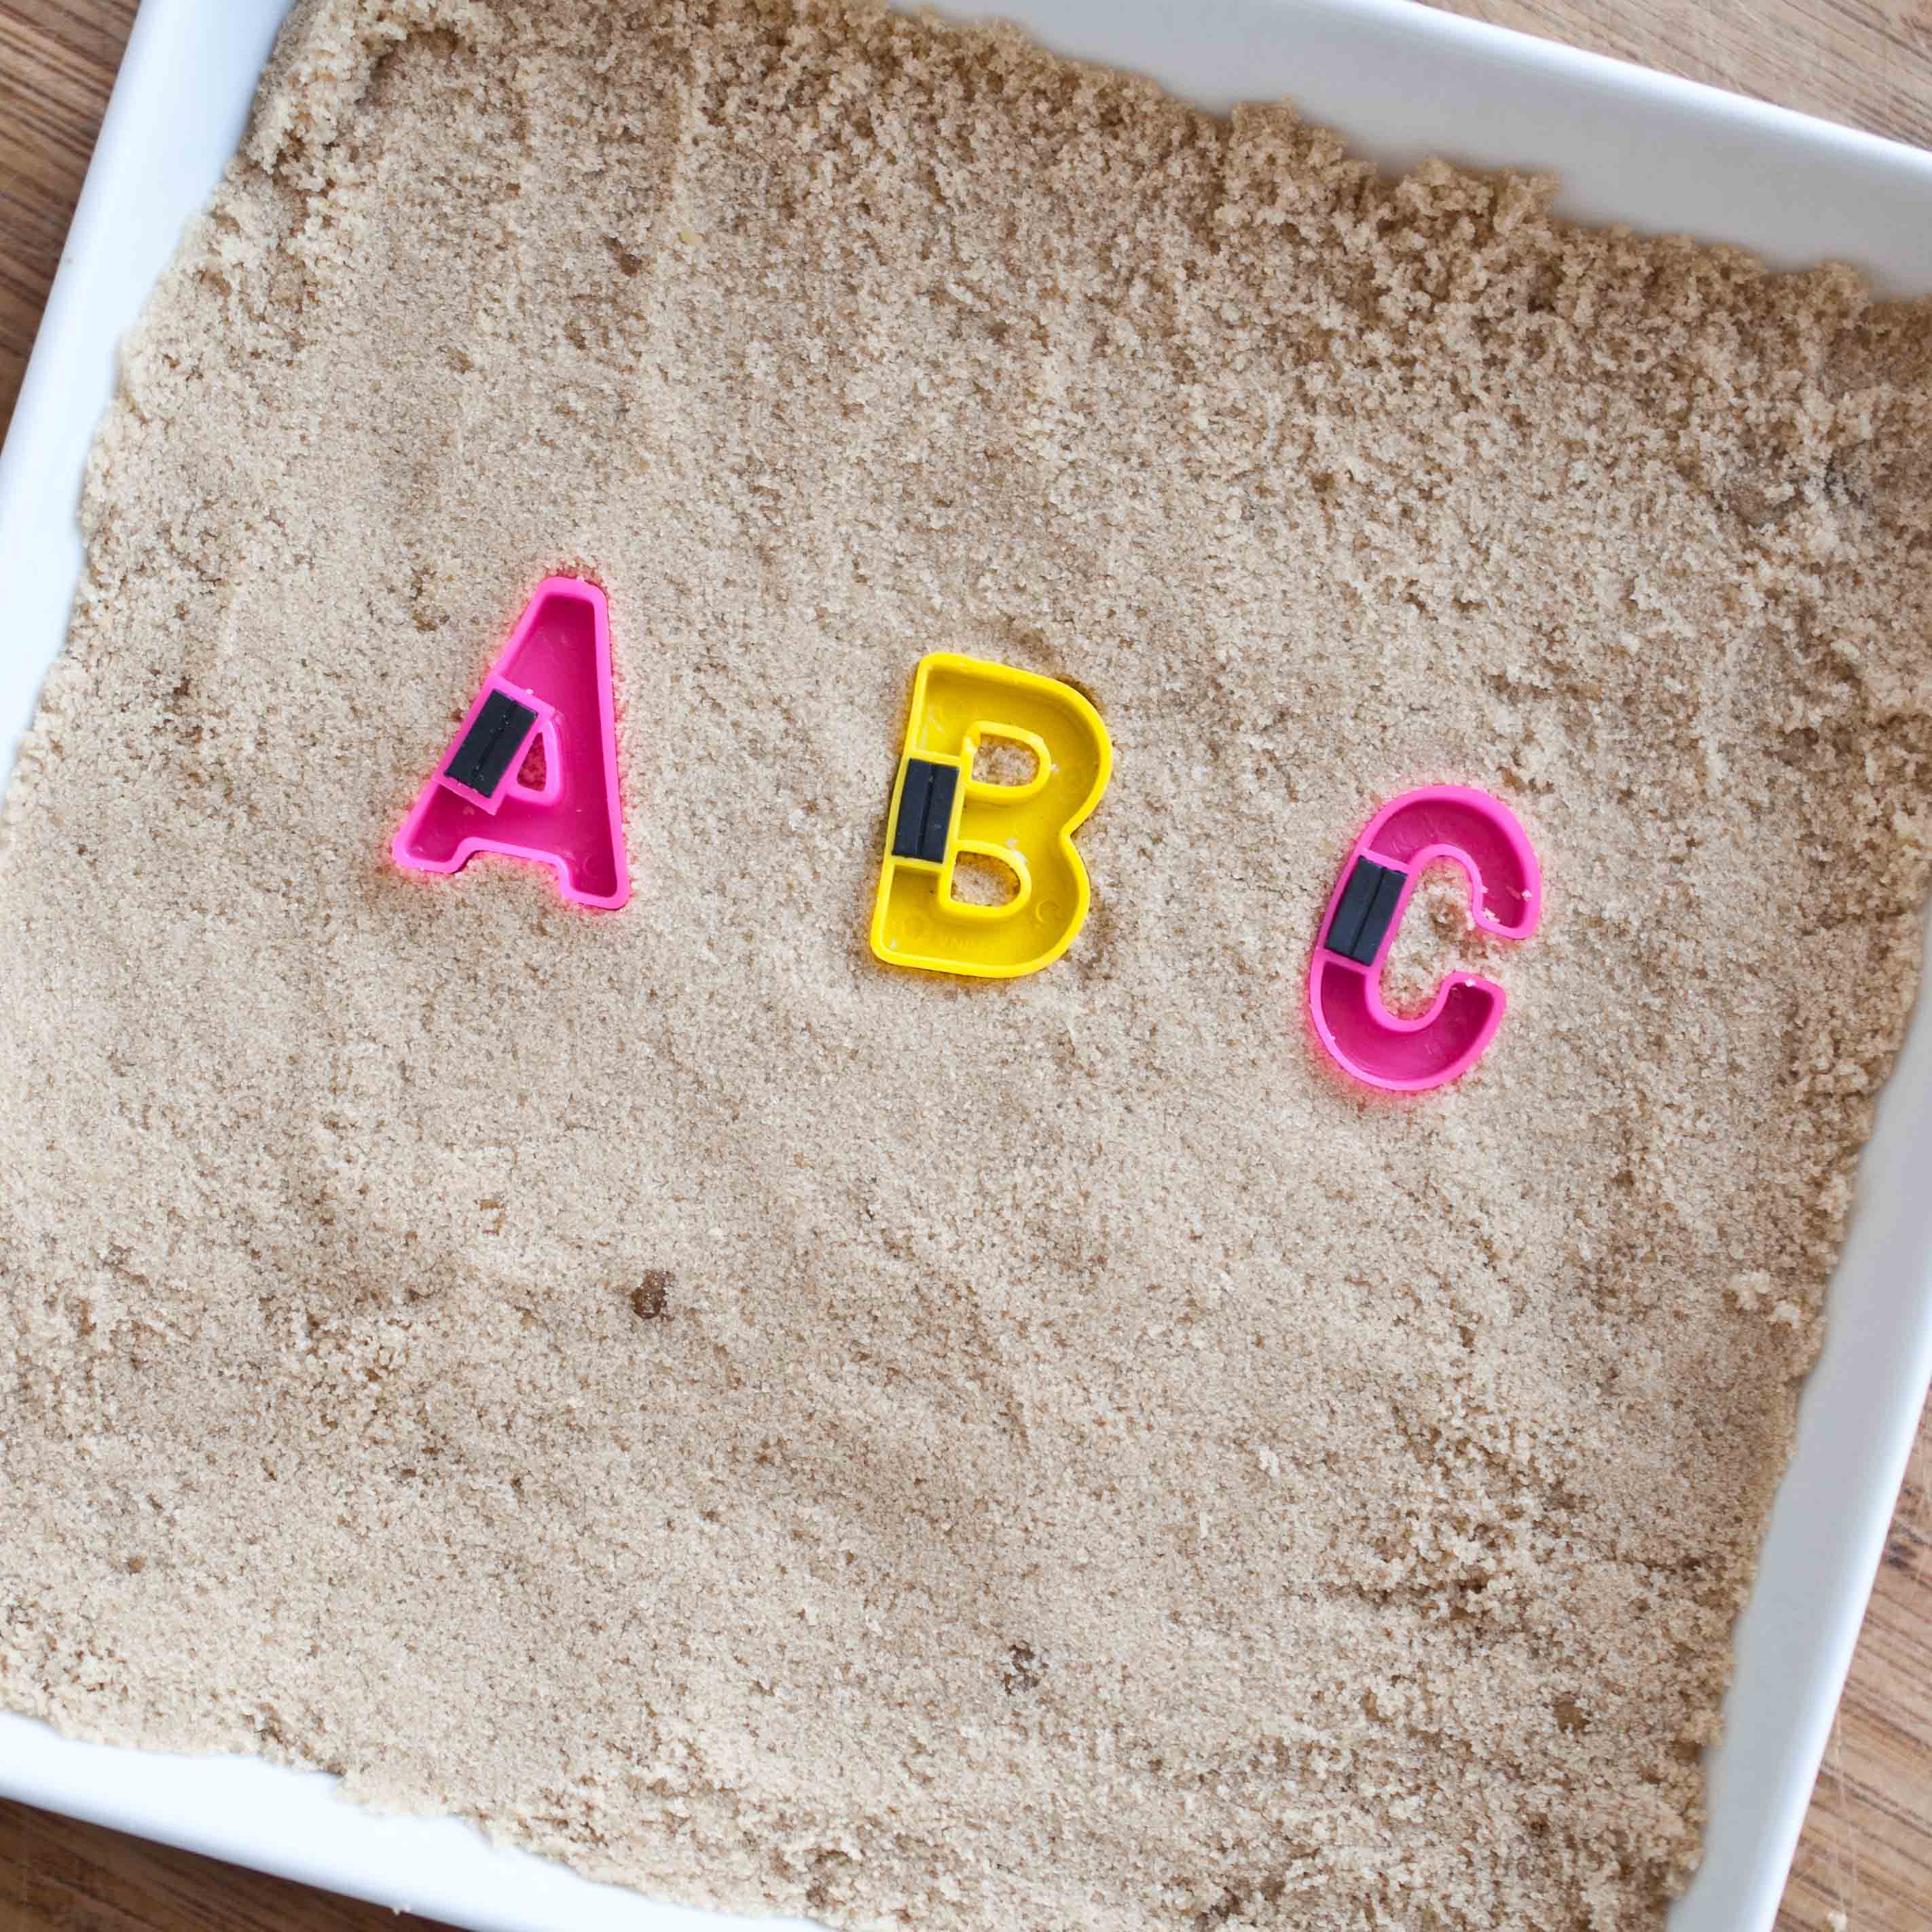
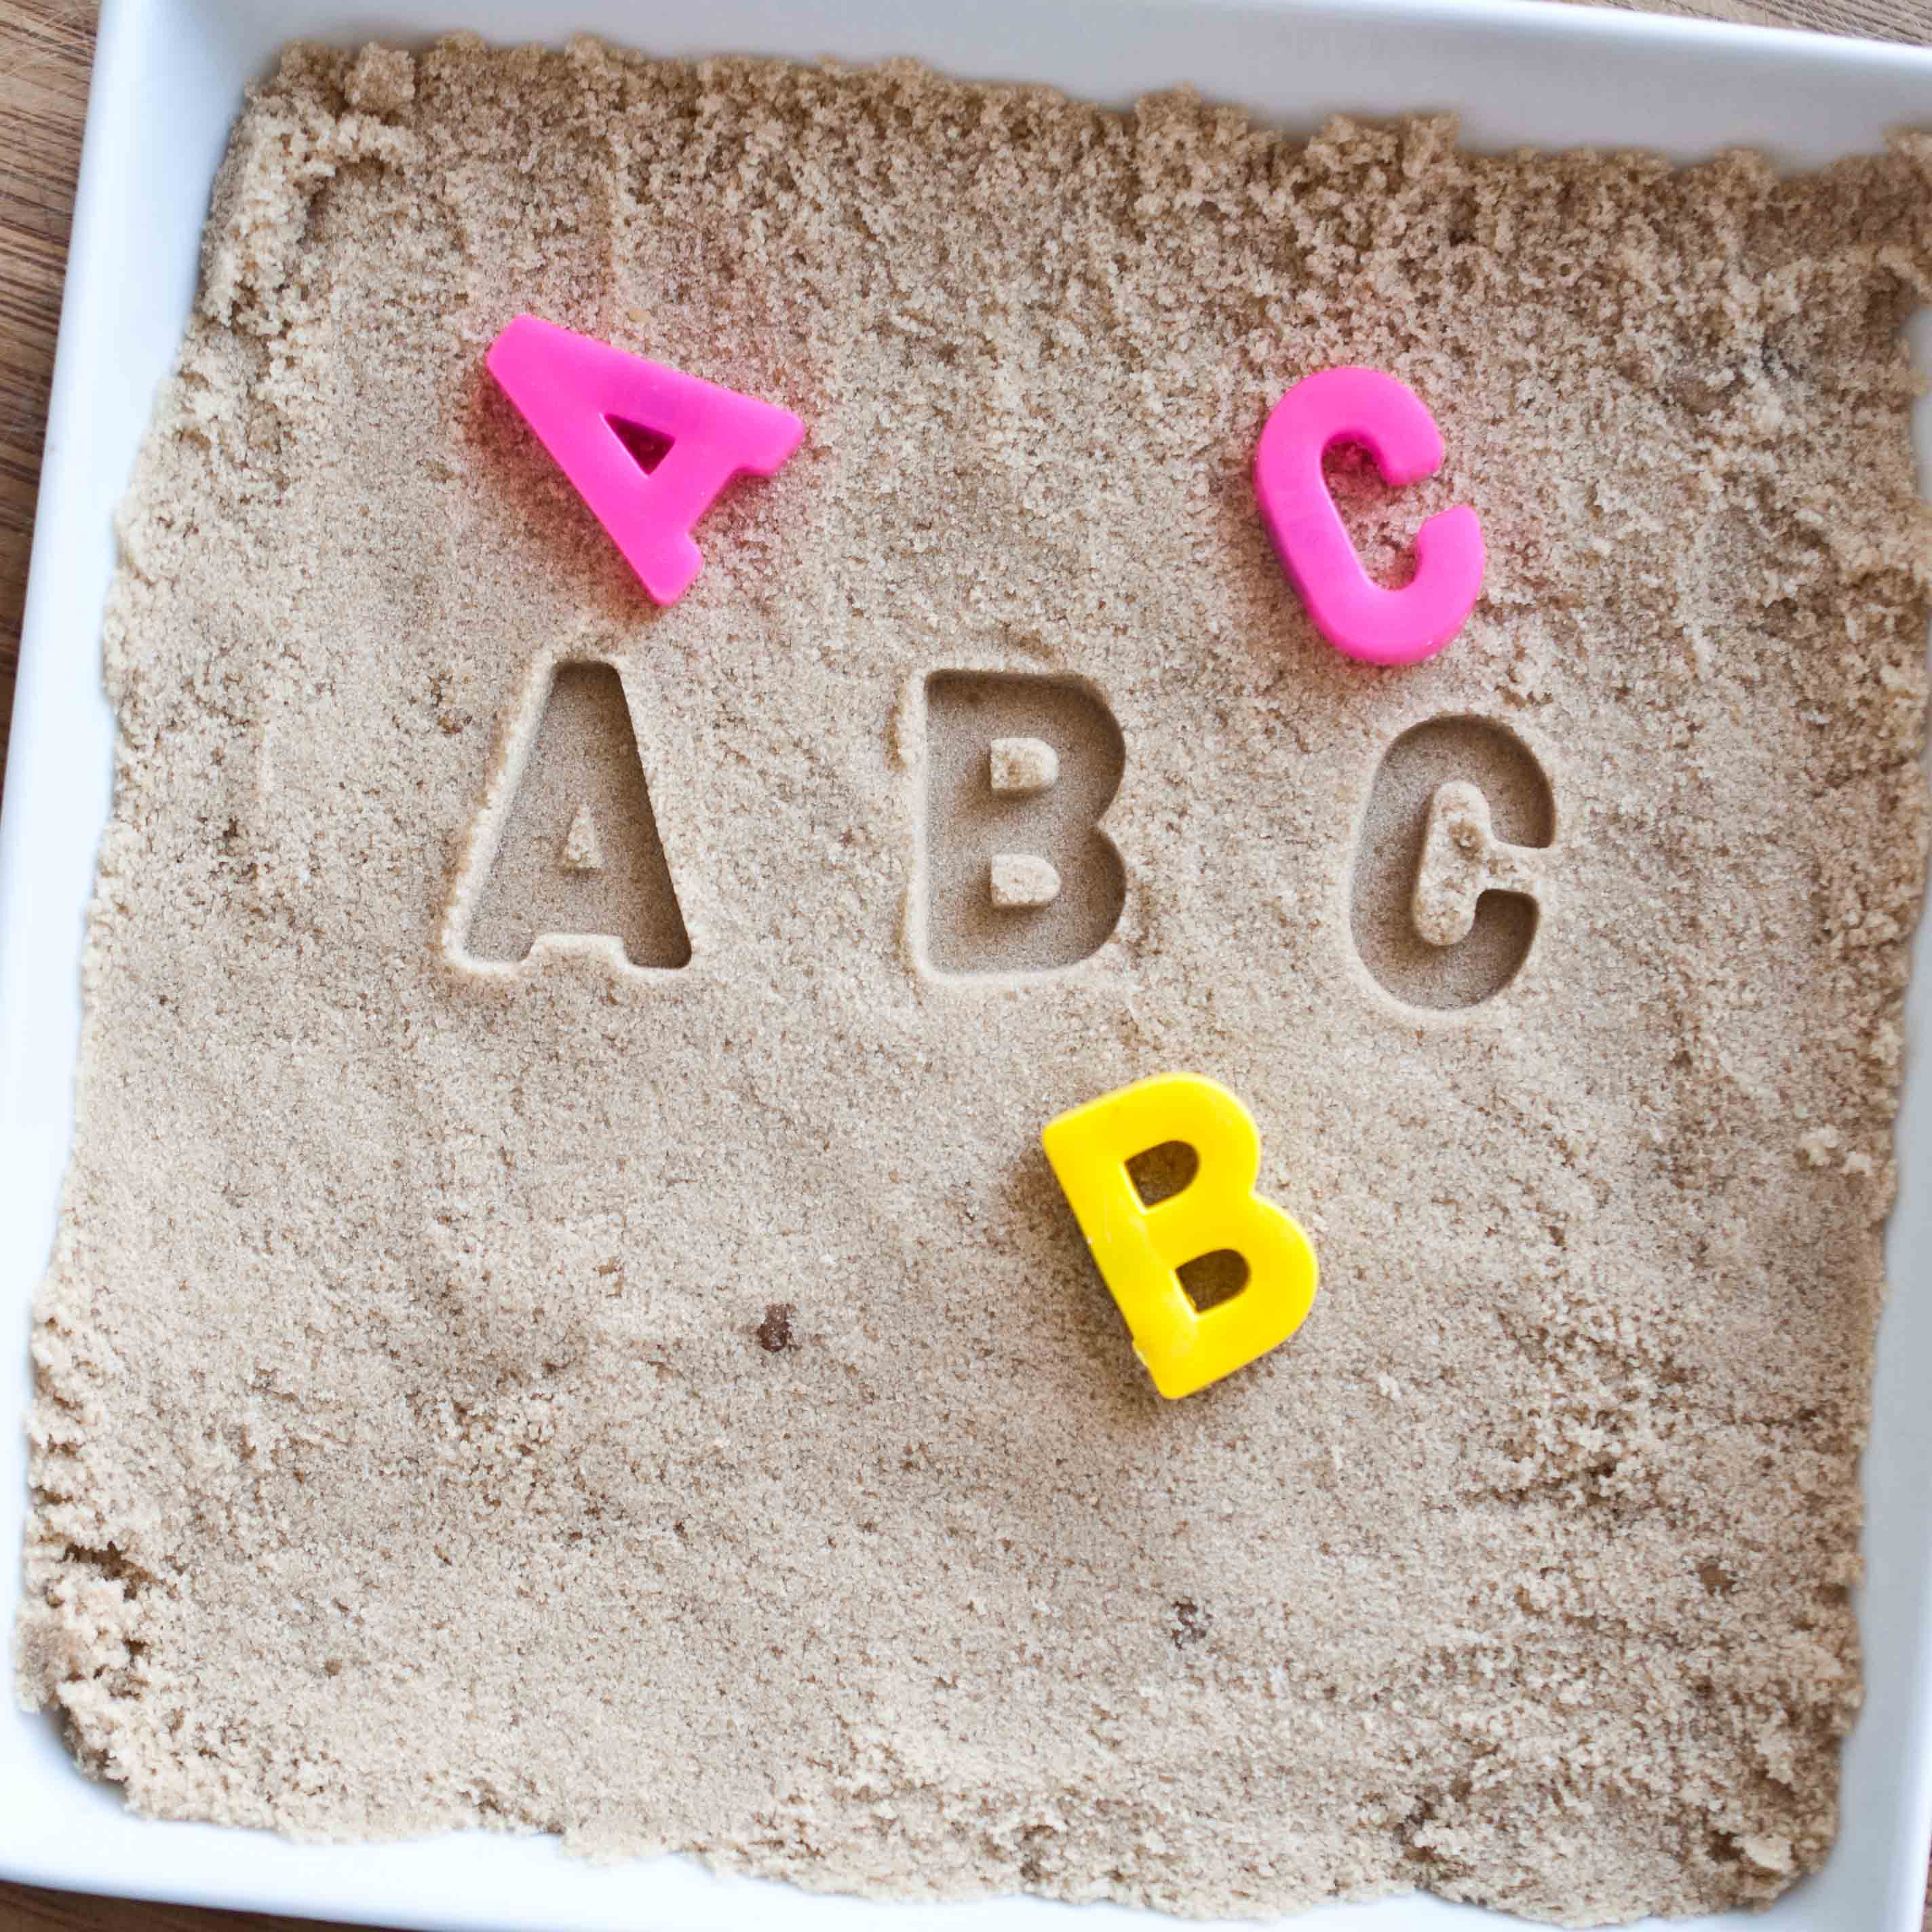
Place your object into the brown sugar and press down, compacting the sugar around the object. Objects that work best are fairly flat, with minimal detail. Heather uses a shell in her book and it turns out great. I used my daughters Alphabet magnets. If it doesn’t look right, remove the object, fluff the brown sugar and start again.
Step Three
Add chocolate chips (or candy melts) to a microwave safe bowl and microwave for thirty seconds, stir and repeat until chocolate is melted. Remove the objects from the brown sugar
Pour the chocolate gently into just the depression made by the object.
Step Four:
Place in the refrigerator until set, about 10 minutes. Remove from the brown sugar and dust off as much sugar as you can. Run a very slow, very cold stream of water from your kitchen faucet. Gently run the chocolates under water until the excess sugar has been removed.
Things to keep in mind:
These will not be shiny and smooth like those you get from a silicon mold, they will have a bit of a pocked texture. This might be what you want if you are going for a weathered look.
All you have to do is leave a comment in the comment section to enter! This makes a great gift for anyone you know who loves to bake, no matter what the skill level.
You aren’t always aware of the nexus of a true obsession. It may only be in hind sight that the catalyst is revealed upon agonizing inspection of your past. For me, however, the spark was breathtaking, an obvious birth of a fixation that lead to this blog. That trigger was Bison Honey Basil Ale. A beer that begged to be turned into Beer Creme Brulee, my first post.
If you enjoy this little blog that I have, and are as fascinated as I am with turning beer into chewable treats, you don’t have me to thank, you owe the lovely folks at Bison Brewery a debt of gratitude. As do I, or course.
For this post, I used Bison Chocolate Stout, an excellent example of the genre.
In a large sauce pan over medium high heat, add 1 cup beer (reserve the remaining beer). Allow beer to boil and reduce until thick and syrupy and only about 1 tsp remains, about 20 minutes. Set aside. (Note: if you want a lower level of beer taste, skip this step and substitute the "extract" you have just made with 1 tsp of vanilla extract in the later step that calls for the beer extract)
Line a loaf pan with parchment paper, making sure the paper goes up and over the sides of the pan, set aside.
In a large sauce pan over high heat add both sugars, butter, cream, corn syrup and remaining 1/2 cup beer. Stir until butter has melted and then stop stirring while the candy boils (you can occasionally swirl the pan), clip a candy thermometer to the side of the pot, taking care that the tip doesn't touch the bottom. Allow to boil untouched until the liquid reaches 244 degrees. The caramel will reach 200 degrees rather quickly,but will take 15-20 minutes to reach 244. The last few degrees climb quickly so stay close to your pot.
Once the caramel has reached 244, remove from heat. Add the reduced beer "extract" that you have set aside and stir until the bubbling has subsided. Pour it into prepared loaf pan, allow to sit at room temperature for 10 minutes, then refrigerate until set, about 2 hours. Cut into squares.
In the top of a double boiler add the chocolate and the stout, stir over low heat until melted and creamy, about 5 minutes. Don't over heat or your chocolate will seize.
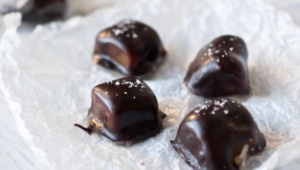
One at a time, place the squares into the chocolate with a fork. Roll around until covered, remove and add to a piece of wax paper, sprinkle with sea salt if desired. Once the squares been covered in chocolate transfer the to the refrigerator, repeat with remaining caramel. Chill until set, about 10 minutes.
The best part about visiting a brewery is the opportunity to sample those special release beers that never make it into bottles. Those brews that are only made in small batches, put into casks that sometimes make it to local pubs or events but will never make it into bottles in your local distributors shelves. Like those songs your favorite band will never record but will occasionally play live if you happen to catch a show on the right night, these are beers that make you feel special for having been granted the experience. In a world where it seems everything is accessible with the right google word search, these near mythical concoctions are only available to those who happen to be in the right place at the right time.
One of my favorites is the Habanero Sculpin from Ballast point. Because of the process they use, the heat is fresh and bright. An uncooked scorch that isn’t shy. Habaneros are an extremely unpredictable ingredient, with heat levels that vary widely from pepper to pepper, making every cask of Habanero Sculpin different from the last. If you ever make it down to San Diego, stop in for a pint and count yourself among the special few.
Since I wasn’t able to get my hands on any Habanero Sculpin, I found myself fixated on this Ballast Point Calico Amber Ale. And the result was a toffee that I couldn’t stop eating. So addictive, and it only takes about 20 minutes to make. I already have plans to make and hand this out as Christmas gifts, if I can wait that long to make it again.
In a large pot over high heat add the sugar, butter and 1/2 cup amber ale, it will triple in volume during the cooking process so make sure to use a large pot. Stir until the mixture starts to boil. Allow to boil untouched until the mixture starts to darken and thicken at about 230 degrees. Stir continuously until it turns a very dark amber and hits 290 degrees. This process will take between 15 and 20 minutes from start to finish. pour onto a baking sheet covered with parchment paper or a Silpat. Allow to cool.
Add the chocolate to a large bowl. Heat the beer until hot but not boiling. You can heat it on a pot on the stove or microwave it in a microwave safe bowl. If you use the microwave, know that the beer will foam up once it reaches it's boiling point. Pour the hot beer over the chocolate chips and stir until well combined and melted.
Pour the chocolate over the toffee and smooth out in an even layer. Sprinkle the crushed pretzels over the chocolate and chill until the chocolate has set. Cut into pieces.
Notes
If you use a chocolate with less than 60% cocoa content, it will have higher levels of milk solids, because of this it will have a more difficult time hardening once the beer is added. Try to fine 60% and chill it to set.
Choosing a beer for a recipe isn’t as arbitrary as it may appear. It also isn’t difficult, but it does require thought and planning. Substituting your favorite beer in a recipe isn’t always a good idea, and may result in an end product that is nowhere near the intentions of the recipes author.
Where do you start? The recipe or the beer?
A fair question, and it’s a toss up. Which ever way you begin, the recipe or the beer, make sure to be mindful of the flavors. Dark beers go well with "dark" recipes. If that beer you want to cook with is a stout, look for a recipe that calls for "dark" ingredients: chocolate, beef, bacon, etc. If the beer you love is a Pilsner, look for a recipe with "light" ingredients, lemon, chicken, fish, etc. There is some room to move around with this rule, but finding complimentary flavors is the key to success when cooking with beer.
Be careful with IPA’s. It’s incredibly difficult to cook with high hop beers due to the fact that the hops reduce to a very bitter product. If you are in love with an IPA, or another high hop beer, strong starches and sugar mellow hops a bit. Try a pumpkin muffin, or a sweet potato pie. Or look for recipes where the beer won’t be reduced, like marinades, beermixology cocktails, or dips.
If the recipe is where you want to start, make note of the flavors and try to find a beer that mimics those. If you want to bake a chocolate dessert, for example, look for a beer with chocolate notes, or coffee, or malt. Look at the list of flavor notes that the beer has and try to imagine those in your dish. Most large chain retailers of craft beer (like BevMo or Total Wine) have cards near the beers that explain the flavors in that beer and give you a fairly accurate flavor profile. If you are making a chicken soup, for instance, you might look for a beer with lemon or basil notes, not a beer with coffee and caramel notes.
Now that you have had your crash course in beer recipe development, please, go cook your beer loving hearts out. And don’t forget to share.
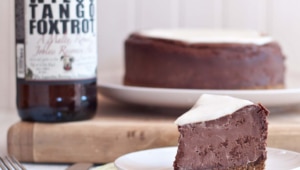
For this recipe, I choose Lagunitas Wilco Tango Foxtrot. I had four craft beers, mostly stouts, that were in the running for this recipe, and all would have made great choices. In the end, it came down to a gut feeling. Lagunitas WTF won out, although loosly categories as a "brown? ale" and more hops that I would generally recommend for this recipe, the flavors of chocolate and malt were an incredible fit for this recipe. This is a beer to keep an eye out for, it’s smooth and bold and fantastic. A fabulous drinking and cooking beer.
A chocolate stout makes an excellent choice for this recipe as well. I’ve made it with both and although I love the WTF, a chocolate stout seems to give more consistent results as far as a general beer style.
If you can’t get your grubby little hands on some WTF, a stout with notes of chocolate would make a great substitution.
Place one oven rack in the middle position, with one rack below. Preheat oven to 325.
In a food processor add the graham crackers, brown sugar and the pretzels and process until it's the consistency of crumbs. Turn the food processor on, remove the stopper from the lid and slowly add the butter and process until it resembles wet sand.
Coat the inside of a 9 inch spring form pan with butter. Pour the crust into the spring form pan. Using the bottom of a heavy, flat bottom glass, press the crust very well into the bottom of the pan until well compacted.
In a pot over medium high heat, add the beer and the chocolate, stir until melted and remove from heat. Allow to cool.
In the bowl of a stand mixer add the cream cheese and the sugar and mix until smooth. One at a time, add the eggs, scraping the bottom of the bowl between additions. Pour the cooled chocolate into the mixer and beat until well combined. Lift the head of the mixer and sprinkle the flour, cocoa powder, espresso powder and salt over the batter, stir on low speed until just combined.
Pour the batter into the pan over the crust.
Place the pan in the oven in the middle position. Place a baking dish on the rack below the cheesecake, fill with water.
If you have experience with a water bath, feel free to use that technique instead of the water pan below the cheesecake.
Bake the cheesecake until the center just slightly jiggles, but doesn't slosh, when you shake the rack, about 60-75 minutes. This isn't a situation where a tooth pick inserted in the middle should come out clean, you just need the center to set and it will continue to set as it cools. Remove from oven.
For the sour cream topping: add the ingredients to a bowl and whisk until well combined. Top the cheesecake with the sour cream topping and return to the oven for 8 minutes. Remove cheesecake and chill in the pan until ready to serve, at least 3 hours.
It’s hard to be a home cook. Blindly navigating a world that seems to come so effortlessly to others. Comparing our kitchen failures with the extravagant successes we see other producing. Left to wonder why we can’t make a perfect soufflé even when we follow the directions with surgical exactness.
And those of us who reached adulthood with little more skill than it takes to boil water are thrown into the same world with those girls who learned how to make perfect ears of orecchiette pasta by the twirl of their Italian Grandmothers thumbs. Those of us whose childhood culinary training didn’t extend much past reheating and defrosting.
So when you sit there, tears in your eyes as your hard work has turned to a delated over-salted mess, I want you to remember a few things:
1. No one will post their failures on their blogs. Or post pictures of them on their Facebook page. When you compare your failures with everyones success, its not fair to you.
2. Everyone fails. Ask anyone who has ever cooked and they will tell you culinary tails of epic failures. Horrible, inedible food that we will never speak of in the light of day. Sometimes we figure out why we created such a disaster, sometimes it remains a mystery.
3. Great cooks don’t give up. Sure, they fail. A lot. But they don’t give up. Focus more on your success than your failures and just keep going.
4. Make a list of the recipes that you want to tackle. Make it as huge and as grandiose as you want, you have your entire life to master them. No matter how often you make them, and what the end result is, vow to learn something from each batch.
5. Remove emotion. In order to figure out how it is that you have ended up with such a kitchen failure on your hands, you have to be able to look at it objectivly. It is hard not get emotional when you feel like you failed, but that isn’t going to teach you anything. Did you really follow the steps exactly, or are you just saying that to make yourself feel better? Did you use the ingredients that were listed or did you use a substitute thinking it would be ok? If you can use each recipe as a learning tool, it wasn’t a waste. Sometimes it’s the recipes fault, sometimes it’s the ingredients fault, and yes, sometimes it is your fault. But it’s all part of the learning process. We have all tried to change a recipe thinking it would be fine, and sometimes it isn’t. Now you know.
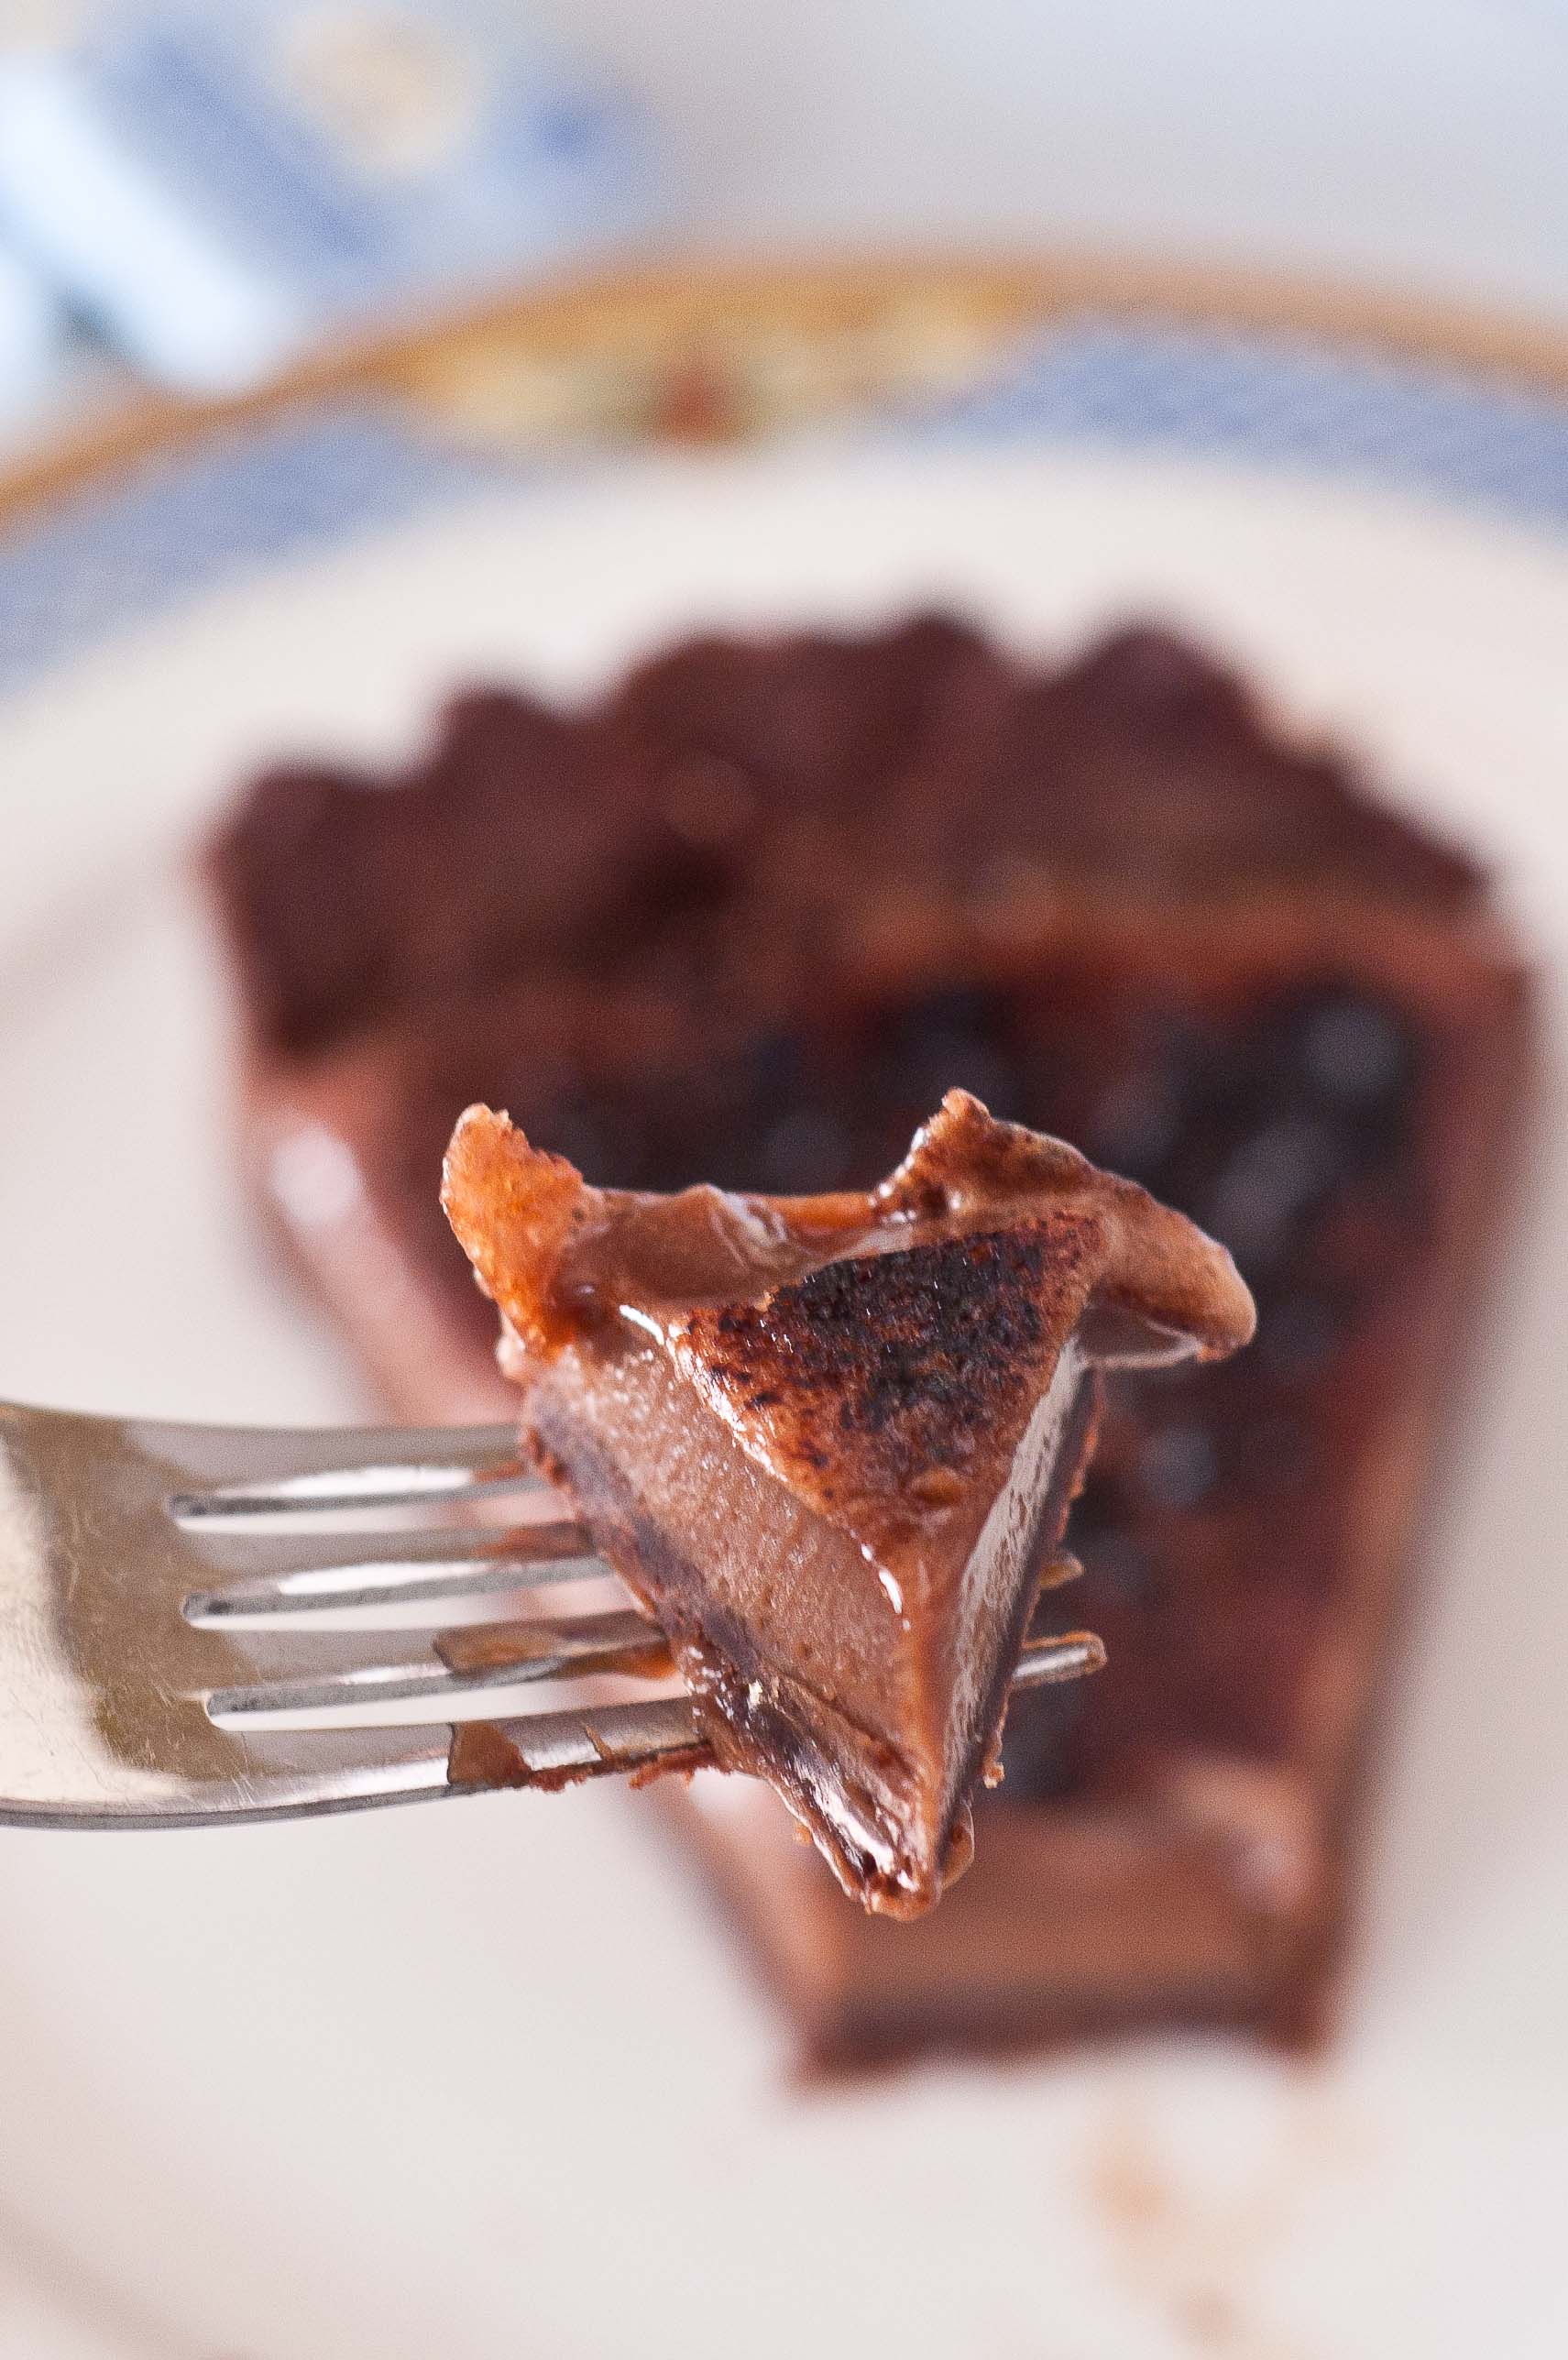
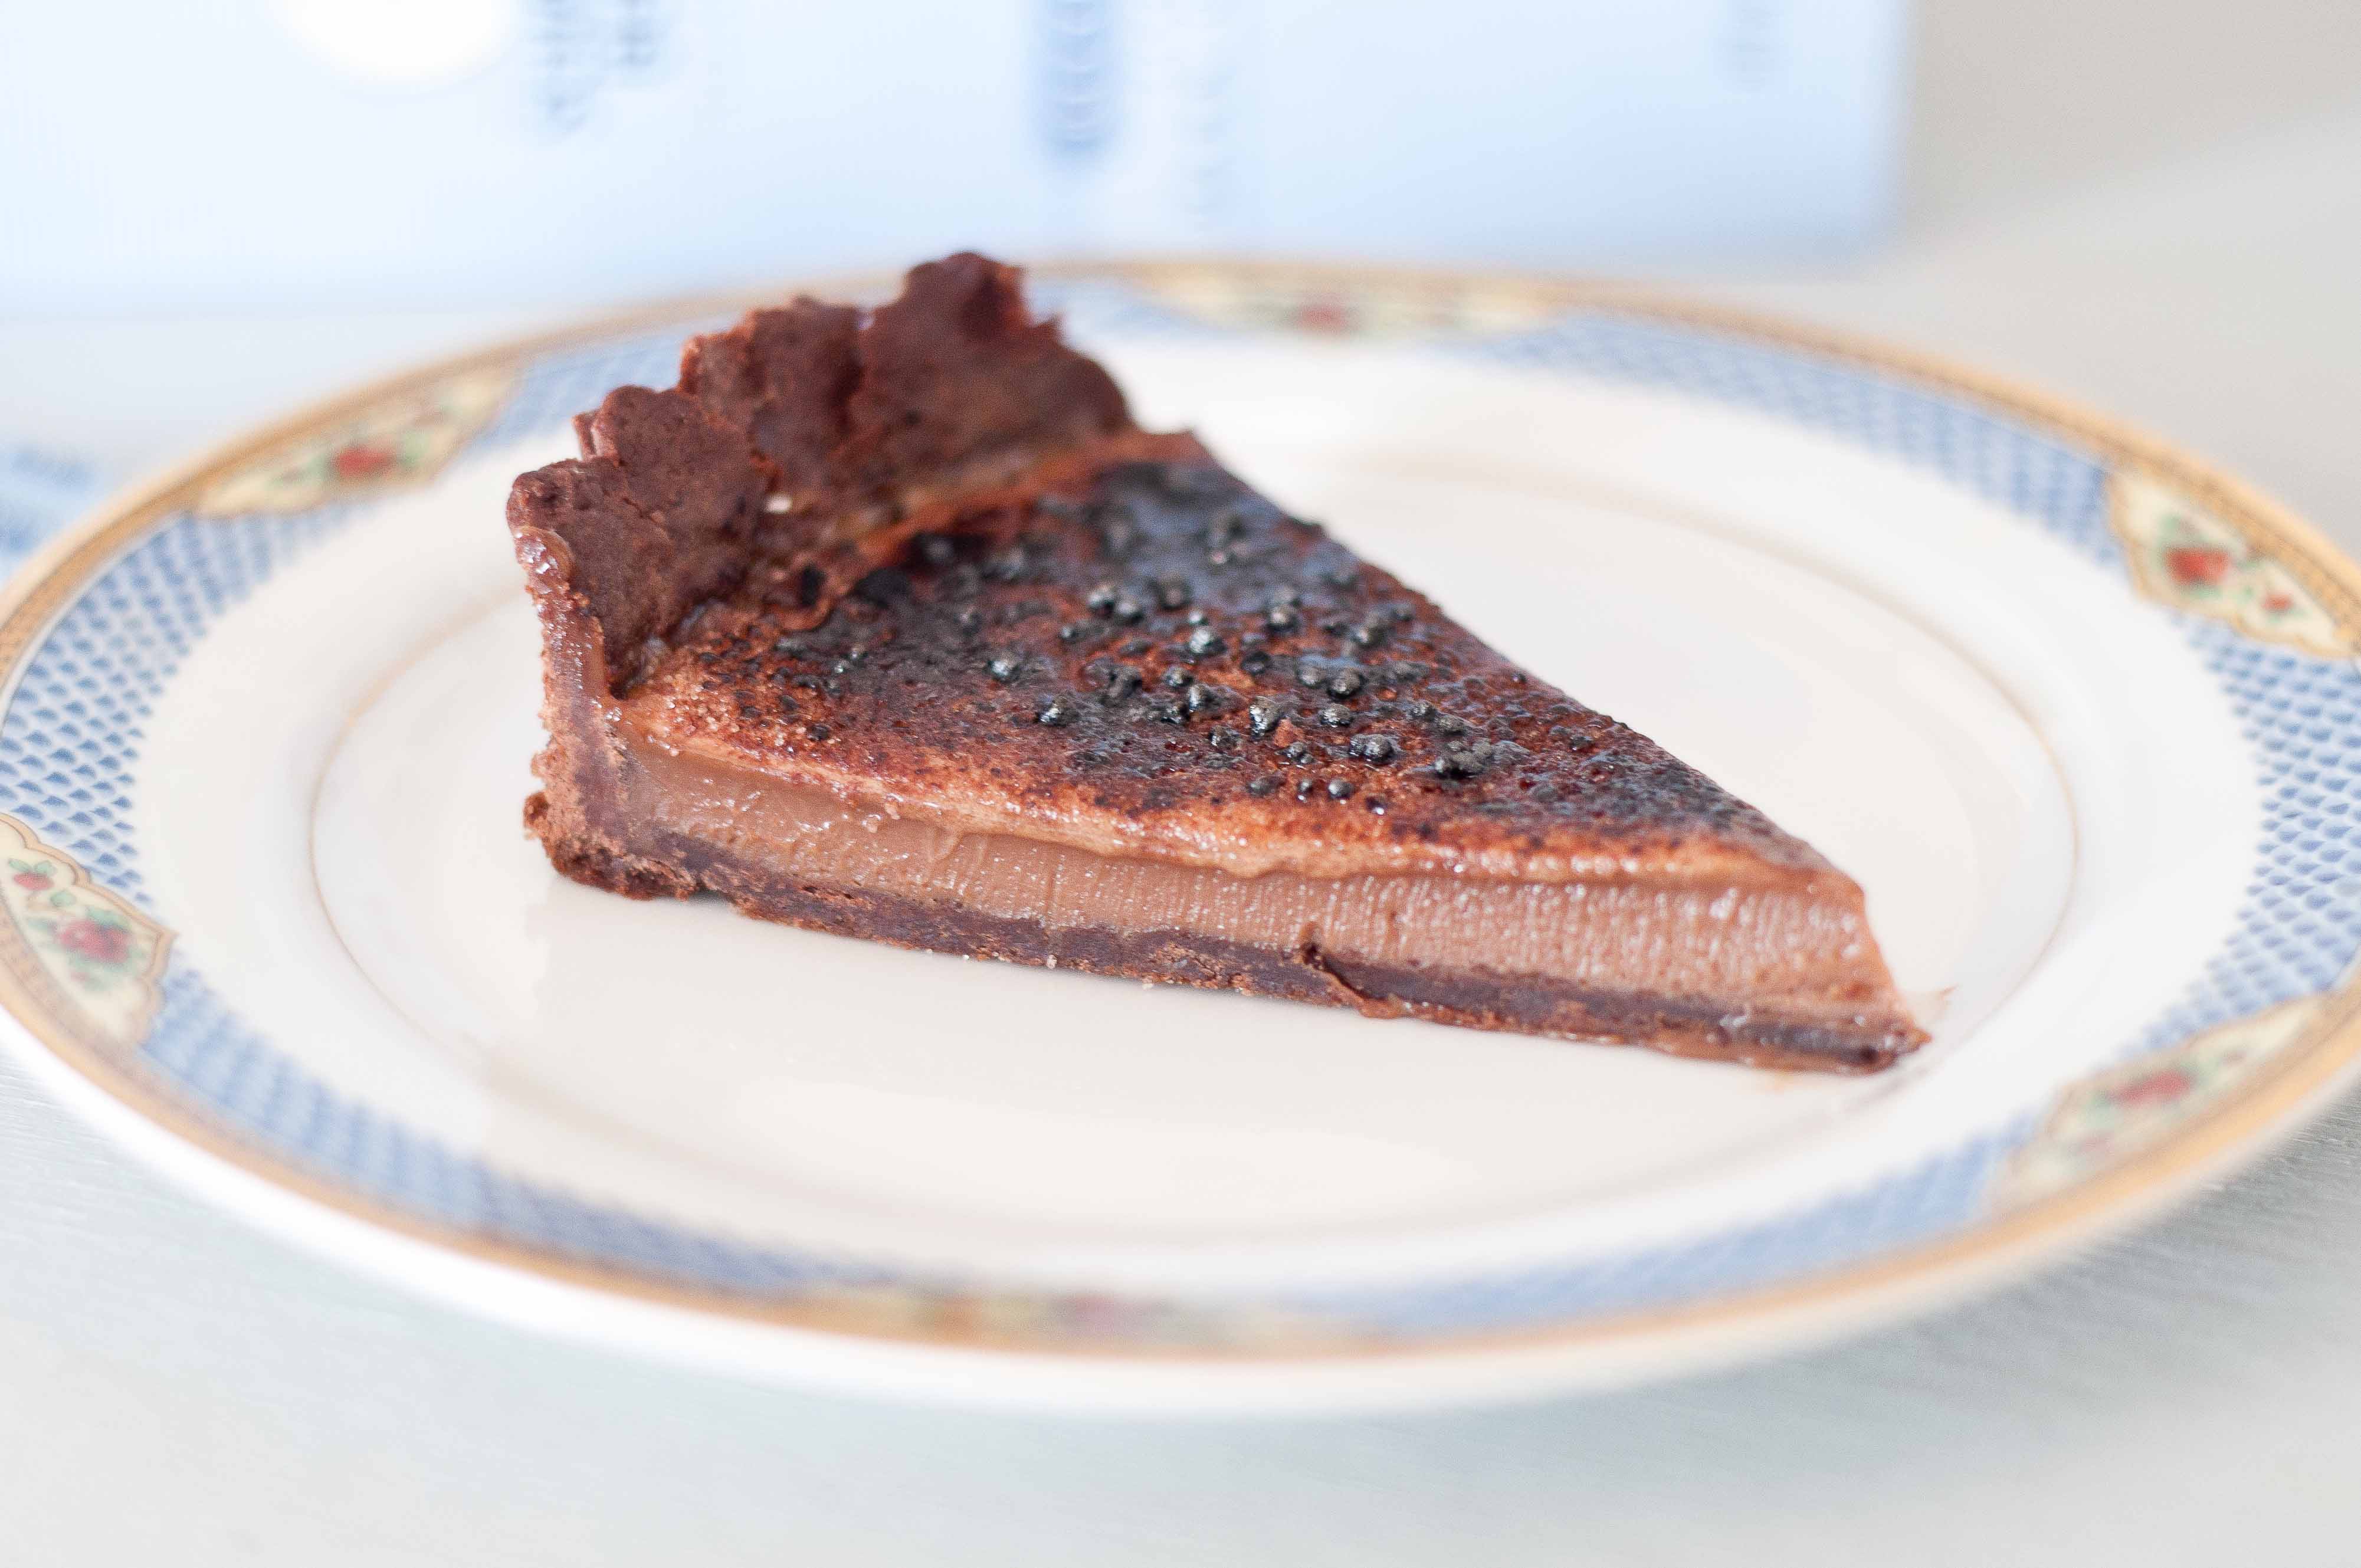
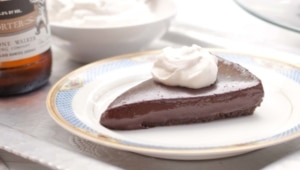
The first recipe on my list of recipes to master was Creme Brulee. It sounded so fancy and grown up, I wanted to learn to make something that was elegant and French and I was shocked at how easy it was. You do need a few kitchen tools, but the recipe and the steps are simple. And the result is incredible. For this recipe, I added a chocolate tart crust and a cocoa powder laced brulee topping.
And a kitchen tip from one of my kitchen failures: Don’t touch the melted sugar before it’s cooled, it will give you the worst mother Eff-ing burn of your life.
Dark Chocolate Crème Brulee Tart
Tart Crust:
1 cup of all-purpose flour
1/4 cup Unsweetened Cocoa Powder
1/4 cup sugar
1/2 tsp salt
10 tbs of unsalted butter, cut into small cubes
3-5 tbs ice cold water
Custard:
4 egg yolks
1/2 cup of sugar
1 3/4 cup of heavy cream
1 3oz bar of 70% Cacao Bittersweet Chocolate, broken into small pieces
1 tsp espresso powder
1/2 tsp salt
Brulee Sugar Topping:
1/4 cup granulated sugar
1 tsp Unsweetened Cocoa Powder
In a food processor, combine the 1/2 cup flour, sugars, cocoa powder and salt. Pulse to combine. Add the cubes of butter and process until combined, about 1-2 minutes. Add the remaining flour and process again. Your dough should resemble course meal. Move to a large bowl and add 3 tbs of the water, knead to combine (if you add the water to the dough with the food processor, your crust will turn into a cracker). Add the additional water if your dough is too dry.
Form into a disk, wrap completely with plastic wrap and chill for at least 1 hour (you can also make the crust a day ahead and allow to chill overnight).
Heat your oven to 375.
Once your tart is all chilled, remove from the fridge and roll out to an even thickness, making sure your dough is just large enough to completely cover the interior surface of the tart pan.
Add to a 9-inch tart pan with a removable bottom (that has been sprayed with butter flavored cooking spray), pressing into shape and removing any excess dough. If the dough is too fragile to transfer in one sheet, it is ok to press it into shape in pieces in the pan. Prick the bottom of the tart with a fork several times.
Place a sheet of parchment paper inside your tart and fill with pie weights. If you don’t have pie weights, you can use dried beans.
Bake for 20 minutes, reduce the oven temp to 300.
In a bowl, combine the yolks and 1/2 cup of sugar and whisk until light and frothy. In a pot over medium heat, combine the cream, salt, espresso powder and chocolate, stir continuously until chocolate has melted, reducing heat to avoid boiling if necessary. Remove from heat and allow to cool to room temperate for about 15 minutes (if you add the cream/chocolate mixture to your egg mixture when it is hot, you will end up with scrambled eggs. Allow to cool to avoid that).
While whisking the egg mixture, slowly add the cream until completely combined. Strain with a fine mesh strainer.
Place tart pan on a baking sheet and set in the oven, then add the custard to tart shell. Bake at 300 degrees until the edges are set and the middle is still wobbly (it will continue to set as it cools) about 35-40 minutes. Refrigerate for at least 2 hours and keep cold until ready to serve.
In a small bowl, add ¼ cup of sugar and 1 tsp cocoa powder, stir to combine. Add to the top of the tart in an even layer. Run a culinary torch over the top of the sugar, slowly and evenly, until it has all melted and is mostly dark. Due to the addition of the cocoa powder, this brulee topping is more likely to catch fire. Make sure to extinguish any fires instantly. You can also brulee with plain granulated sugar, leaving out the cocoa powder, if it makes you nervous! Serve immediately. Once the sugar has been bruleed, it will start to liquify after about an hour.
The creaminess of chocolate pairs so well with a well crafted porter. For this tart I used Firestone Walker Reserve Porter, it has the perfect balance of flavors for this recipe with notes of chocolate, coffee, caramel and a touch of a citrus taste. You also want to use a really well made chocolate, because, like beer, craft chocolate has well developed flavors that can’t be matched by the "Macro" chocolatiers. I used Sharffen Berger 62% Semi Sweet chocolate for the perfect balance of richness and sweetness.
I’m a sucker for a well made dark beer, and this recipe pairs well with the cold bottle of Porter.
I also made a porter whipped cream, with a rich smooth sweetness and notes of dark beer, you’ll want to eat this right out of the mixing bowl.
Chocolate Porter Beer Tart
For the crust:
1 cup crushed chocolate wafer cookies or chocolate graham crackers (NOT chocolate covered)
In a food processor, add the chocolate wafer cookies and brown sugar. Pulse until nothing remains but fine crumbs. While the food processor is still running, remove the spout stopper and slowly add the melted butter. Process until it resembles wet sand.
Press very firmly into the bottom of a 9 inch spring form pan (or tart pan with removable bottom) that has been sprayed with butter flavored cooking spray.
Bake at 350 for 12 minutes or until tart crust starts to look dry and you can smell it cooking. Remove from oven and allow to cool.
In a double boiler add the chocolate and the butter, stir over medium-high heat until chocolate has melted. If you don’t have a double boiler, you can place a metal bowl over a pot that has a few inches of water at the bottom. Make sure that the bottom of the metal bowl does not touch the water in the pot.
Add the beer and stir until combined. Remove from heat and allow to cool for 5 minutes. Add the cream and stir to combine. Sprinkle 1/4 cup of powdered sugar over the chocolate and whisk until combined. I like my desserts on the bitter side, as I suspect a lot of you beer lovers do as well. The sweetness level of this dessert will depend on the type of beer you use as well as the level of sweetness you enjoy. Taste the chocolate and decide weather or not you want it sweeter and add additional sugar accordingly.
Pour chocolate in the spring form pan over the curst. Chill until set, about 4 hours.
In the bowl of a stand mixer, add the cream, 2/3 cup powdered sugar and 2 tbs of porter. Whip on high until soft peaks form, about 3 minutes.
Once the tart has set, remove the sides of the spring for pan (or tart pan) and serve topped with whipped cream.
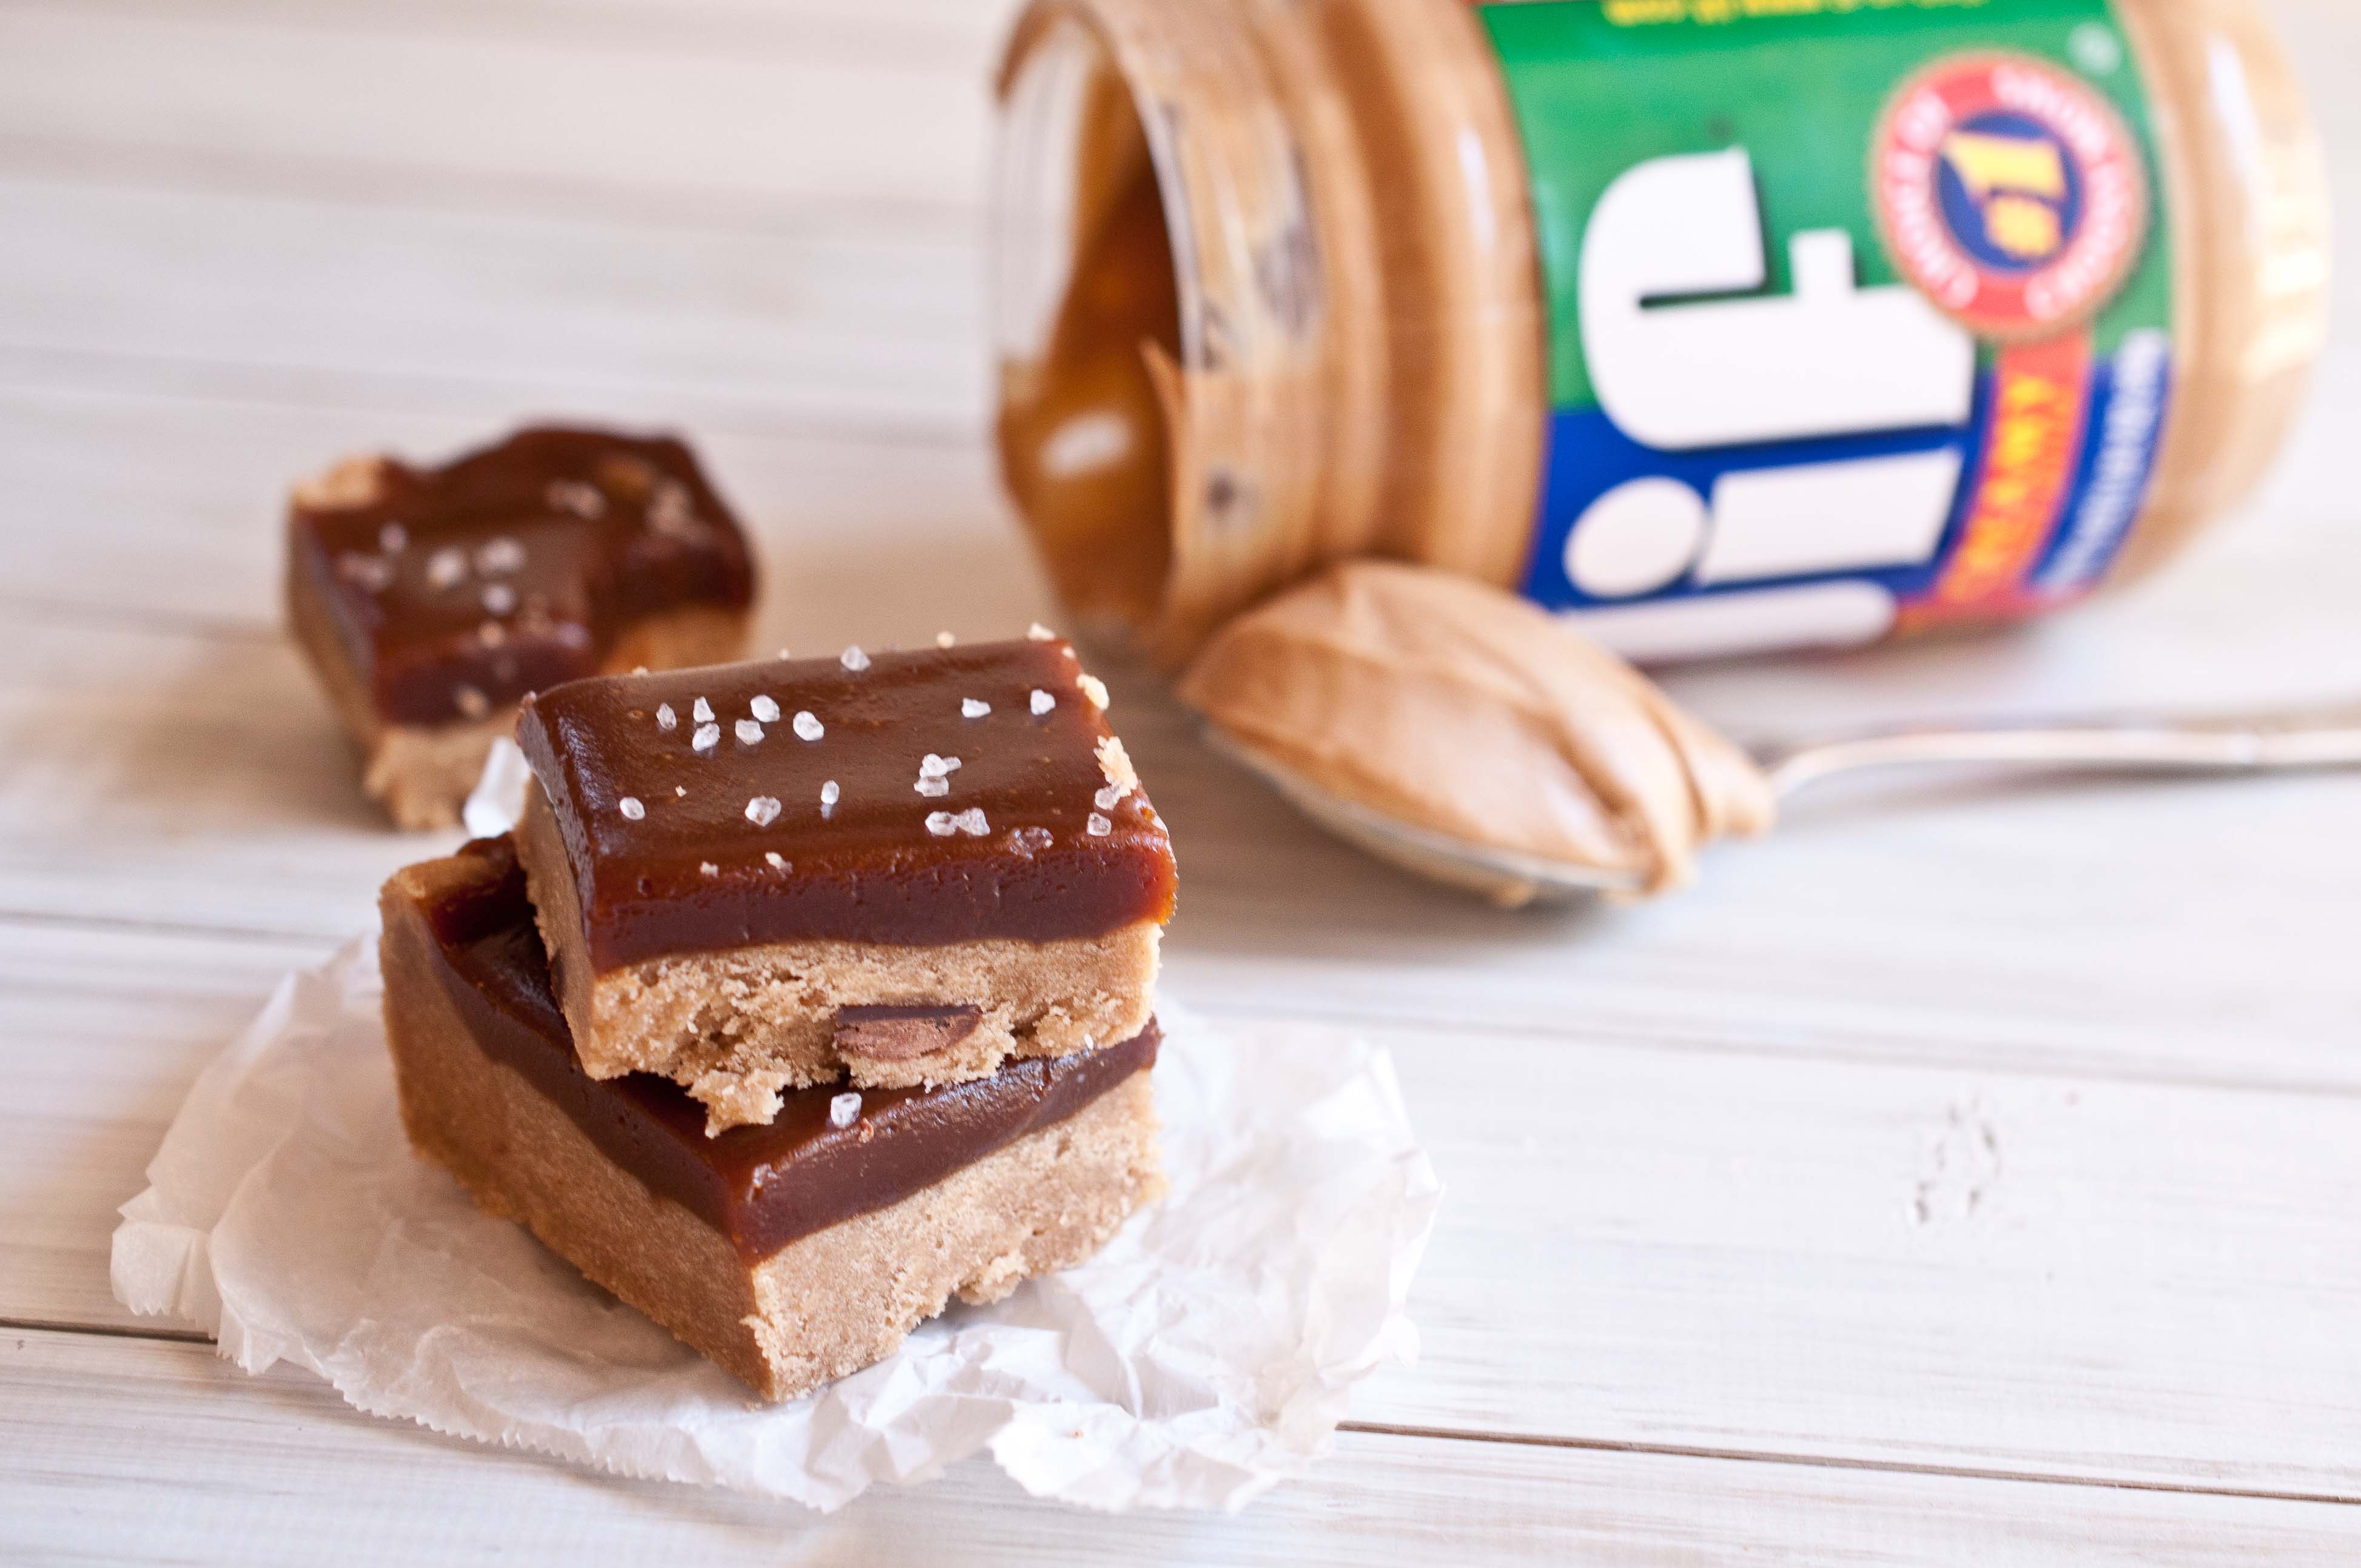
Whoever wrote that probably wouldn’t have wanted you to mix it with butter and sugar, but regardless of the increased amount of calories and fat, you can still feel good about giving yourself a healthy dose of antioxidants. And eating a Super Food that has protein and fiber, lowers cholesterol and your risk of heat disease.
Because, like I told you at the beginning of the year, I’m trying to seek a balance in my life. If I am going to have a fabulously delicious dessert, I also want it to have some good stuff in it too.
I have also decided to cut food dyes out of my diet all together by the end of the year. Because, unlike peanut butter, they have zero benefits, lots of risks and are known carcinogens. I’ll write more about that later once I’ve figured out how to conconct an all natural red food dye.
I don’t want to be perfect, I just want to find a balance in my life. Peanut butter caramel bars are a great balance, giving you a dose of healthy goodness with an incredible dessert. But don’t misunderstand me, this is in no way a diet food. They are high in calories and a treat that you should enjoy every once in a while, but at least you have the peace of mind that there are also health benefits.
Peanut Butter Chocolate Chip Shortbread:
For the shortbread crust:
¾ cup Brown Sugar
1 sticks of Butter
½ cup Creamy Peanut Butter
1 tsp vanilla
1 tsp Salt
2 cups Flour
1 tsp Baking Powder
1 ½ cups Dark Chocolate Chips
Peanut Butter Caramel Sauce:
1/2 cup heavy cream
¼ cup Creamy Peanut Butter
1/2 cup sugar
1/3 cup light corn syrup
1 stick of butter
½ tsp vanilla
1/2 tsp course sea salt
Line the bottom of an 11 x 7 inch baking dish with parchment paper, allowing the paper to go up and over the edges of the pan.
In the bowl of a stand mixer, cream the butter and sugar. Add the peanut butter and vanilla and beat on high until well combined. In a separate bowl combine flour, salt, and baking powder, stir to combine. Add the flour mixture to the stand mixer and beat on medium speed until mixed well with the butter mixture, scraping the bottom of the bowl occasionally. Gently fold in the chocolate chips.
Press the shortbread into the bottom of the baking dish in one even layer. Chill in the refrigerator for 30 minutes. Preheat the oven to 350. Bake for 25 minutes or until the edges have turned a golden brown and have started to look dry. Allow to chill in the fridge for 10-15 minutes.
In a pot over medium high heat, add the peanut butter and the cream. Stir continuously until the peanut butter has melted and is well combined with the cream. Remove from heat, add the vanilla and set aside.
In a separate pot over medium high heat, combine the sugar, & corn syrup. Stir until the sugar has dissolved. Allow to boil, without stirring, until the mixture reaches 230 degrees, about 5 minutes. While the caramel is cooking, do not stir, but swirl the pan every 30 seconds to redistribute the caramel sauce evenly. Once 230 degrees is reached, add the butter, stirring to allow it to distribute and melt, then remove from heat. Stir in the peanut butter cream, adding slowly as it will bubble up furiously.
Pour the caramel over the shortbread and refrigerate for 4 hours, or until set. Sprinkle the top with the sea salt. Remove from pan using the parchment paper and cut into squares.
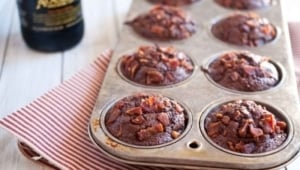
There is something mysterious and alluring about Alaska. Beautiful landscapes pushing past a transcendental, white washed façade. I’ll even forgive her the birth of ignorant, poorly spoken, female politicians to glimpse the majesty of the Aurora Borealis. It just may be because of this enchanted terrain that the beer seems to have a prestigious eminence. The water is clearer and more ethereal, giving rise to a superior scaffolding for the detailed flavors put forth in Alaskan craft beer.
The Alaskan Brewing Smoked Porter has a bold, creamy, smoked profile that bridges the flavors of bacon and chocolate in these muffins. The savory sweet interplay works well for breakfast or dessert, or anytime in between.
In a large bowl, combine the cocoa powder, flour, sugar, salt, baking powder, and smoked paprika, whisk until well combined.
In a separate bowl, beat the egg and the oil. Make a well in the dry ingredients and add the egg/oil, chocolate chips and the beer. Stir until combined.
Spray muffin tins with butter flavored cooking spray (or line with muffin papers). Add the batter to the muffin tins until about 2/3 full. Top with the chopped bacon, evenly distributed between the muffin tins.
Bake for 18-22 minutes or until the top springs back when touched.
There are so many great things about living in Los Angeles. In my 20’s I got to partake in a lot of them. My husband is a musician and we ran around with a very Music Industry crowd. Late nights, parties, back stage passes, Rock Stars, watching our friends become famous, blah, blah.
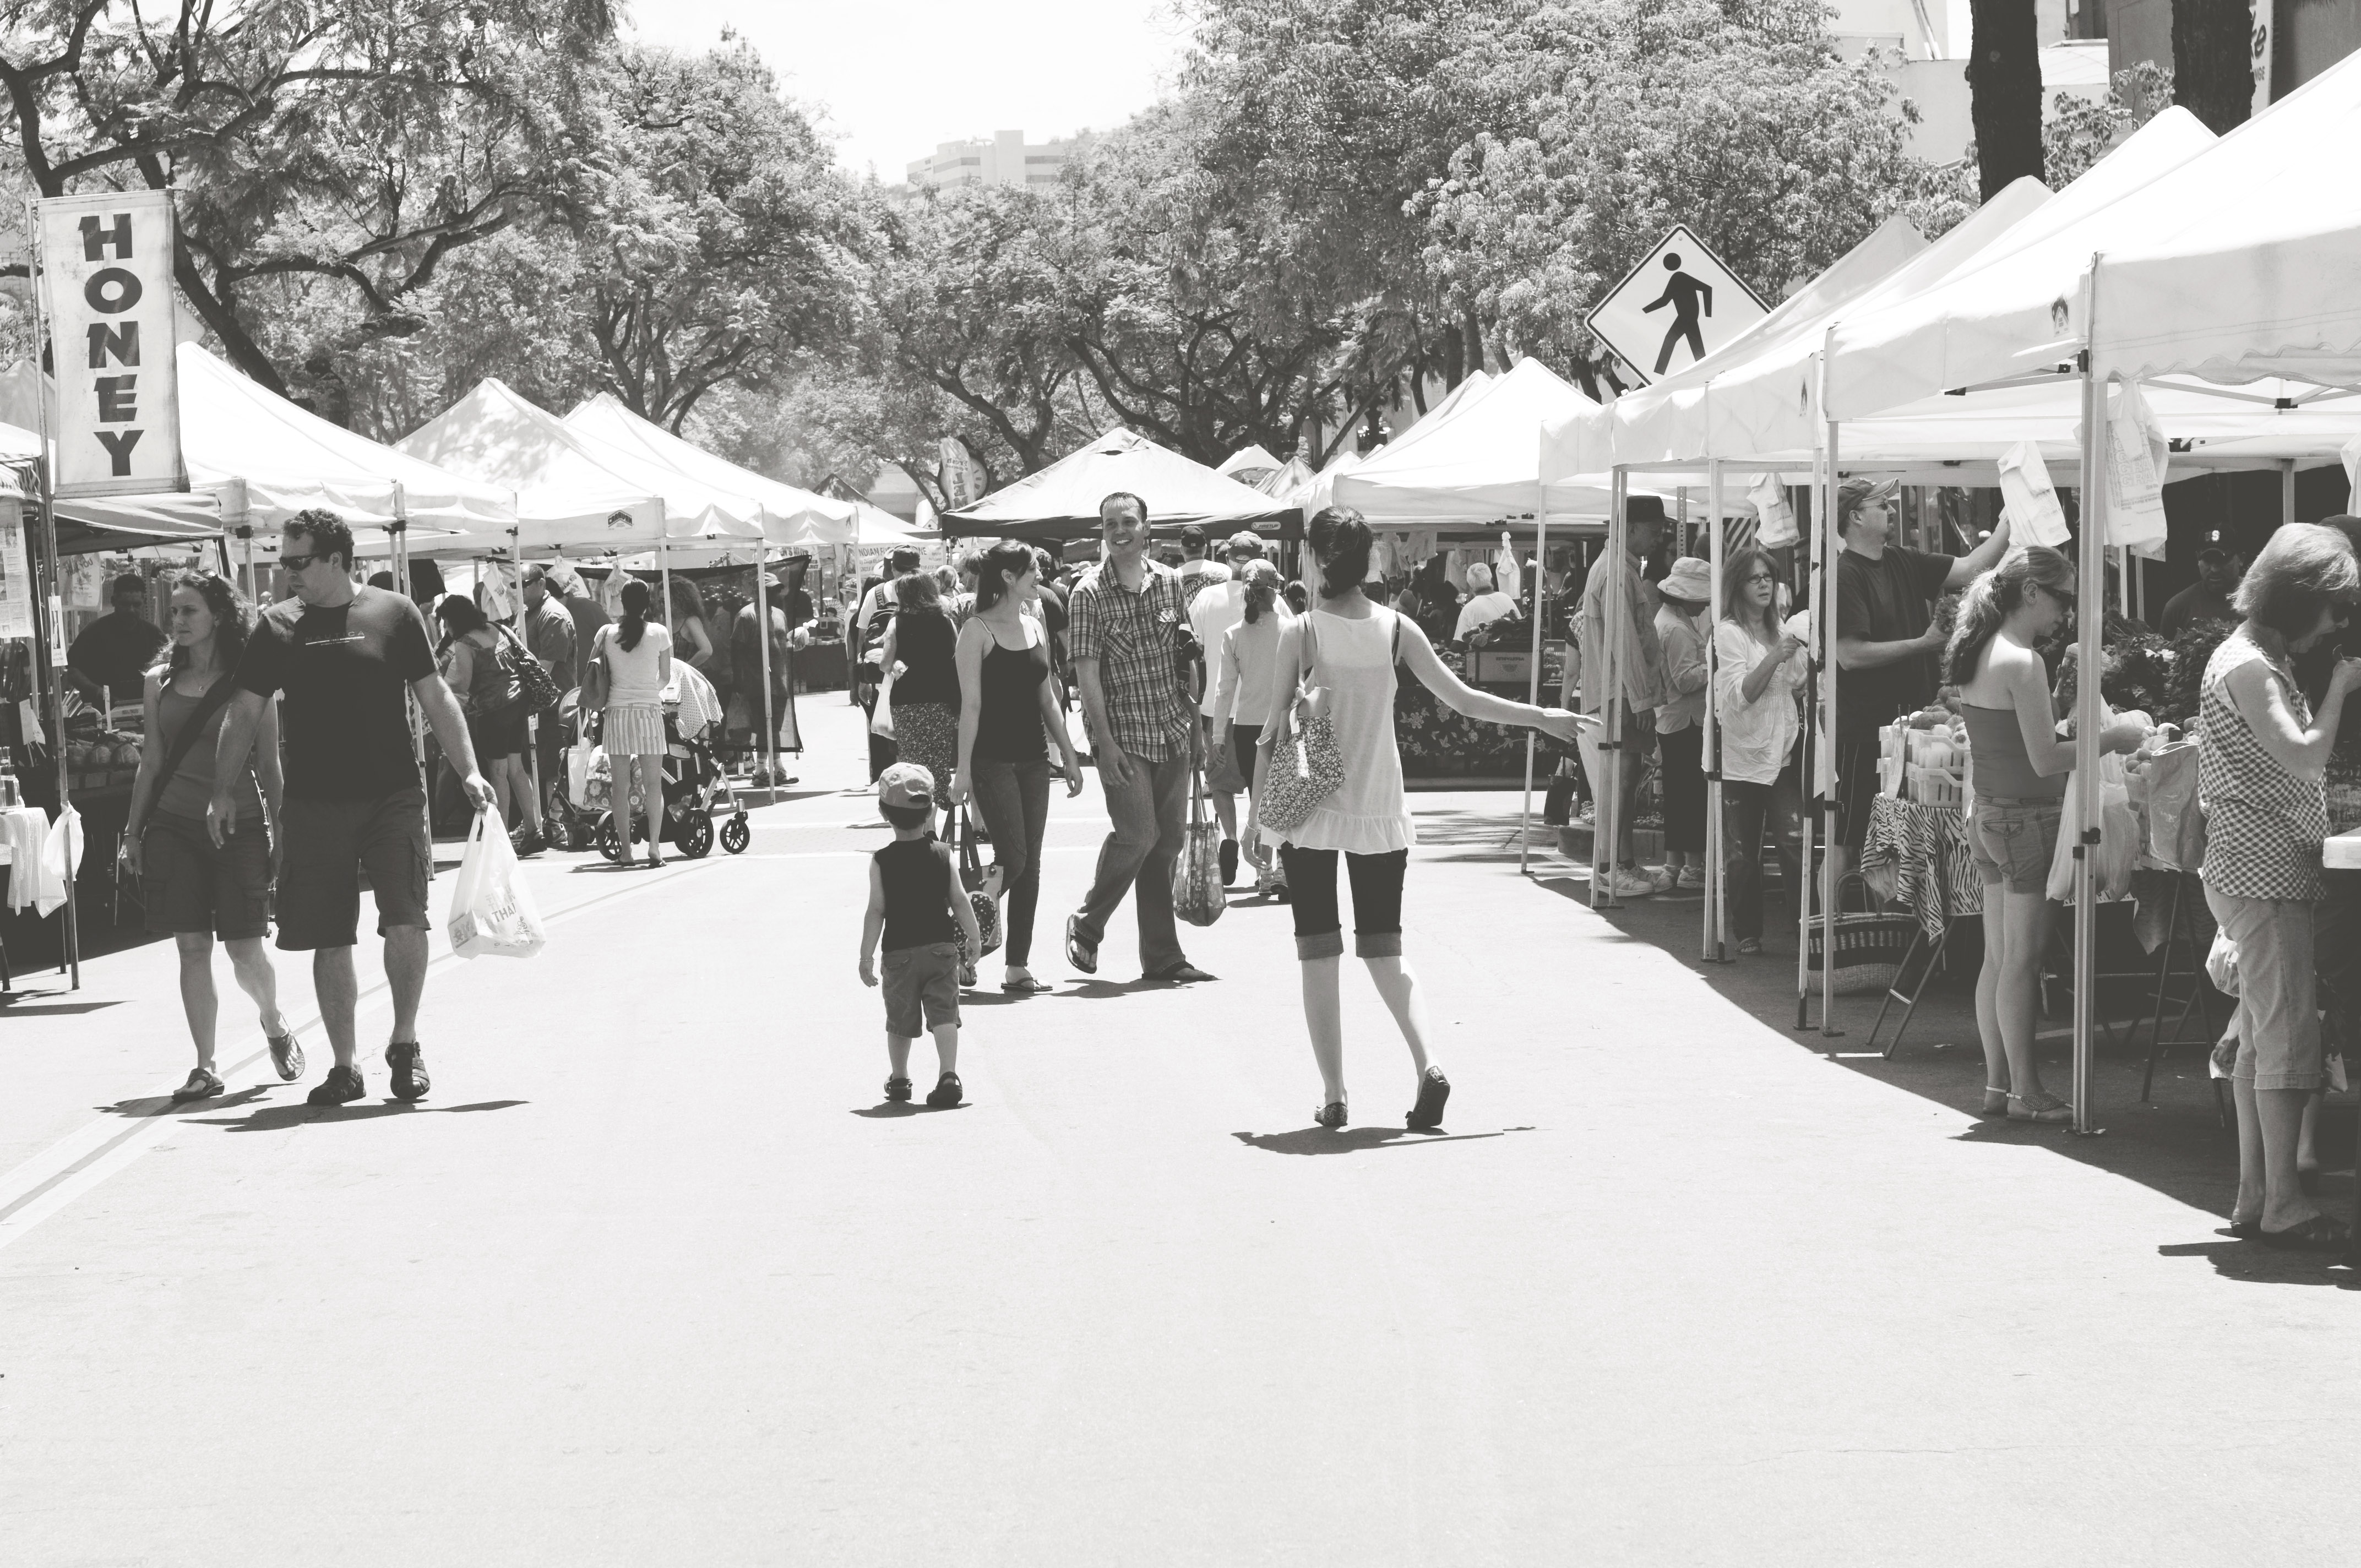
The best thing about California? The produce.
Seriously. If you ever visit LA, skip Hollywood Blvd (don’t worry, it sucks) and head for a farmers market. We have them nearly every single day of the year, with the exception of a few major holidays.
Tuesday in October? Head to Culver City or Silverlake. Thursday in February? There is a great one in Hollywood called Yamashiro.
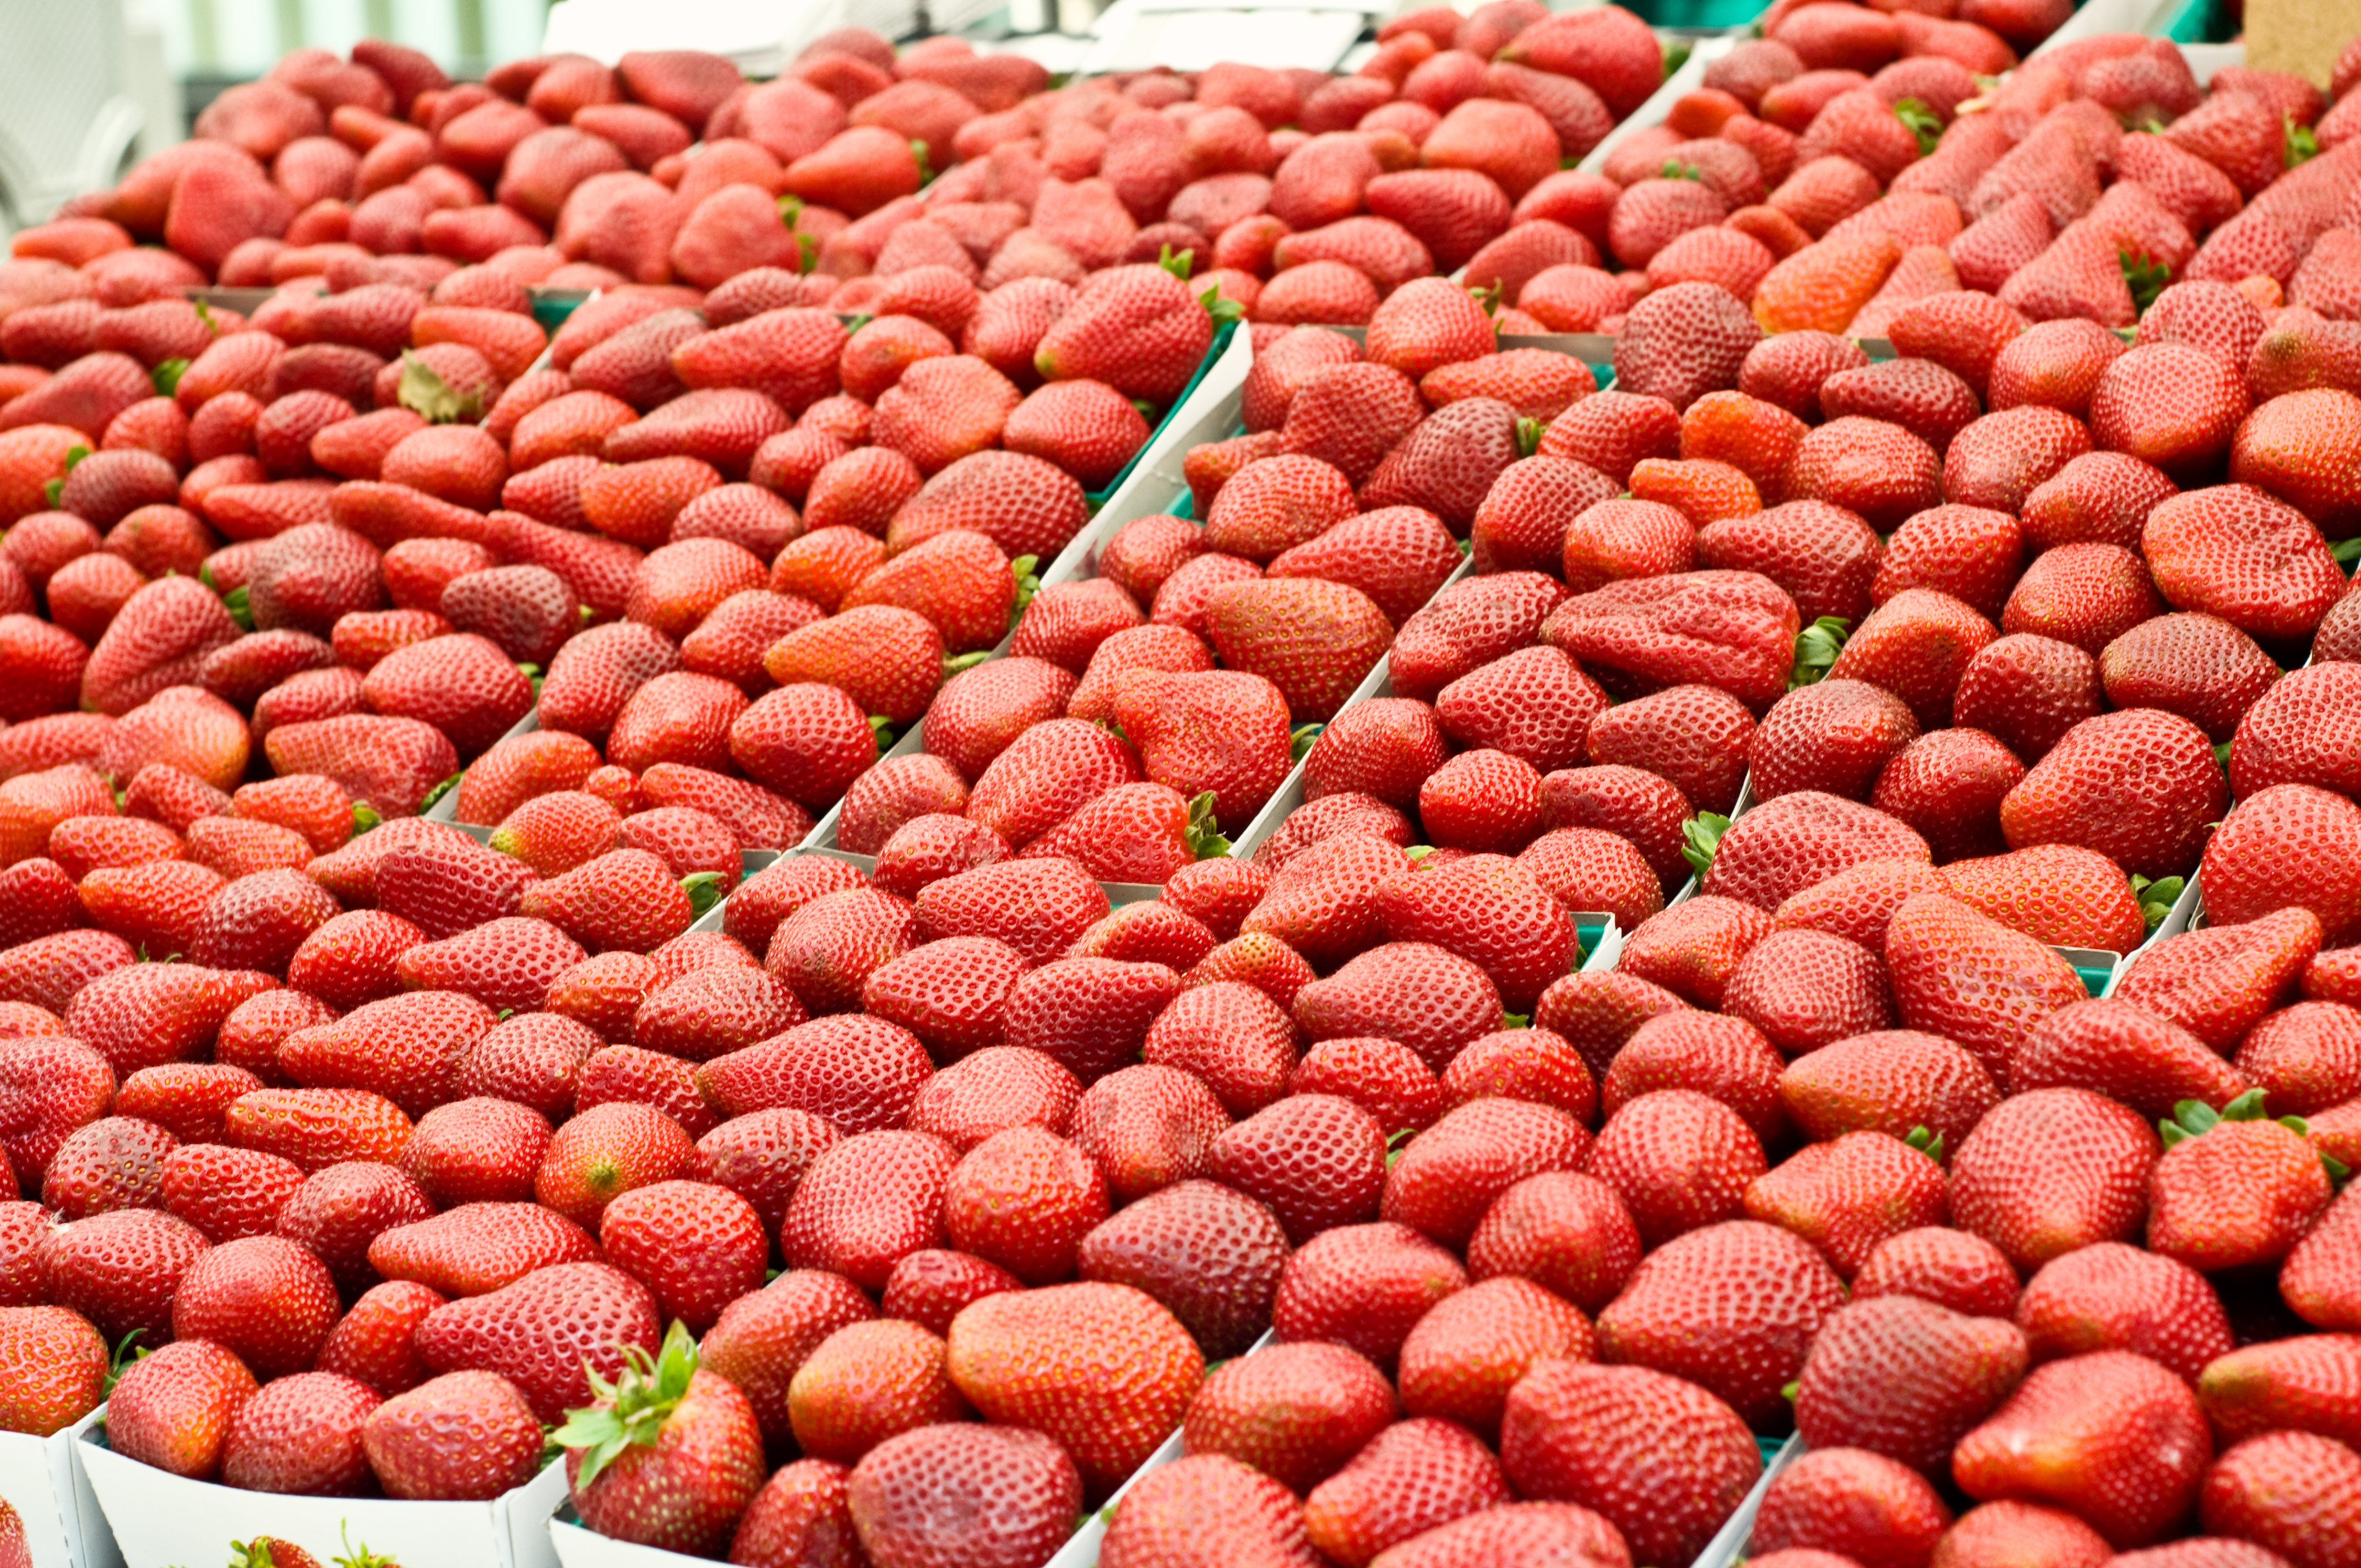
And Strawberries are in season nearly all year. Did you know that California grows 50% of the produce for the entire United States? It also grows 75% of the produce for the Western side of Canada.
And, California has the best strawberries in the world. If you ever make it to California, put: "Eat a real California Strawberry" on your to do list. California grows 85% of the strawberries in the US.
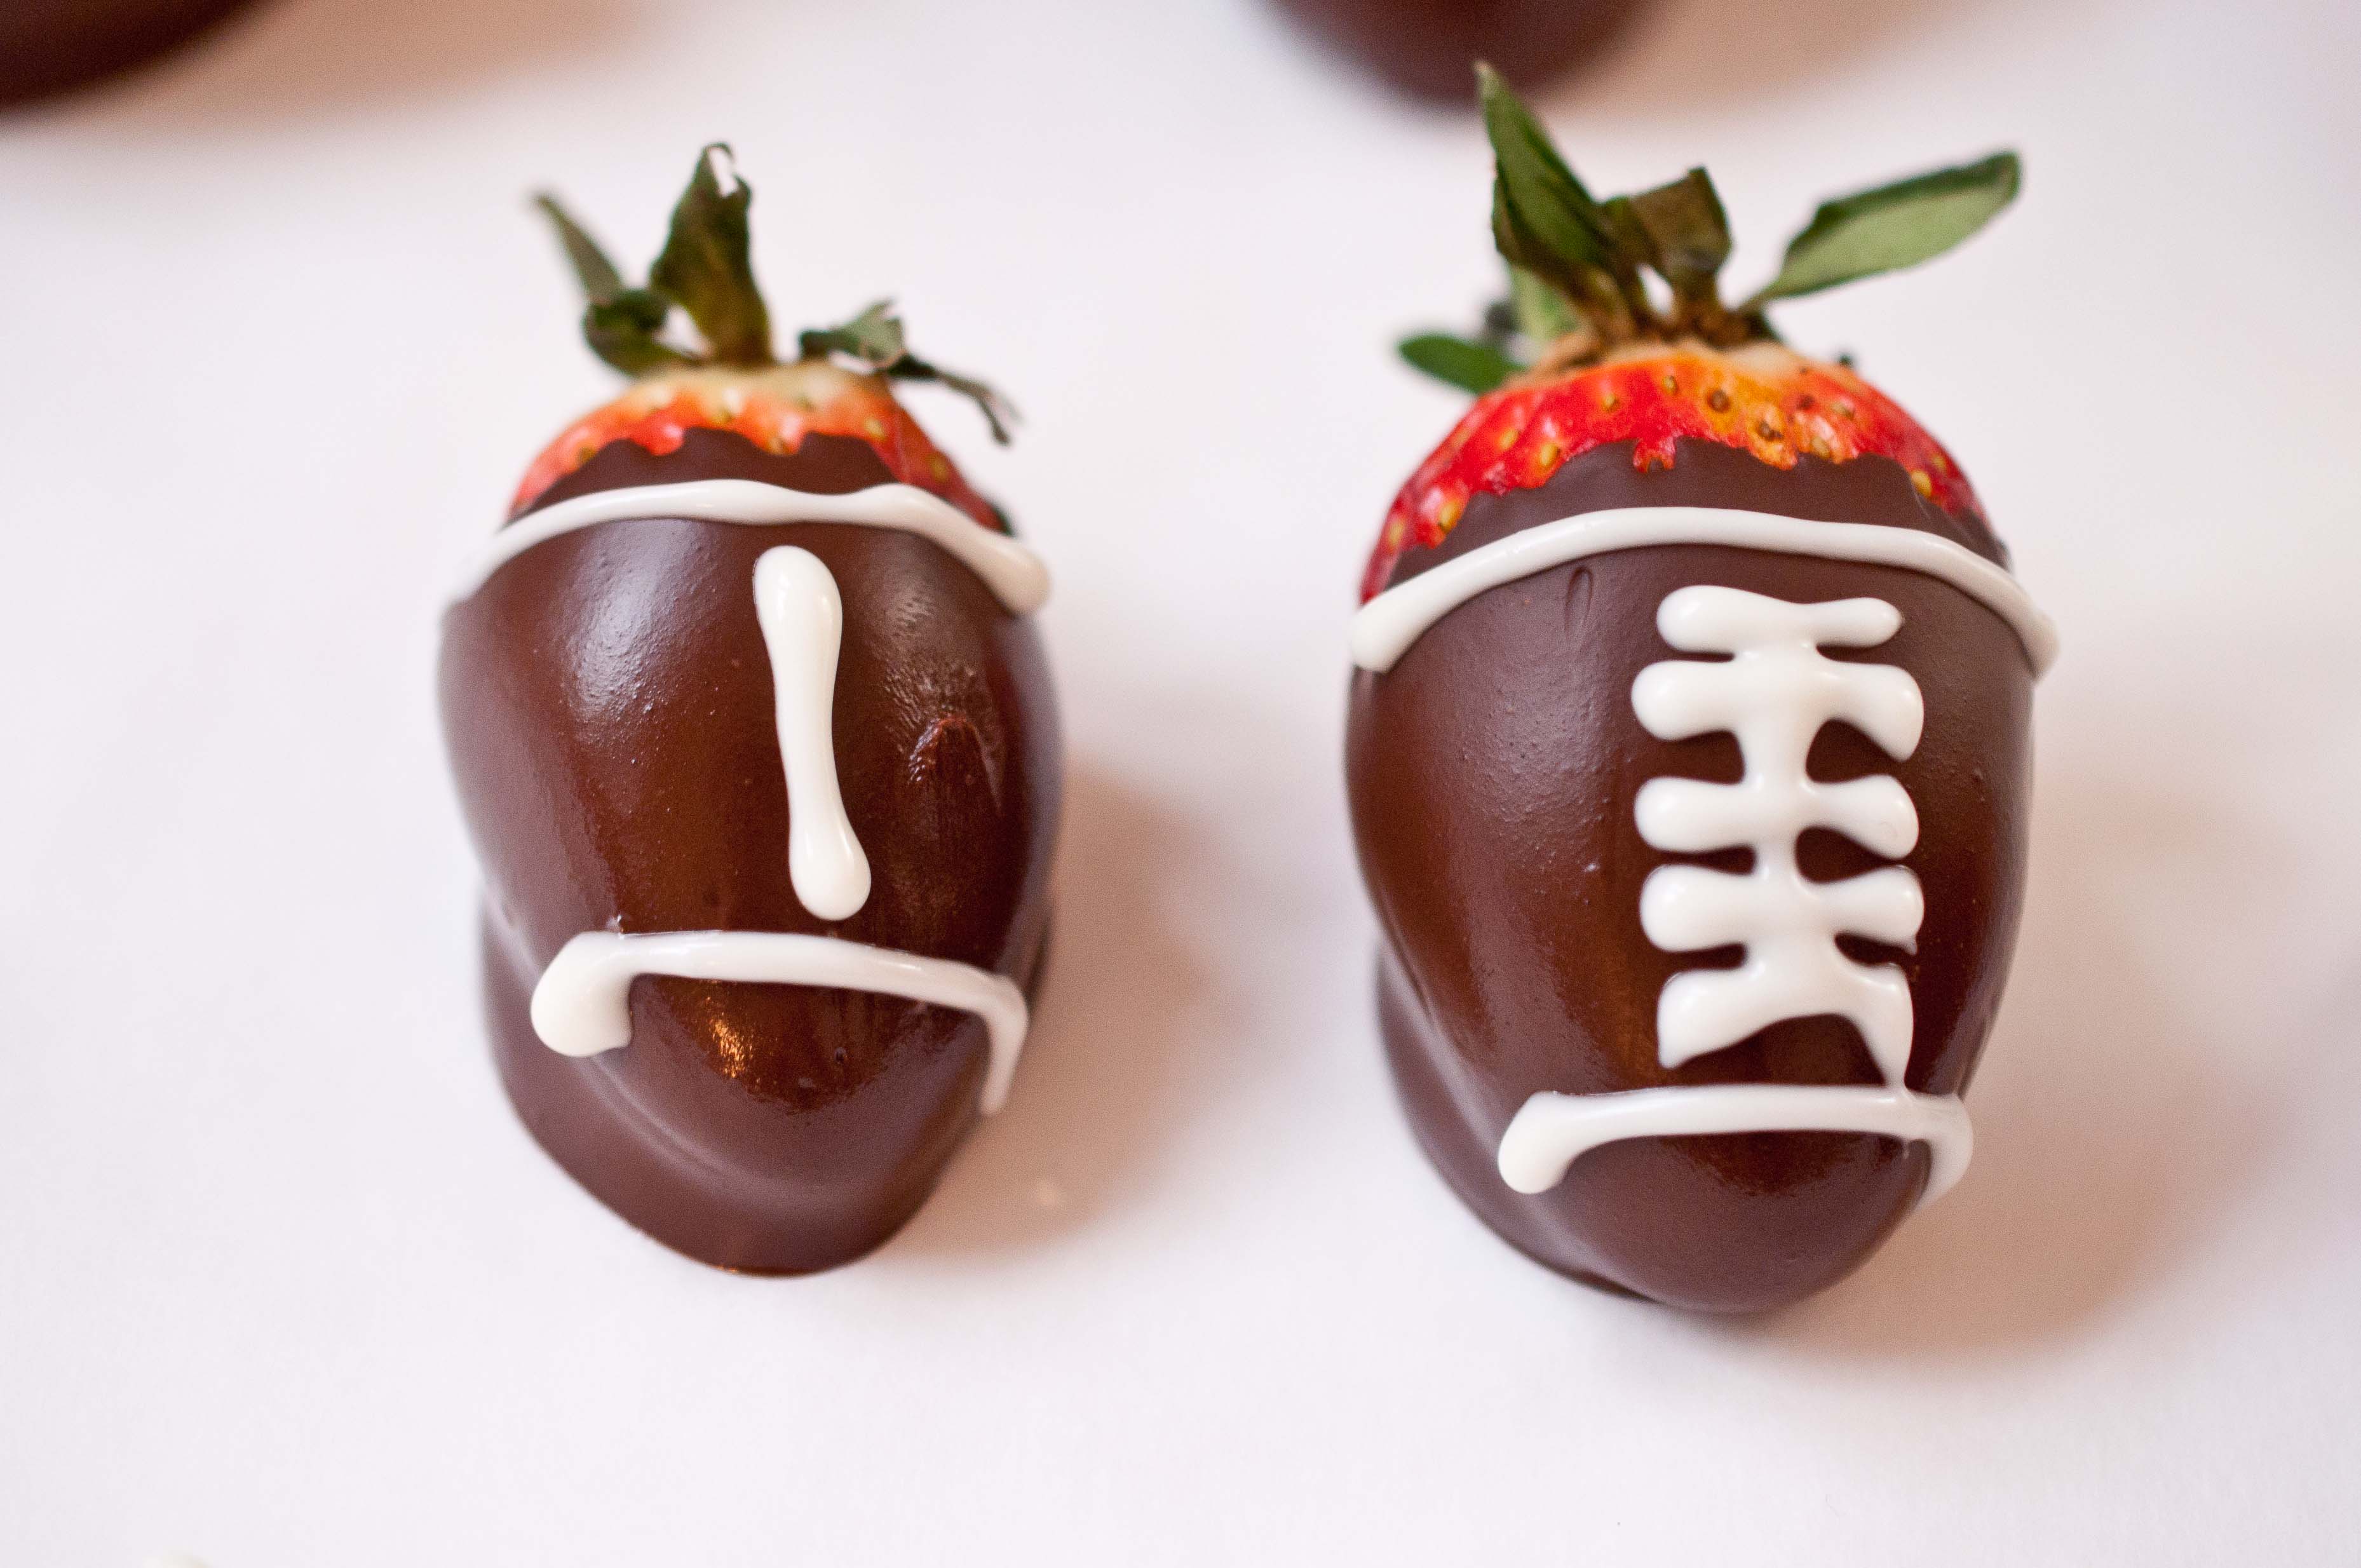
I do realize that there is a chance that when that little ball game rolls around in a few weeks, (what’s it called again? The Super Bowl?) you might not live in a place as lucky as Strawberry-afornia or have access to these beauties year round. That’s OK, just tuck this idea away in your head and make them for a sports themed birthday party sometime over the summer.
Chocolate Strawberry Footballs
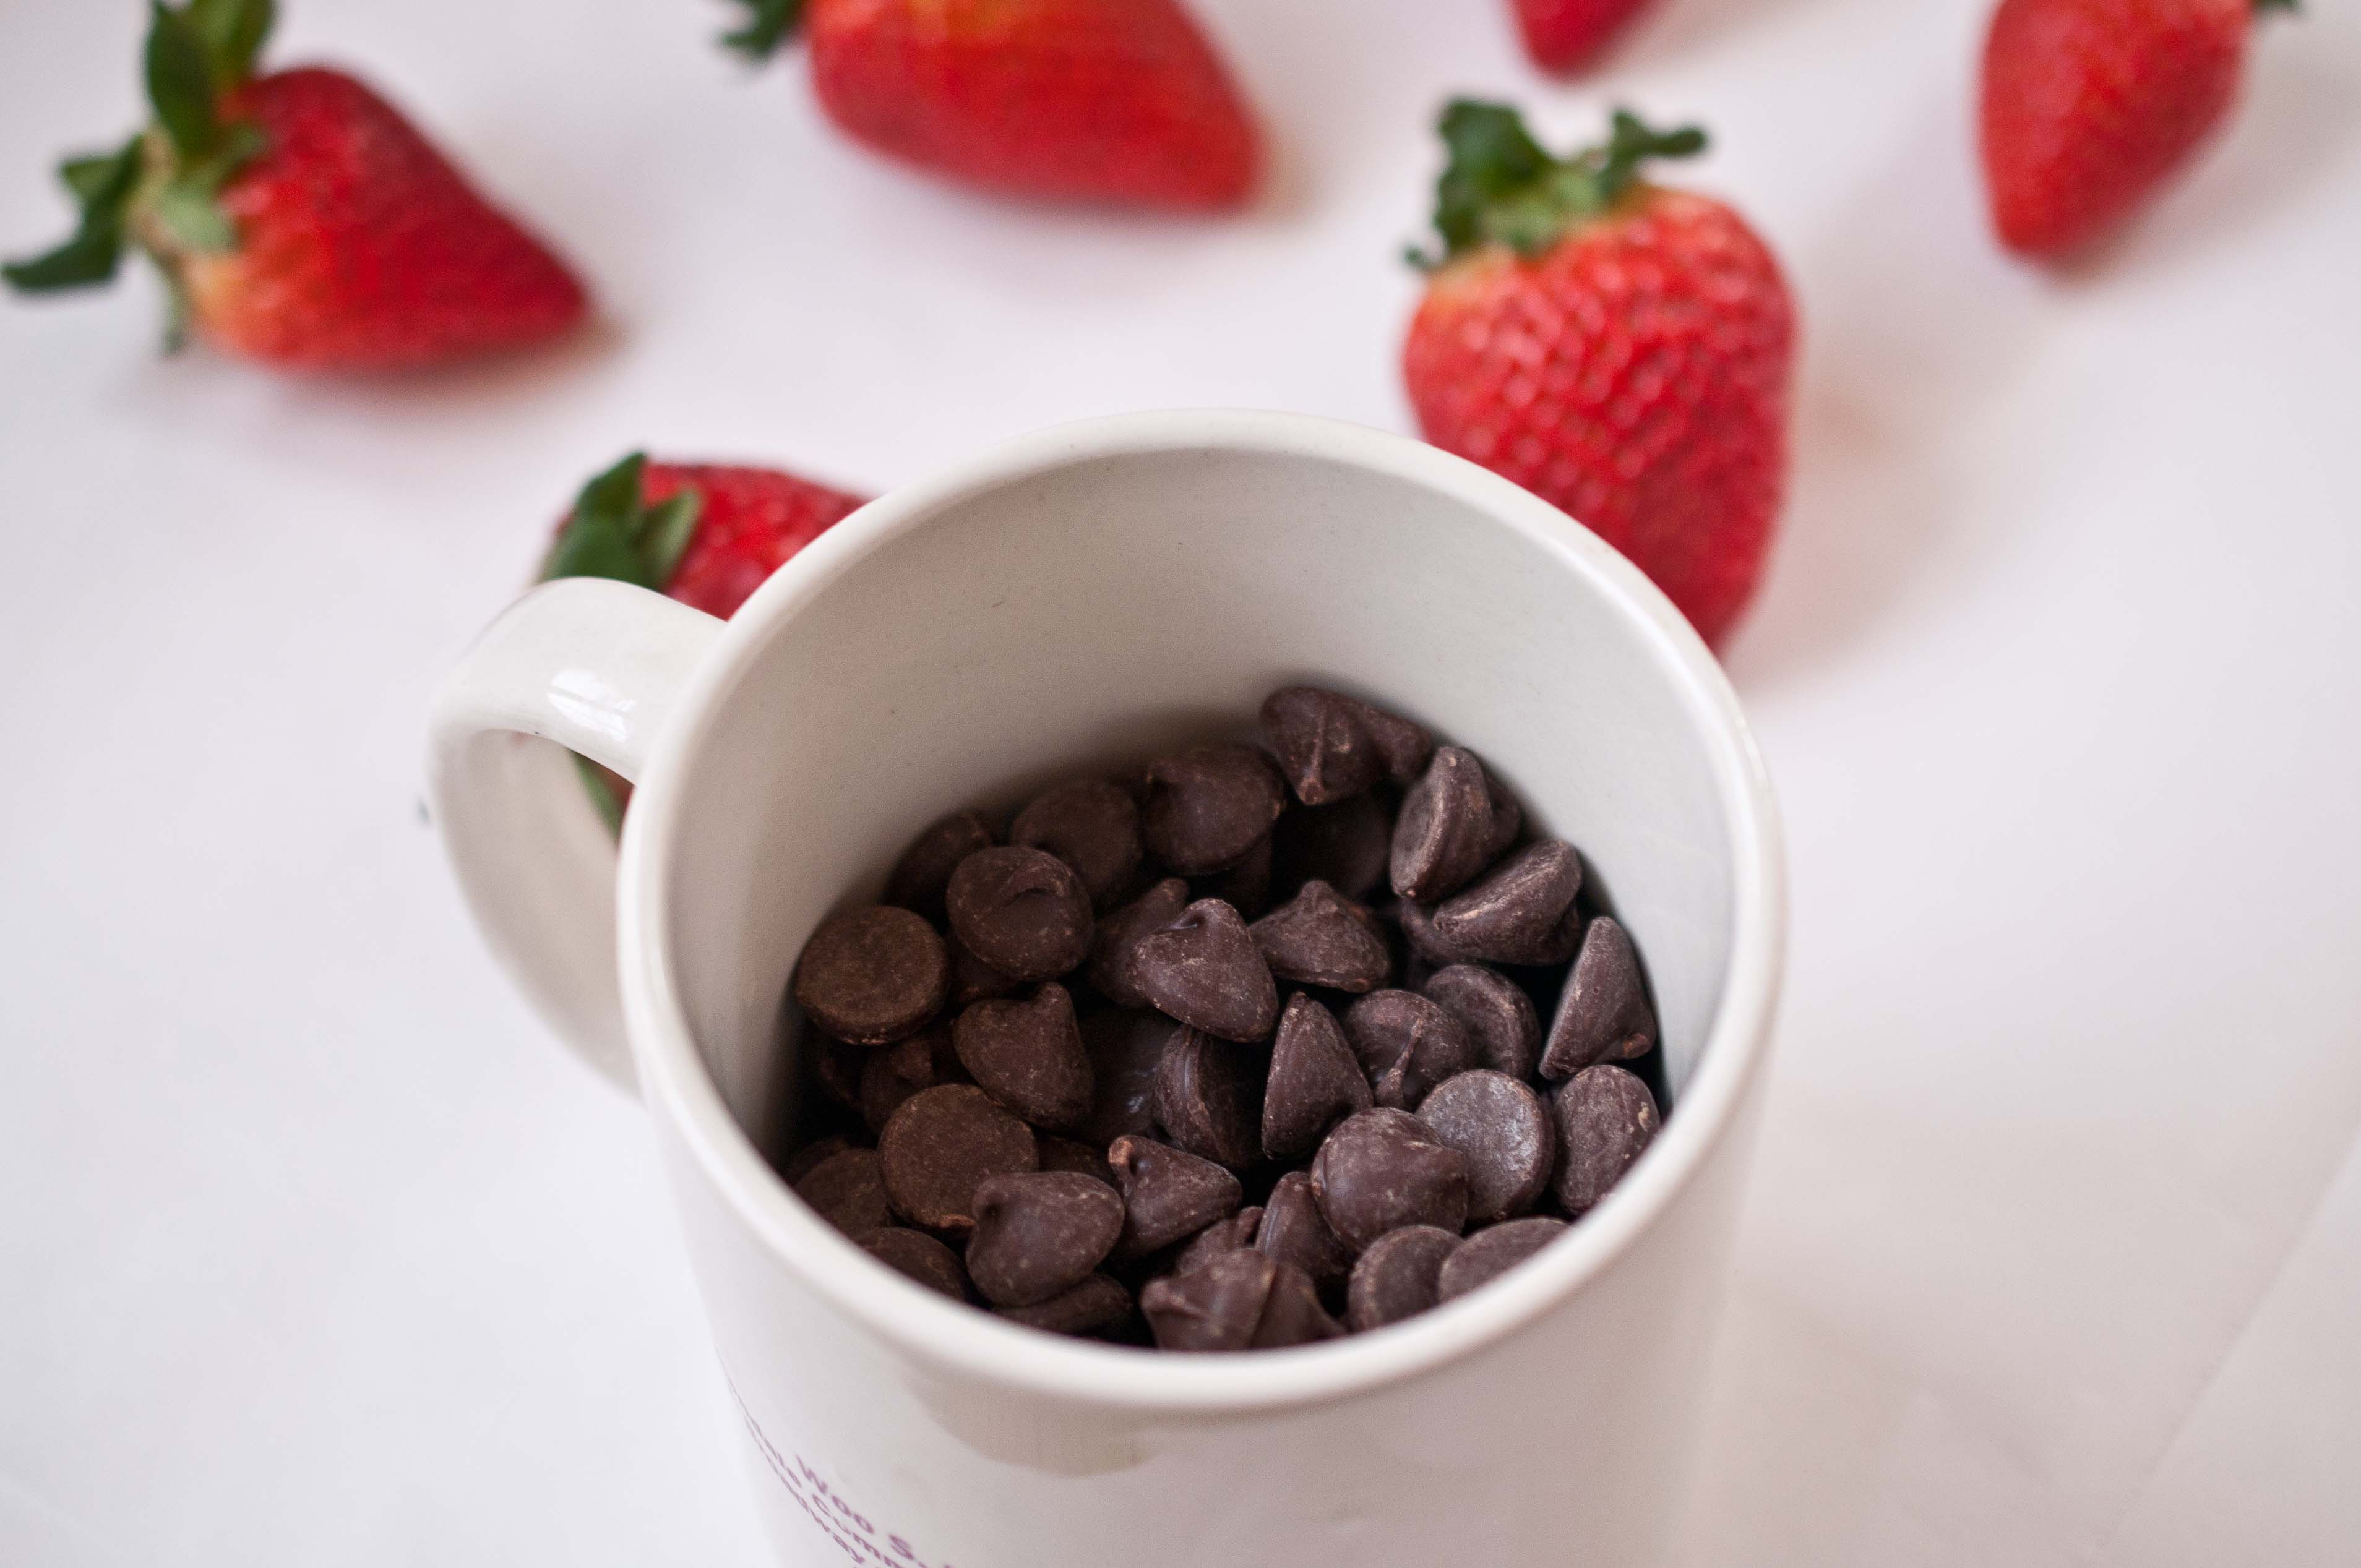
1 1/2 cups dark chocolate chips
12-14 large strawberries
1/4 cup white chocolate chips
you will also need:
2 Coffee mugs
piping bag
#2 tip
Parchment paper
In a microwave safe coffee mug add the dark chocolate chips. I’ve found this to be the best vessel for strawberry dipping. If the bowl you use is too wide then the melted chocolate is too shallow, and it’s hard to get the strawberries dipped.
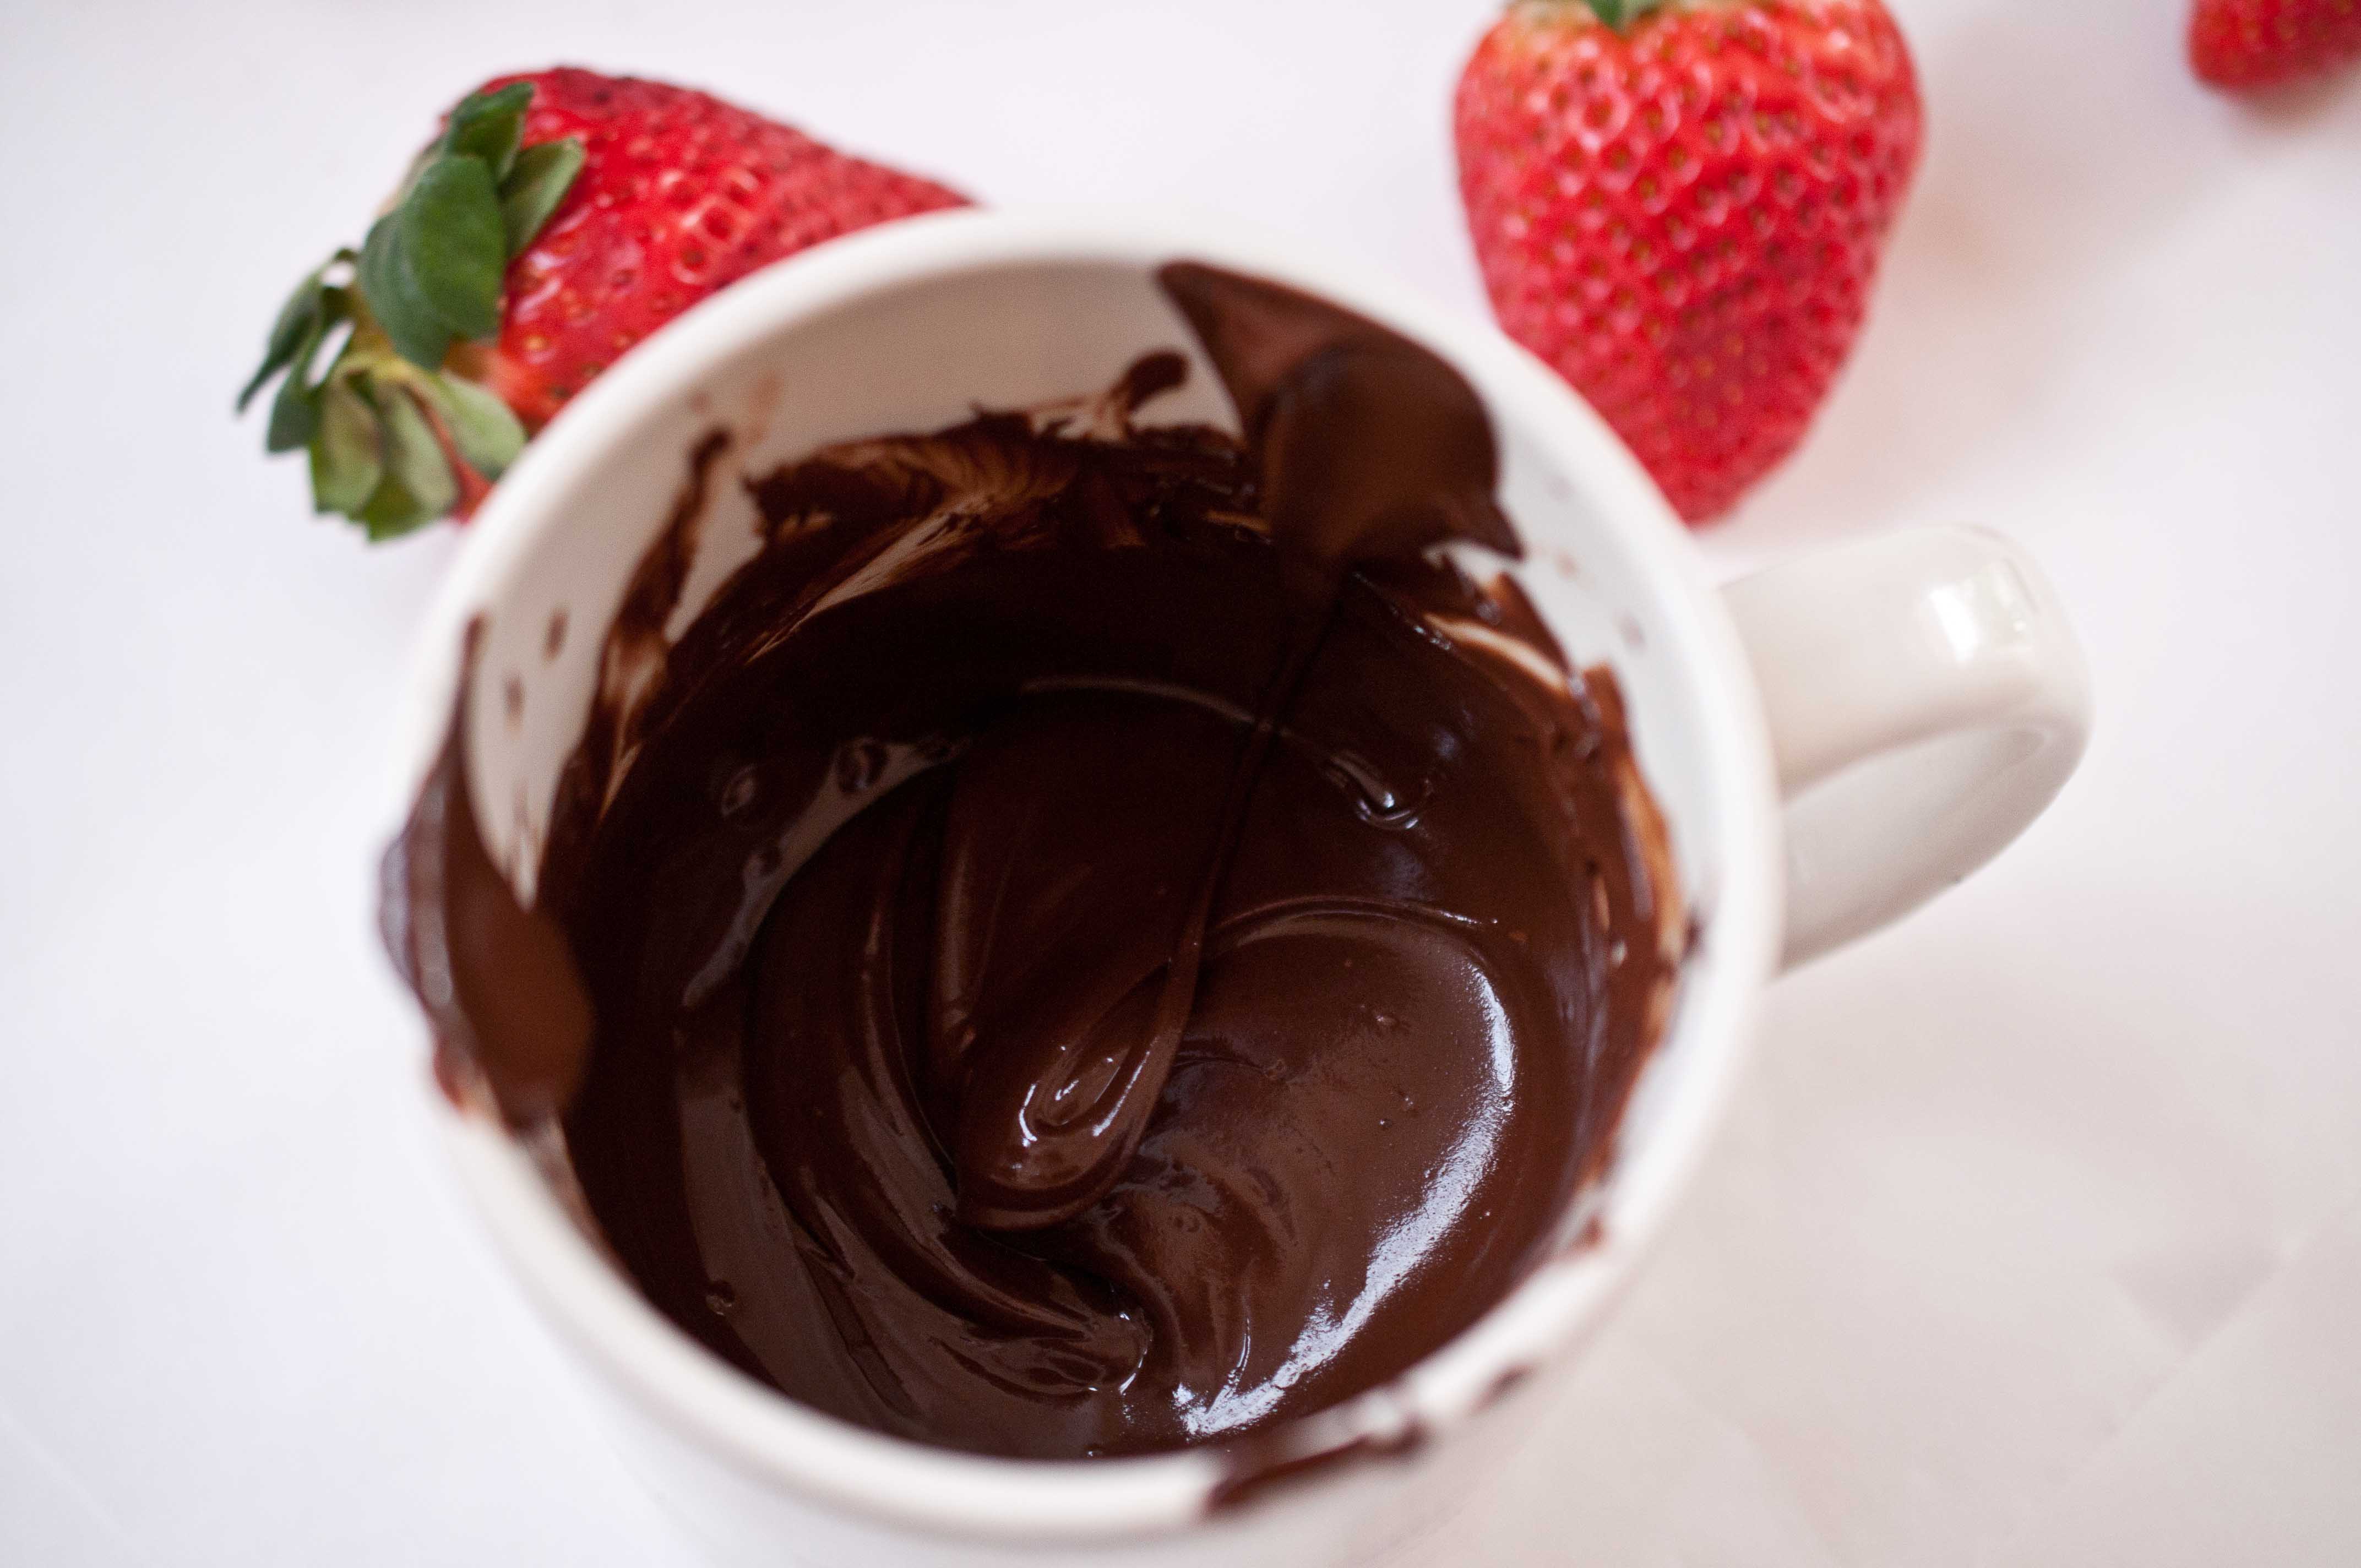
Microwave on high for 30 seconds. Stir and repeat until melted. Don’t over heat or your chocolate will seize and there is really no coming back from that.
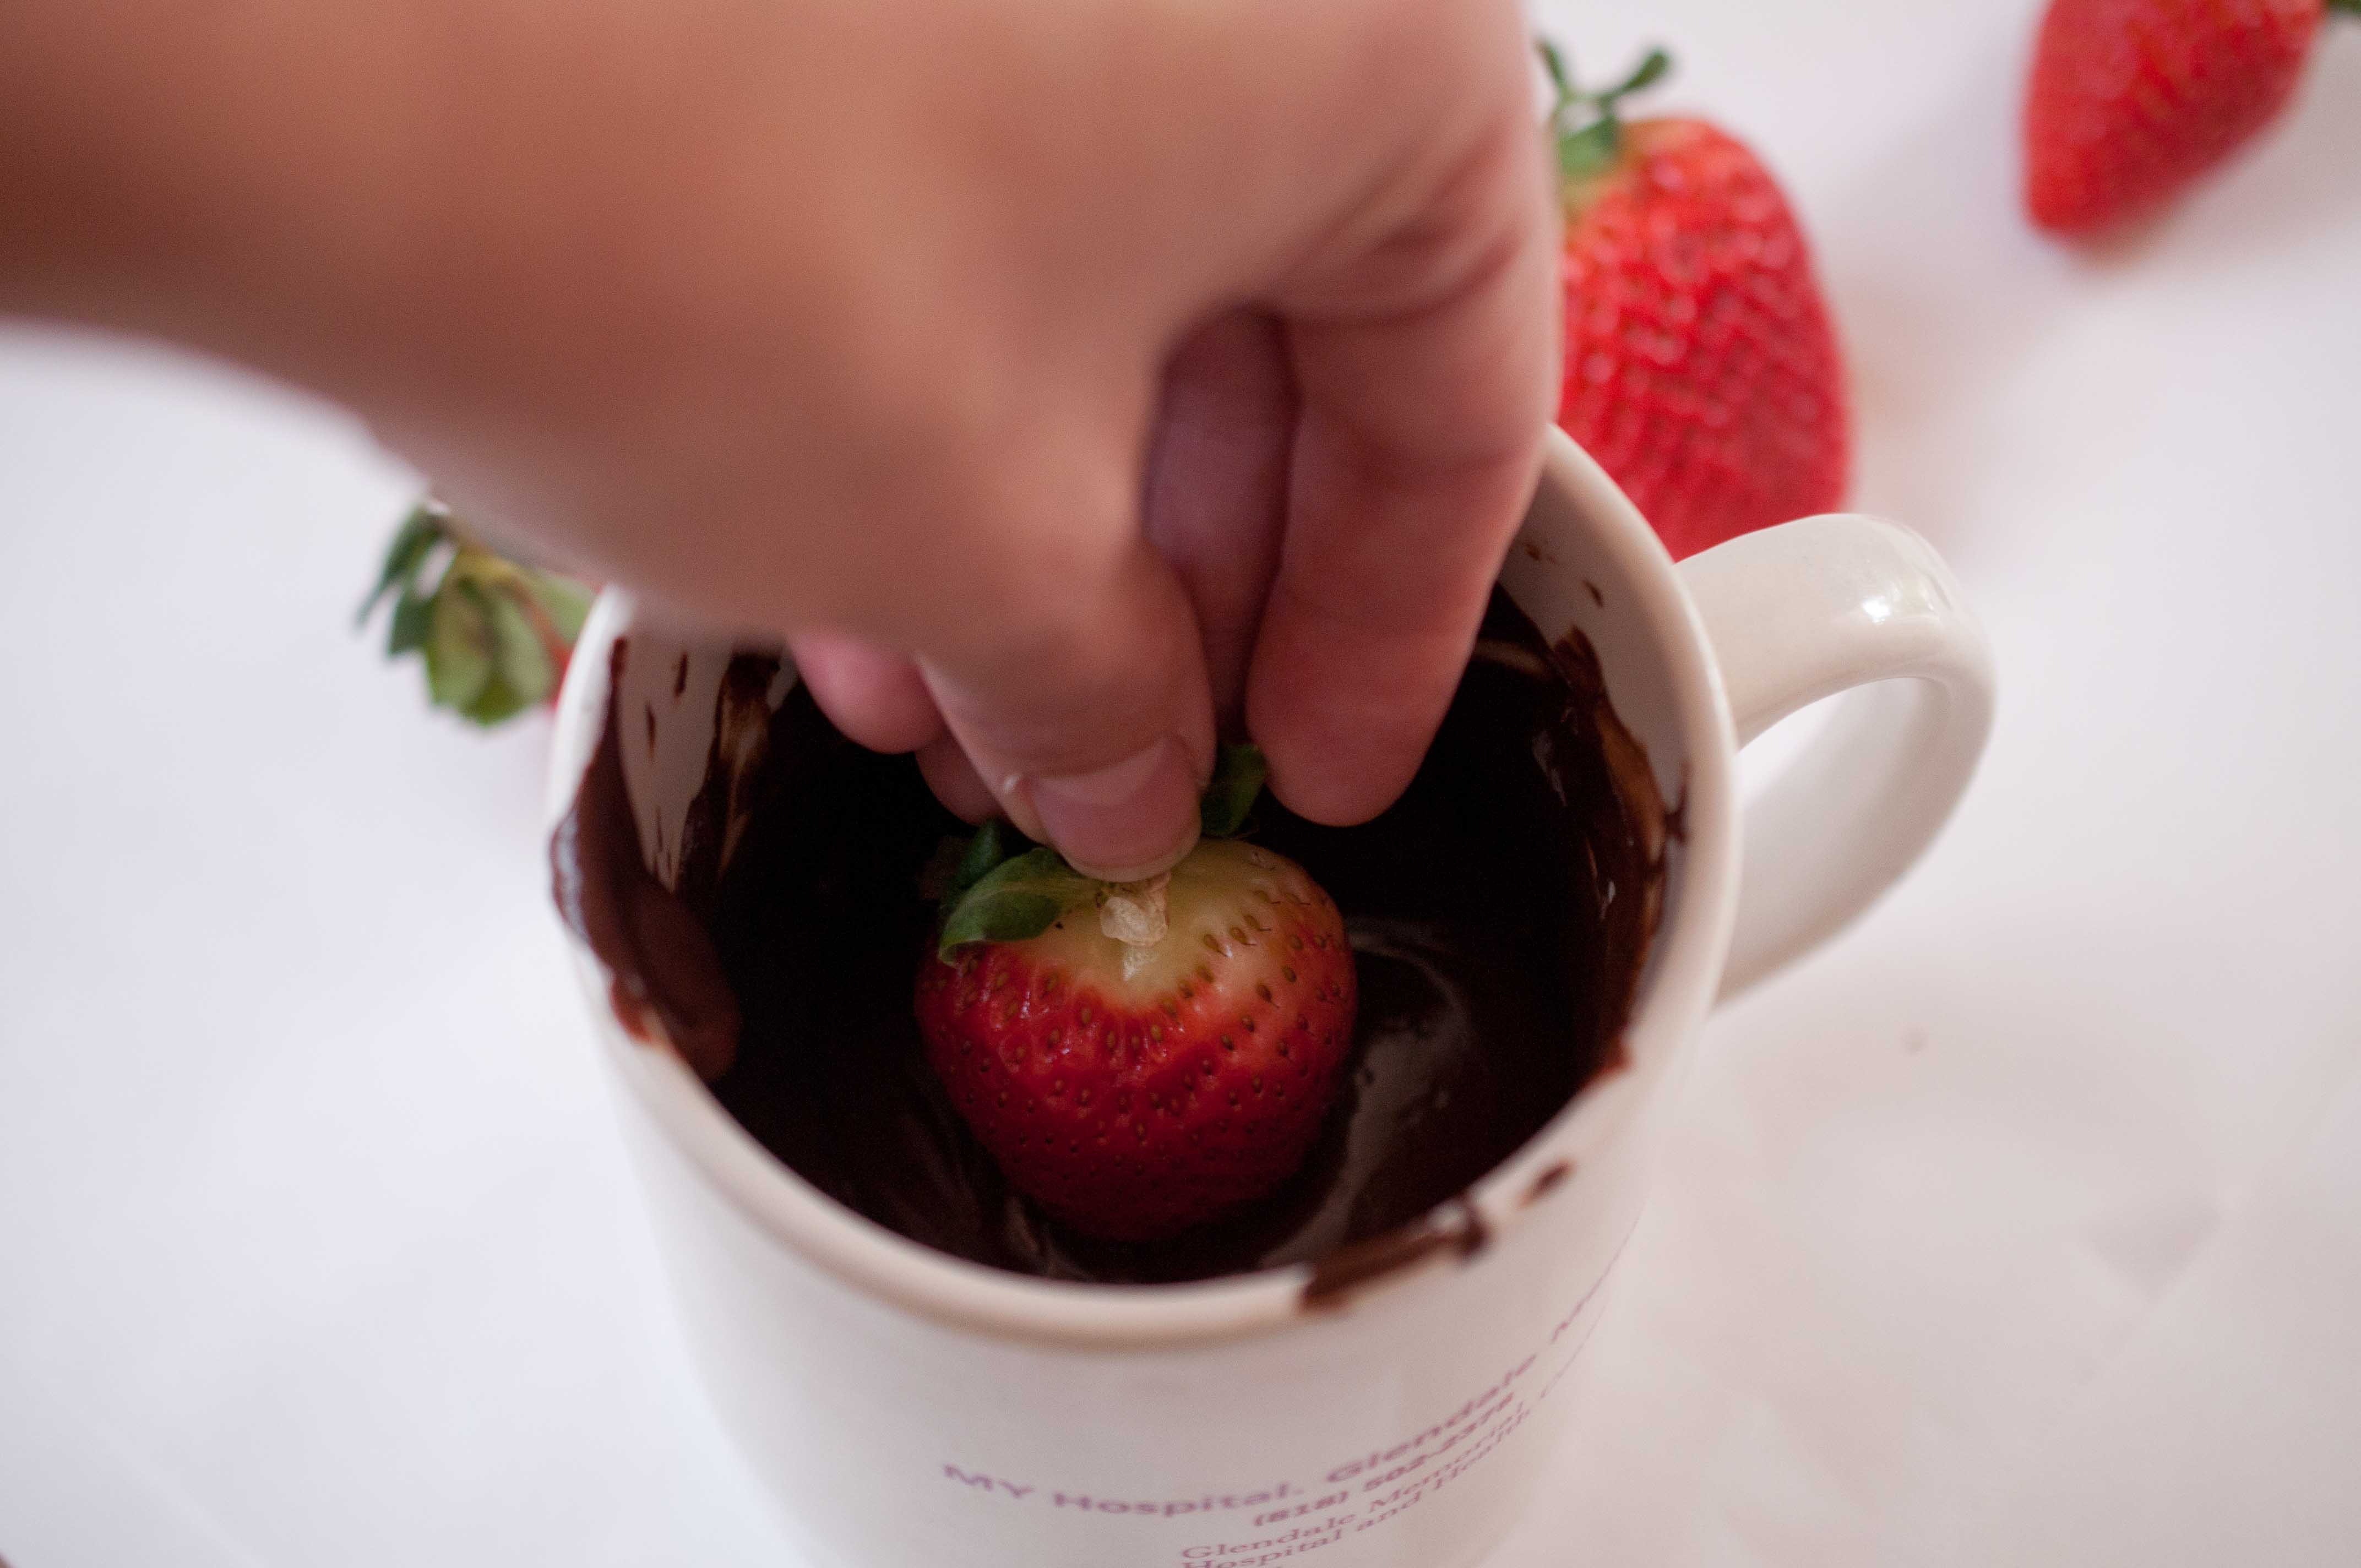
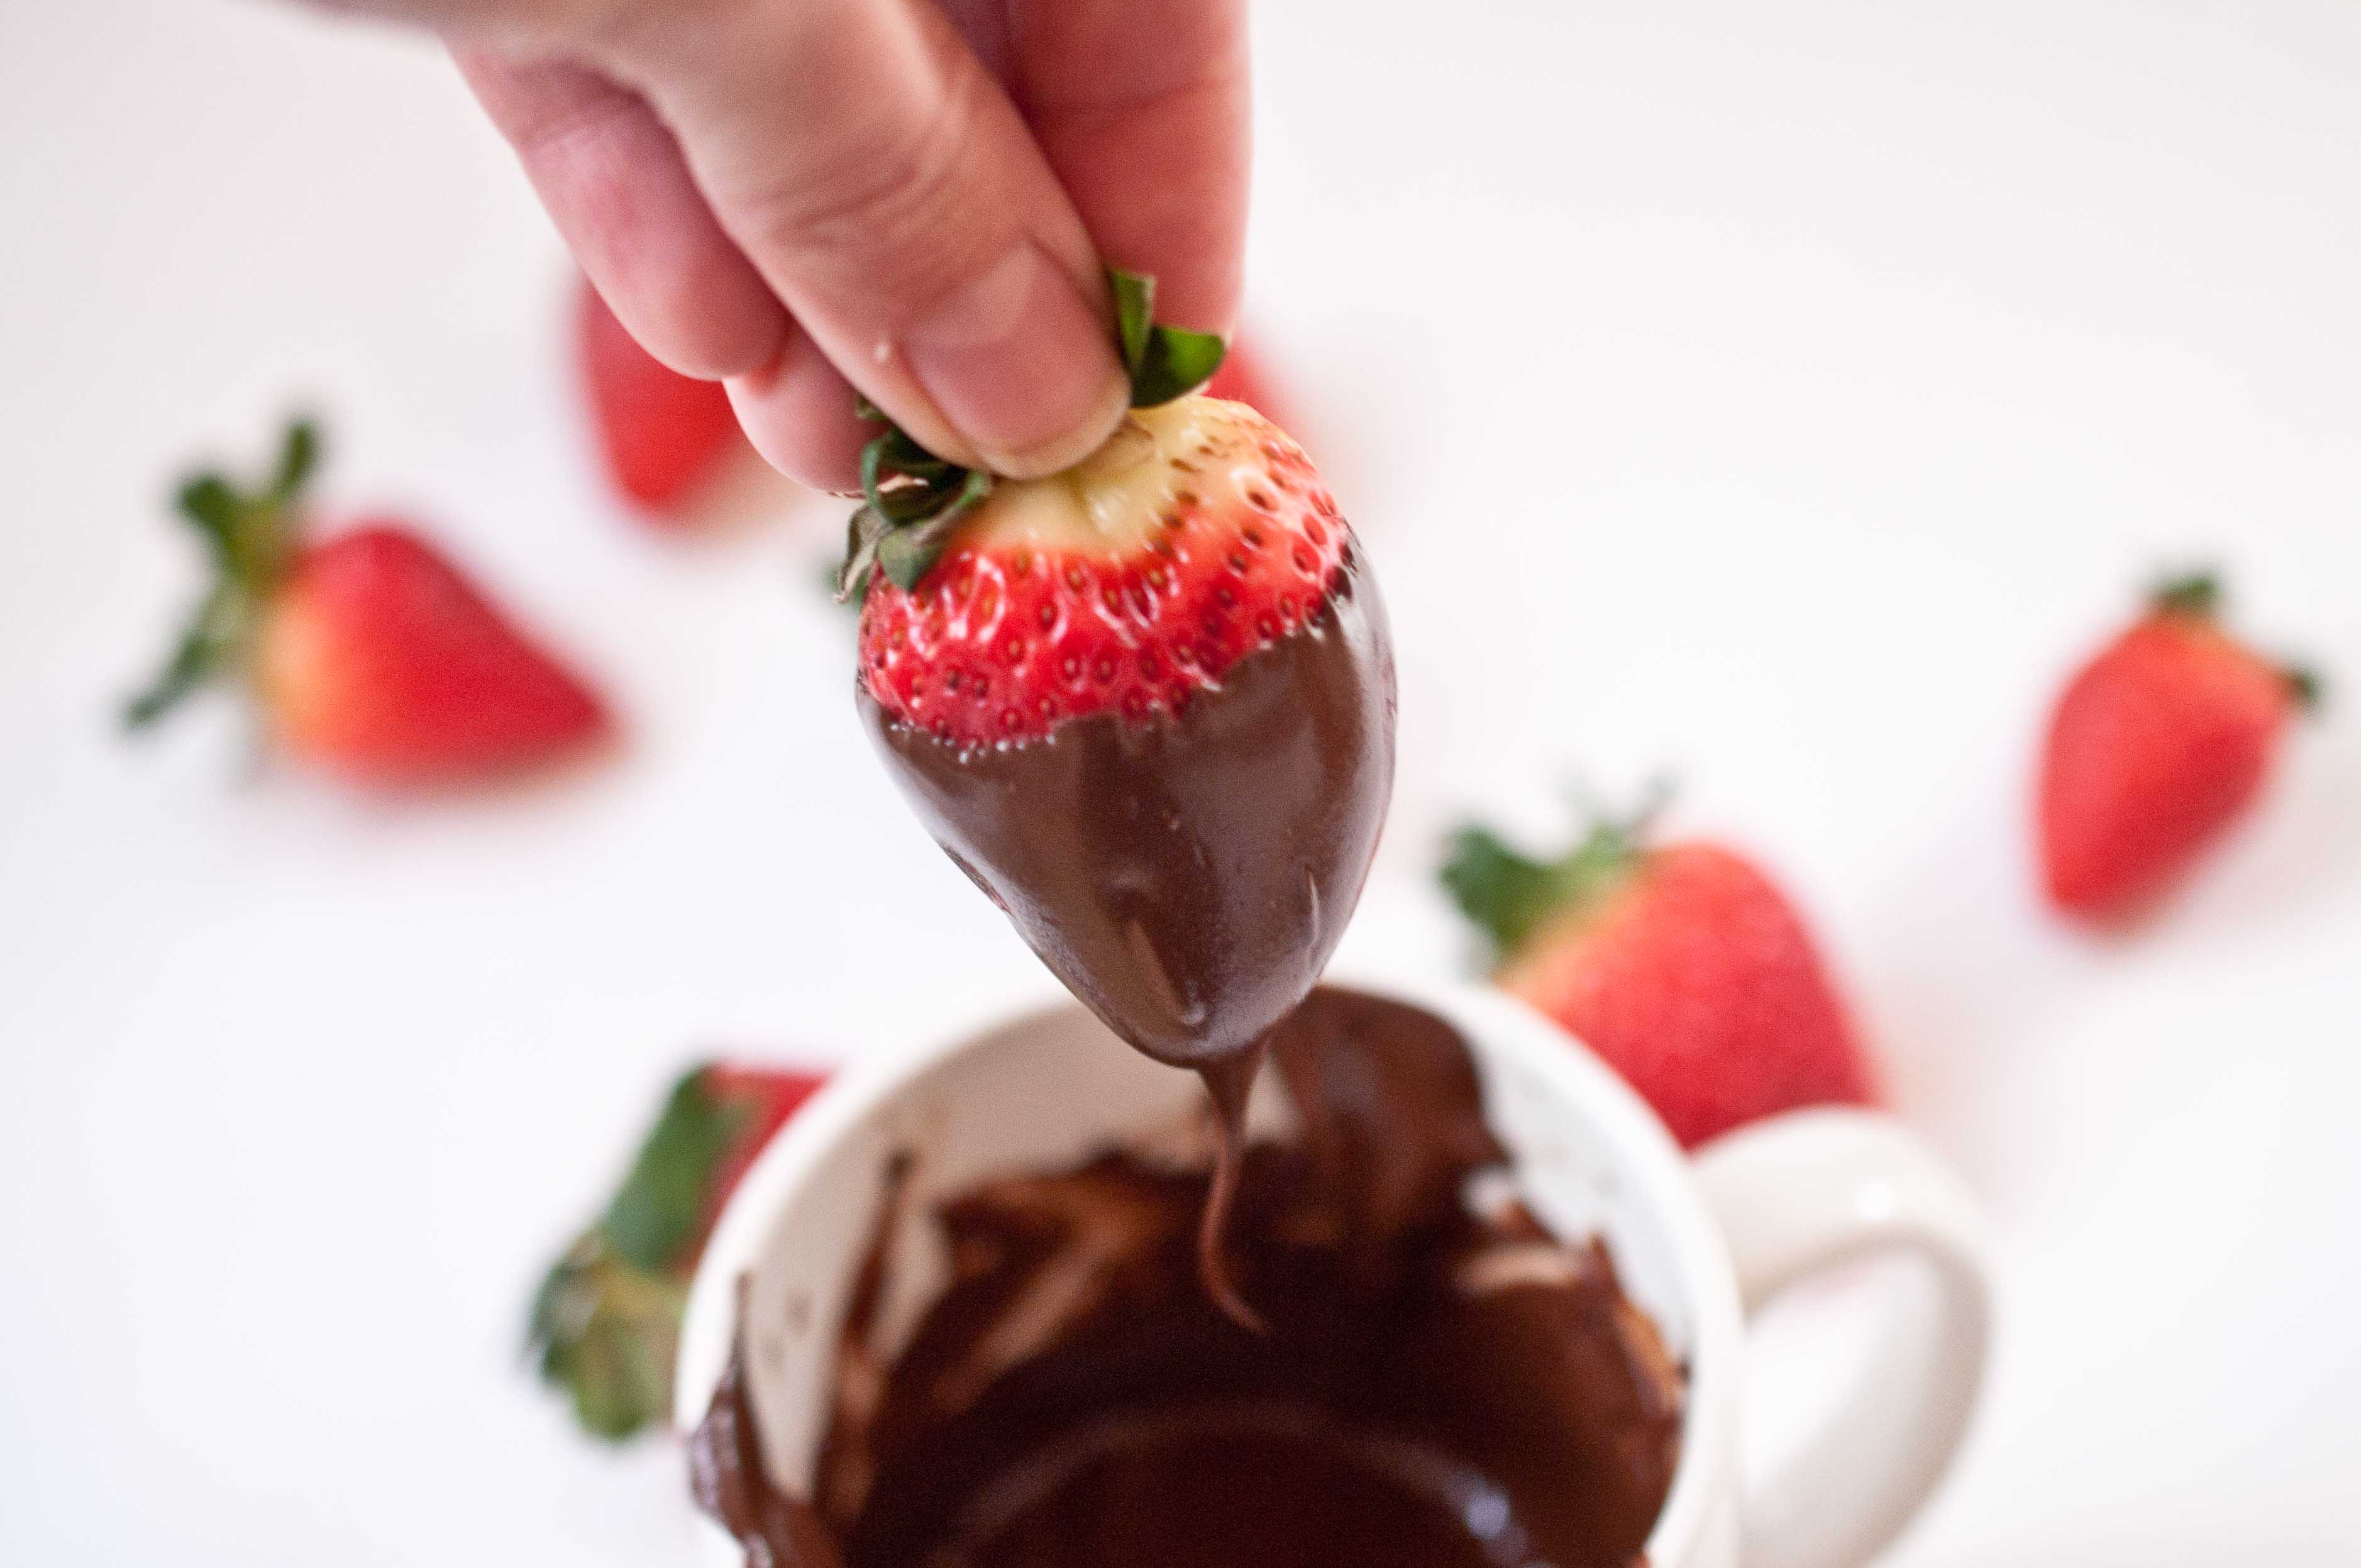
Grab the strawberry by the leaves (make sure strawberries are completely dry or the chocolate won’t stick).
Dip in the chocolate and swirl around carefully until coated.
Hold above the coffee mug for a few seconds to allow the excess to drip off.
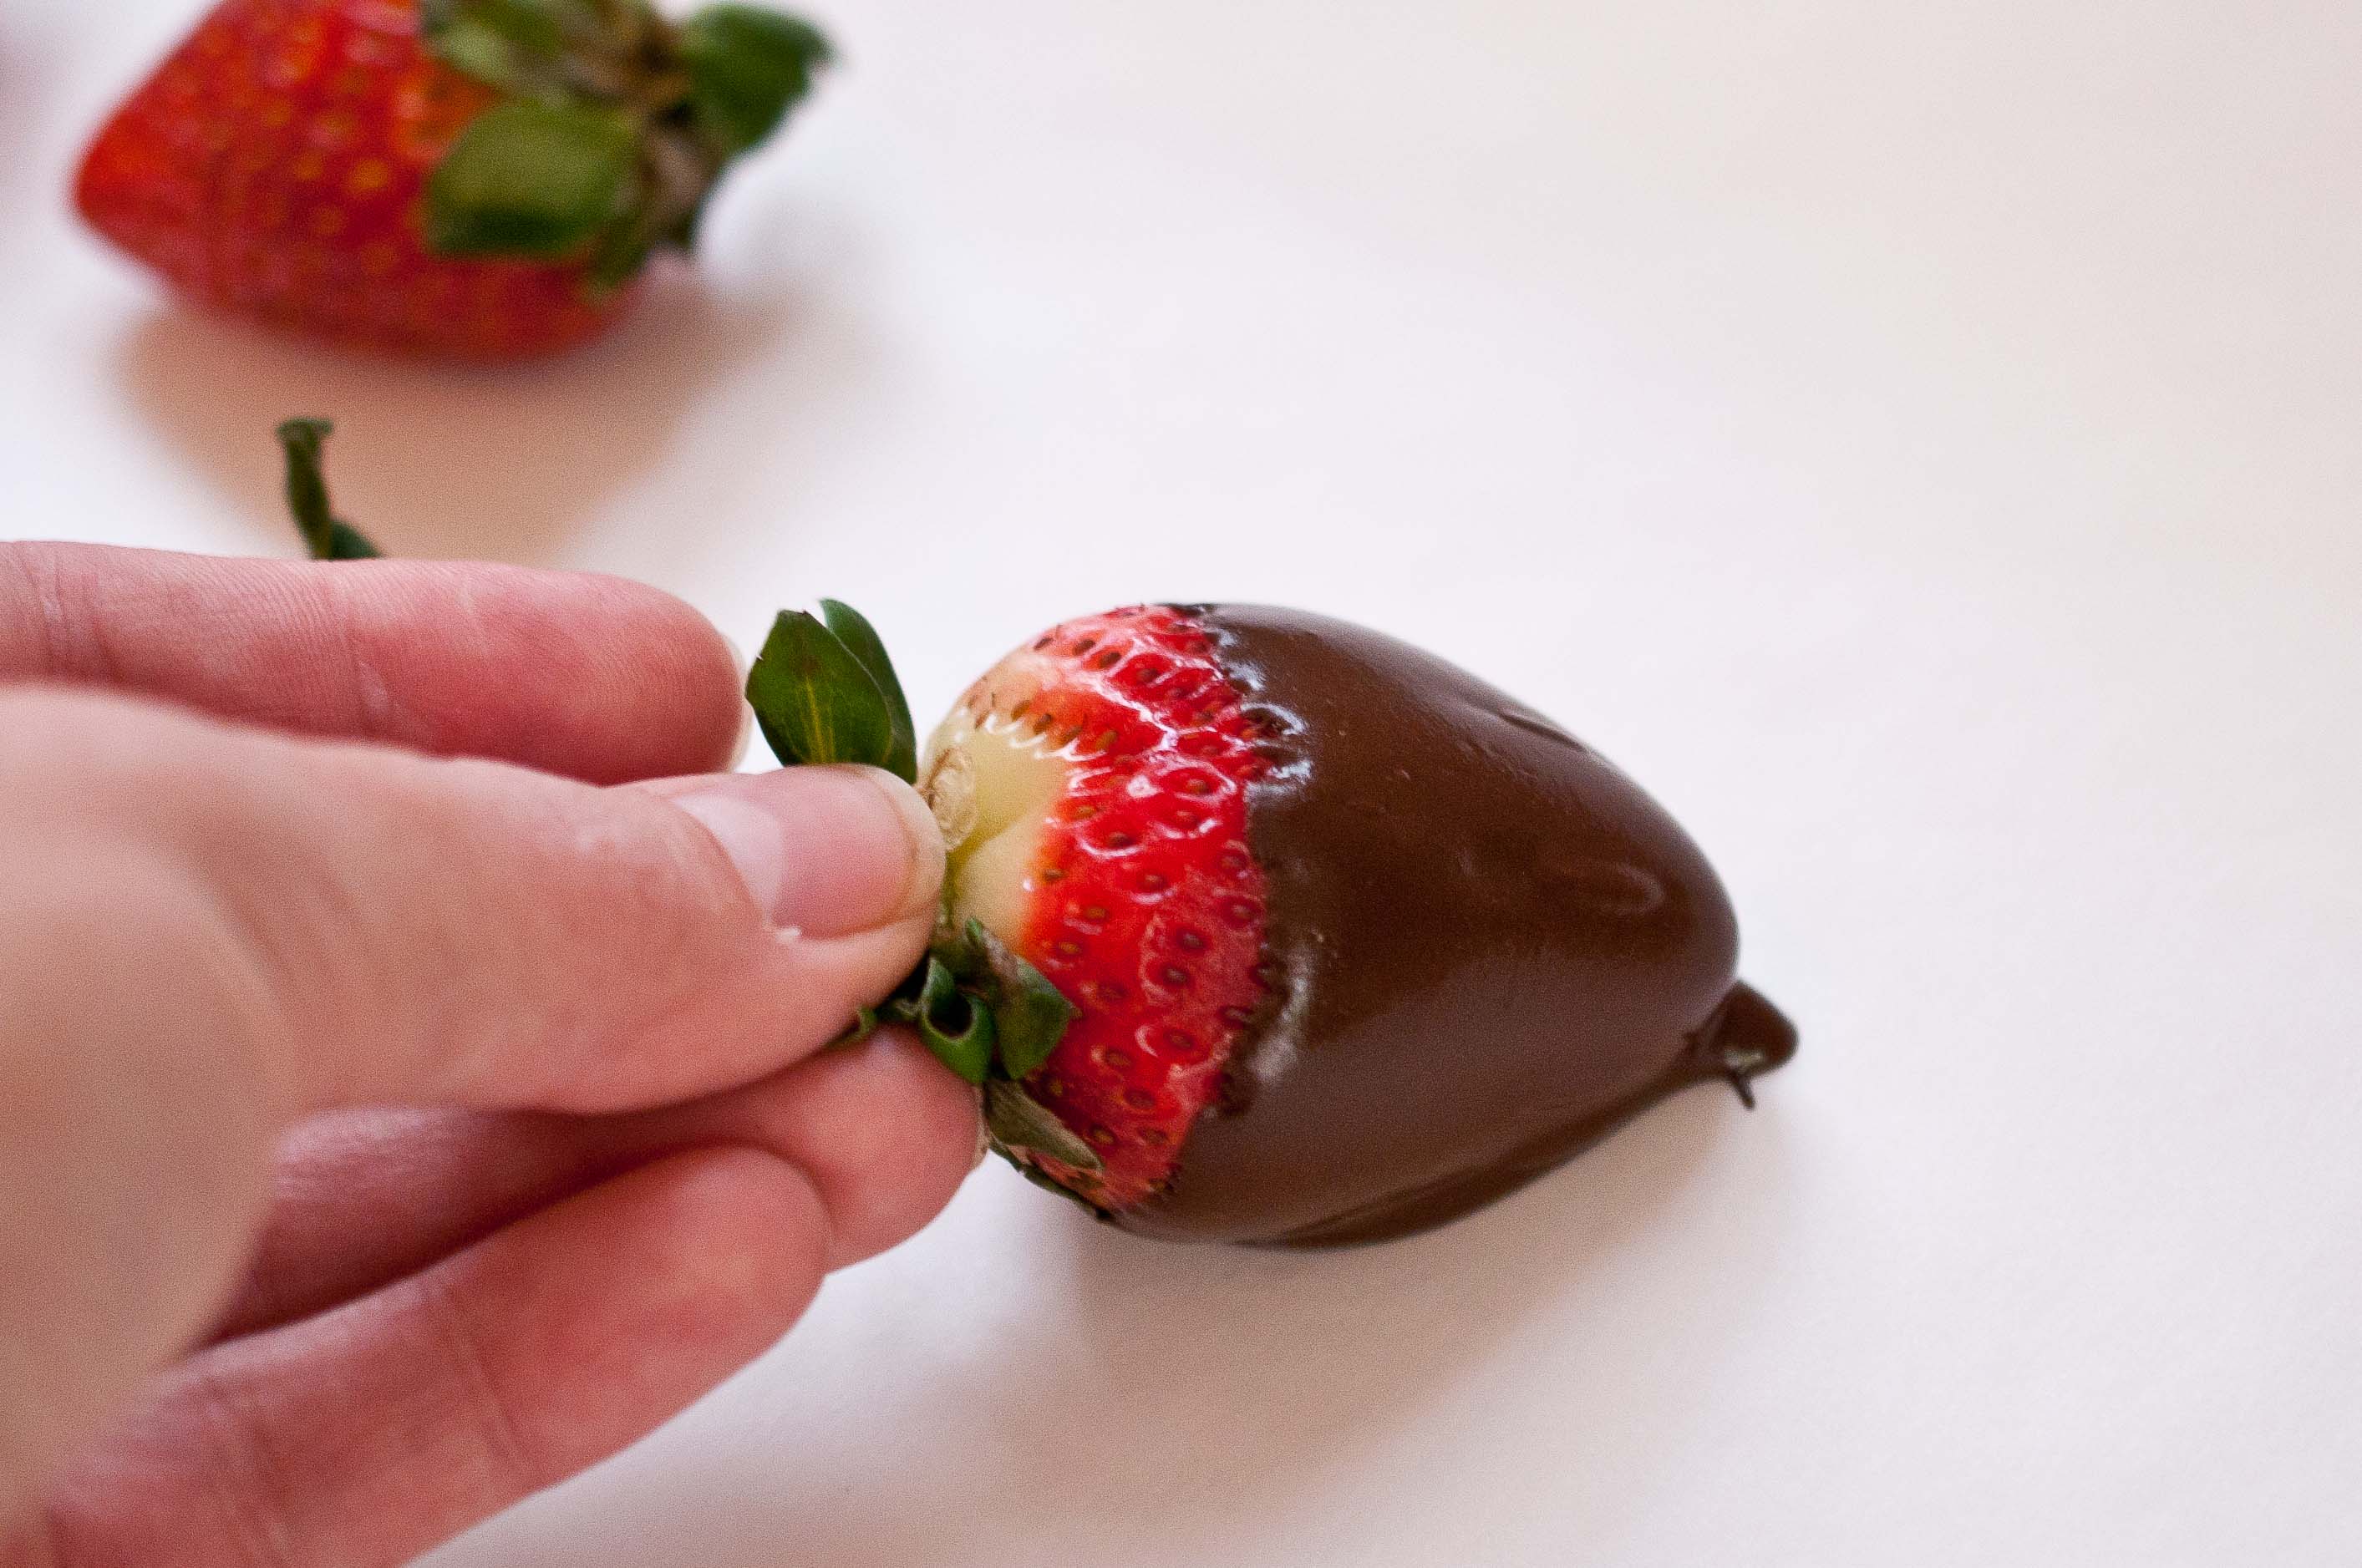
Place on a sheet of parchment paper to dry.
Push forward slightly to avoid a pool of dried chocolate forming in the front of your berry.
Allow to dry for about 15 minutes.
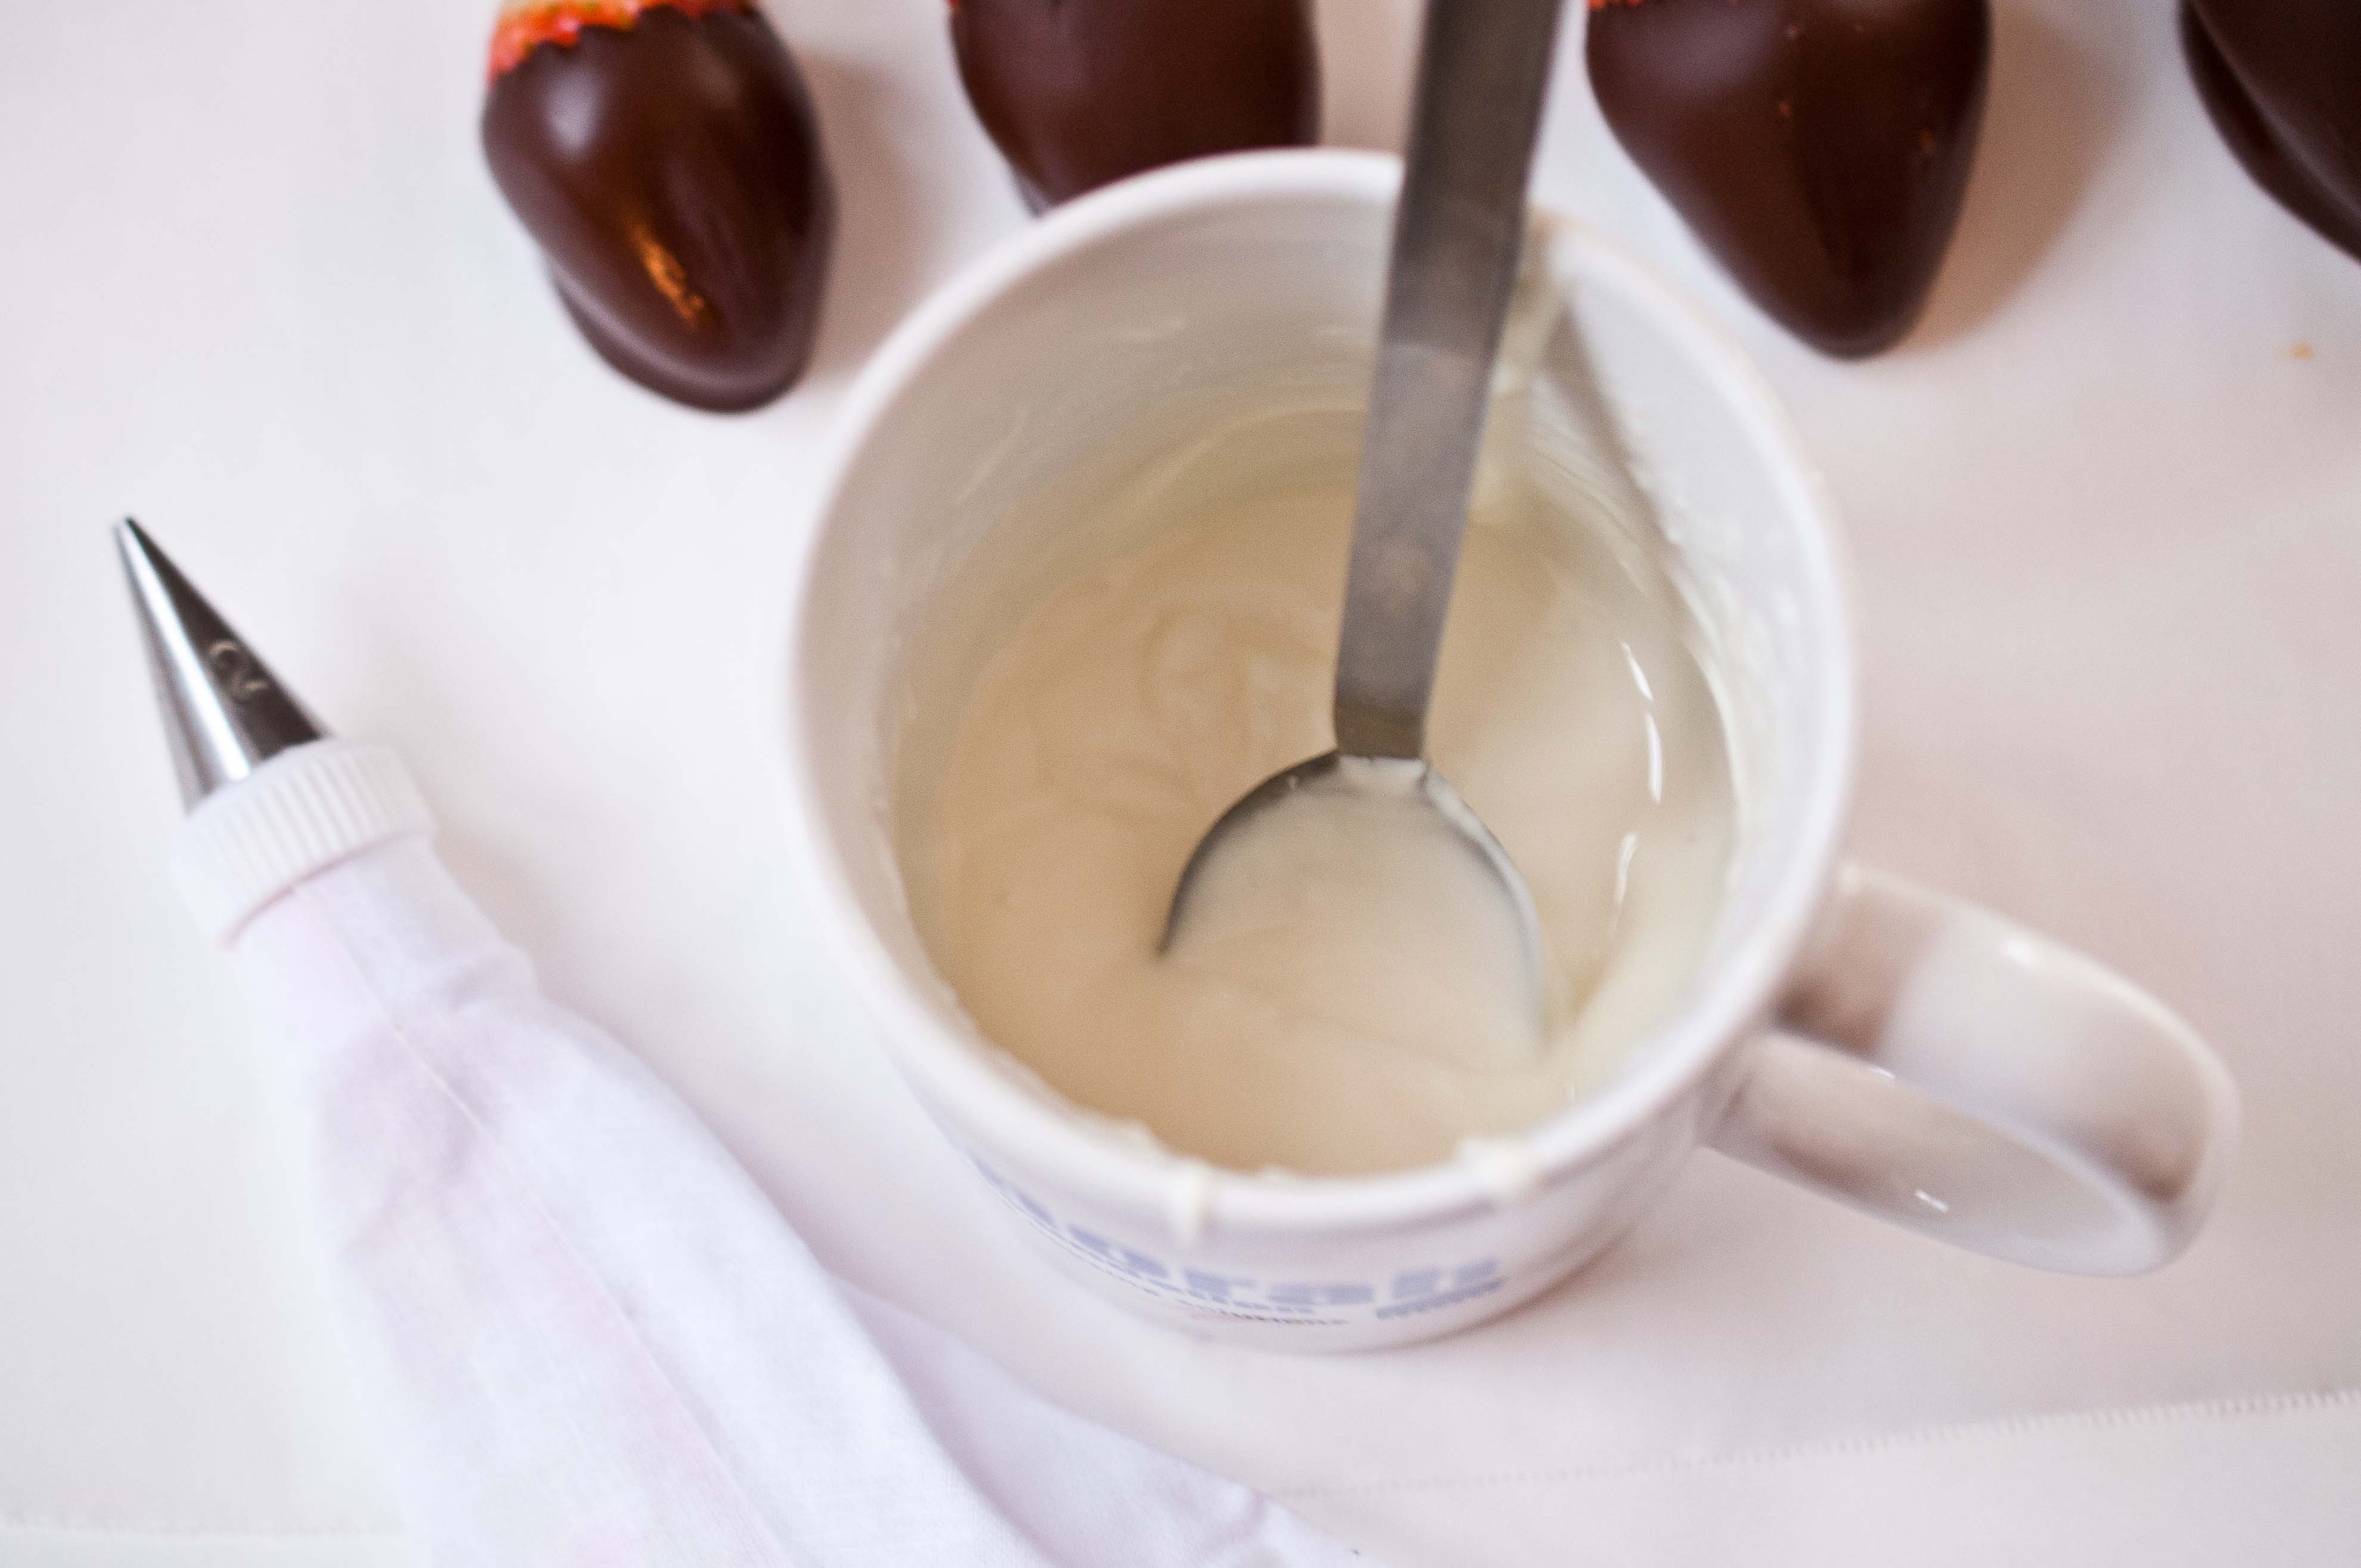
In a separate coffee mug (or really, any microwave safe bowl will work for this), add the white chocolate. Microwave on high for 20 seconds and stir, repeat until melted. You have to be even more careful with white chocolate, it tends to seize quicker. It isn’t actually chocolate, its cocoa butter solids so it behaves differently. If it does seize, you can try and add a few drops of canola oil, but you might just need to toss it out and start over.
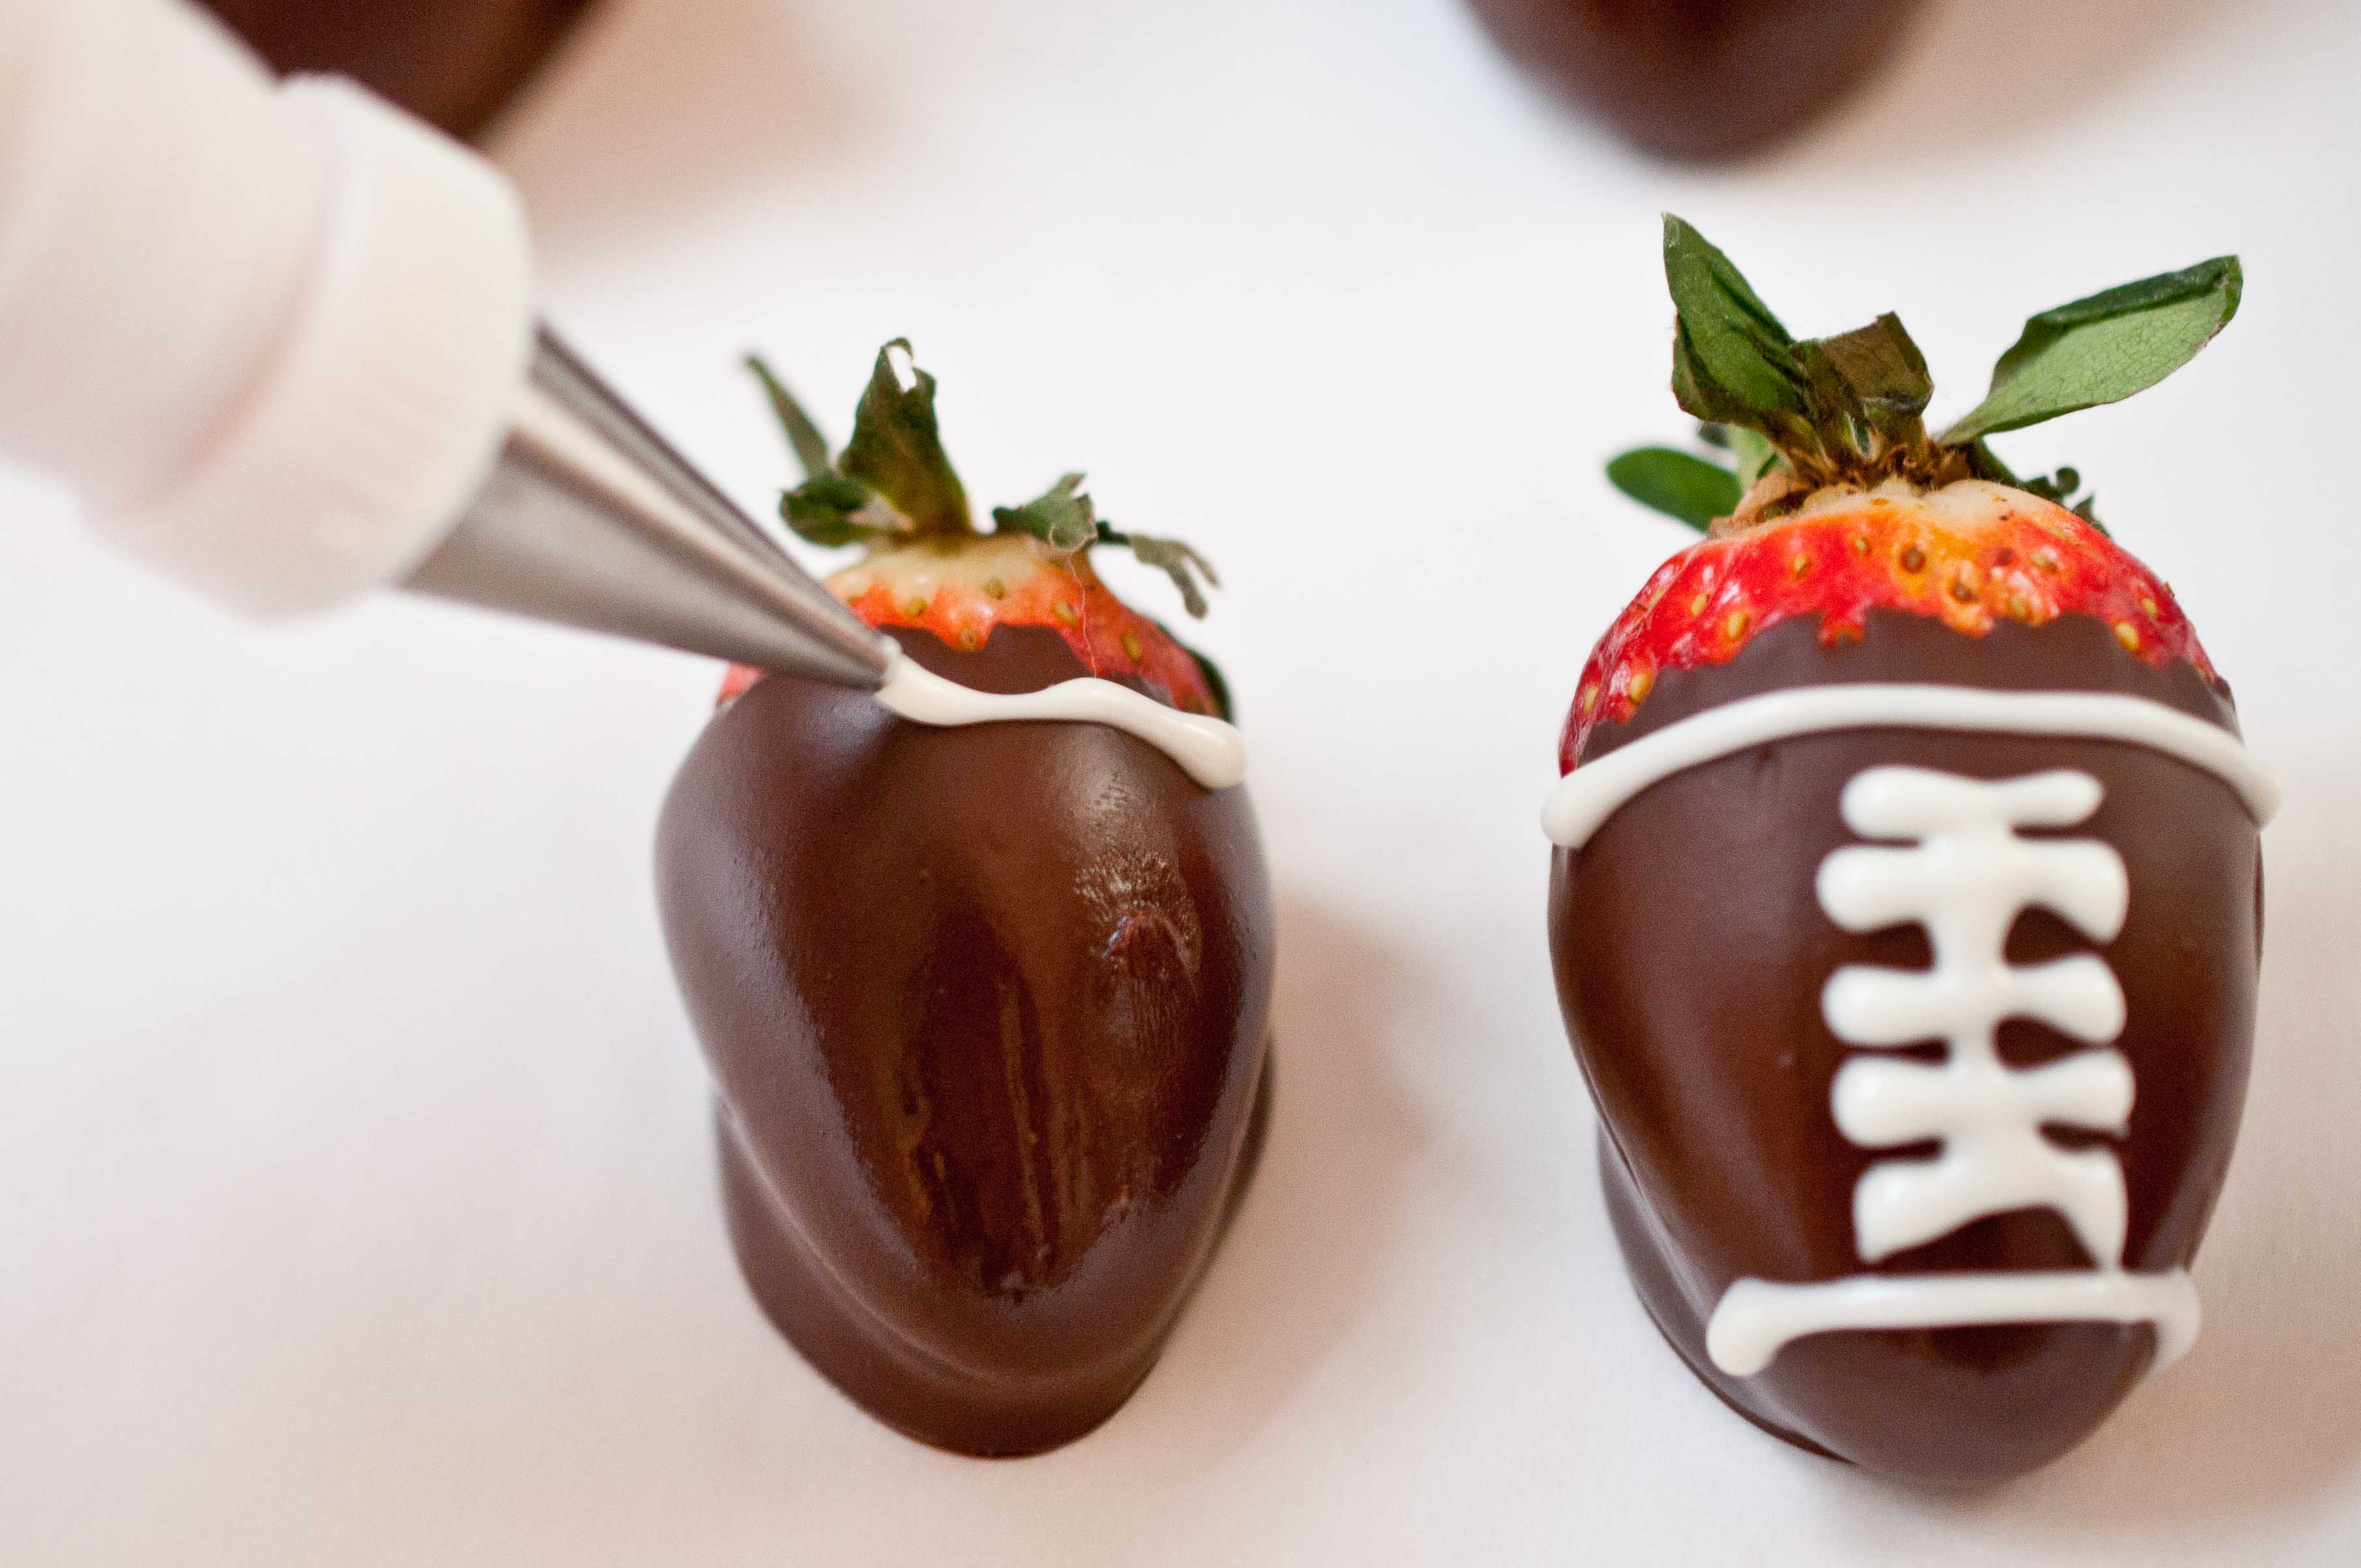
Pour the white chocolate into your piping bag. Pipe on a stripe at the top and one at the bottom of your strawberries.
Then pipe a line down the middle of the berry.
Then pipe 5 or 6 lines across the middle line.
Tips:
-Let the white chocolate cool a bit, but not harden, before piping. If it’s too hot, it’ll be really runny.
-When piping the lines, double back a bit to avoid the "strings" of white chocolate from dripping down the sides.
-Serve chilled
-Don’t make more that 24 hours in advance, strawberries tend to shrink a bit as they age.
You didn’t think that I could make this delicious whipped goodness and not come up with a fabulous cake to go with it, did you?
But, I have to admit that I’m not a fan of mint, because of what I will always referr to as The Moroccan Mint Experience. While travel through Middle Atlas a few years ago with my sister…we…we’ll it’s hard to explain. But as a result, I no longer like mint.
Although my favorite part of the devolution of mint in my life, is Mohammed
He lives in a cave in a mountain town called B’Halil.
He made me mint tea in his cave. And when someone as wonderful and welcoming as Mohammad takes time to welcome you into his cave and heat up water over an open flame and make you tea out of brown water and mint leaves YOU DRINK IT!!
And I am so grateful to him for the tea. Although he has nothing to do my my distaste for mint tea, he is my favorite memory of my journey towards no longer liking it.
For some reason, however, Candy Canes are exempt for my I Hate Mint rule. Can’t really say why.
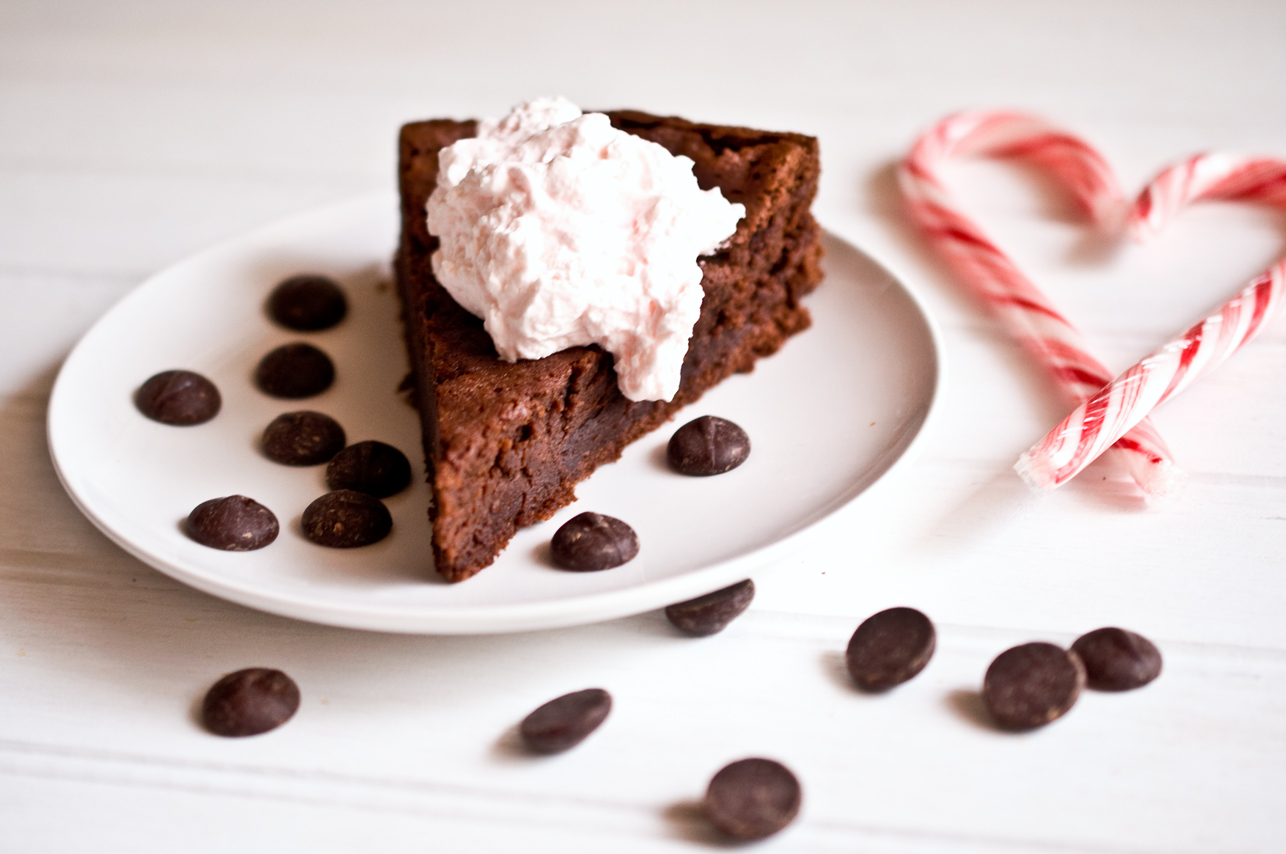
Even if you hate mint, or if you love it so much you want to take a long soak in big bathtub full of Junior Mints, I hope you like this cake. I did.
Chocolate Peppermint Soufflé Cake With Candy Cane Whipped Cream
In a small pot, add the butter and peppermint extract, stir over medium heat until the butter has melted, don’t allow to boil. Remove from heat.
In the top of a double broiler (or a metal bowl set over a pan of simmering water) add the chocolate and the peppermint butter. Stir over medium-low heat until the chocolate is melted and combined with the butter. Remove from heat and set aside to cool slightly.
In the bowl of a stand mixer, add the egg yolks and 1/3 cup of sugar. Mix on high until well combined and light and frothy. Turn off the mixer, and add the flour, salt and the cocoa powder. Mix until just combined. Add the chocolate mixture and beat again until the chocolate is incorporated into the egg yolk mixture.
In a separate bowl, add the egg whites and 1 tbs sugar. Beat with an electric mixer on high until soft peaks form. Add the remaining two tbs sugar and beat again until shiny and stiff peaks form.
Remove bowl of the stand mixer that contains the chocolate batter. Put one third of the egg whites into the chocolate batter, and gently stir until barely combined. Add half the remaining egg whites and stir again. Add the remaining egg whites and stir until just combined.
Line the bottom of a 9 inch spring form pan with a round of parchment paper. Spray the sides with butter flavored cooking spray.
Pour the batter into the spring form pan in one even layer.
Bake at 350 for 35 minutes or until the top is dry and slightly cracked.
Allow to cool for at least 15 minutes, the top will deflate slightly.
Remove from the spring form pan, allow to cool to room temperature.
I’m SO excited about this post! Mr. Fit’s first recipe. It’s a bourbon cocktail recipe, he’s so good at cocktail makin'. I’ll share that with you all at the end.
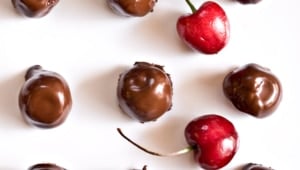
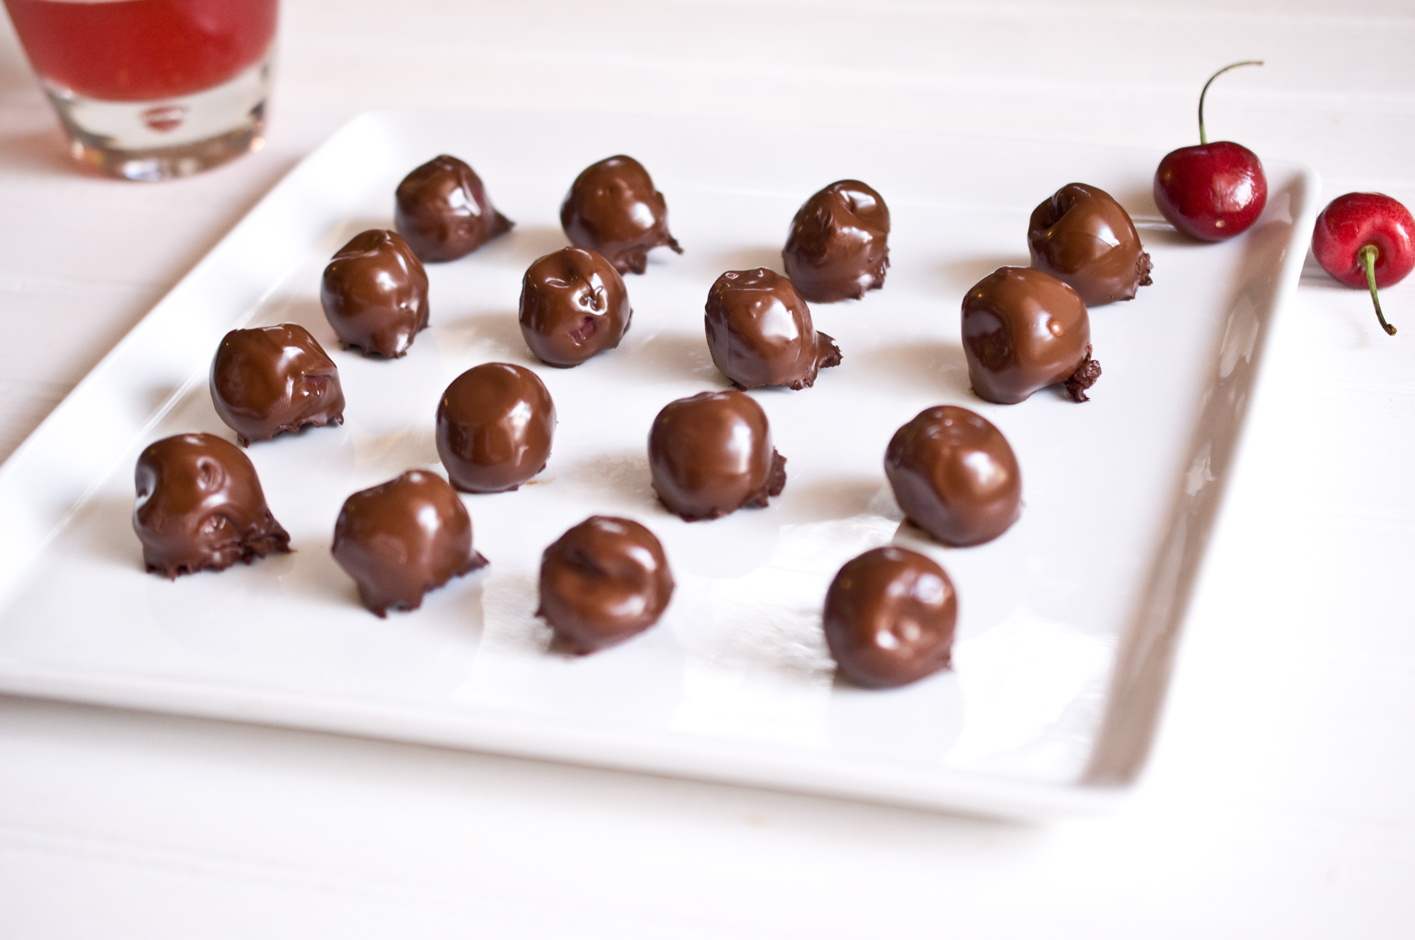
First, these super fun chocolates that make a perfect last minute hostess gift. Or a fun addition to your holiday dessert tray.
Nothing like soaking fruit in liquor to help you get through the holidays!
While my cherries where soaking in bourbon, the three of us headed over to Travel Town to take a few shots of Tater.
I’m trying to challenge myself to get better at photography by taking pictures of non-edible things like humans. Even though she’s so cute I wanna bite her little cheeks!
Even though I am way too hard on myself, I think it is really important for me to take steps towards bettering myself in a lot of different ways. If I want to be a better photographer, it isn’t just going to all of the sudden happen one day. I have to work on it, read, study, shoot, and re-shoot. And I get to take pictures of Tater, and she is pretty stinkin' cute.
When we got back, and I had finished the cordials, I had a 1/2 cup of perfectly good bourbon and nothing to do with it. I hate to waste perfectly delicious booze, so I gave it to Mr. Fits and he wrote up a recipe for us all.
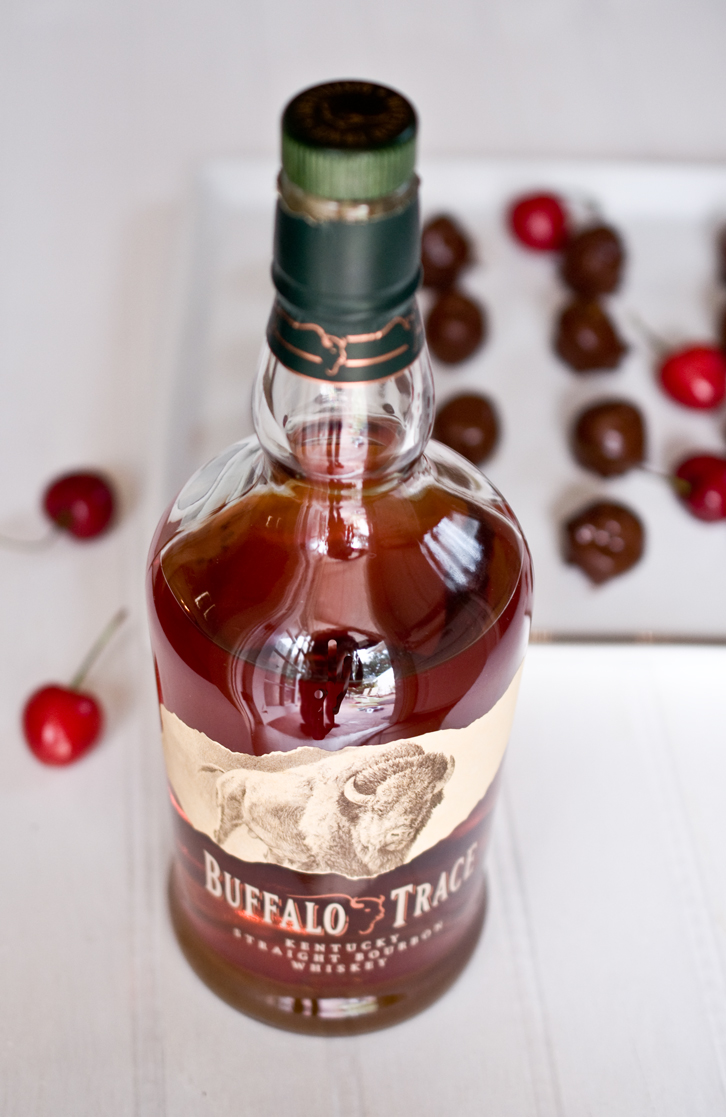
Use good bourbon for this recipe. You taste it, and you want it to taste good. My recommendation is Buffalo Trace. It’s a beautiful, artisan bourbon and it’s affordable. Shocking, I know. It is one of those magical products that is loved by bourbons snobs and inexpensive enough to go out and buy. Don’t tell those Buffalo Trace people that they could probably double the price and I would still buy it. It’s the only bourbon I actually like to drink.
Bourbon Soaked Cherry Cordials
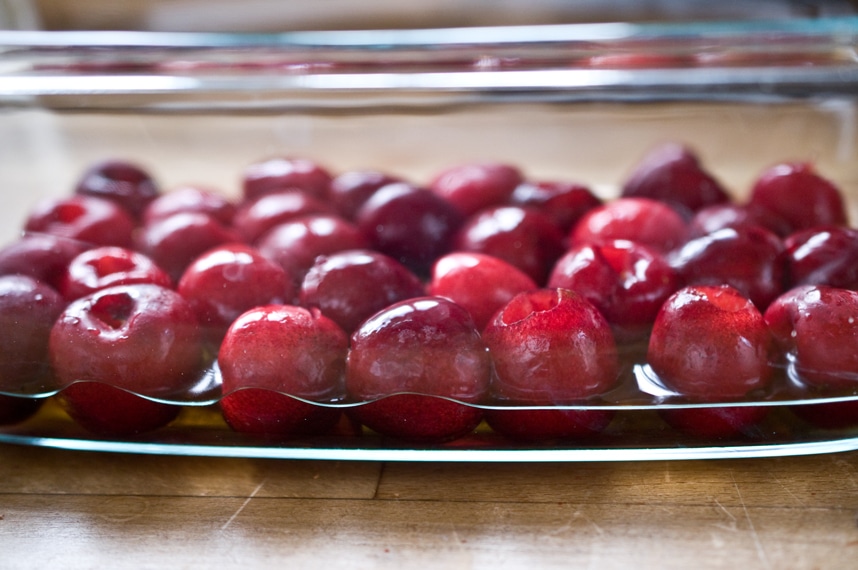
30 fresh, sweet cherries (like Bing, don’t use sour or pie cherries)
1/2 cup Buffalo Trace Bourbon
2 cups dark chocolate (60%-70%)
Pit all thirty cherries and place then in one tight layer on the bottom of a loaf pan. Pour the bourbon on top of the cherries and toss to coat.
You want the cherries to be sitting in the bourbon, about half way covered.
Allow to soak for 1 1/2 hours at room temperature, tossing to redistribute the bourbon every 20-30 minutes.
Remove from the liquid with a slotted spoon and place cherries on a plate covered with 3-4 paper towels. Allow to drain and dry for about 10 minutes. Reserve the bourbon for the below cocktail recipe.
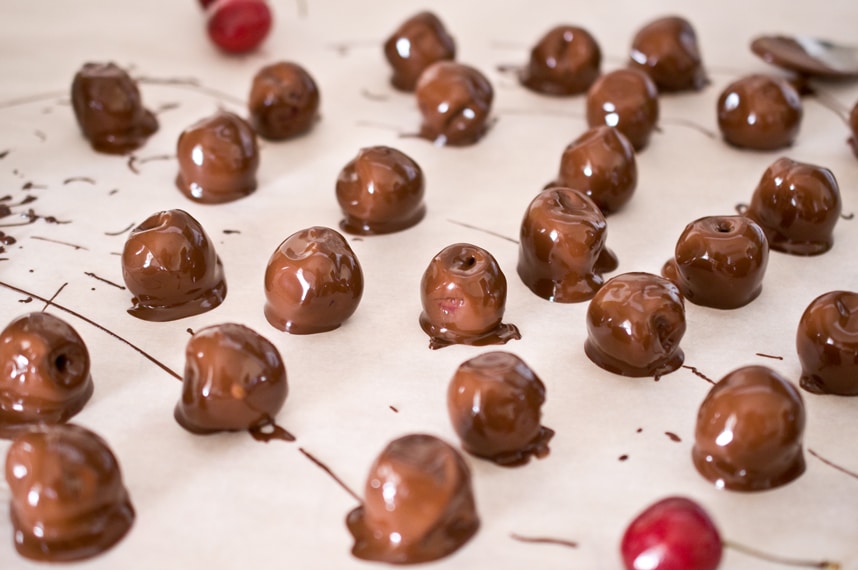
Place chocolate in the top or a double boiler. If you don’t have one (and to be honest, I don’t even have one) add water to the bottom of a pot, then place a metal bowl over the pot (this is what I do). Make sure the bottom of the bowl is not touching the water, very important. I have also heard that you can place the metal bowl on an electric heating pad, but I have never tried it.
Place the chocolate in the bowl, set heat to medium-low. Stir constantly. Use a food thermometer to measure the temperature. You want it to be between 90 and 93 degrees. This is so your chocolate gets that beautiful shine to it and has that crisp snap when you bite into it. If you heat it too much or too little, it won’t have that.
Once the right temperature is reached, remove the bowl from the heat. Add the cherries in batches (about 8-10 at a time) roll them around in the bowl and remove with a spoon.
Place on wax paper to dry. Chill in the fridge until ready to serve.
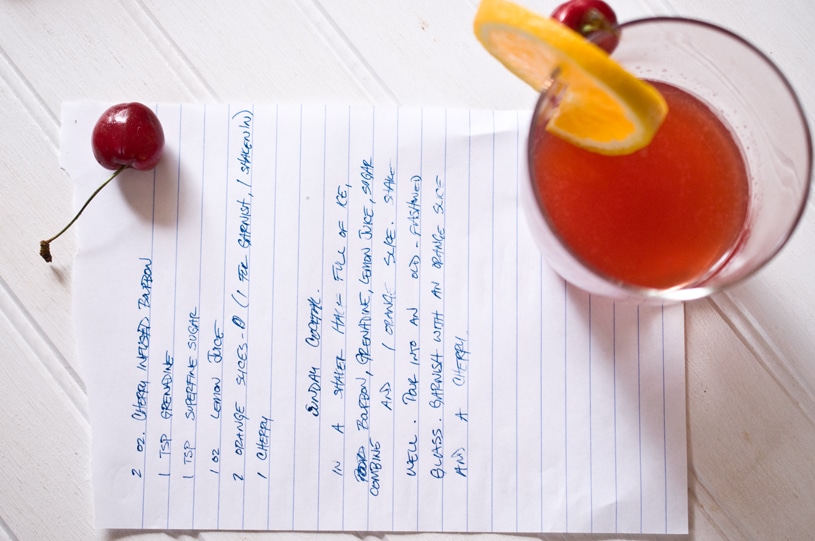
NOW that cocktail recipe I promised you. He even wrote it down for me, I love his handwriting:
Sunday Bourbon Fits
2 oz Cherry Infused Bourbon (from the above recipe)
1 tsp Grenadine
1 tsp Powdered Sugar
1 oz Lemon Juice
1 Orange Slices (plus 1 additional for garnish)
1 Cherry (for garnish)
(makes one cocktail)
In a shaker half full of ice, add bourbon, grenadine, sugar and lemon juice, stir to combine. Add one orange slice, replace shaker cap, and shake well. Pour into an Old Fashion glass. Garnish with one orange slice and a cherry.