There’s a good chance that when you think about cooking with beer, a meat recipe comes to mind. Your Dad’s beer marinated ribs? Beer can chicken? Beer braised pork? There’s a good reason for that.
Not just for the spectacular flavors that craft beer can impart on the meat, but because beer, especially high acid beer, acts as a meat tenderizer by breaking down tissue.
For this recipe you are free to run the spectrum of beer styles. Most recipes I write will be accompanied by stern warning about using any beer other than the type called for, this isn’t one of those recipes. That IPA I keep shaming you into avoiding? You can even give that a try. My gut instinct with a recipe like this was to use a light, high acid beer with herb notes (basil, sage, oregano) but I opted for a porter to test my "Any Beer Goes" theory.
The porter effect, as I am now calling it, gave a "meatier" quality to the chicken. Which turned out wonderfully, and gave this a bit of a pork taste.
The beer I used for this recipe was the Payback Porter by Speakeasy. It’s a fantastic choice for a porter because the notes are similar to those I see in barbecue sauces and rubs: smoke, coffee, cocoa, and molasses.
Next time I’ll use a beer with a high acid content for a little contrast, but as far as the beer that you pick, experiment and let me know how it goes.
Beer Braised Chicken Sliders With Hoisin Beer Barbecue Sauce
Heat 2 tbs canola oil in large pot or Dutch oven. Sprinkle the chicken with salt on all sides. Place in the pot and cook on each side until browned, about 2 minutes per side. Cover with 1 1/2 cups of beer and 1/2 cup chicken broth, cover and cook for 15 – 20 minutes or until chicken is completely cooked.
While chicken is cooking, prepare barbeque sauce by warming olive oil in large saucepan over medium-high heat. Add garlic and sauté for 30 seconds; add 1 cup beer, hoisin sauce, chili powder and soy sauce. Cook for 10-15 minutes or until thickened and reduced, remove from heat.
When chicken is cooked, remove from pot and allow to cool. Using two forks, shred chicken to as thin slices as possible, then add to hoisin barbeque sauce pan, tossing well to coat.
Split rolls in half across the middle to resemble small sandwich buns, fill with chicken.
When you have a blog, and you post instructions about how to make or cook something that you have dreamed up, you want all of the mistakes to happen to you. You want to be the one to discover the holes in the theories, the lapses in the instructions or the possible interpretations that will end up in failure.
Lucky for me, and for any who attempt to make these, those failures bestowed themselves upon me during this craft project.
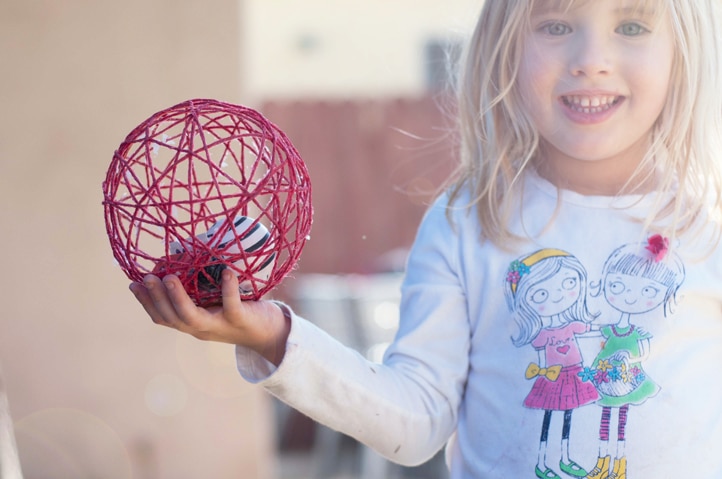
These yarns balls have been popping up in craft books since the 70’s but made a resurgence a few years ago when Martha Stewart posted a rough DIY on how to make these as christmas ornaments.
Reading the comments on the post it seem as if half the people who attempted this had glowing success and the other half had epic failures. I fell into the latter half. Which ended up being a good thing because I was forced to seek out the answers to the most common failure:
WHY didn’t the yarn harden??
Most of the bloggers who did respond didn’t seem to know the answer: Too much glue? Wrong type of glue? Too humid in your part of the Country?
None of those answers really seemed to fit the issues I was having, but I could tell by the next morning with string that was soft and not stiff, that I had to fix the problem or there would be no party favors for Taters "Lets Have A Ball" Party.
I consulted my sister, from whom I stole the idea to put toys inside these decorative balls in the first place. She’s completely brilliant and epically creative Polaroid photographer.
Her advice: "More glue, it won’t have a choice but to harden."
True. I traced the lines of the yarn with my Elmer’s glue bottle, blotted it in with a sponge brush and in three hours, I had Yarn Ball Party Favors ready to go.
Another common factor that I saw in success was glitter. It seems to act as a binder of sorts. Add it to the glue and it helps to hold shape.
Other than the threat of failure looming over my head, I loved the way these turned out.
Materials:
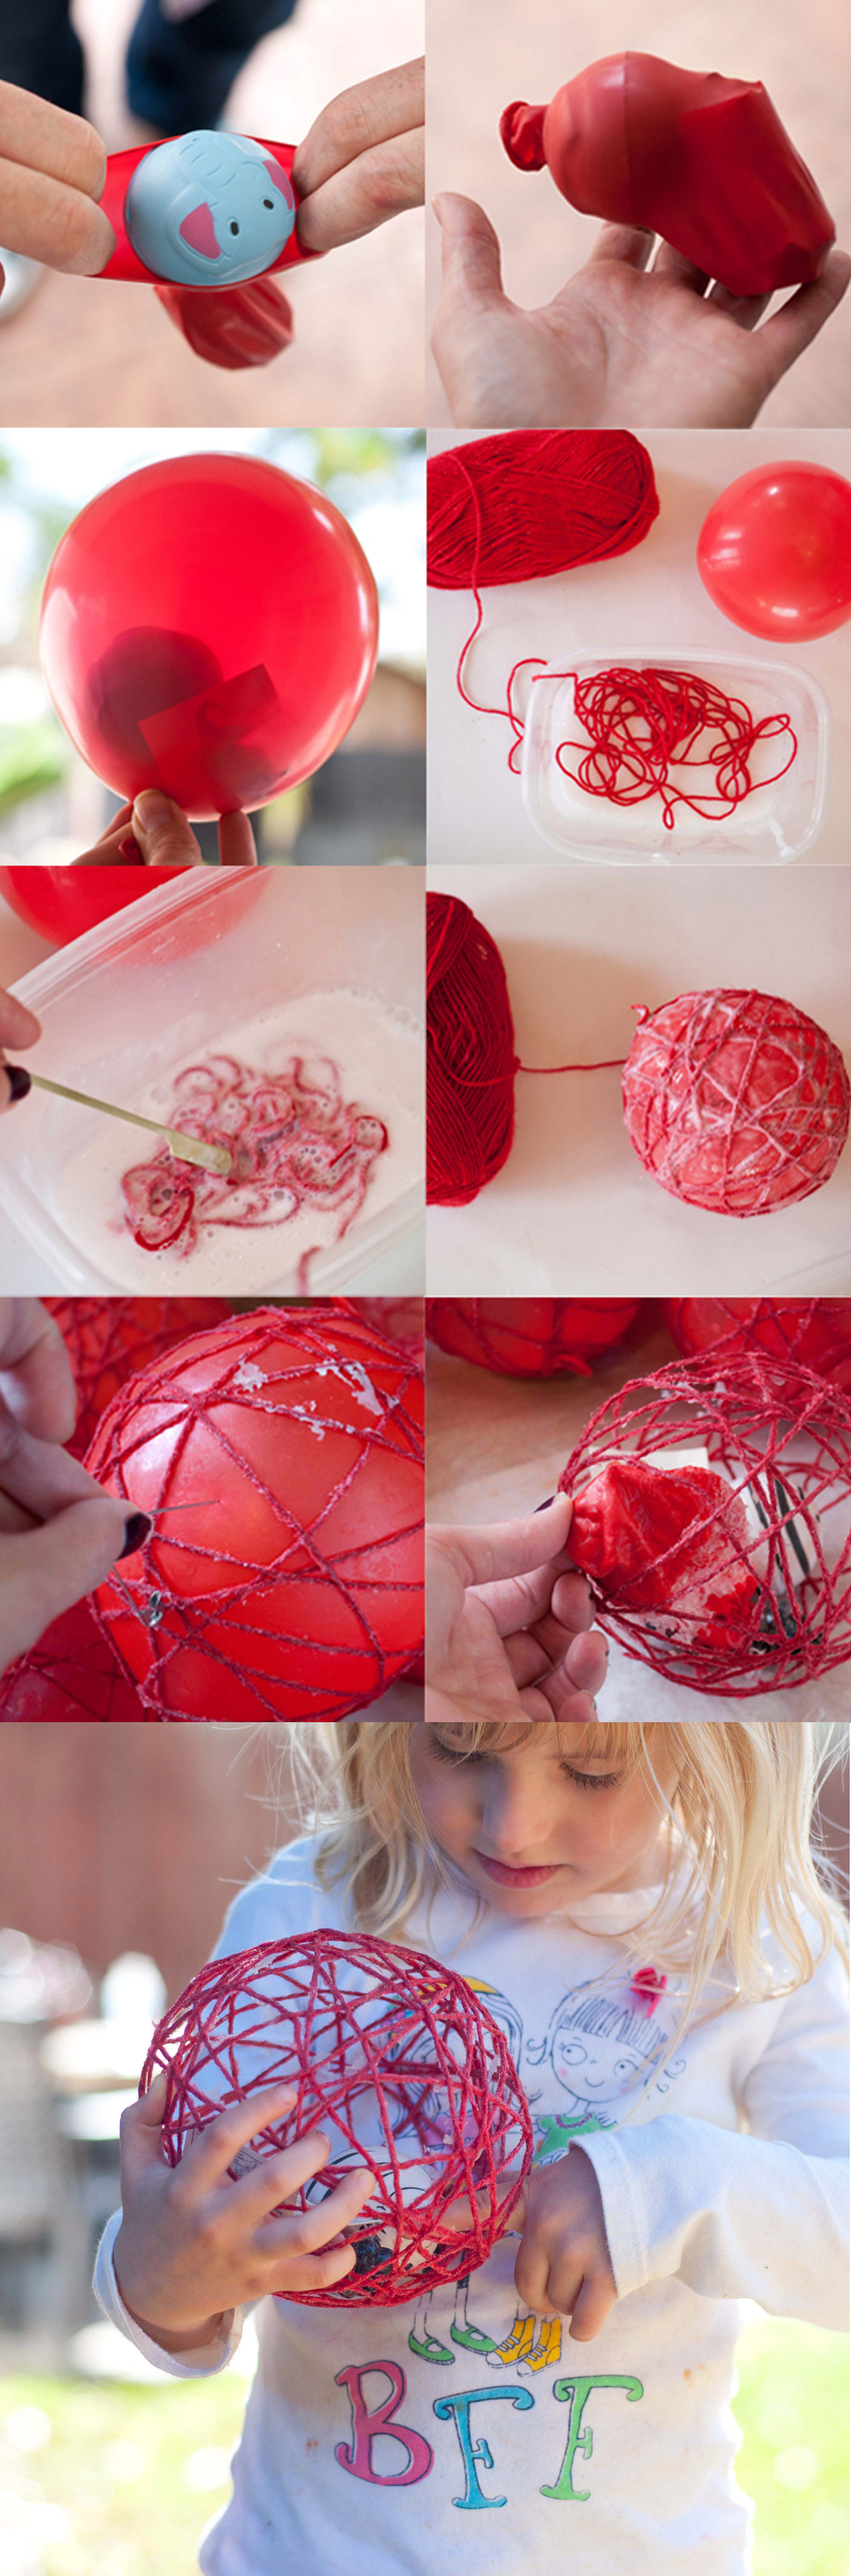
8 ballons, about 6 inch round
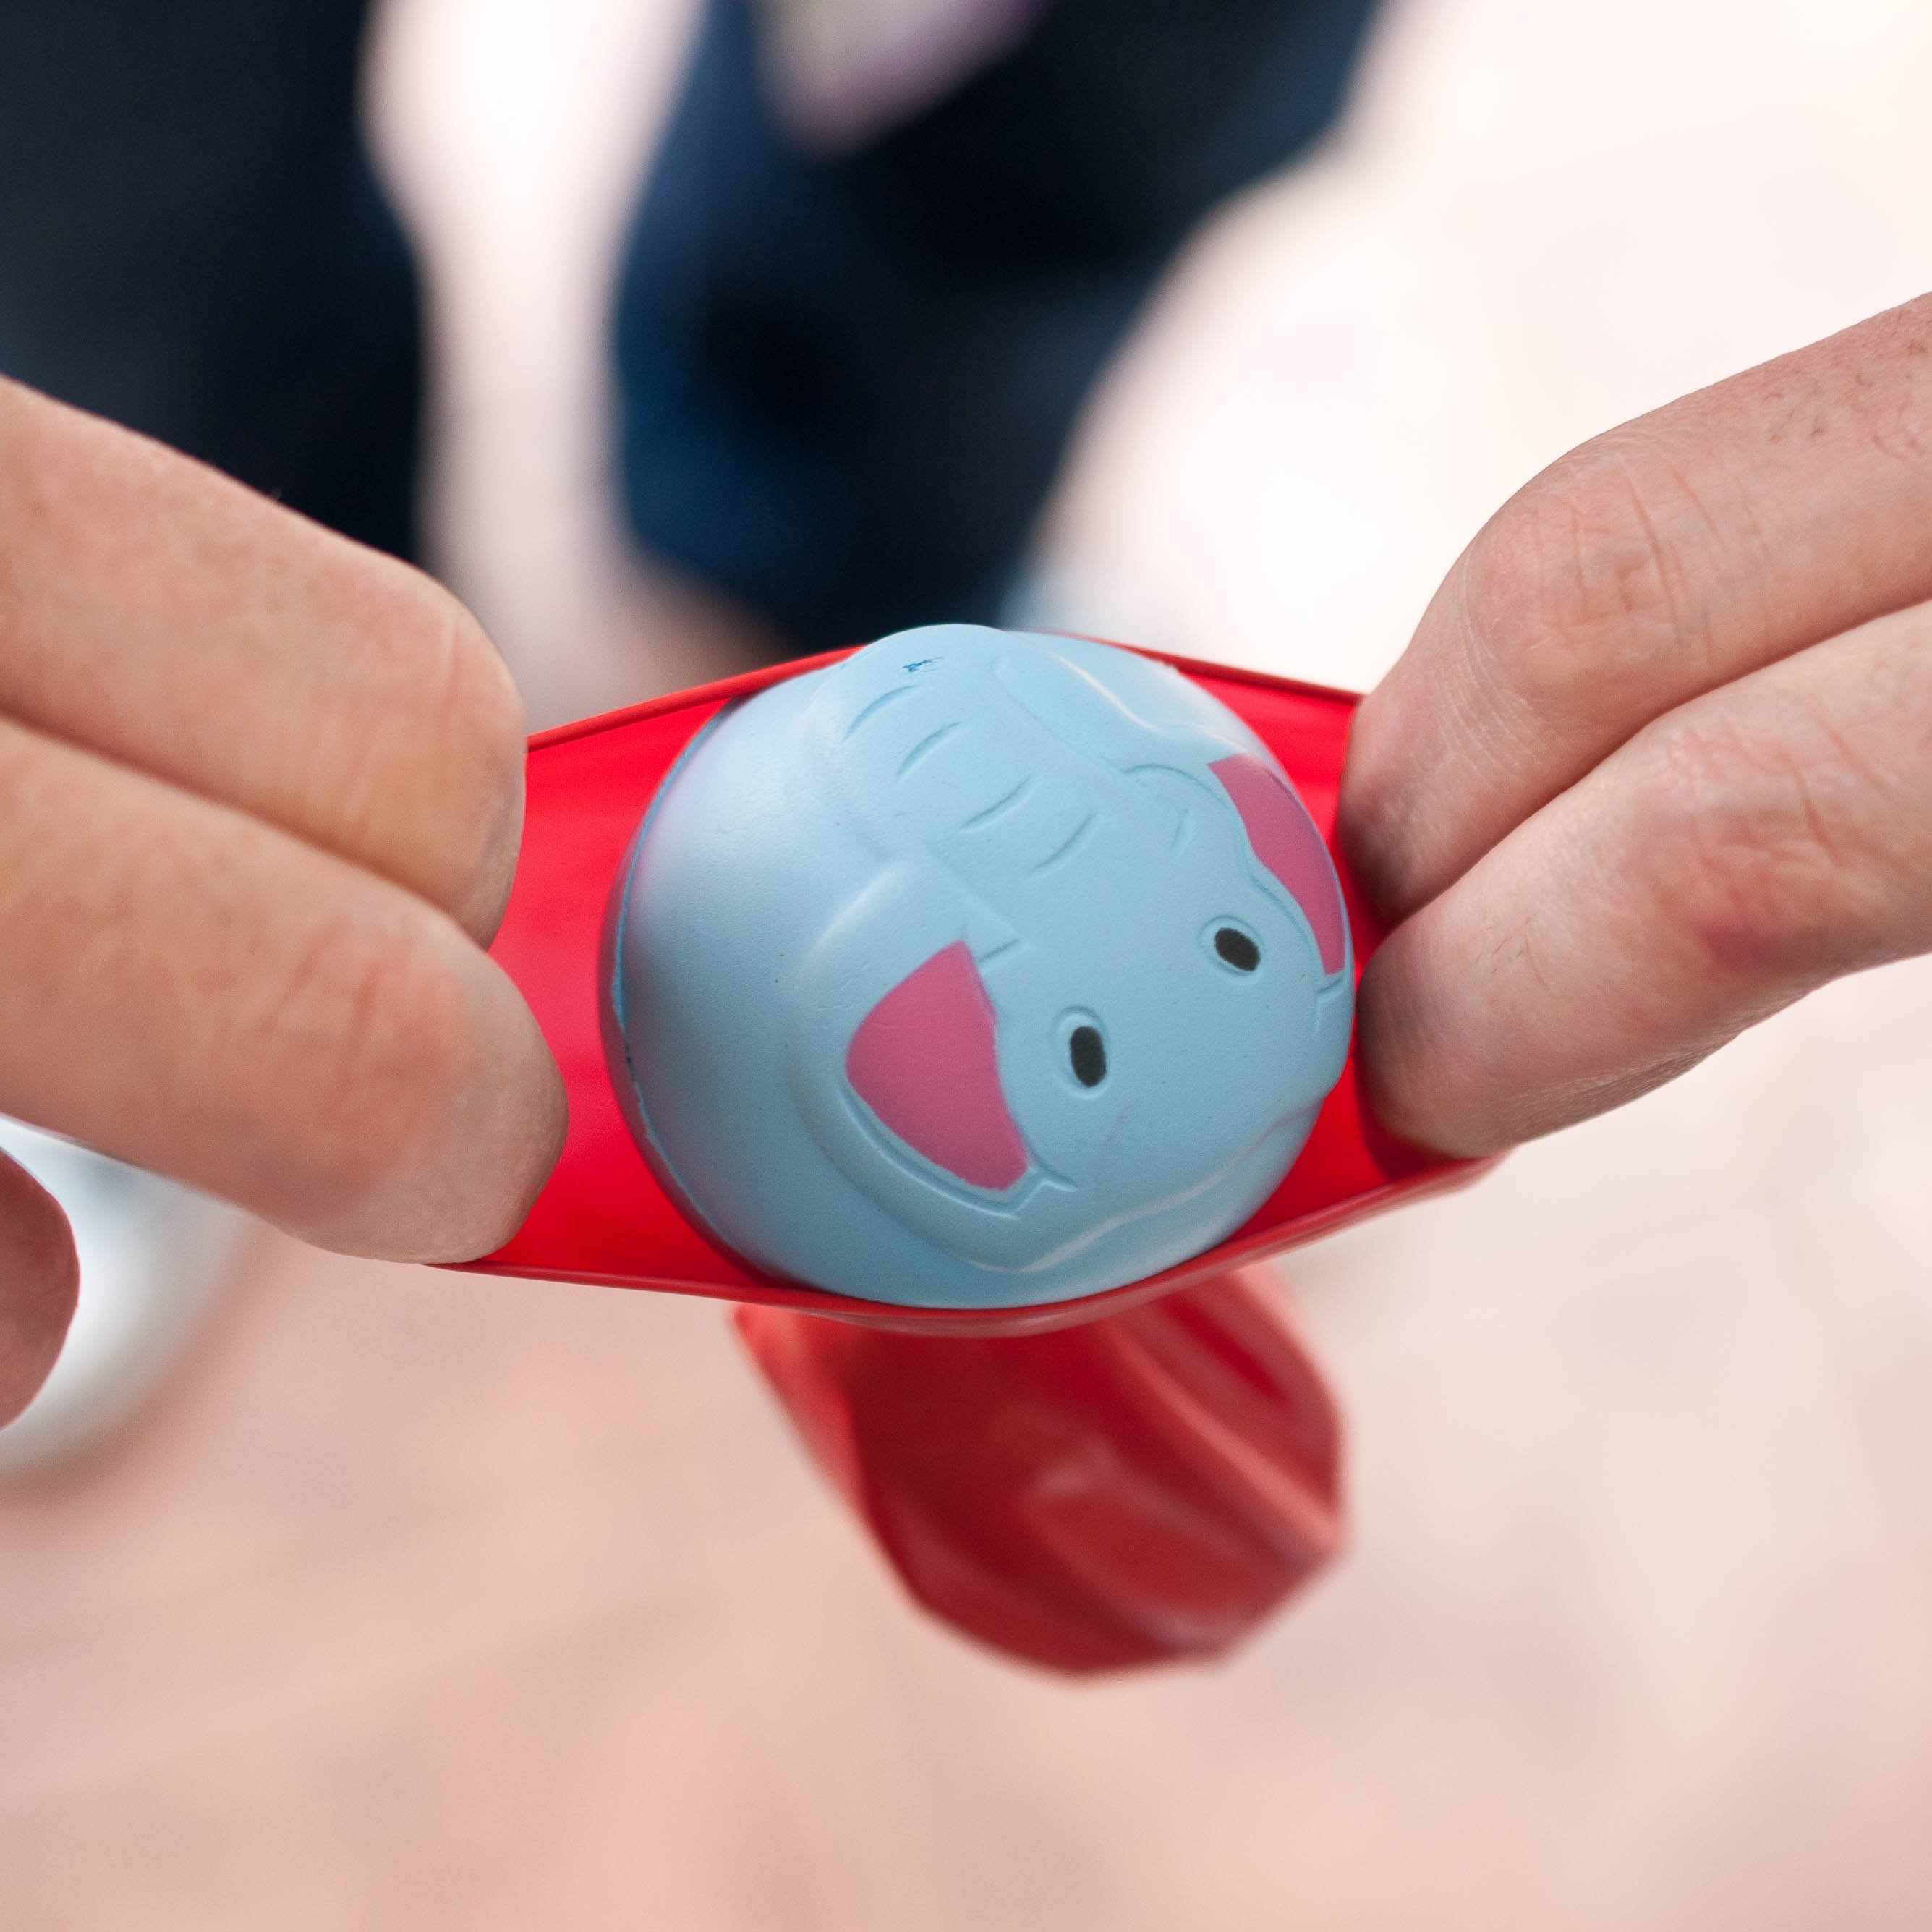
Toys, I used squishy balls, temporary tattoos and Lady Bug Bubbles (Small enough to smash into a balloon and large enough not to fall through the yarn holes)
2 bottle of Elmer’s glue
1/4 cup warm water
2 tbs glitter
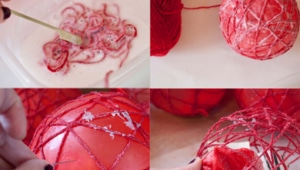
Step one:
Squish the toys into the balloons. You might want to have extra incase you break some trying to get the toys in. Also, it helps to have an extra set of hands to help. I used my husbands:
Step Two:
Blow up the balloons and securely tie the end.
Step Three:
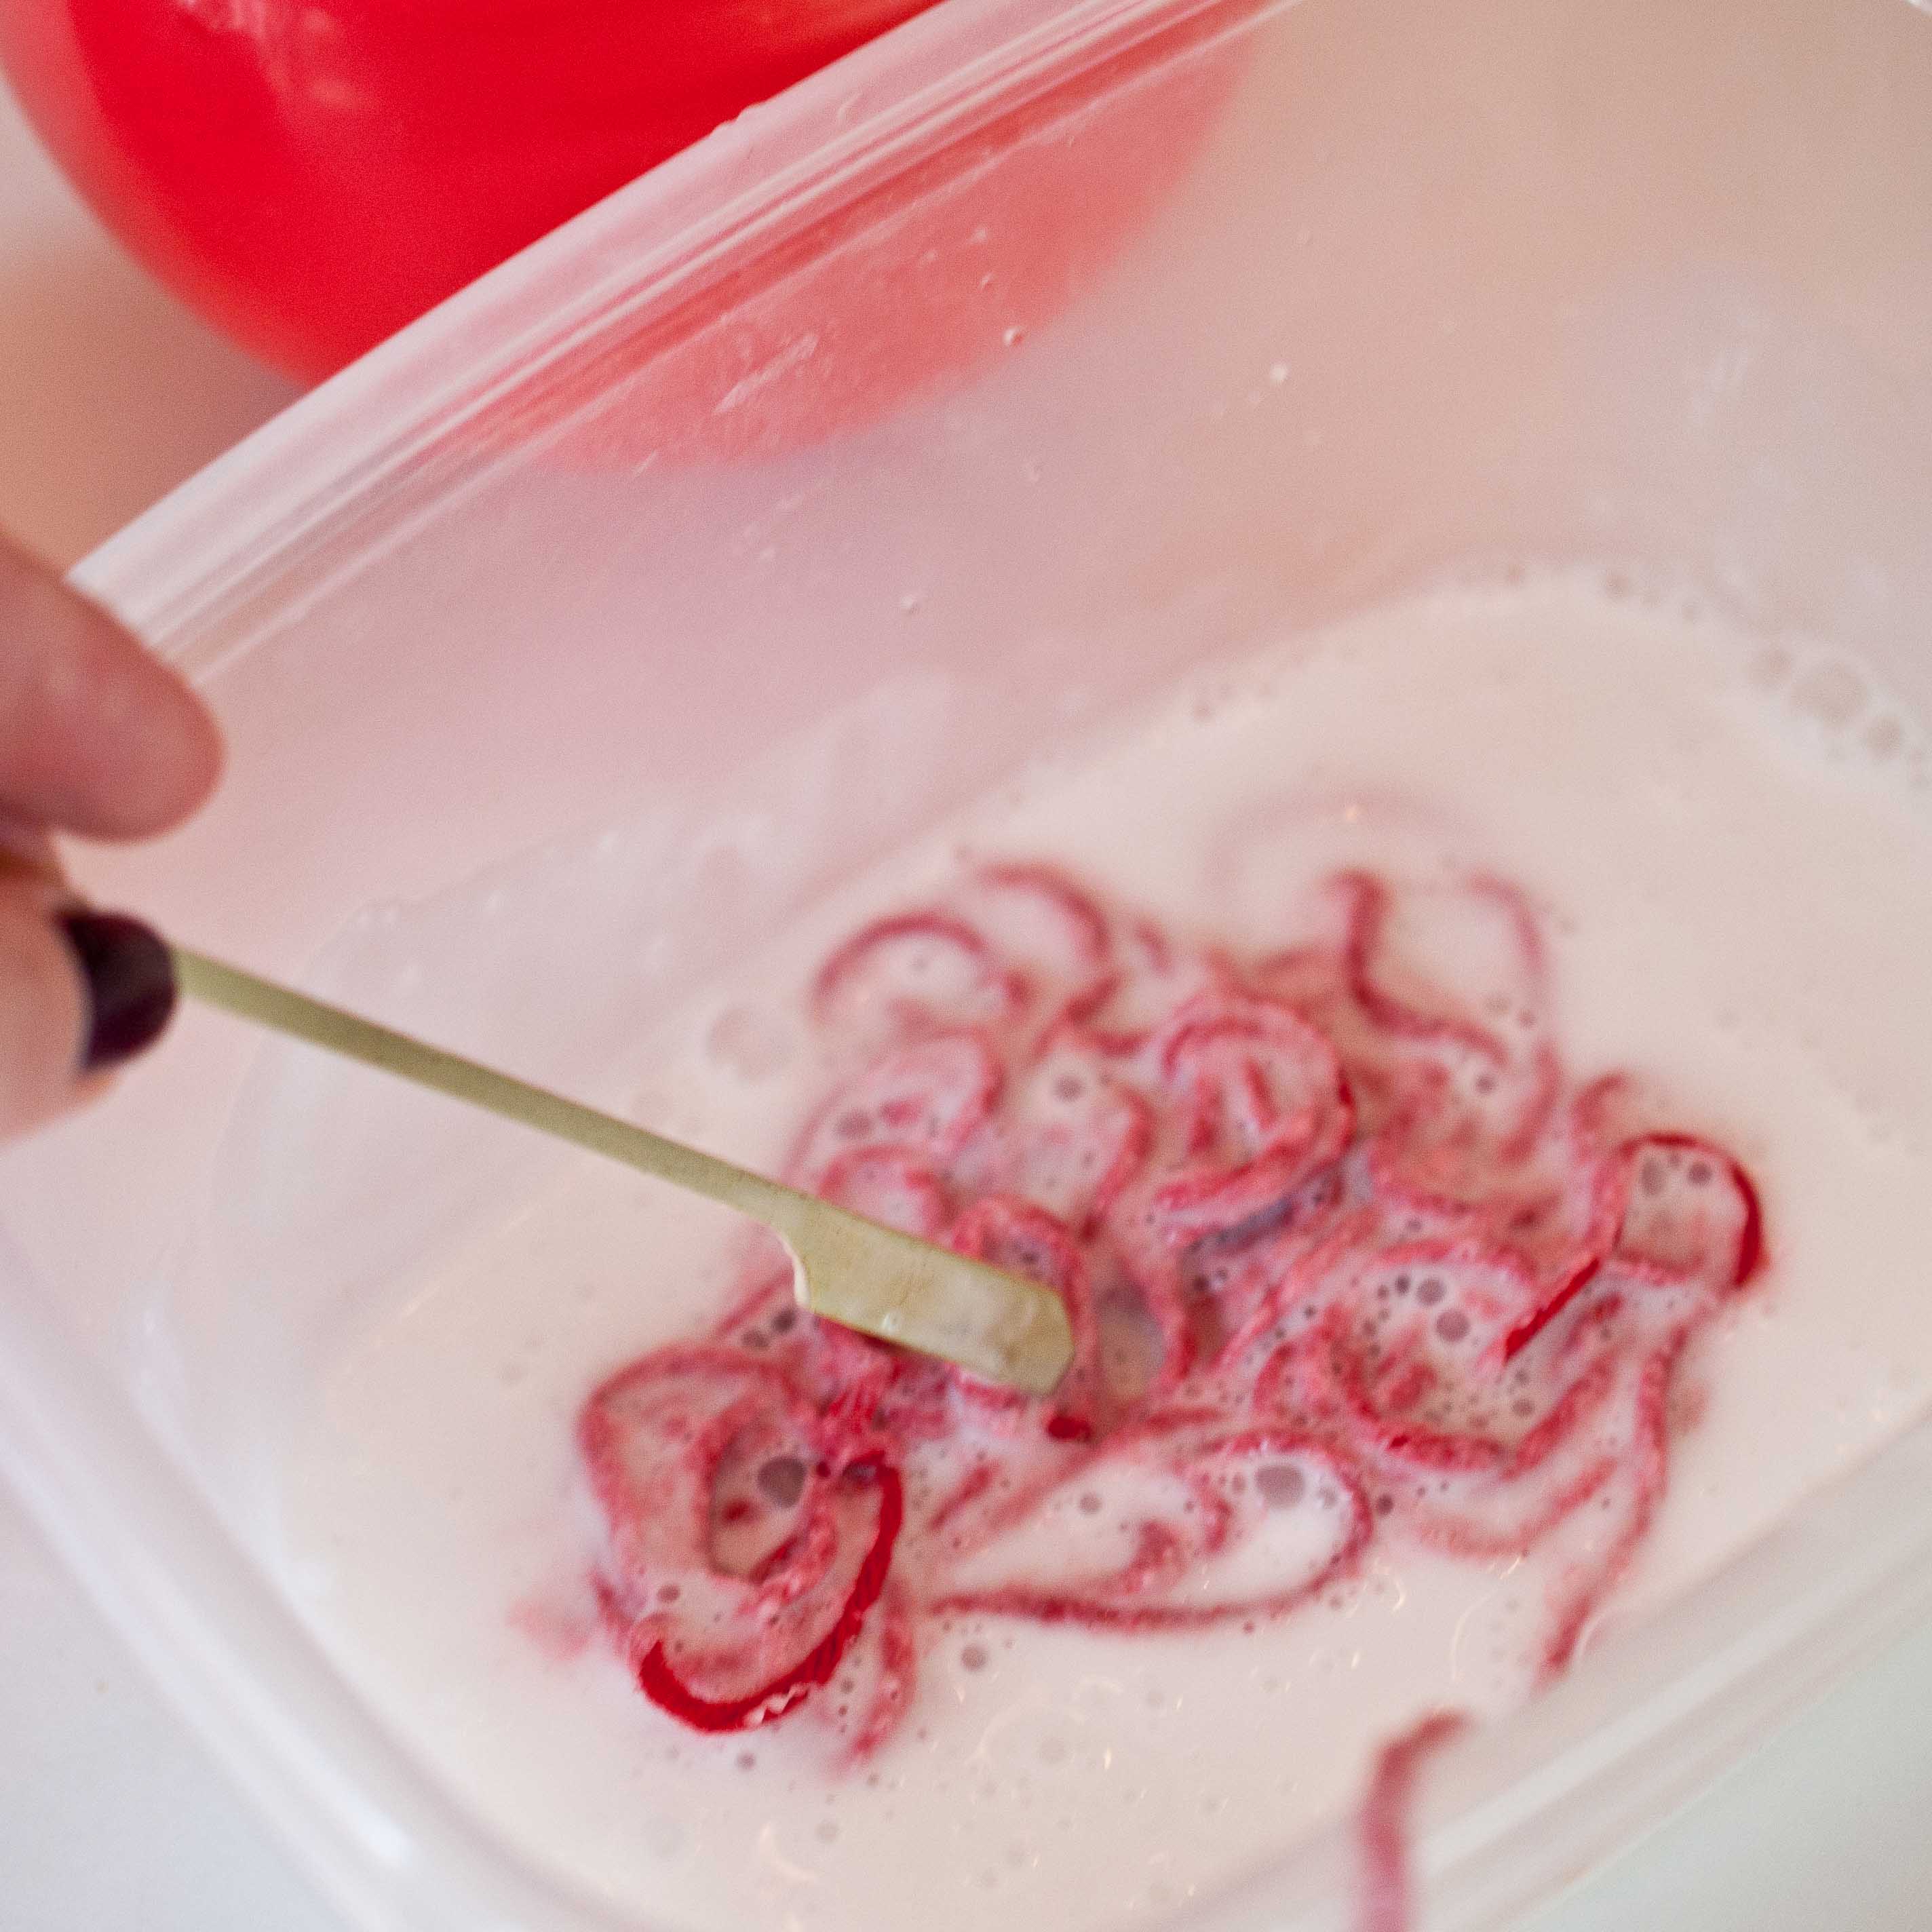
Mix the glue, water and glitter in a large bowl.
Step Four:
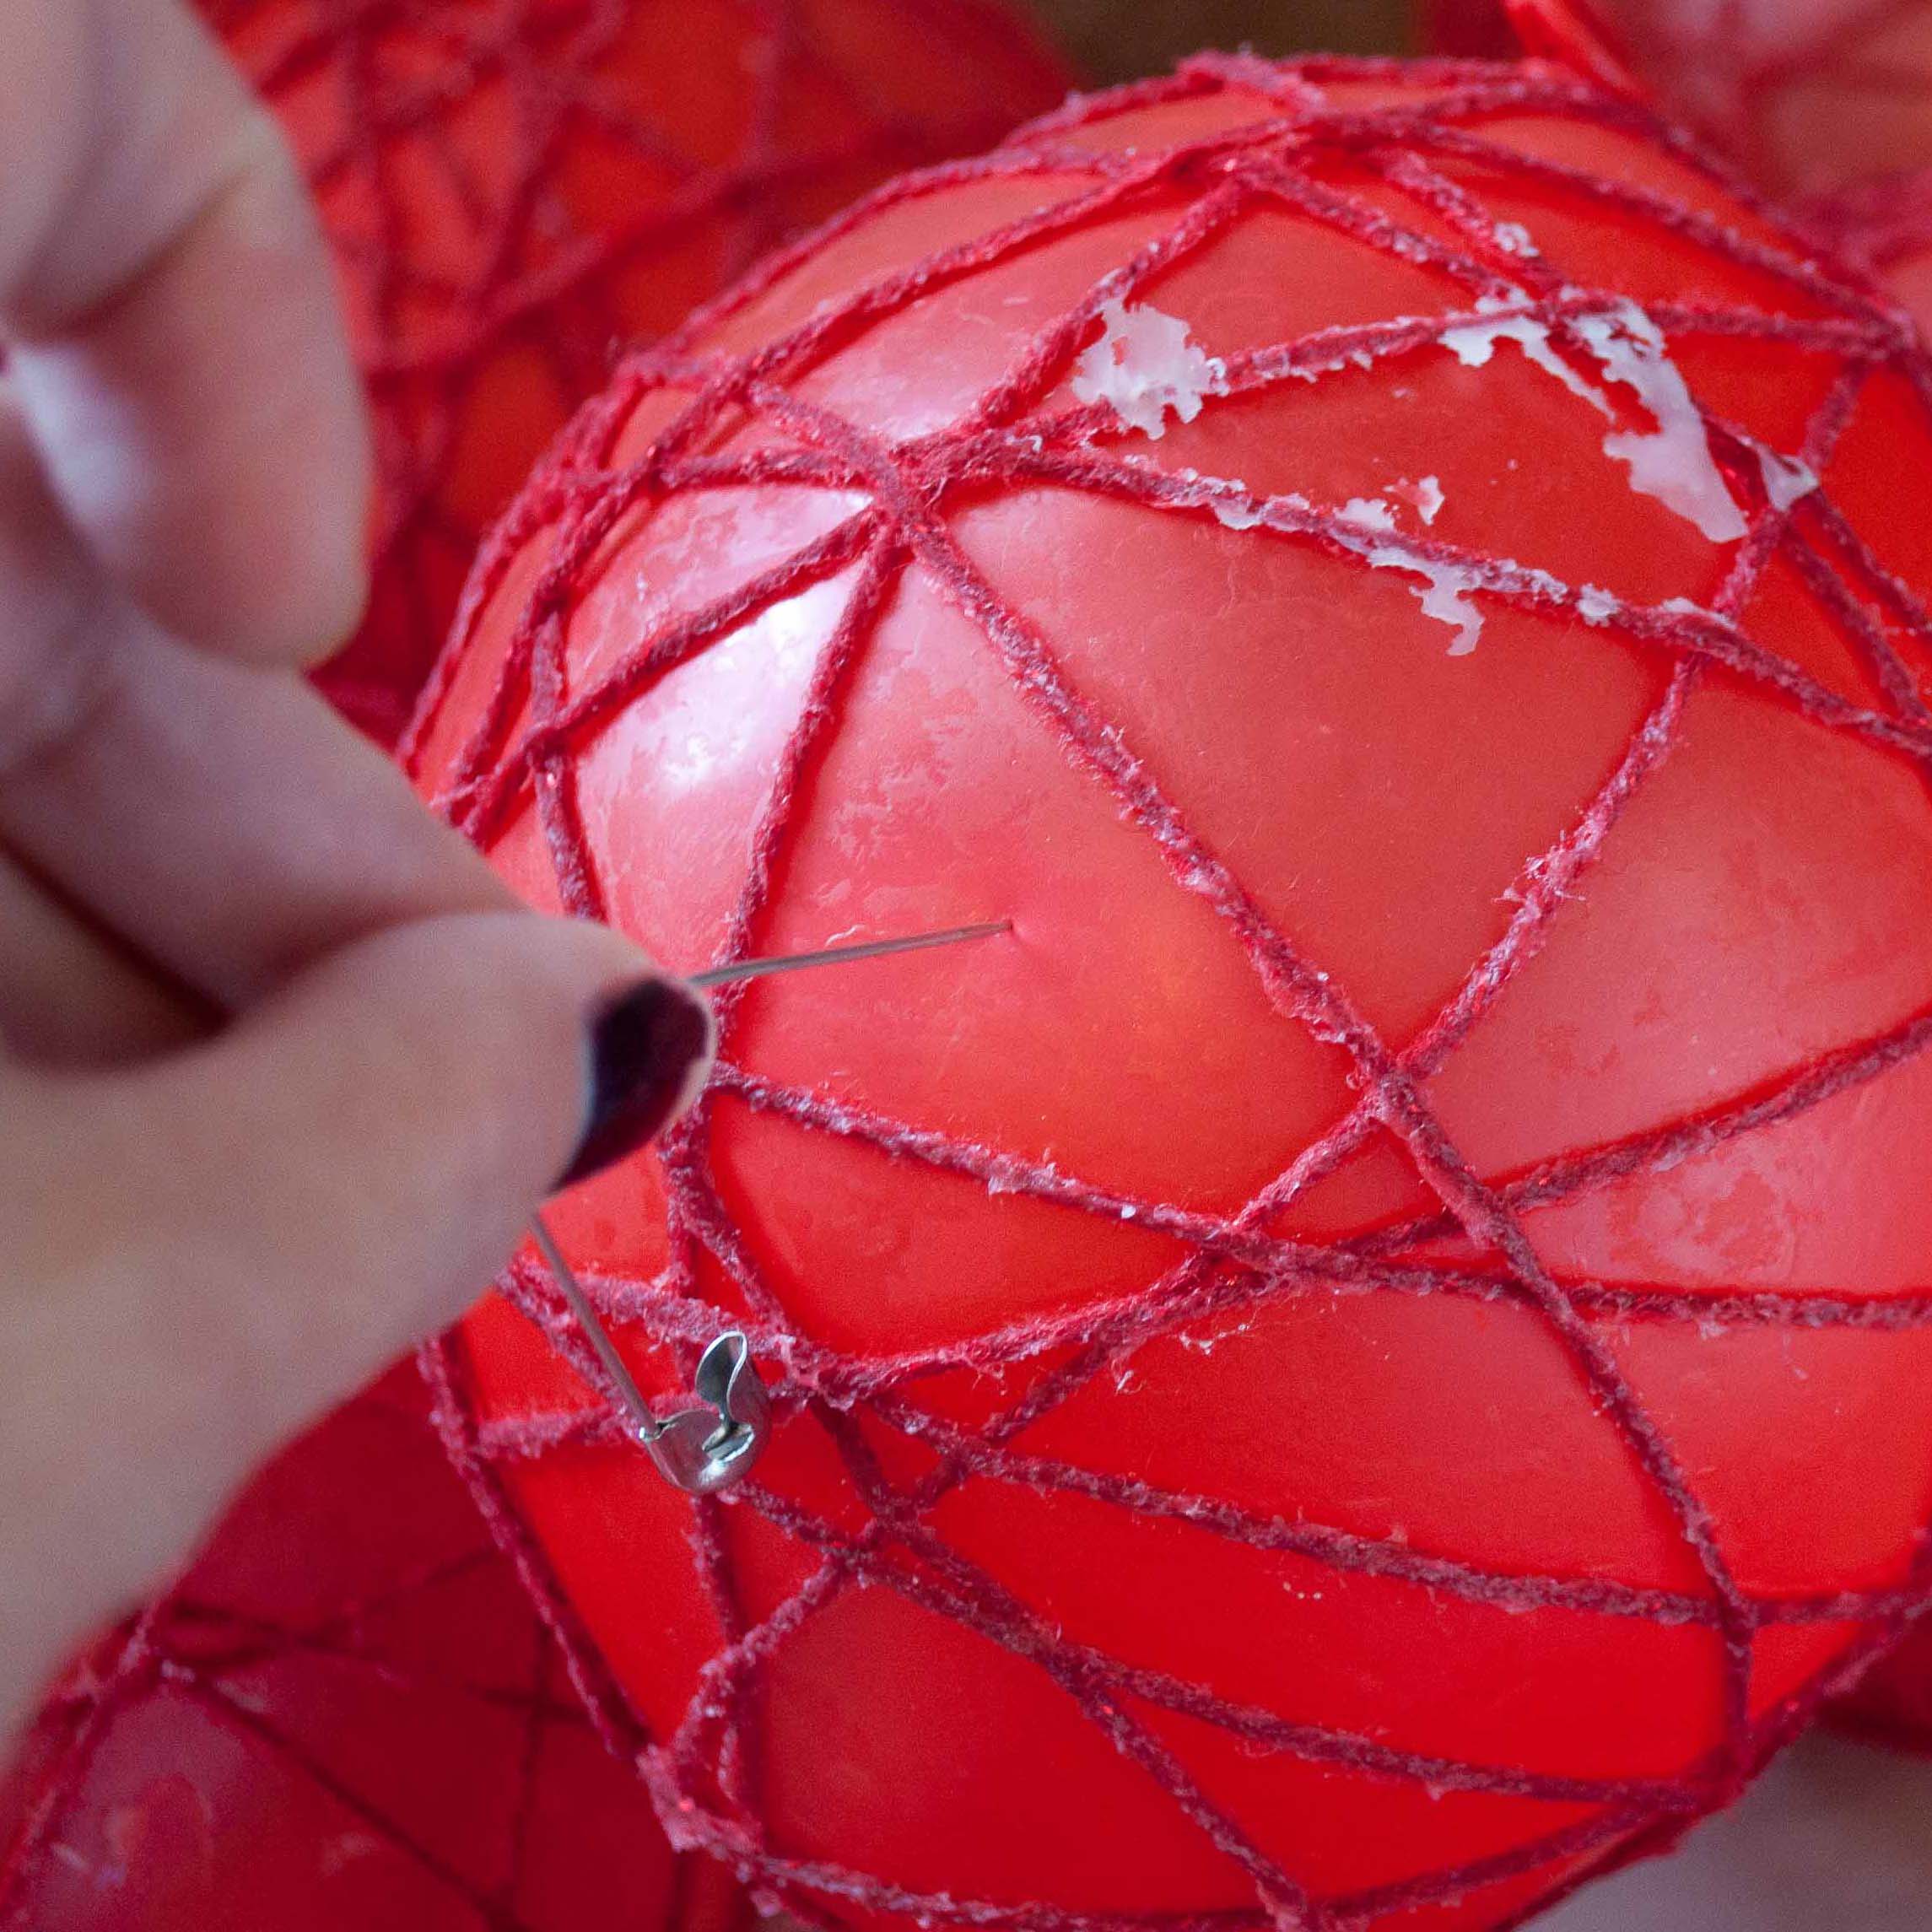
Place a few feet of yarn into the glue and press down, try not to stir or you’ll end up with a tangled yarn mess.
Step five:
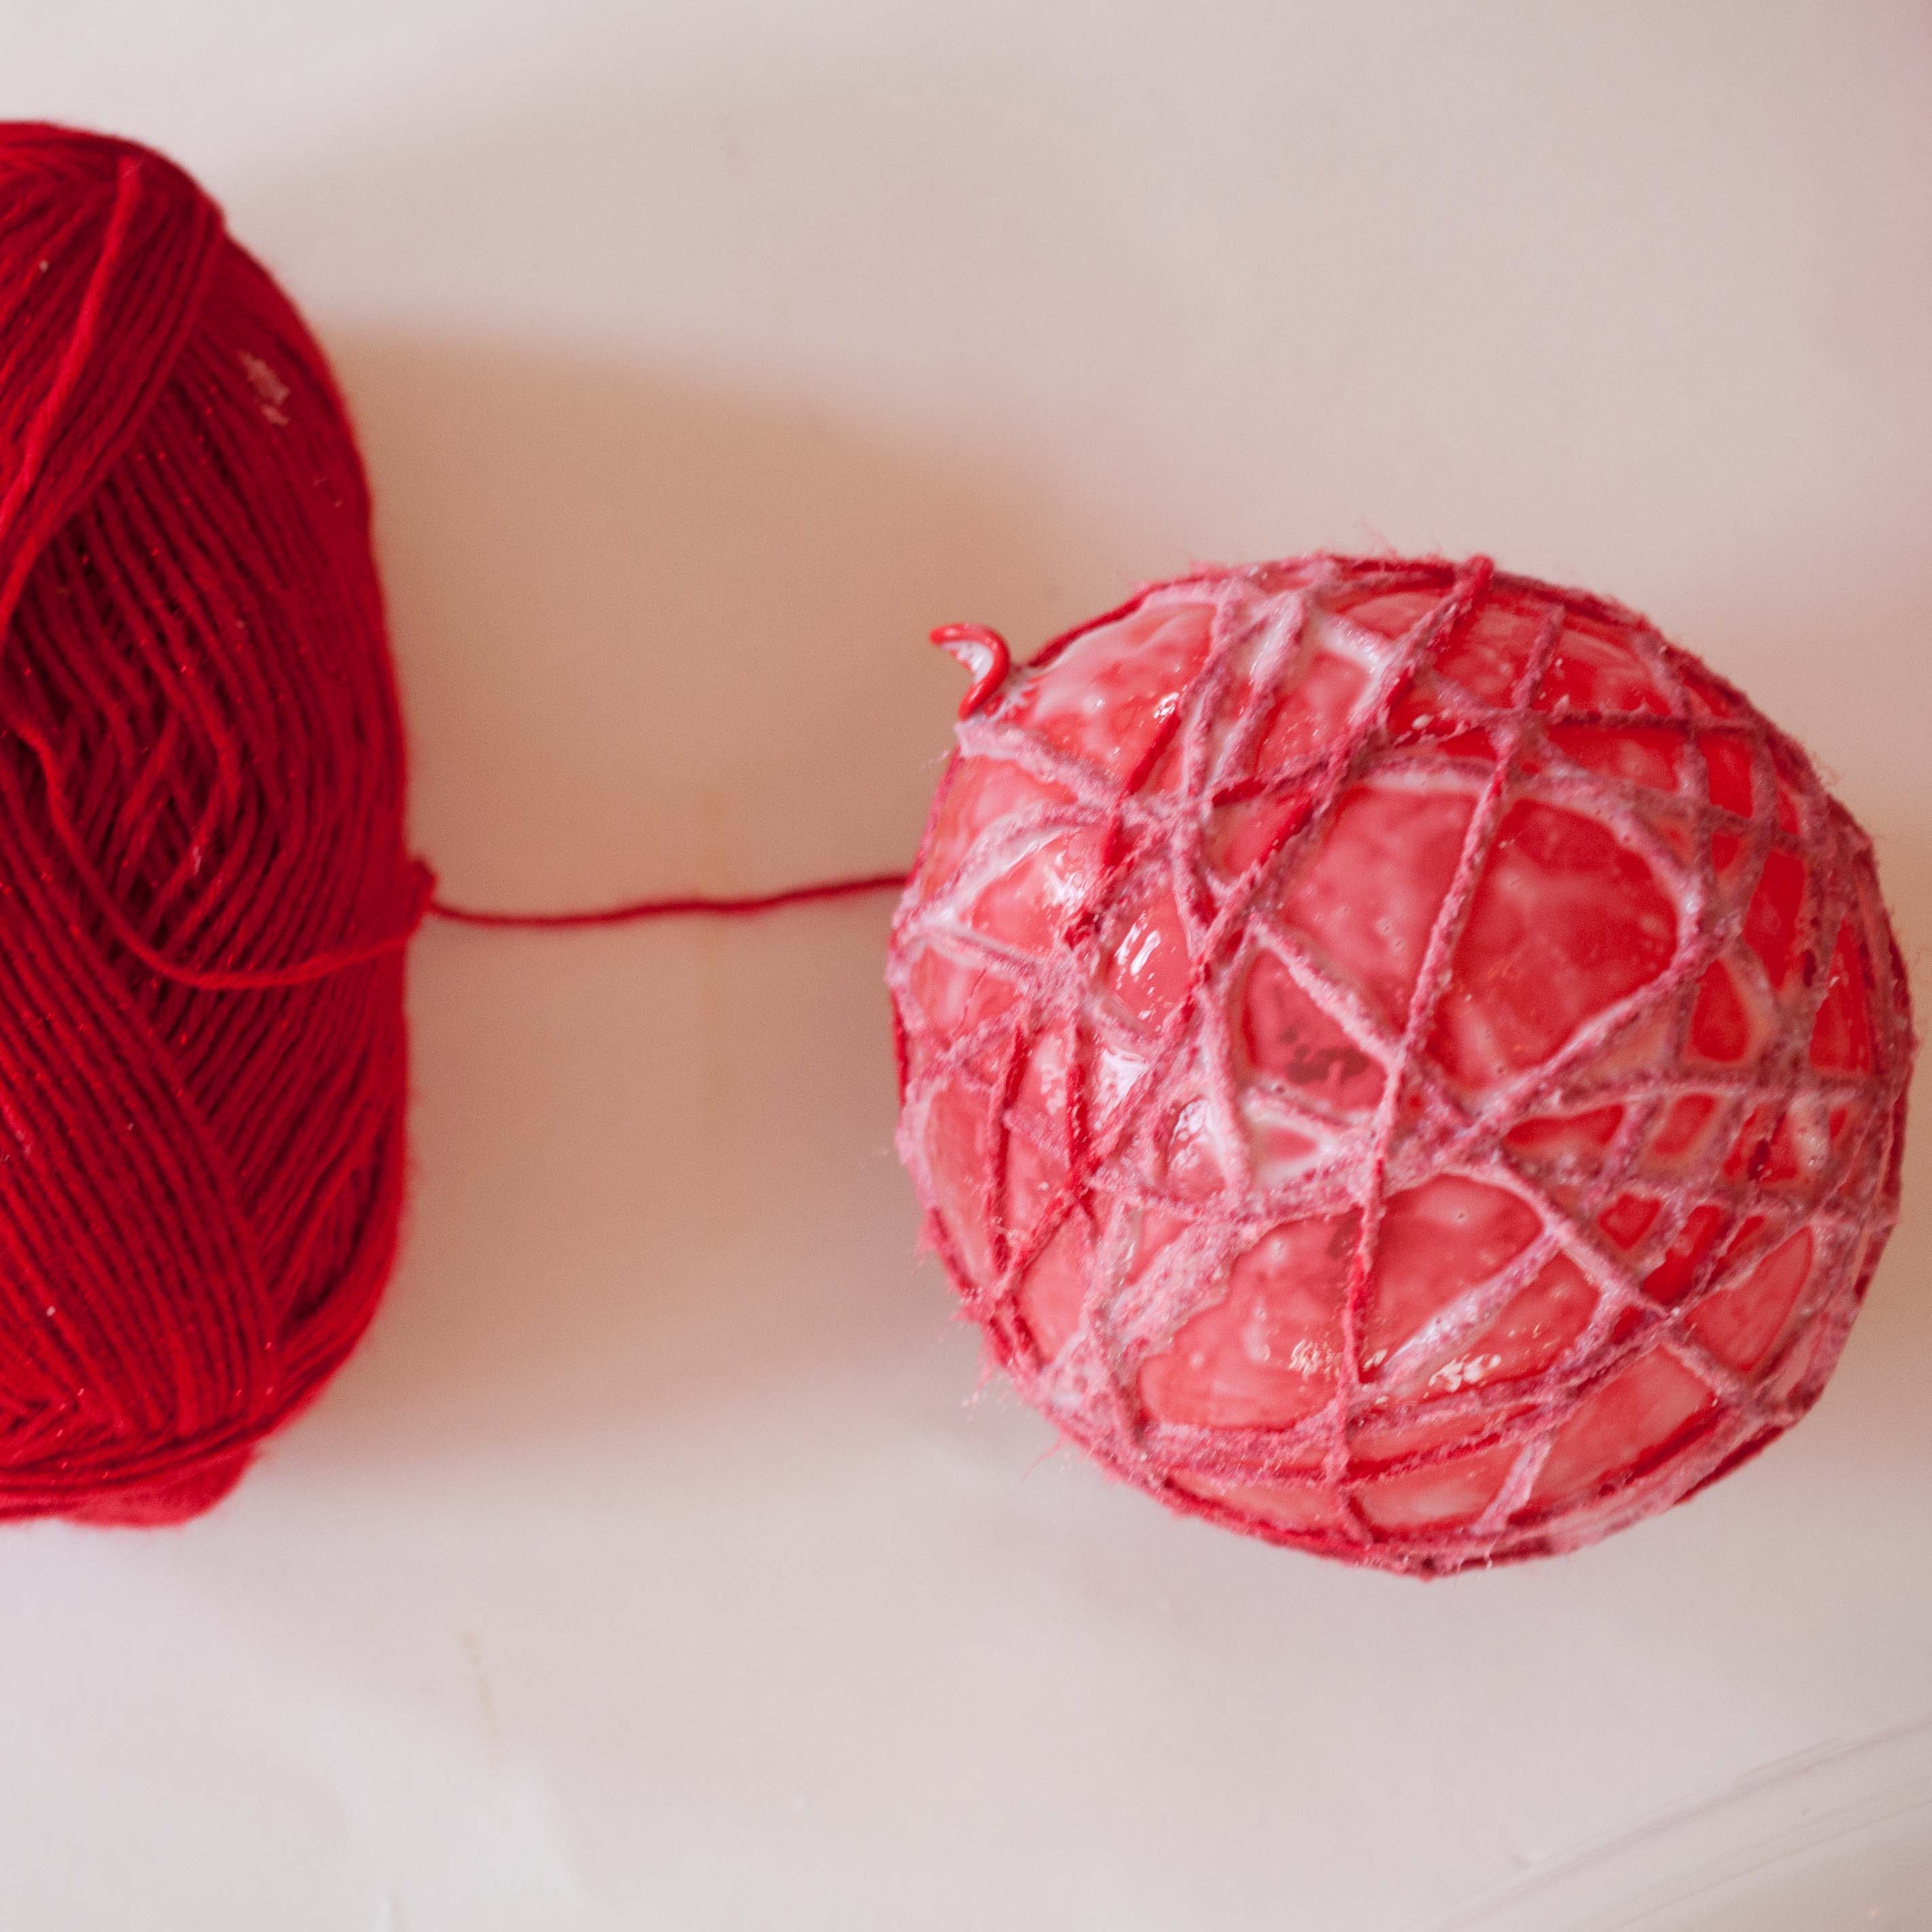
Wind the yarn around the balloons, cutting of the end and tucking it into an inconspicuous spot and then place on sheets of wax paper to dry.
Step Six:
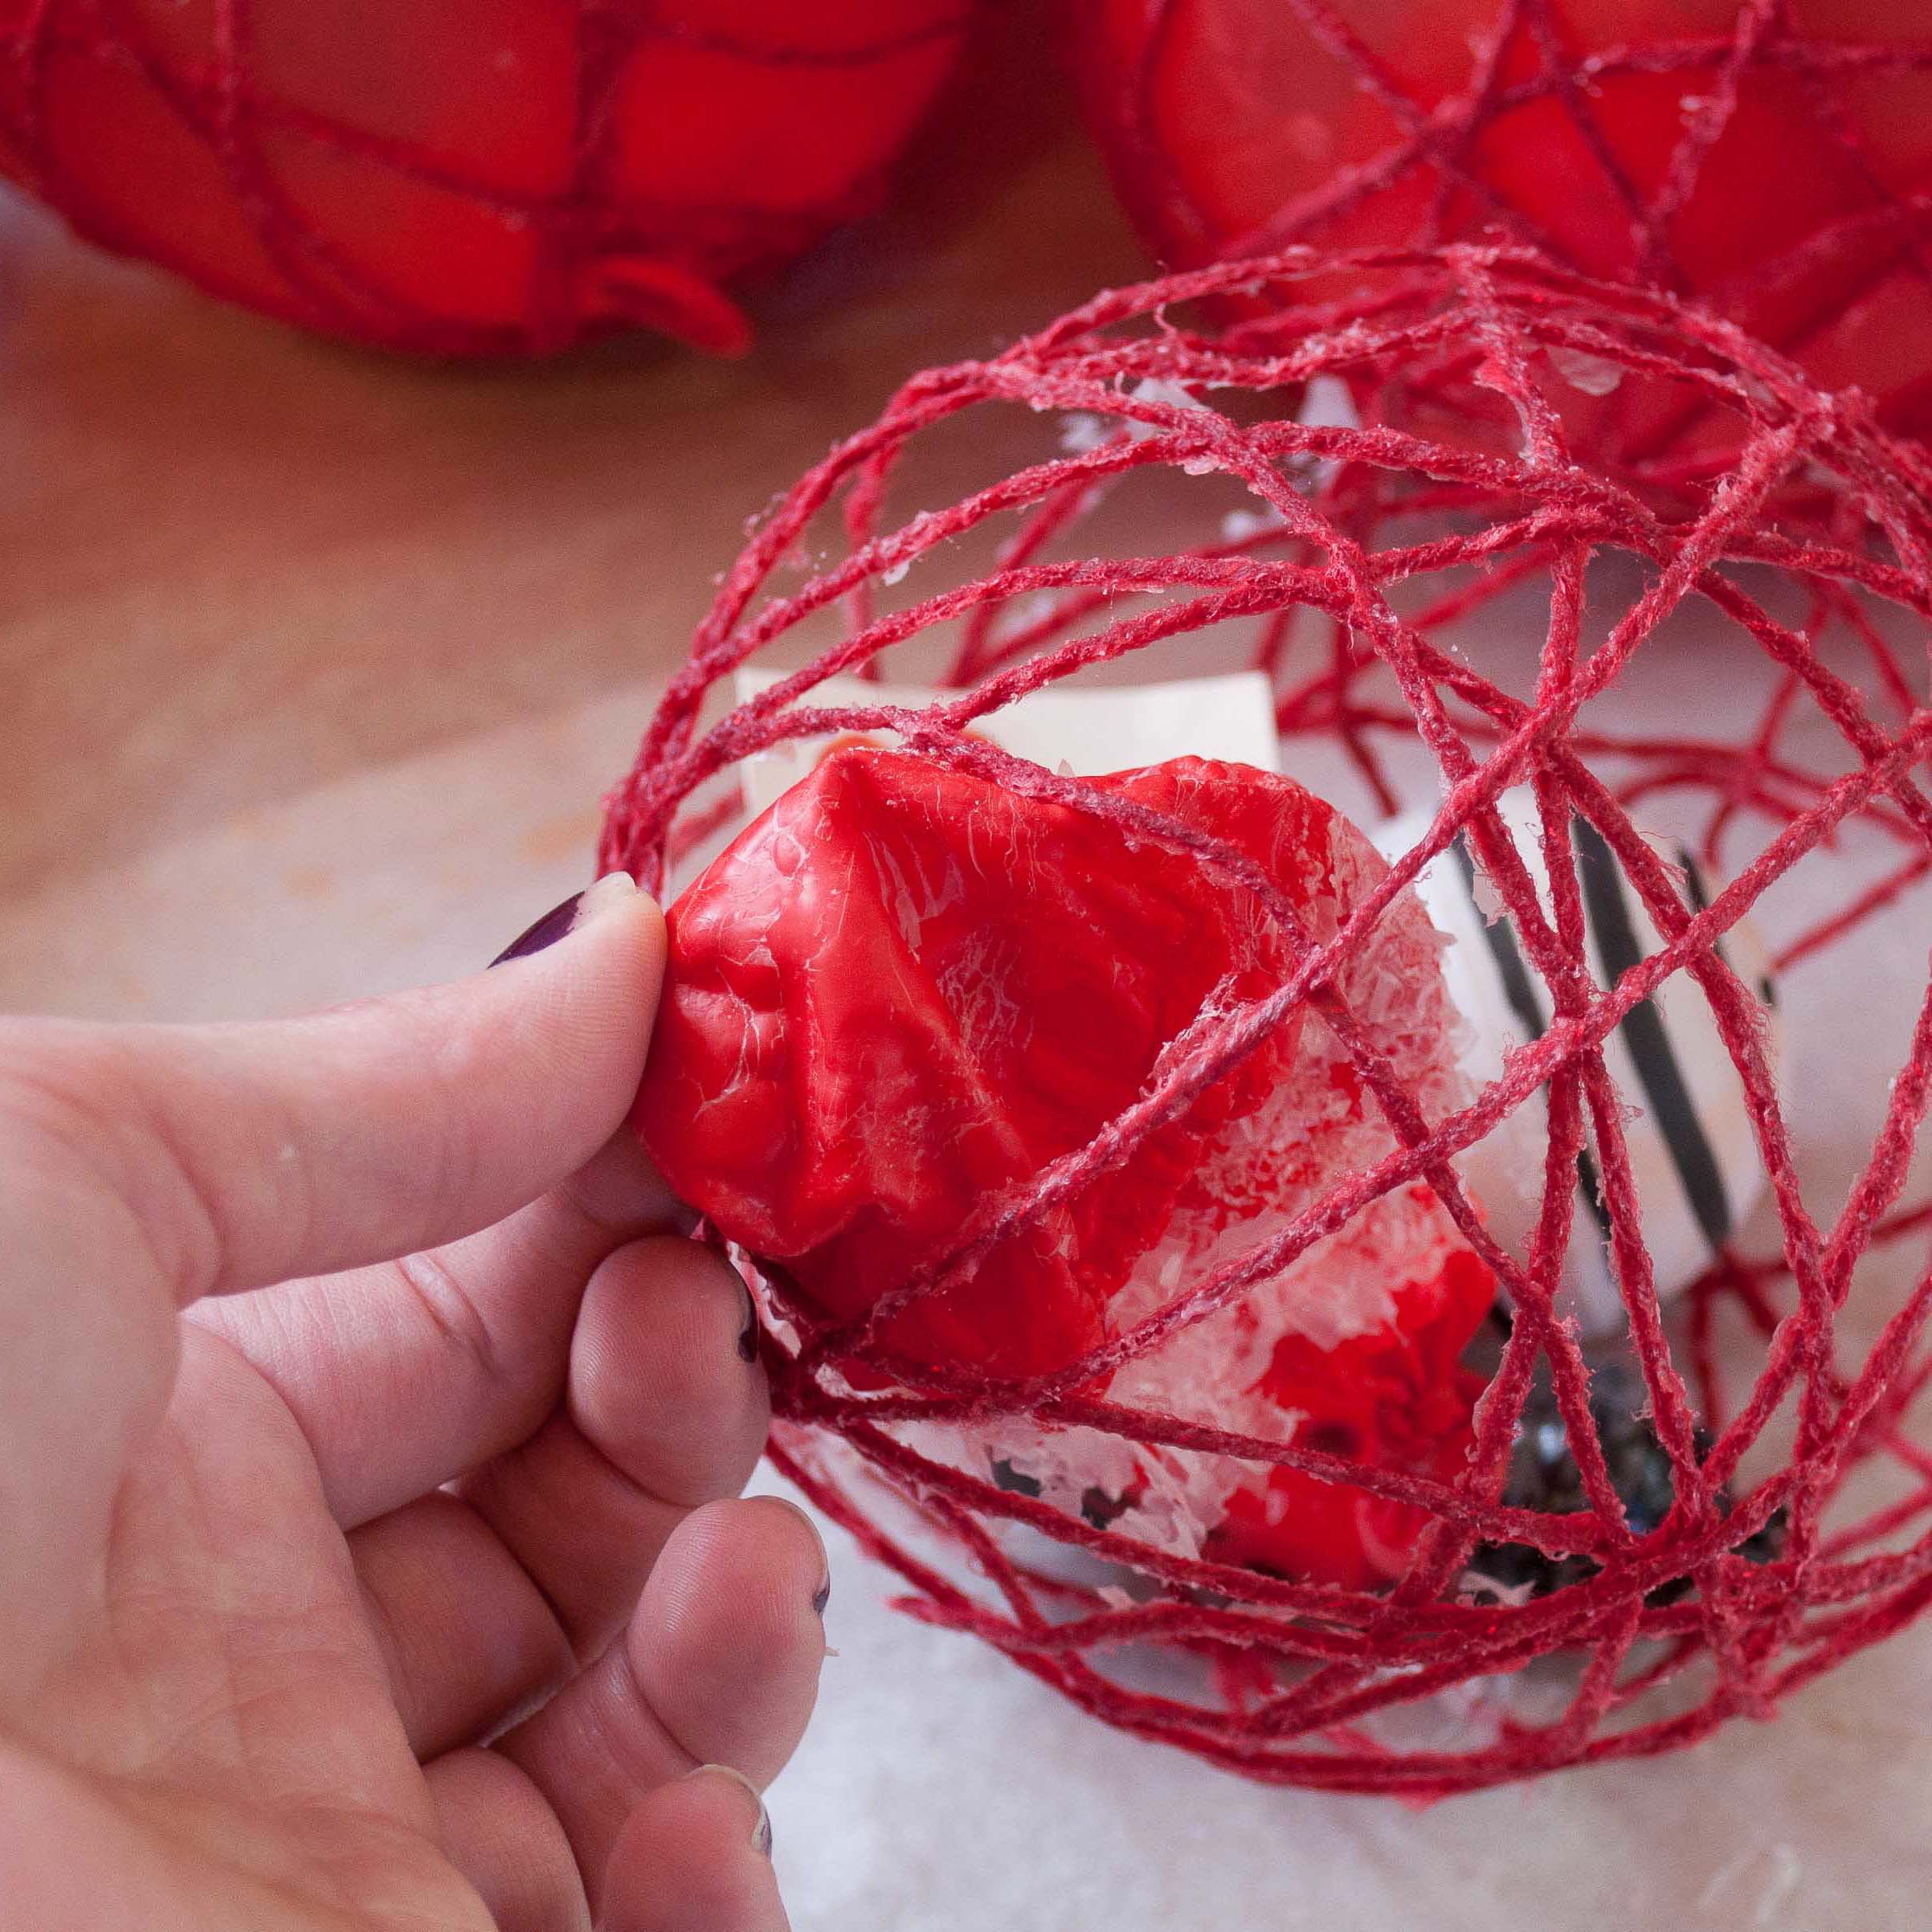
Allow to dry completely until the yarn has become very stiff and there is no give to it. Then pop the balloon in the middle.
Step Seven:
Wrestle the toys out of the popped ballon and remove the deflated balloon from the ball.
Tips:
If your yarn never hardens, don’t remove the balloon. Trace the yarn with the glue bottle tip and then pat the glue into the yarn with a sponge brush.
Yarn must be hard and stiff for this craft to work.
I like to play with my food. For some reason, it makes me less hungry.
When I got these little suckers from a vendor at work, I had no interest in eating them. But I did want to play with them. Maybe it’s a commentary on how much food we waste in America, or maybe it’s just because candy is pretty, Food Crafts are huge source of entertainment in my world. Although there are many cupcake toppers featured on websites across the land, I’m not a fan of inedible garnishes. Even if I don’t plan to eat it, it seems like you just didn’t try hard enough.
Sure you can print out a pretty flower decal from your home computer, or make a rose out of paper, or a fancy embelishment with ribbons and buttons, but if you can’t eat it what the heck is it doing on my plate?
No one glues plastic googly eyes to a pot roast. Or puts a wizzard hat on a chicken sandwich. Why are completely random acts of craftiness allowed on baked goods?
And paper flag banners on a cake? weird. Why not put a pile of mail on there, or decorative globe? What’s next, filling my plate with bedazzled paper mache vegetables?
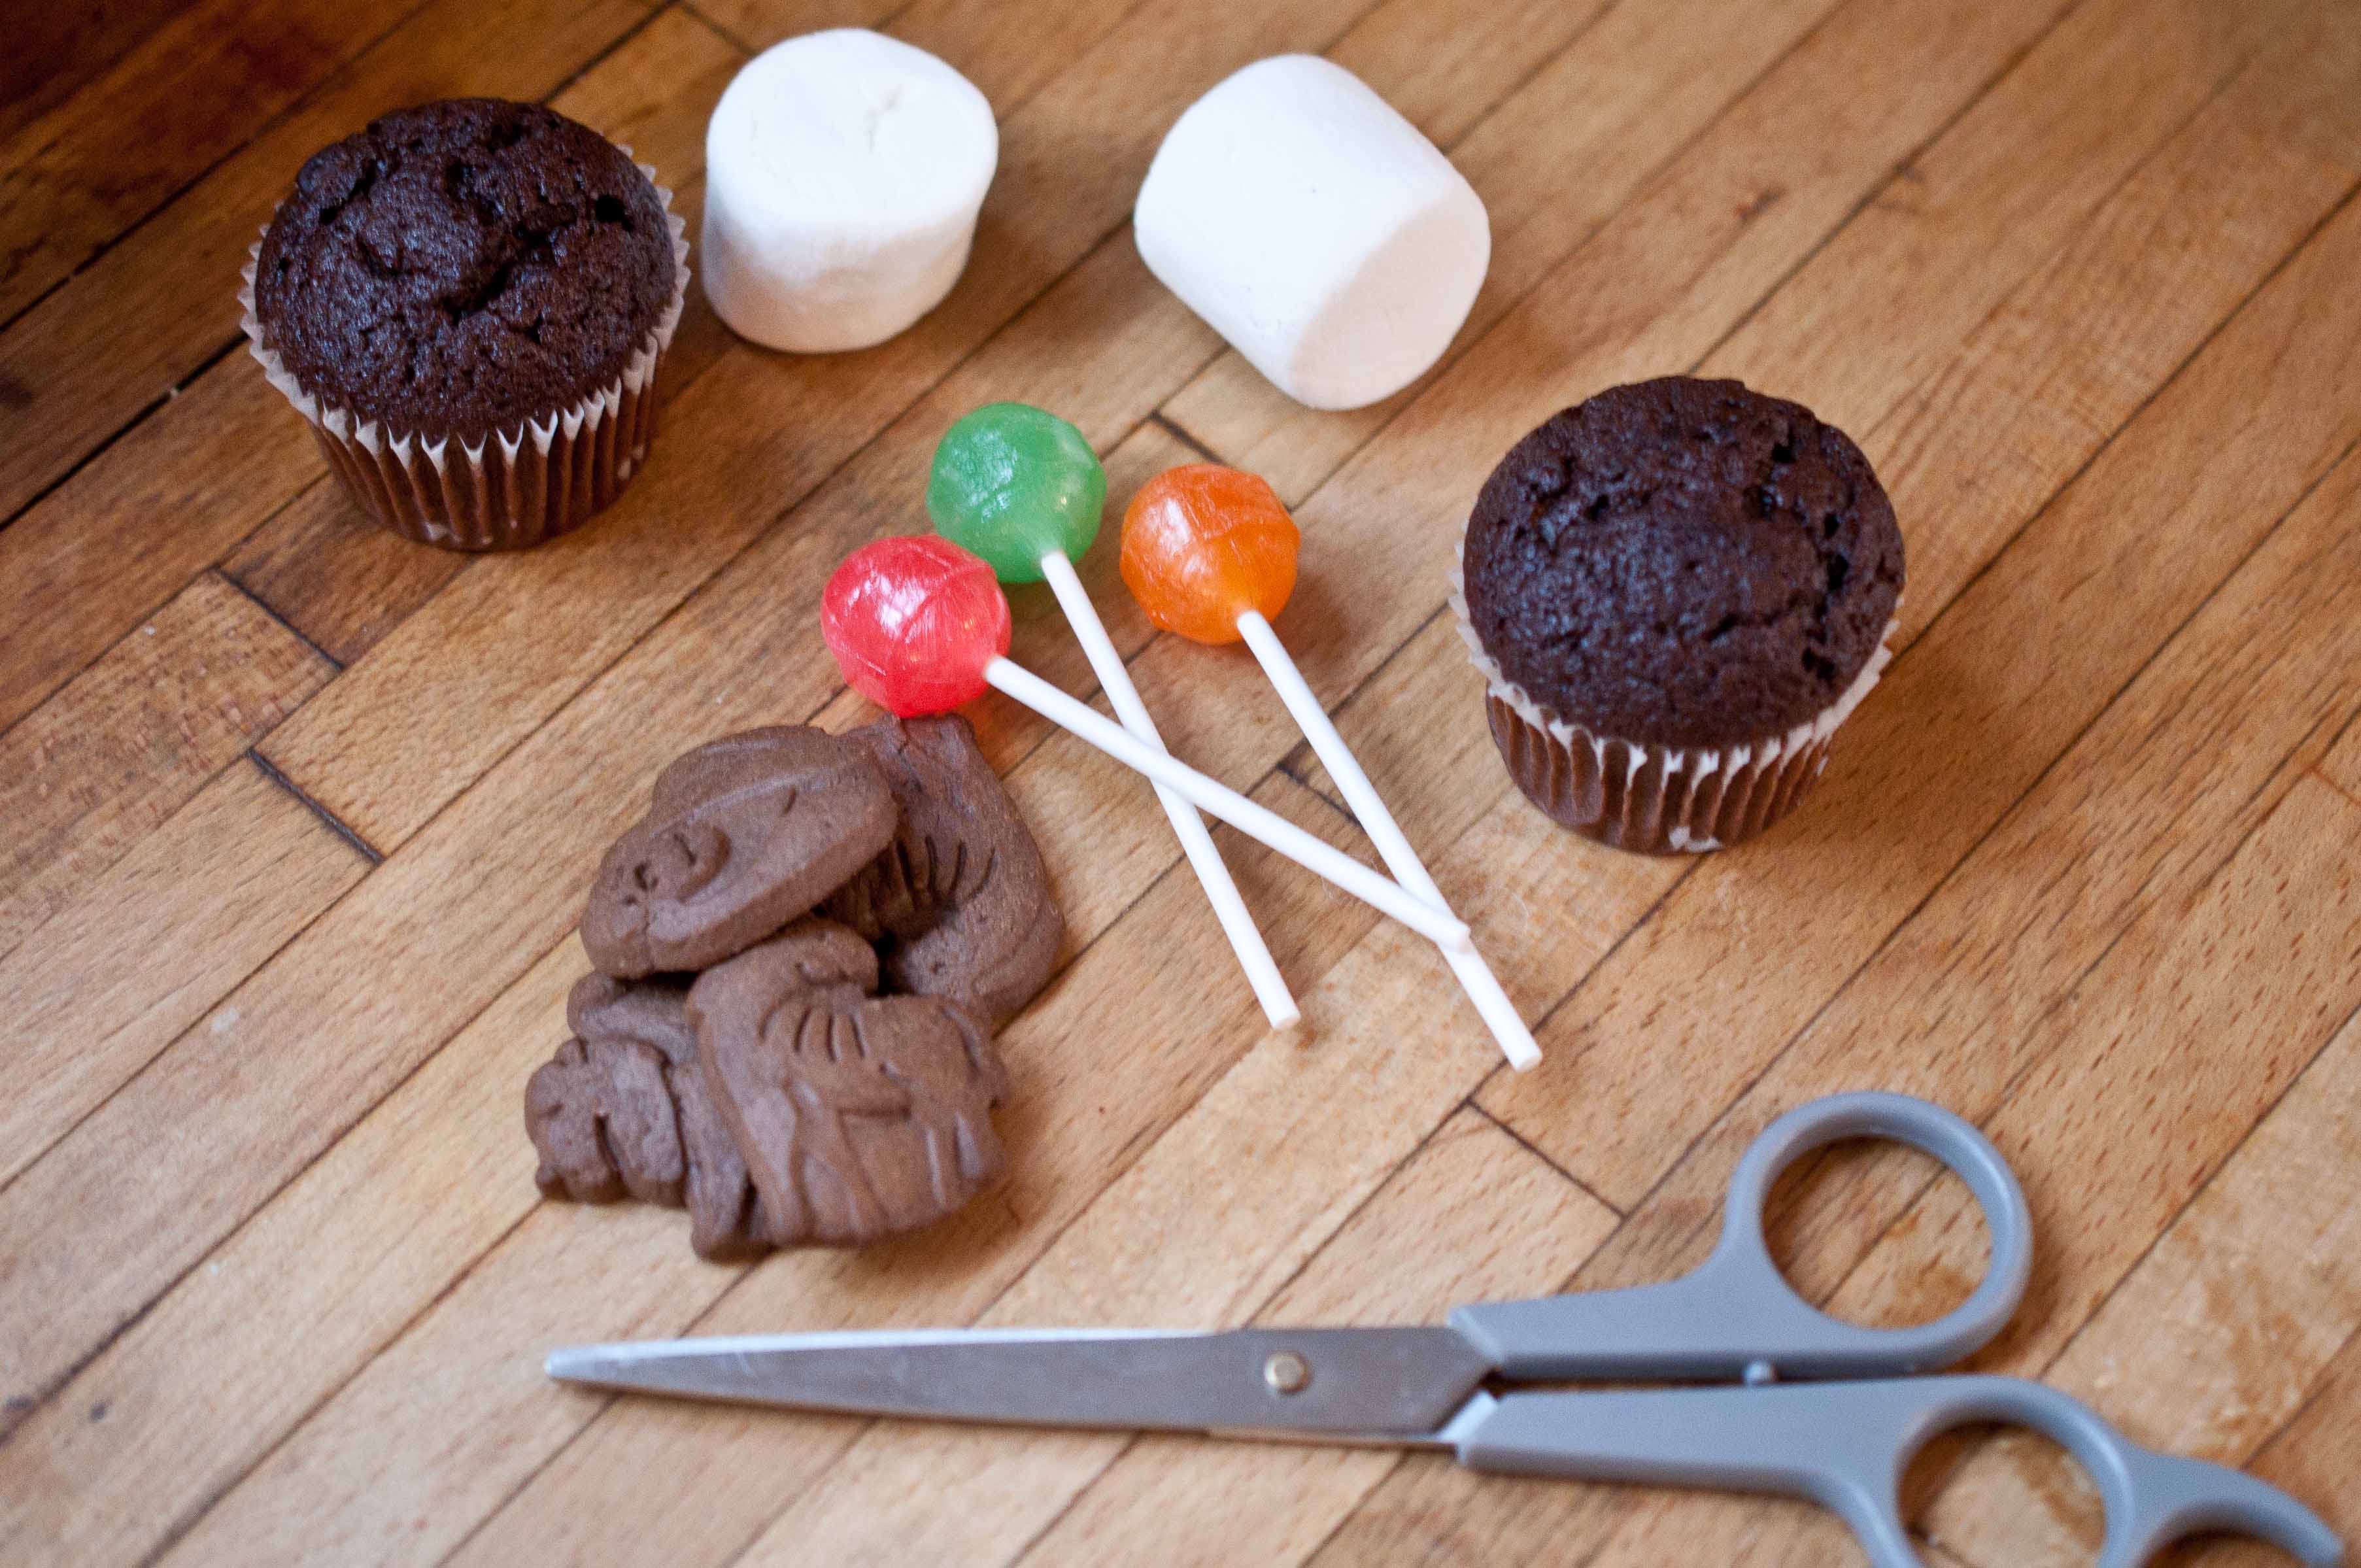
Here is my entry for completely edible cupcake garnish, other than the stick, of course.
1/2 cup chocolate graham crackers (or chocolate Teddy Grahams)
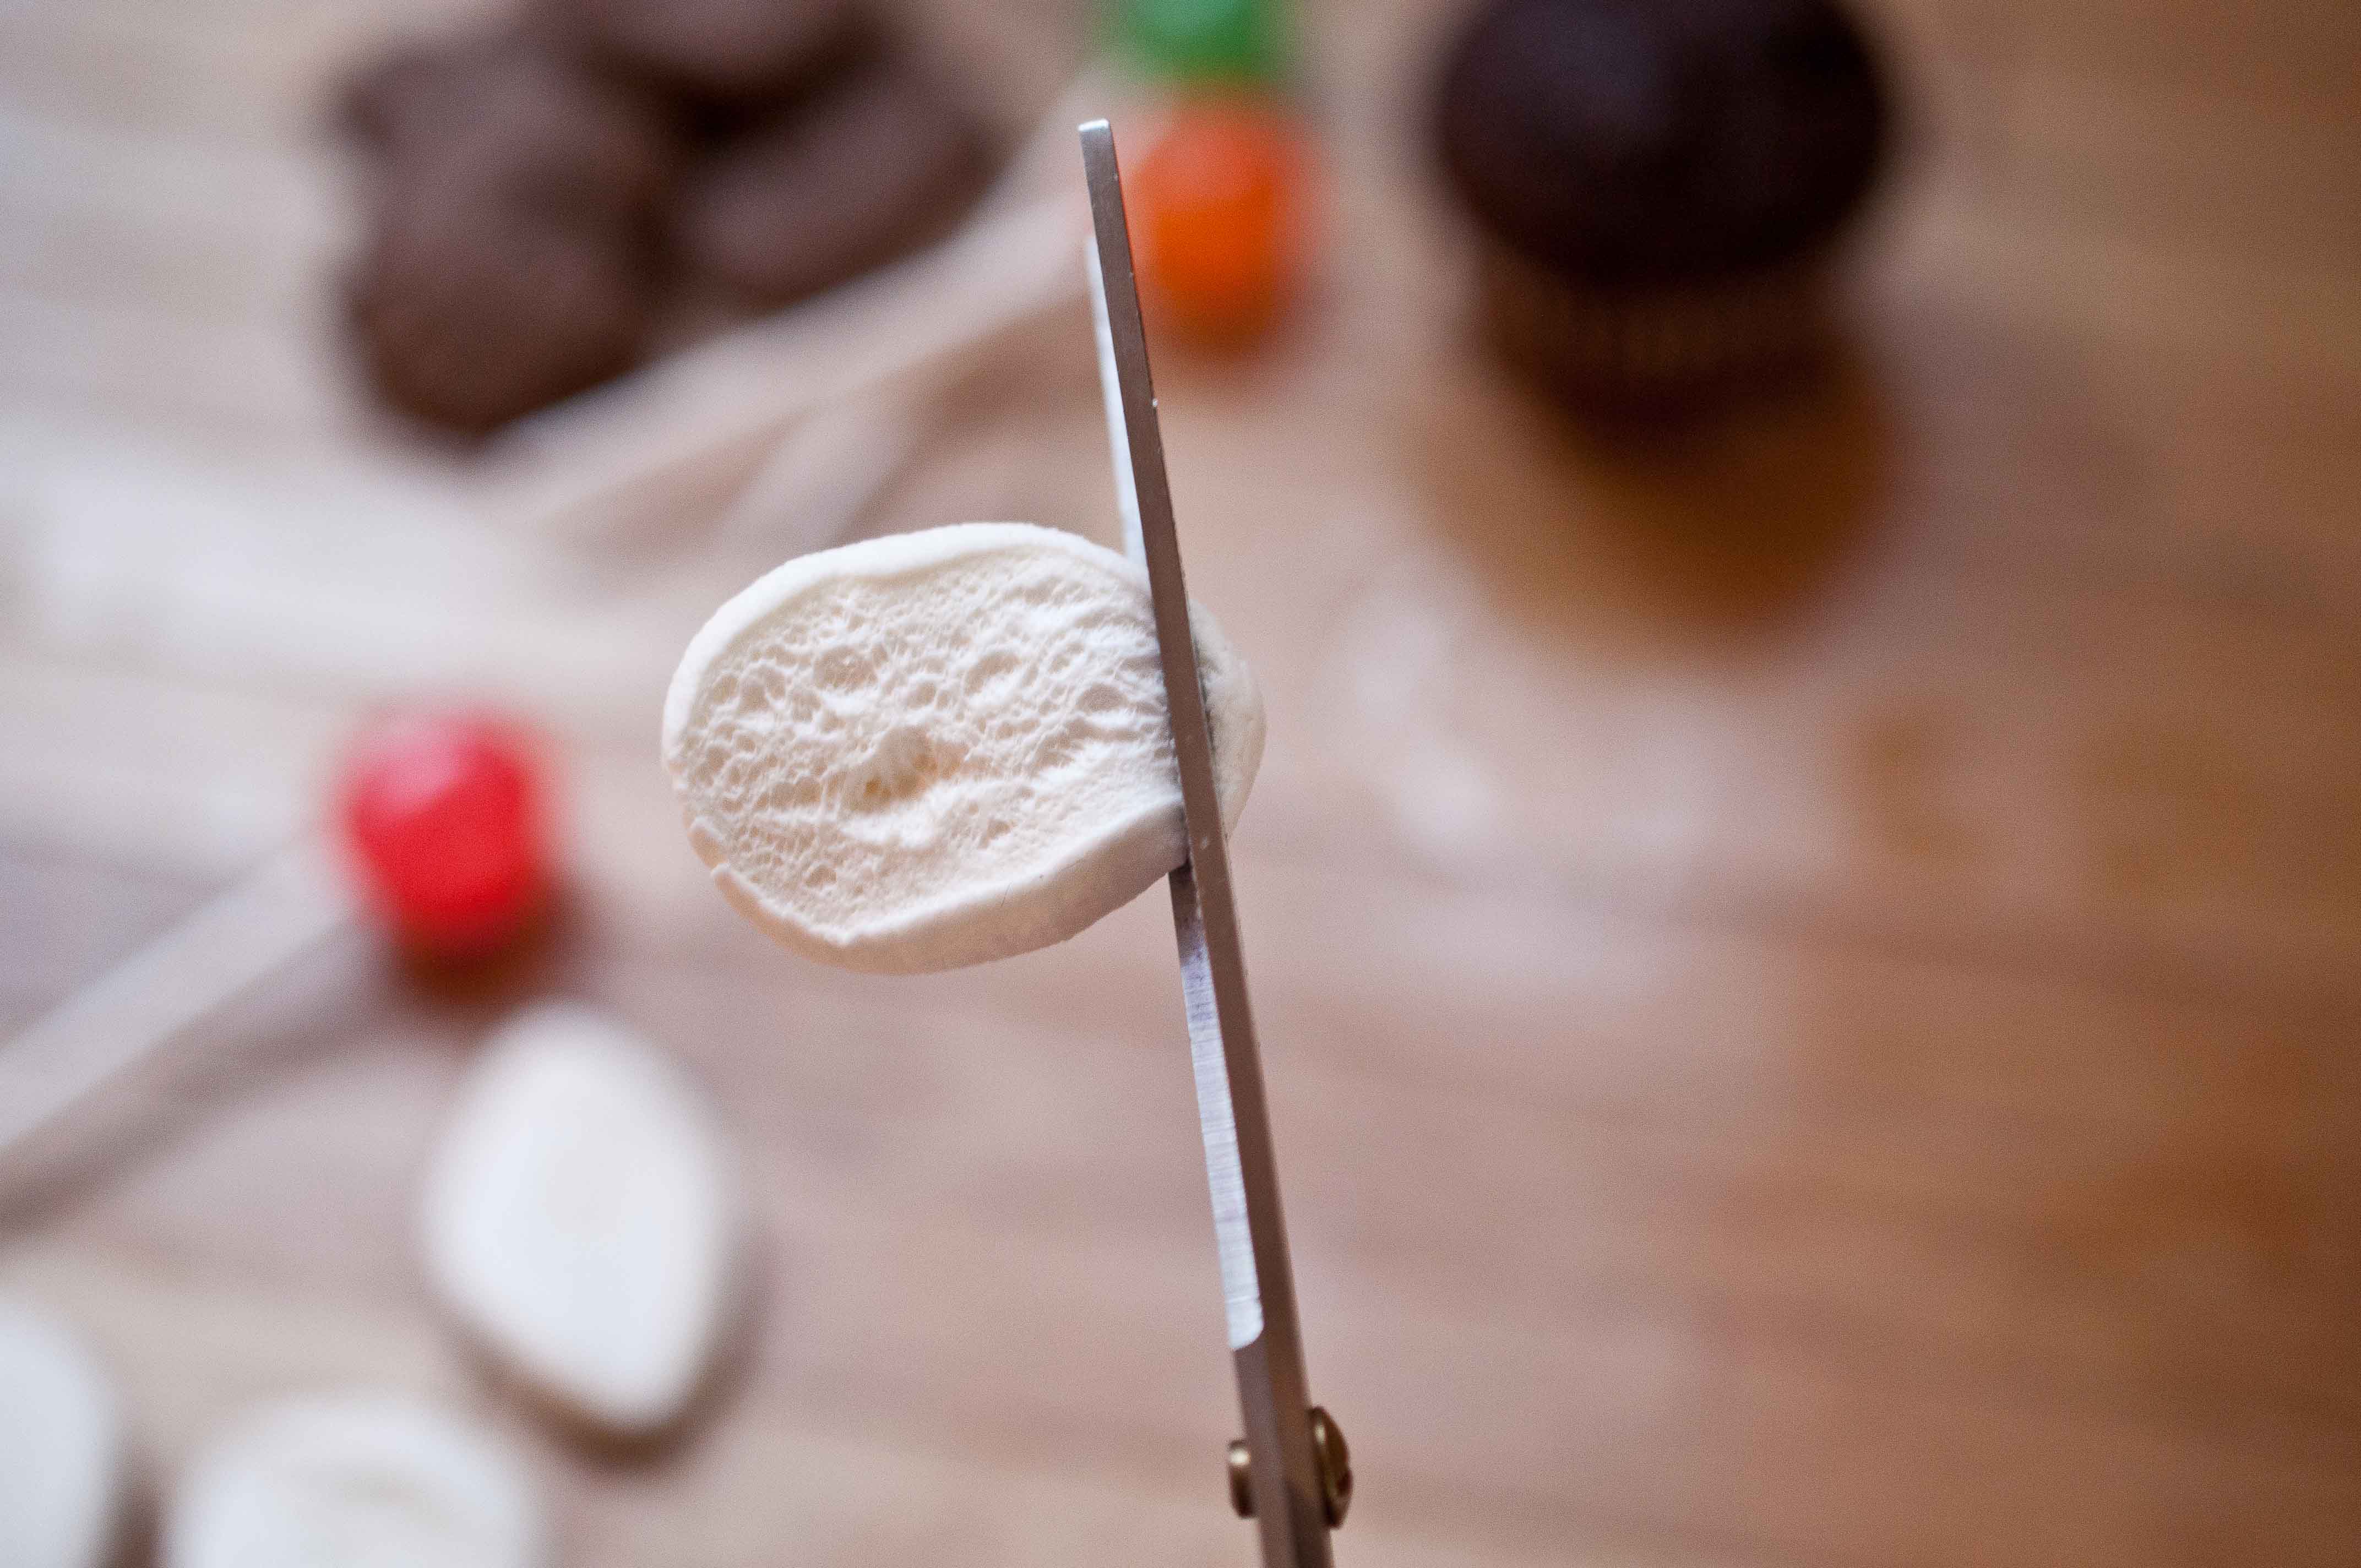
Cut the marshmallows into four to five slices. There are going to be a few that just don’t look right, so cut more than you need. They will curl up a bit, but just push them flat.
There will most likely be one end that is a bit more rounded and one that is a bit pointier.
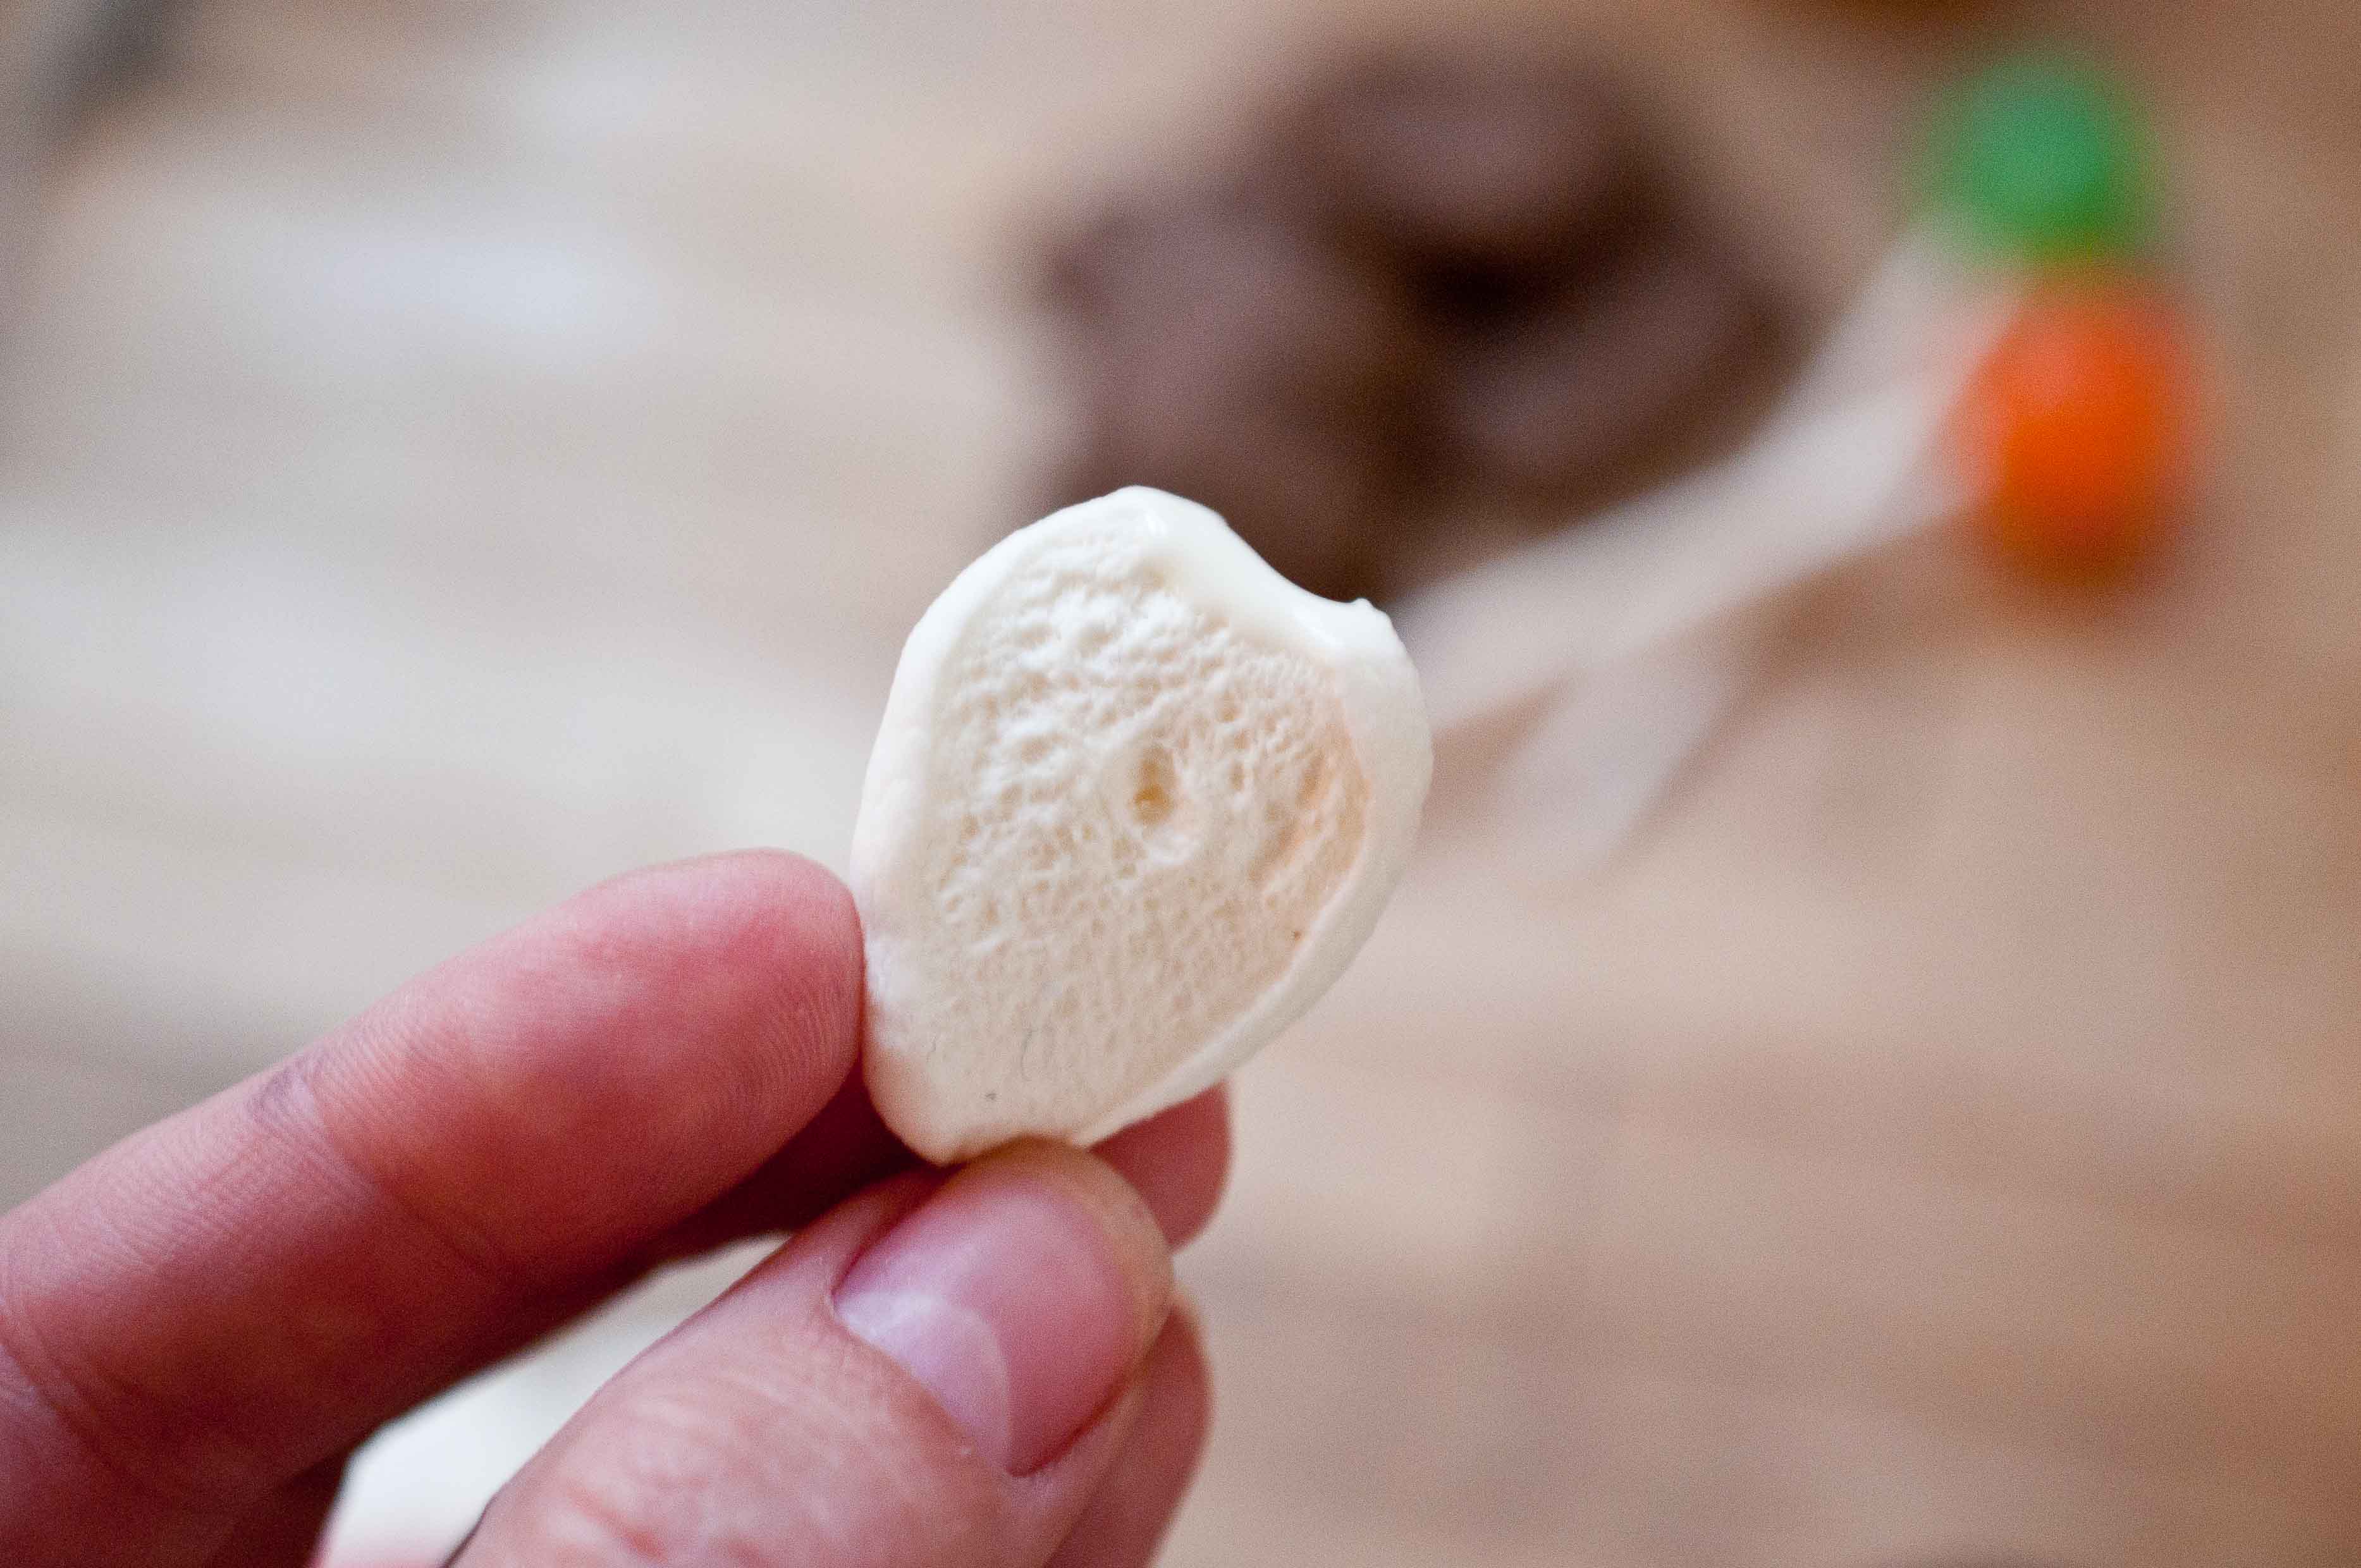
Cut off a very small amount of the pointed end, about 1/8 of an inch.
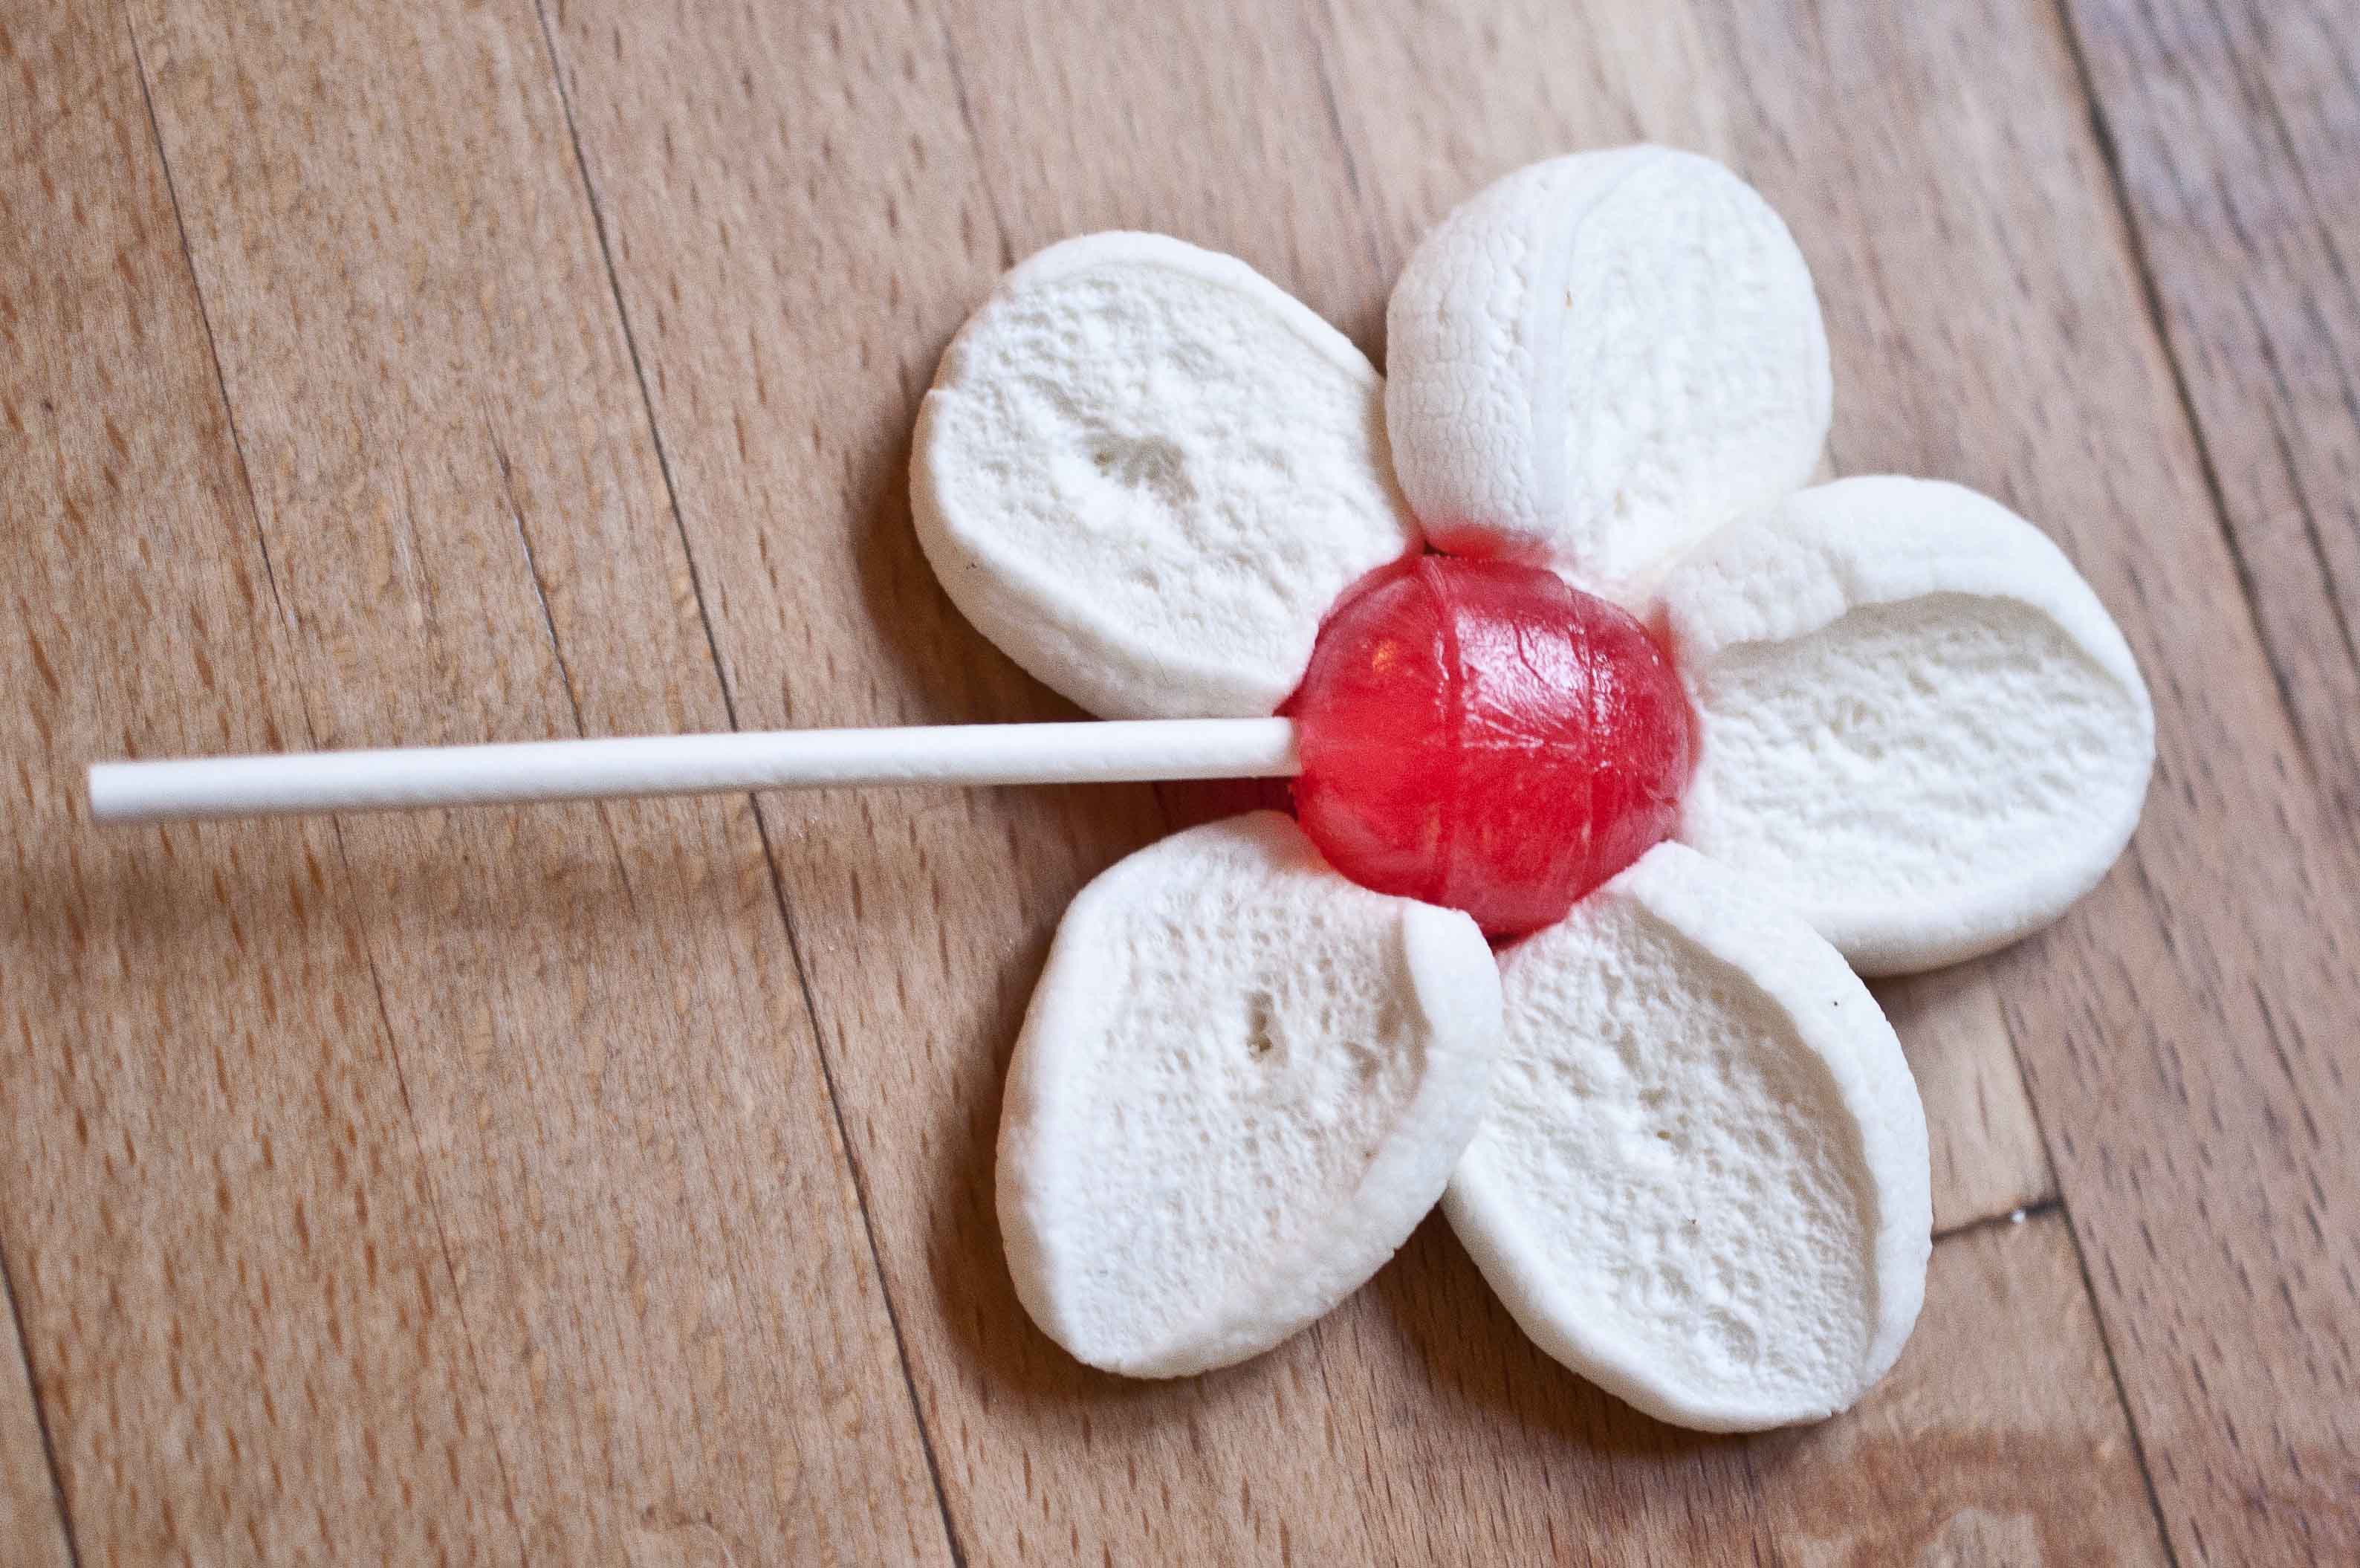
Place the white chocolate in a microwave safe bowl. Heat in the microwave on high for 20 seconds, stir and repeat until melted. Don’t over heat or it will seize. Using a butter knife or a spoon, smear a small on the marshmallow petal where you just made the cut.
Press the chocolate side against the sucker, at the base, nearest the stick.
Repeat for all pedals. You’ll want to put about 5 petals on each flower which will require a bit of overlapping of the pedals.
Lay flat until the chocolate glue dries.
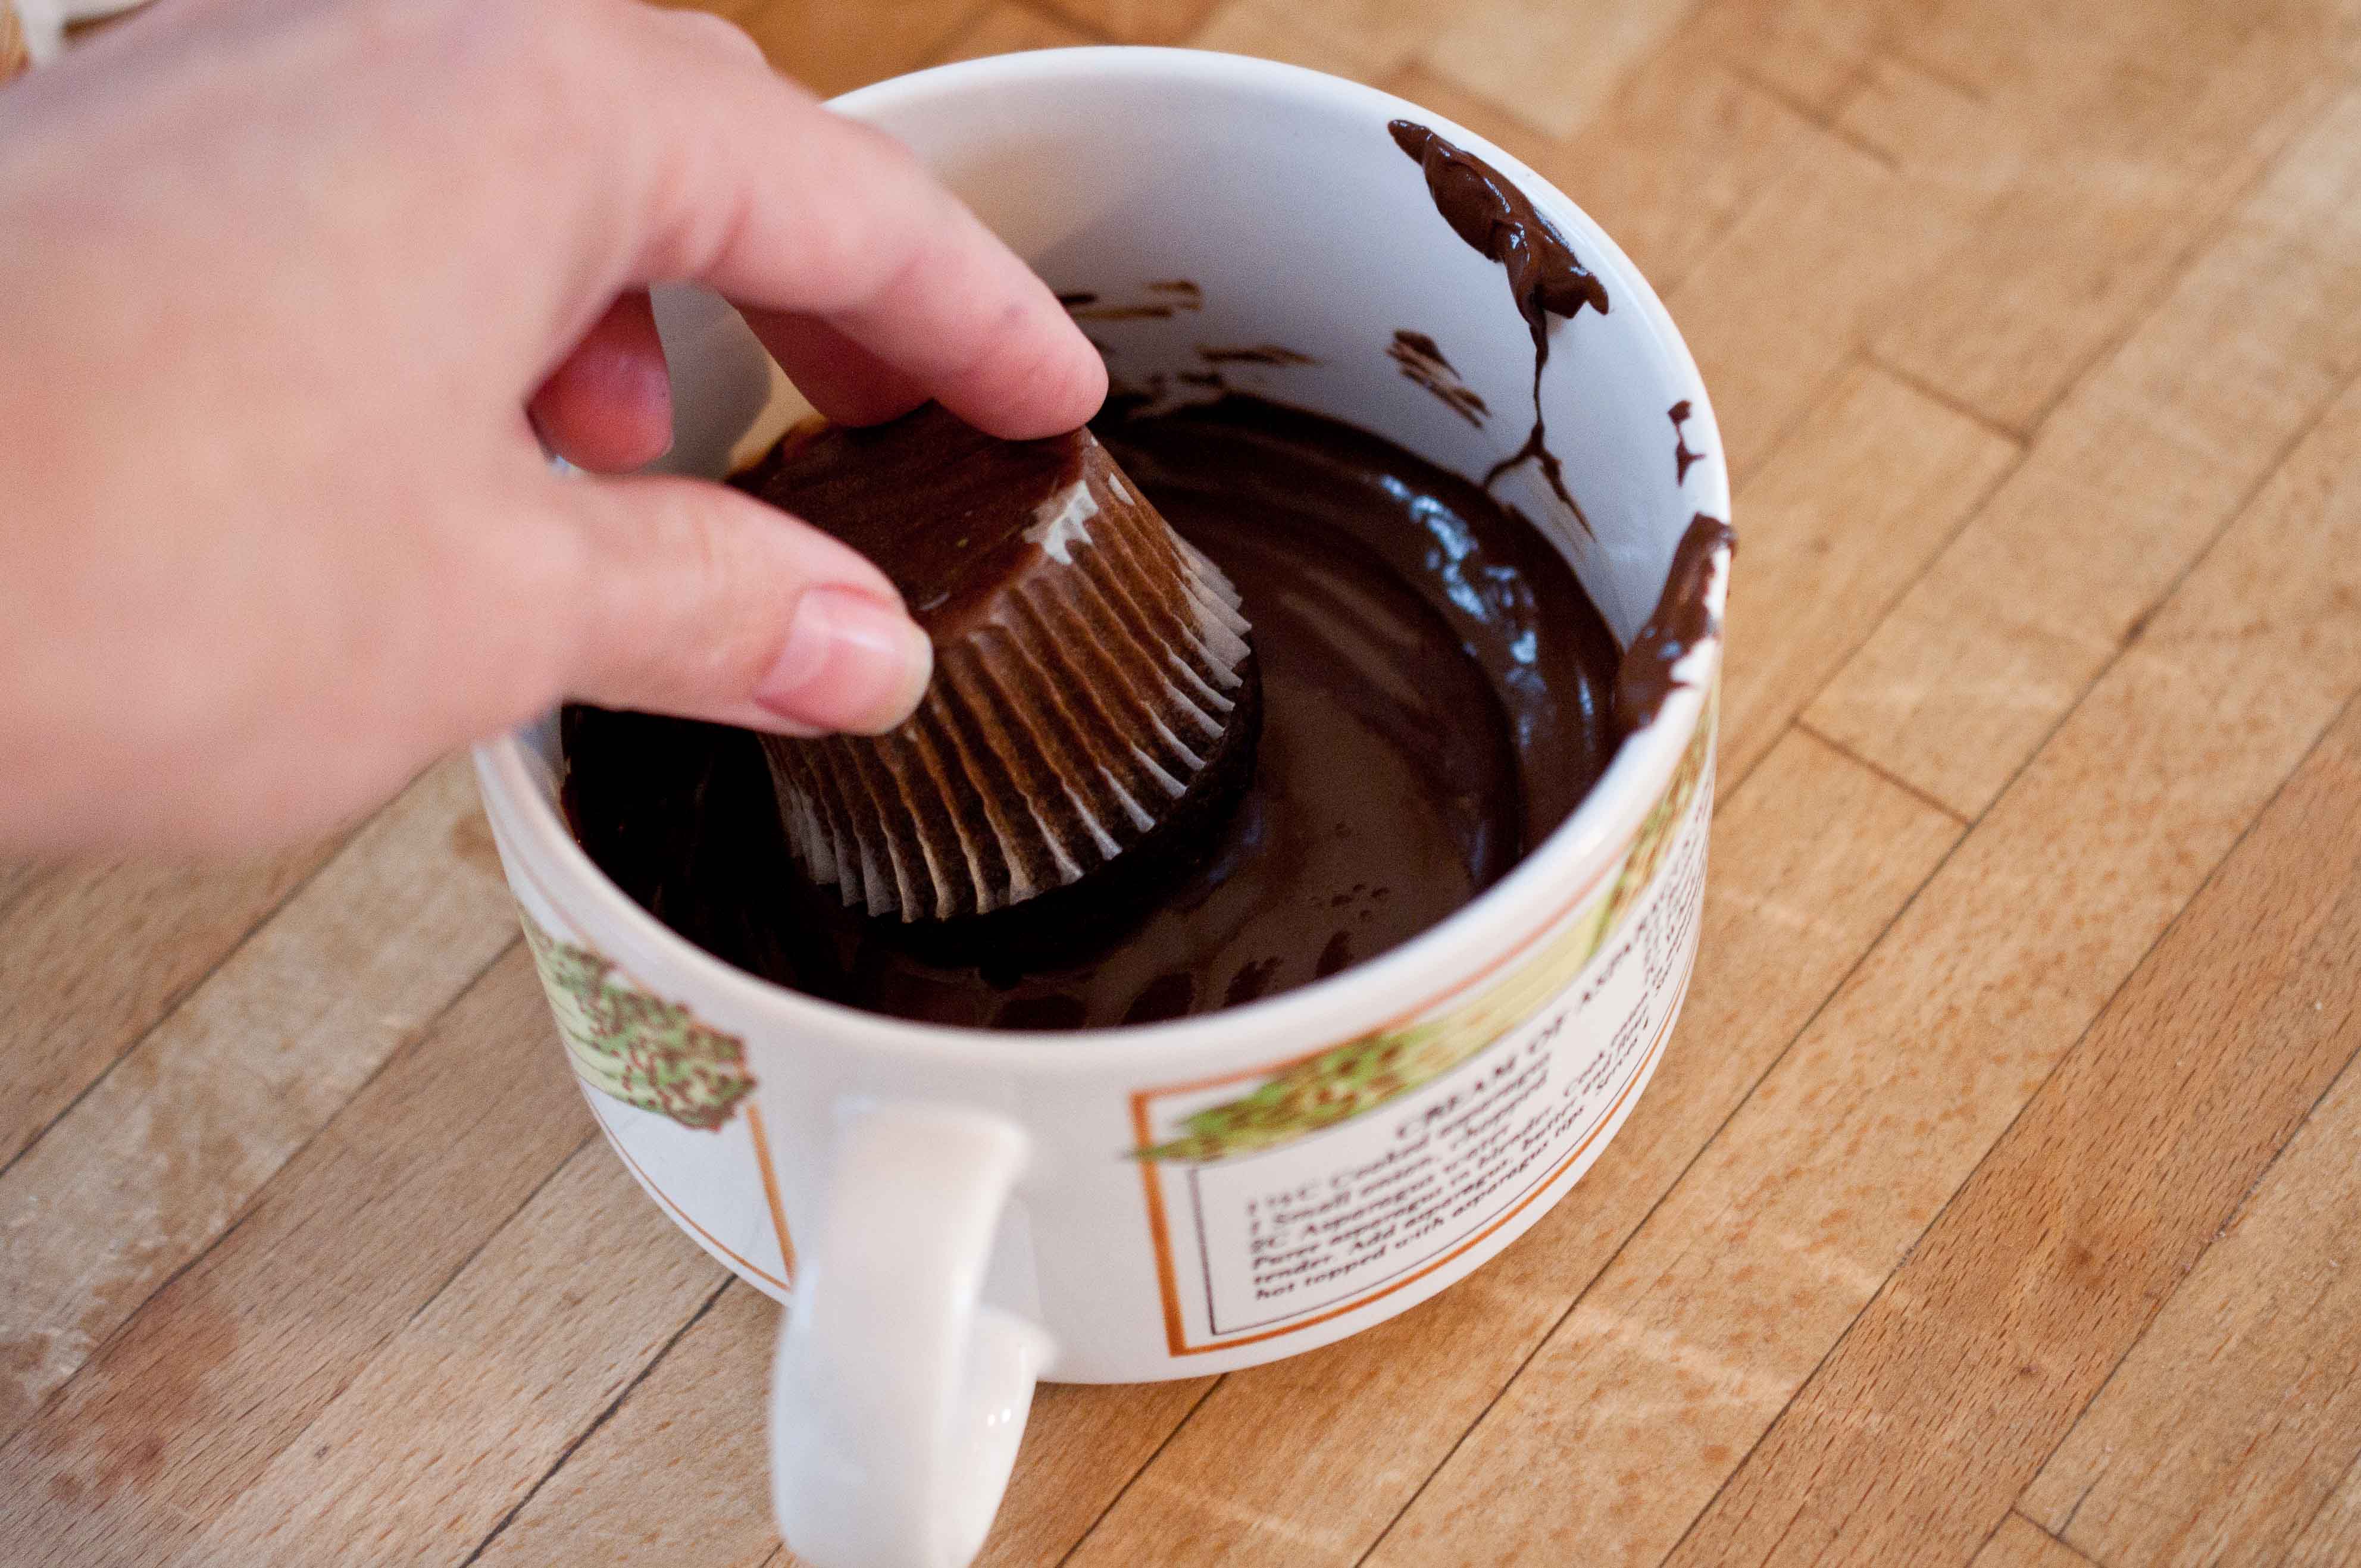
Put the chocolate chips in a microwave safe bowl and heat on high for 30 seconds, stir and repeat until melted.
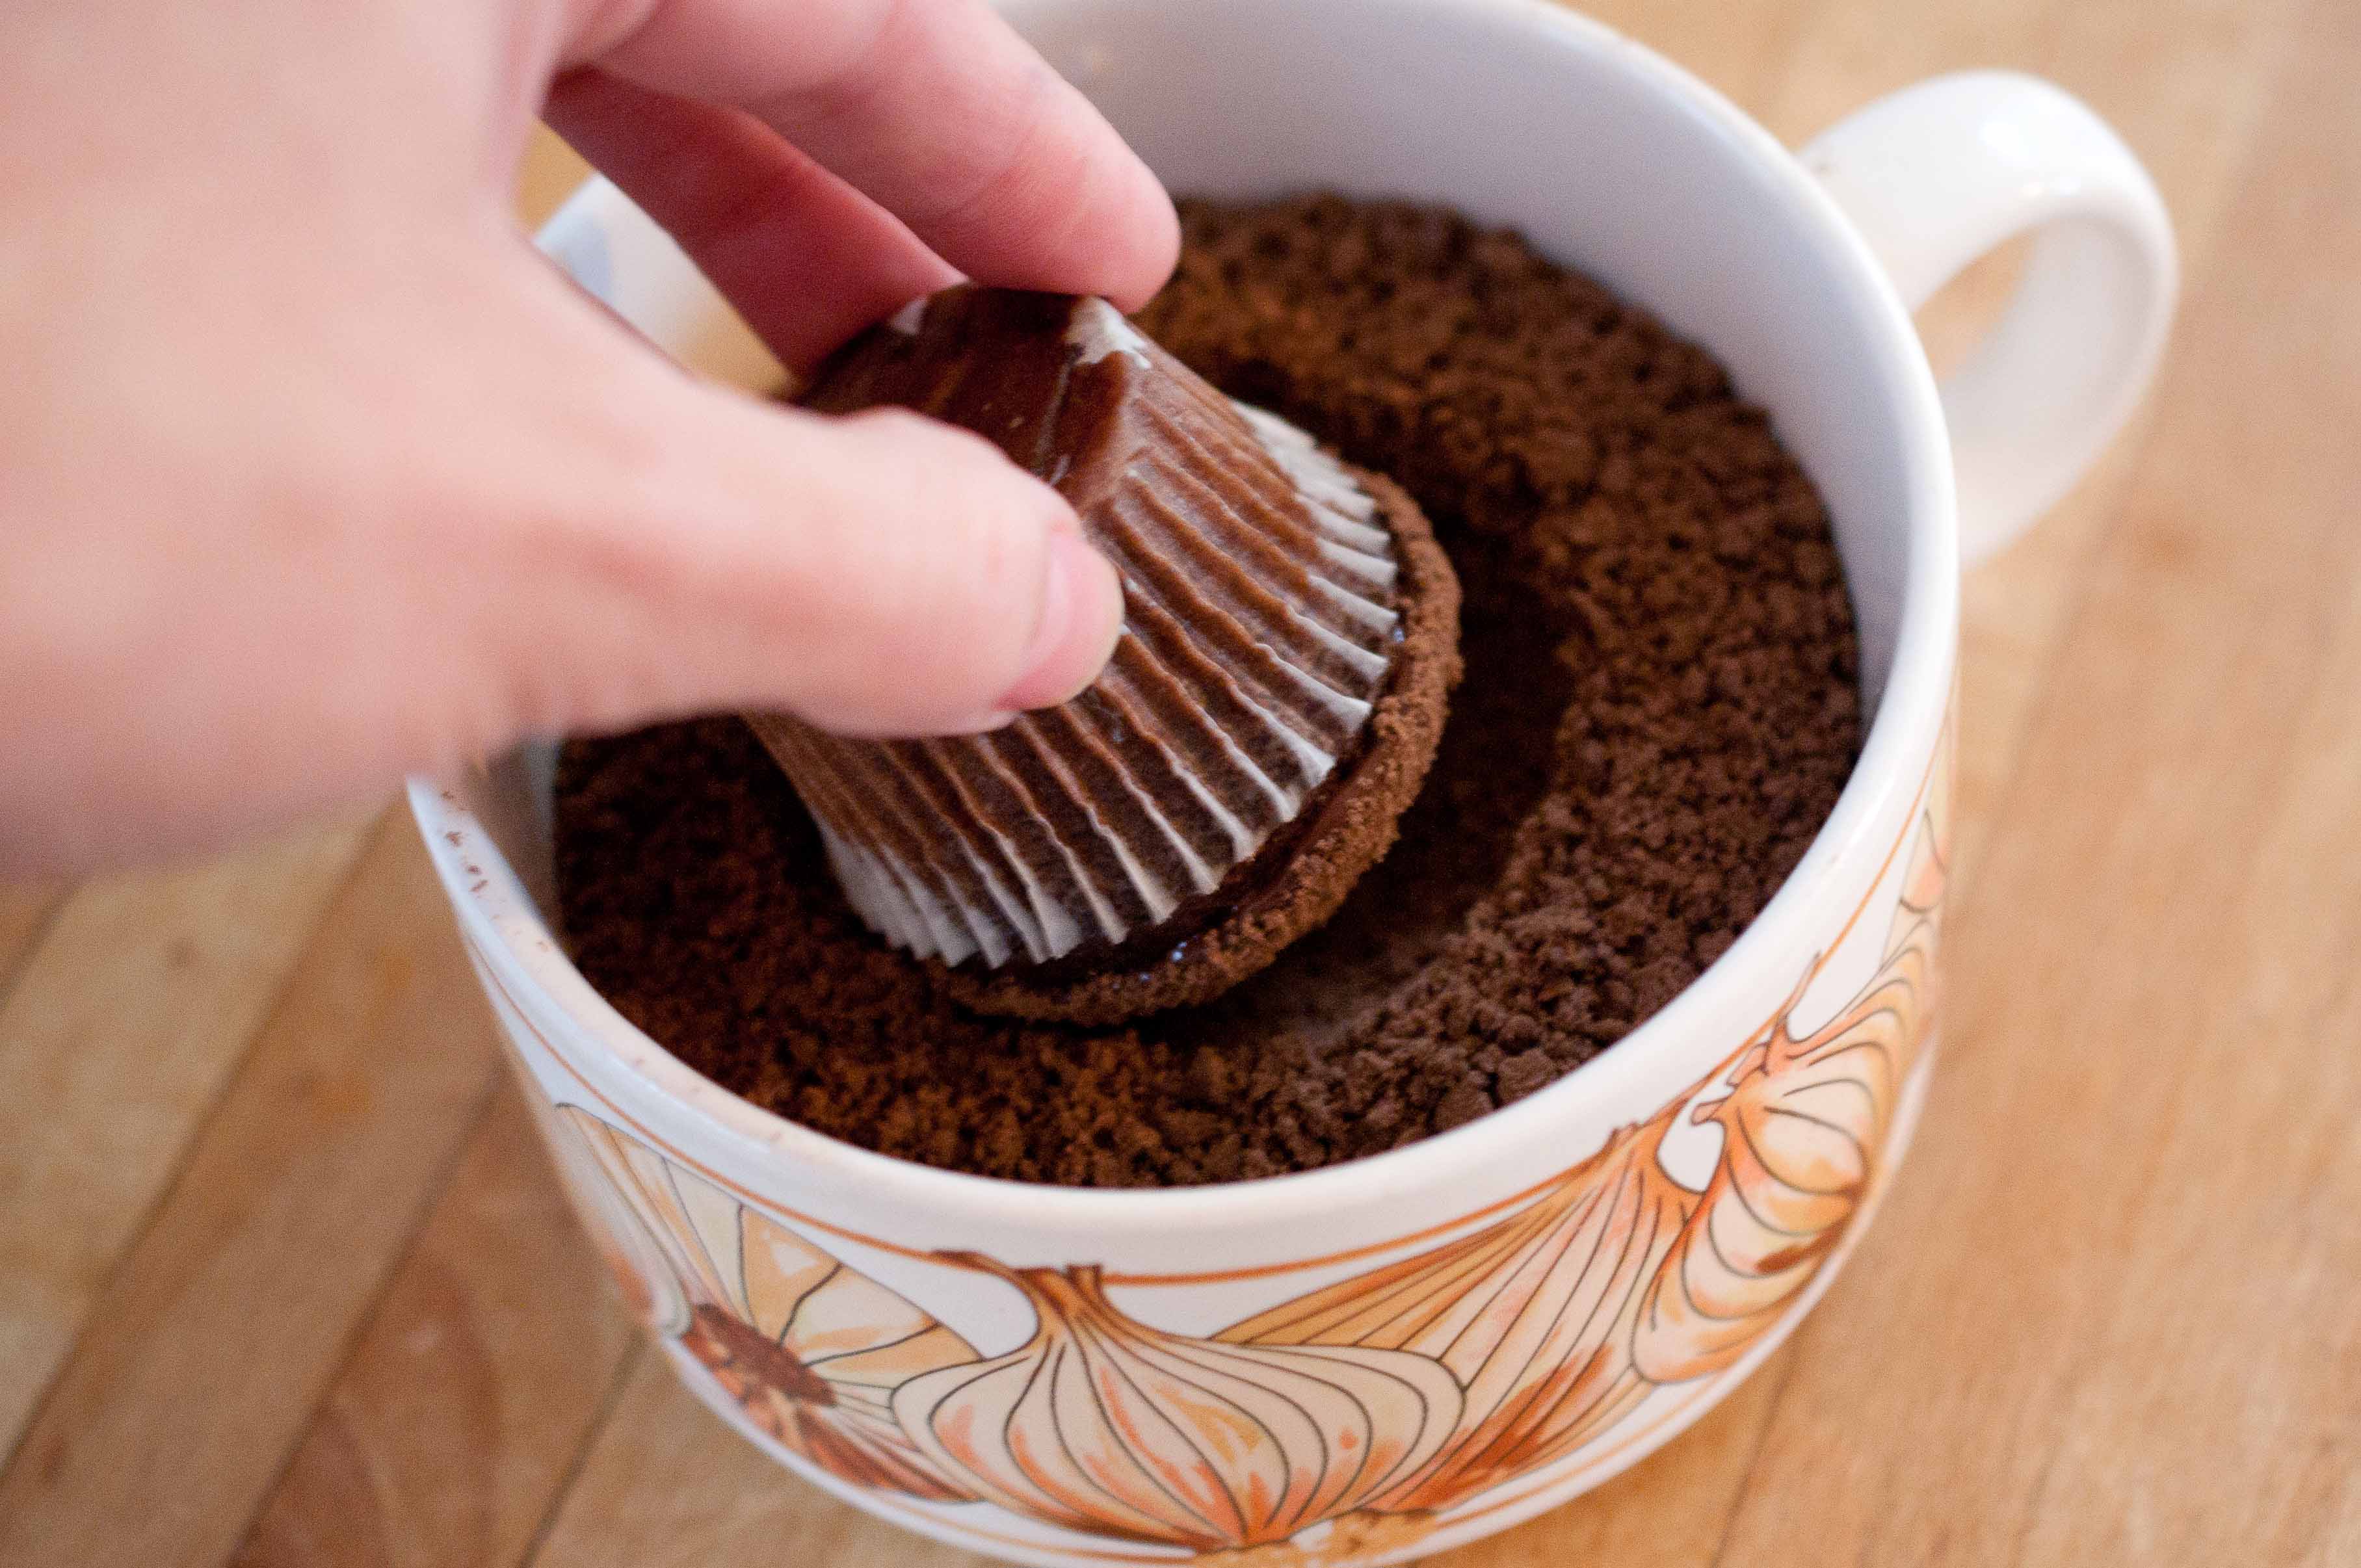
In a food processor, process the graham crackers until nothing is left but crumbs. Transfer crumbs to a bowl.
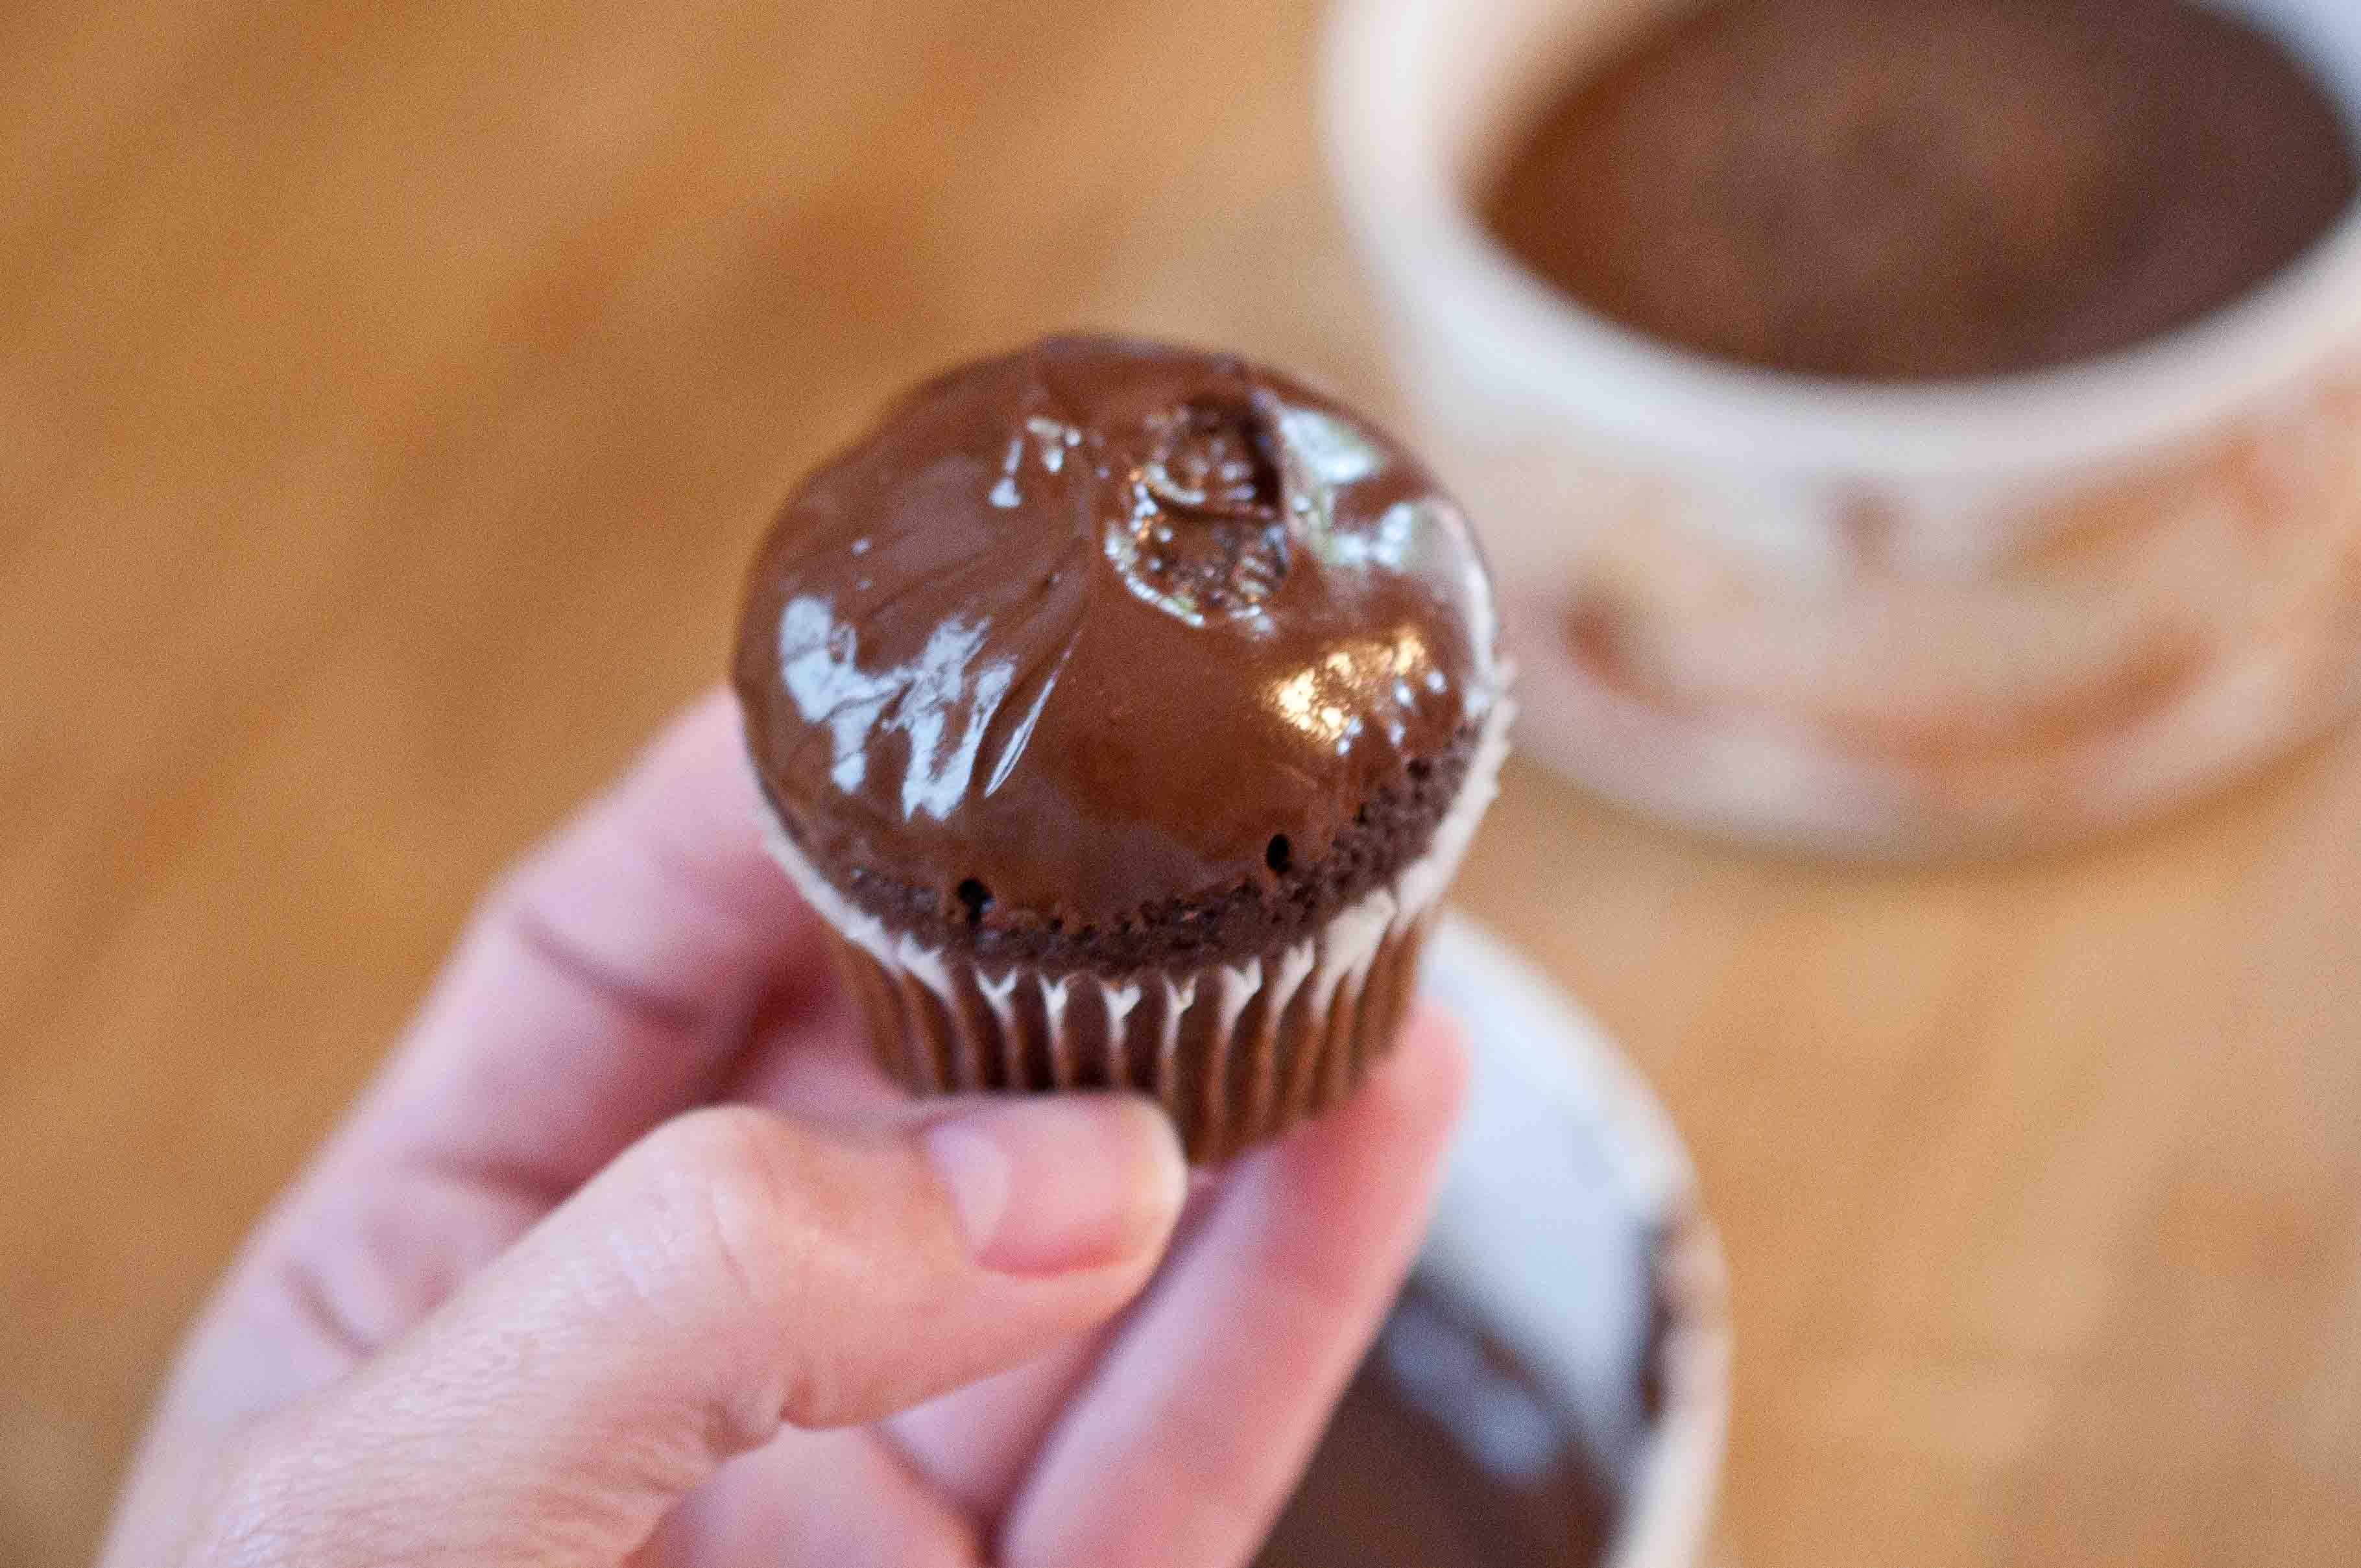
One at a time, take the mini muffin and submerge the top in the melted chocolate until completely coated.
Before the chocolate cools and dries, roll the melted chocolate muffin top around in the graham cracker crumbs.
Once all the chocolate has dried, plant your candy marshmallow flower in your little mini muffin pot.


